Dairy Free Chocolate Cake
This post contains affiliate links. Read the full disclosure here.
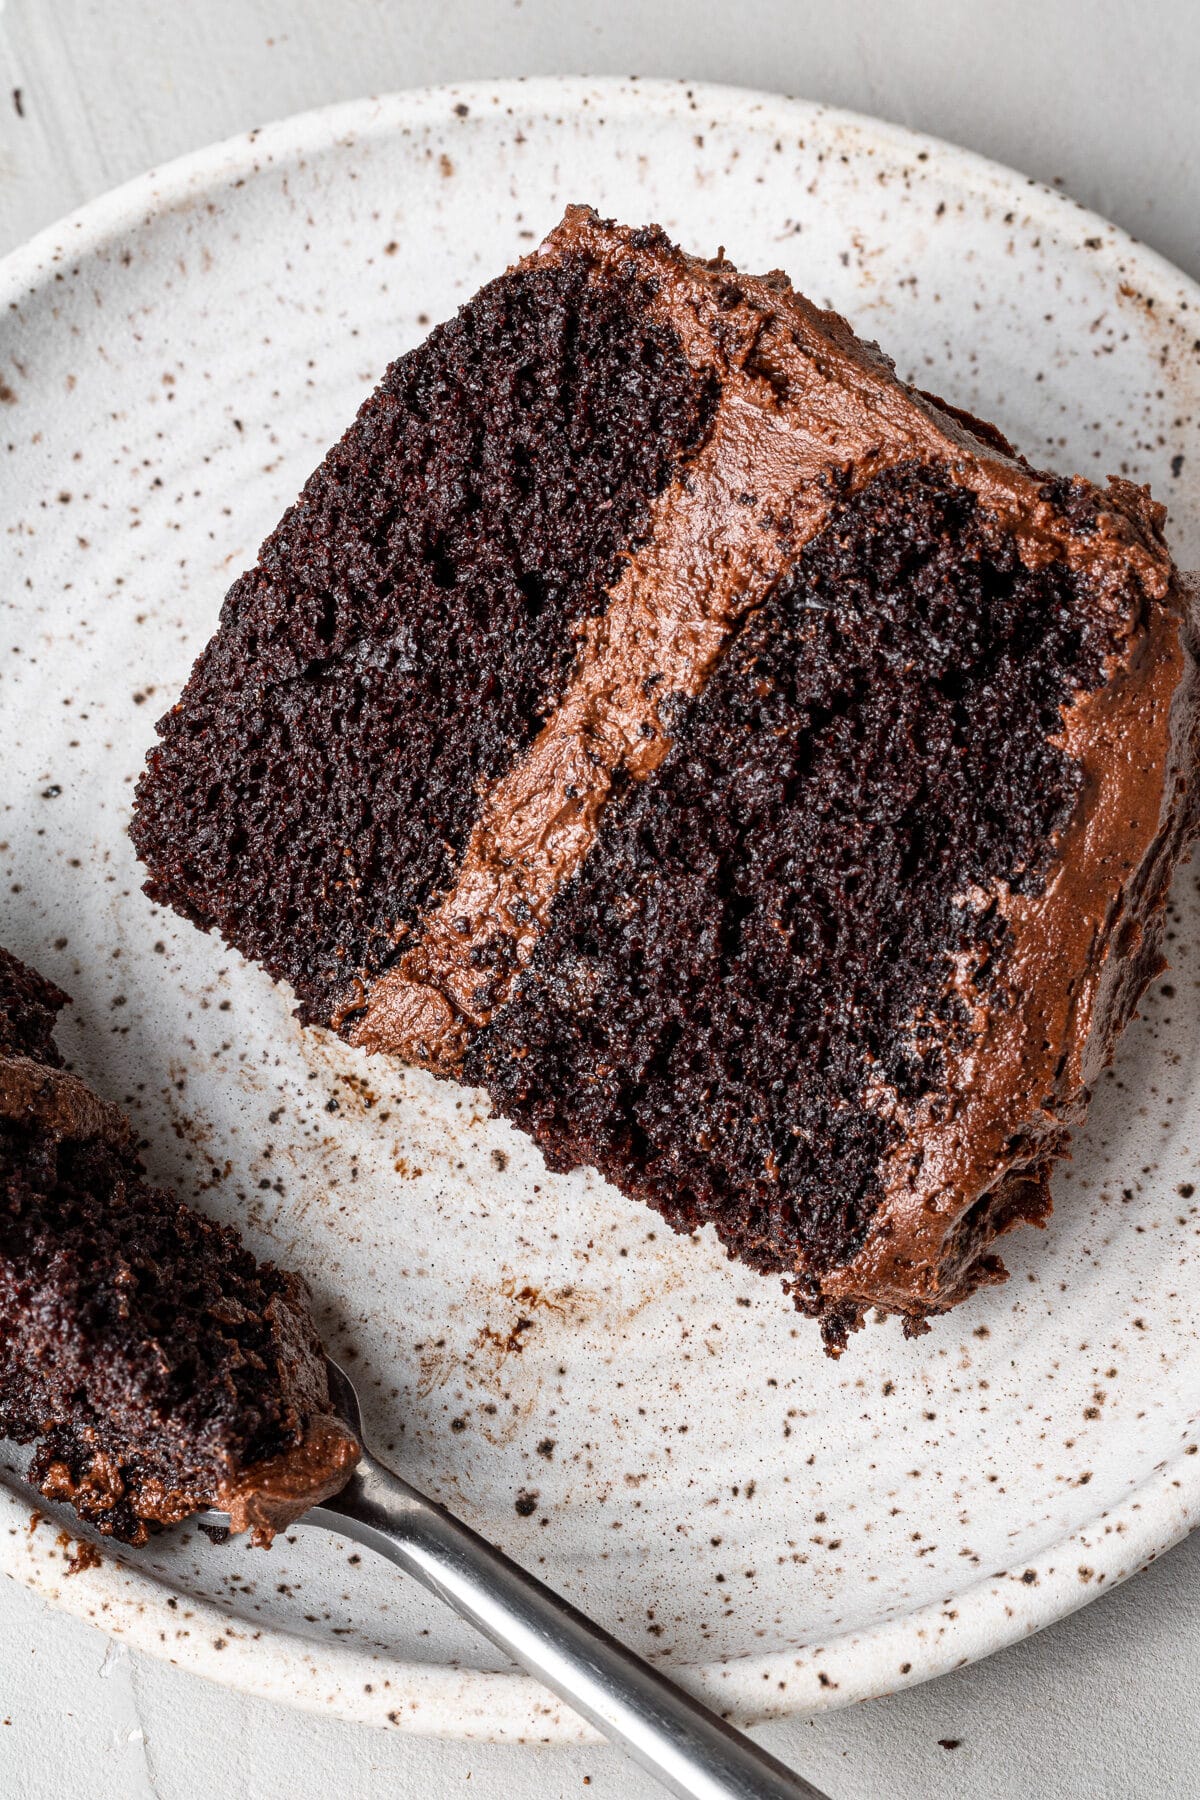
This is the BEST dairy free chocolate cake ever! It’s moist, fluffy, with rich chocolate flavor and a fudgy chocolate buttercream. It’s the perfect dairy free cake recipe that will keep you coming back for more!
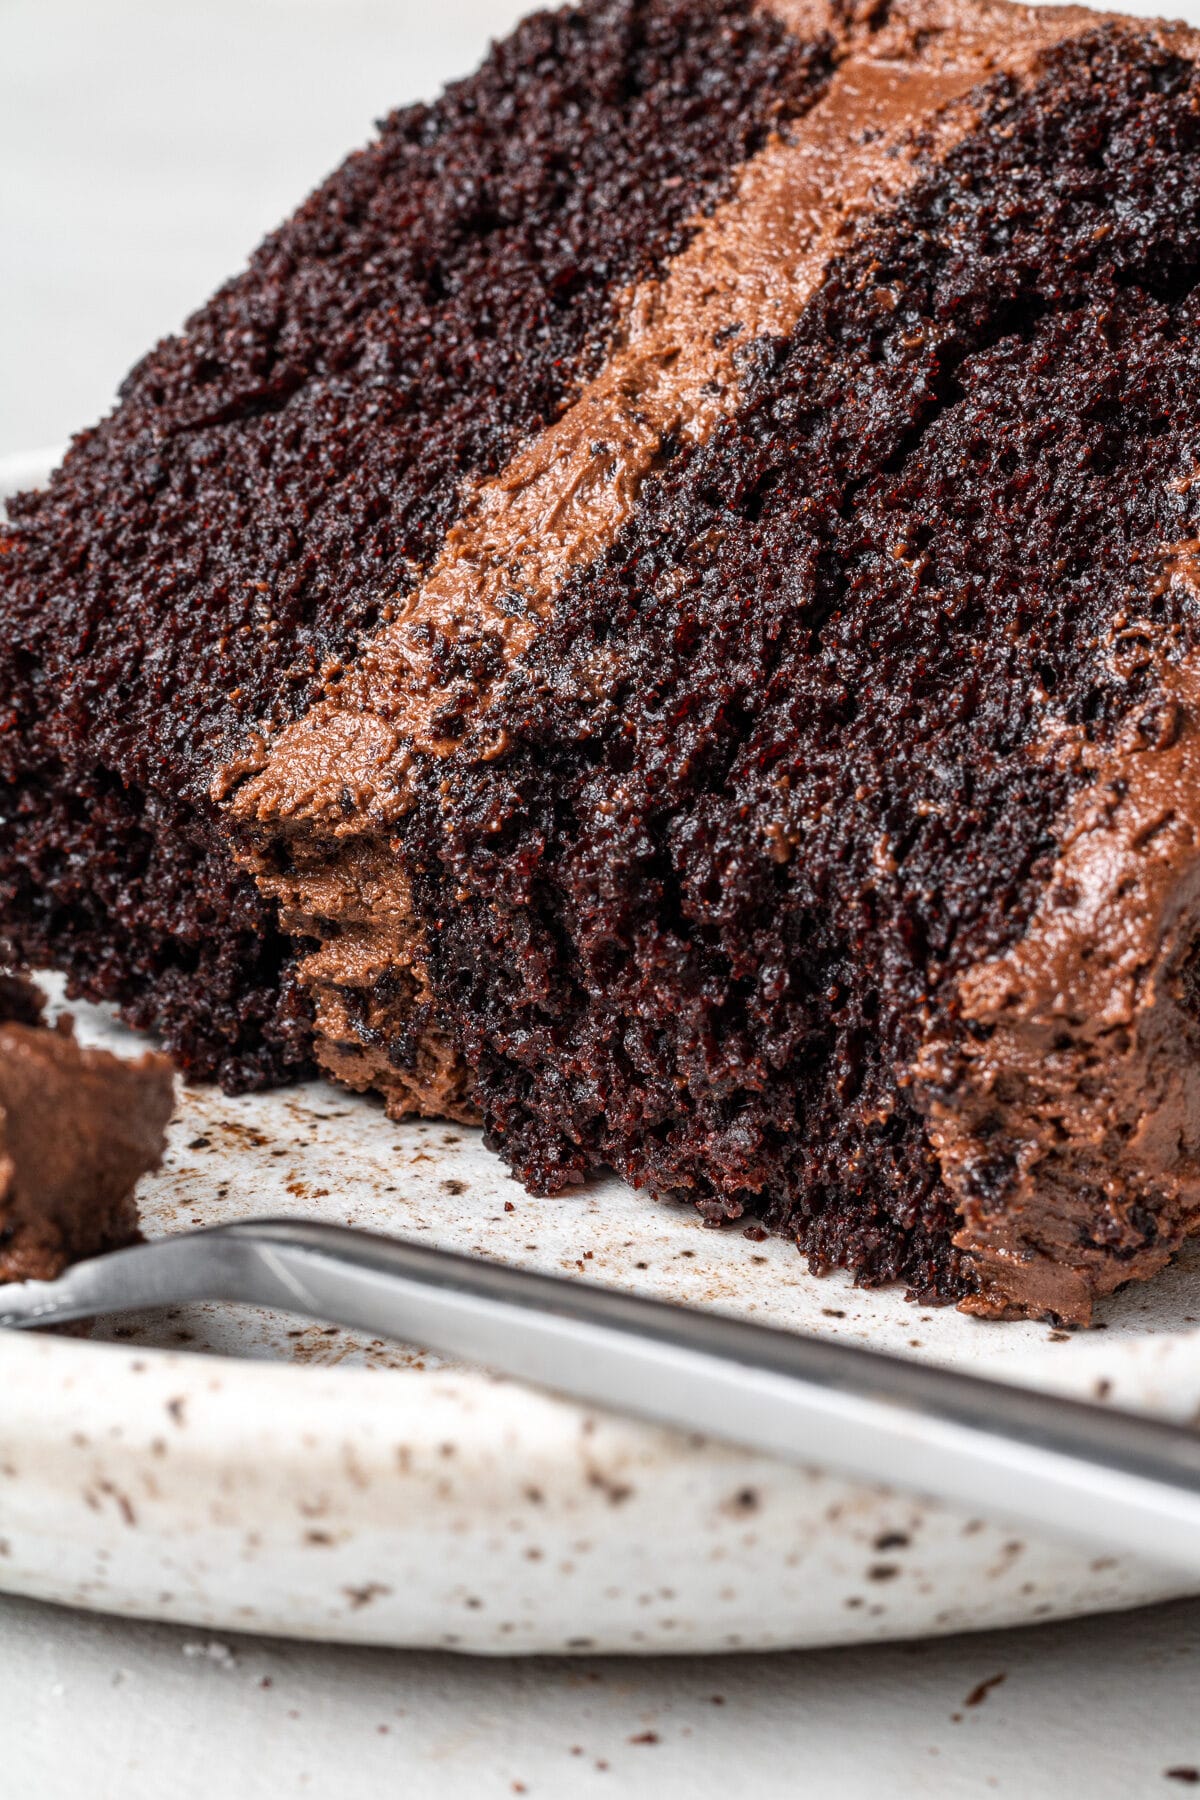
This double layer dairy free chocolate cake is fluffy, decadent and rich and incredibly hard to stop eating! I’m not ashamed to admit I sometimes just sit in front of the entire cake and go at it with a fork (and no, I am not kidding!).
I love this recipe so much that I used it as my own wedding cake! Seriously, this is the only chocolate cake recipe you’ll need. It’s a perfect go-to recipe for weddings, birthdays, holidays, or any other occasion!
Just like my dairy free vanilla birthday cake, I promise no one will ever know it’s dairy free!
Featured Reader Review
“Made this for a dairy free friend’s birthday. Turned out beautiful, delicious and decadent! Cake set well and frosting was easy to work with. People couldn’t believe it was dairy free. I used almond milk and a dairy free butter.”
Liz
Why This Dairy Free Chocolate Cake Works
- You can easily adapt this recipe to fit different pan sizes (instructions are further down in the post).
- While I’ve used a chocolate buttercream here, you can also pair it with a dairy free vanilla frosting.
- The recipe uses oil instead of butter to create the ultimate moist and light crumb.
- Did I mention how easy it is to make? Seriously – one bowl and no mixer required for the cake layers!
Ingredients Needed
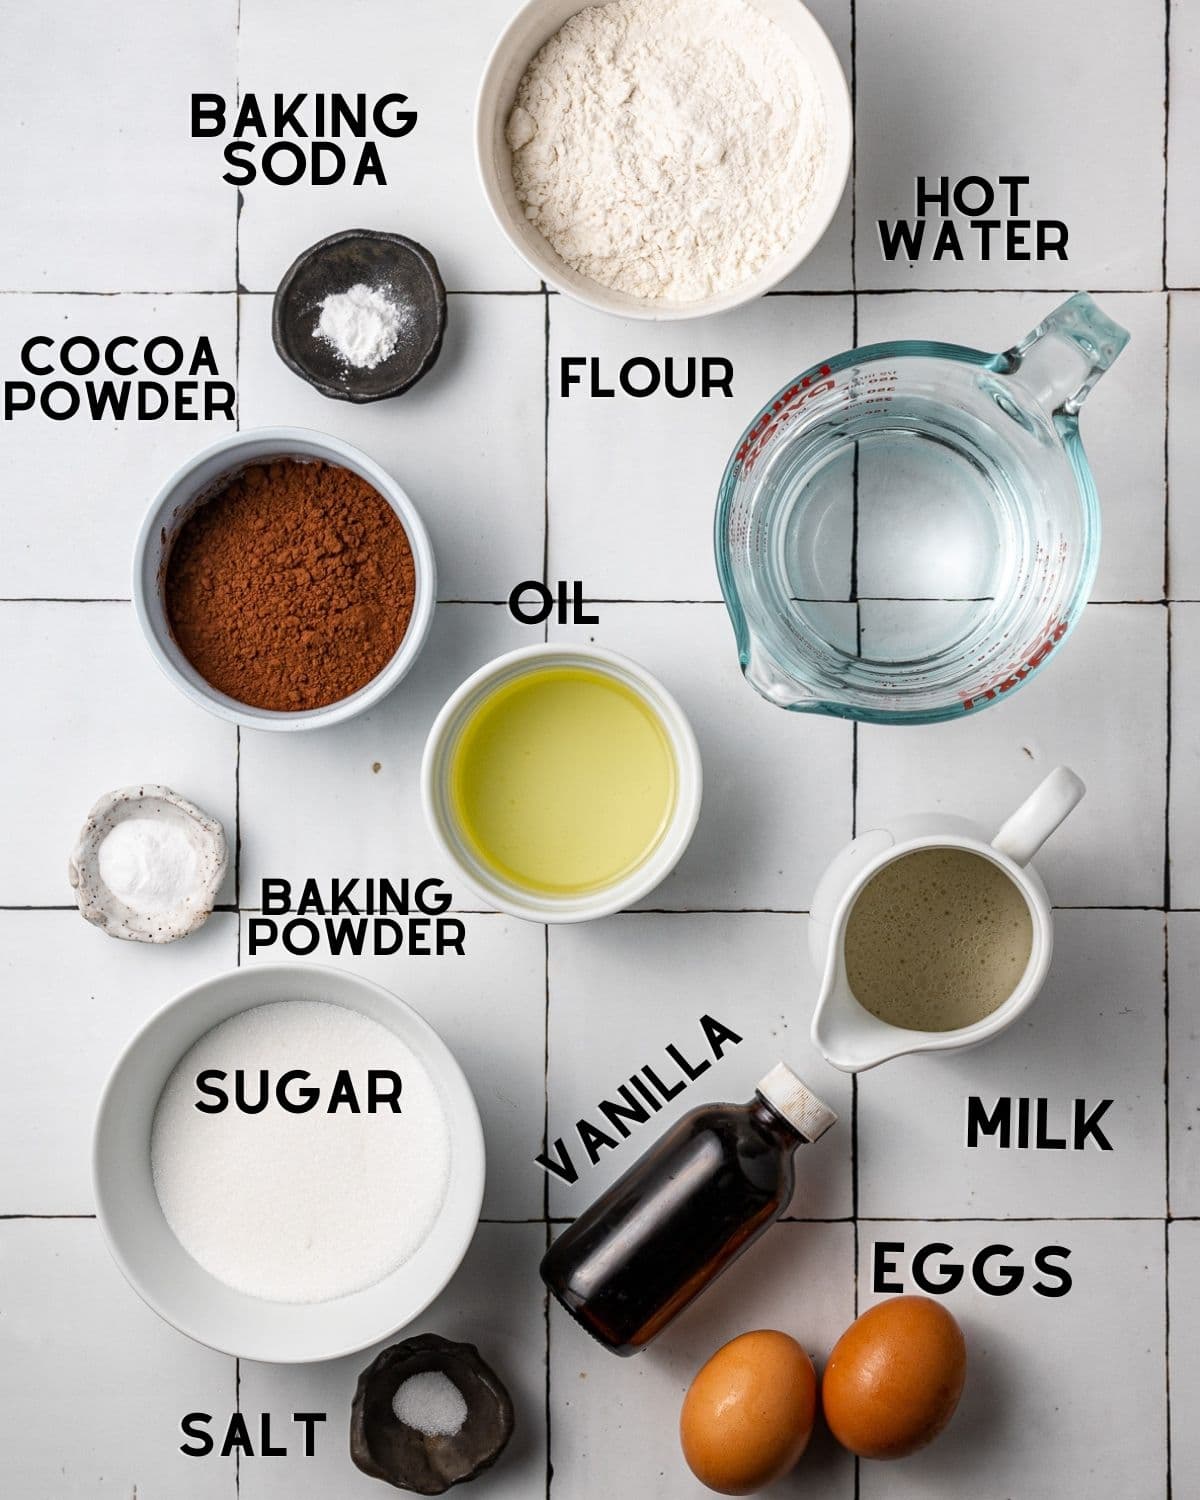
- Dairy free milk: I’ve tested this recipe with various dairy free milks, and they all work great. I personally like to use soy or oat.
- Oil: You can also use any neutral oil in this recipe, like canola, sunflower oil, or vegetable oil.
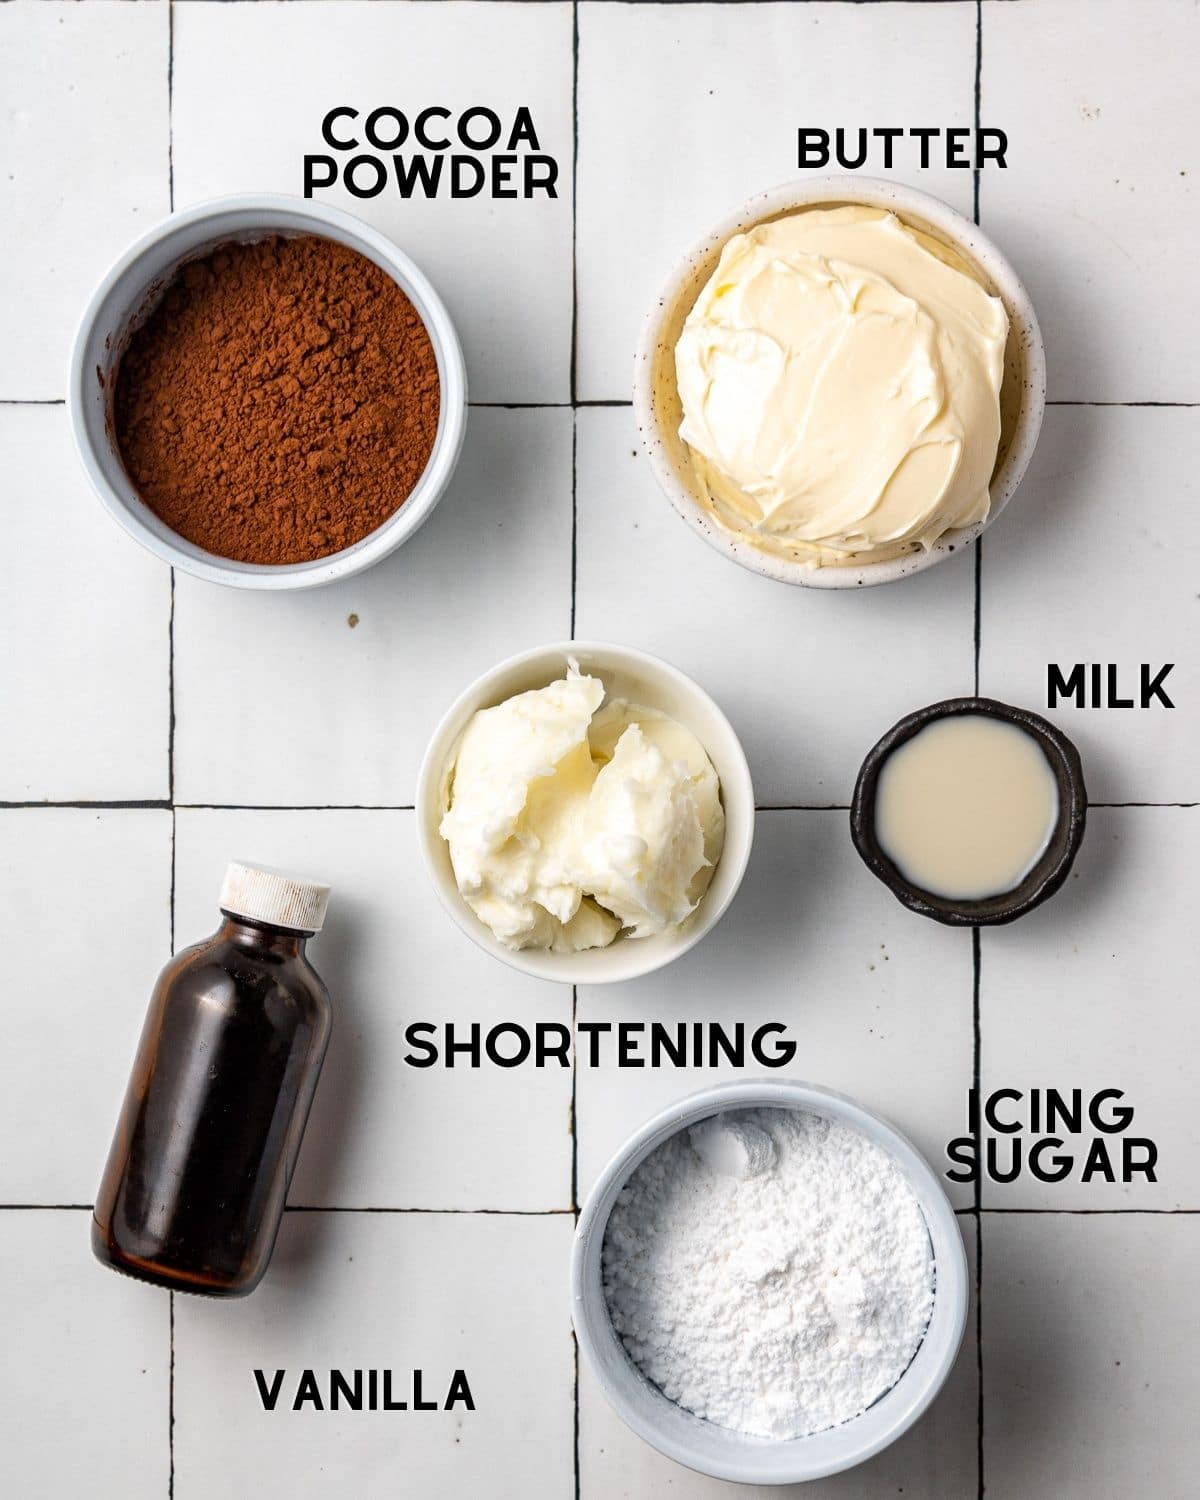
- Vegetable Shortening: I always use shortening in my buttercream recipes. It makes the buttercream more firm and easy to frost or pipe the cake with. When I tested this recipe with a few different dairy free butters, there were some that were firmer than others. If your dairy free butter is the texture of margarine, vegetable shortening can help firm it up, but you can replace this with dairy free butter if desired.
How To Make This Cake
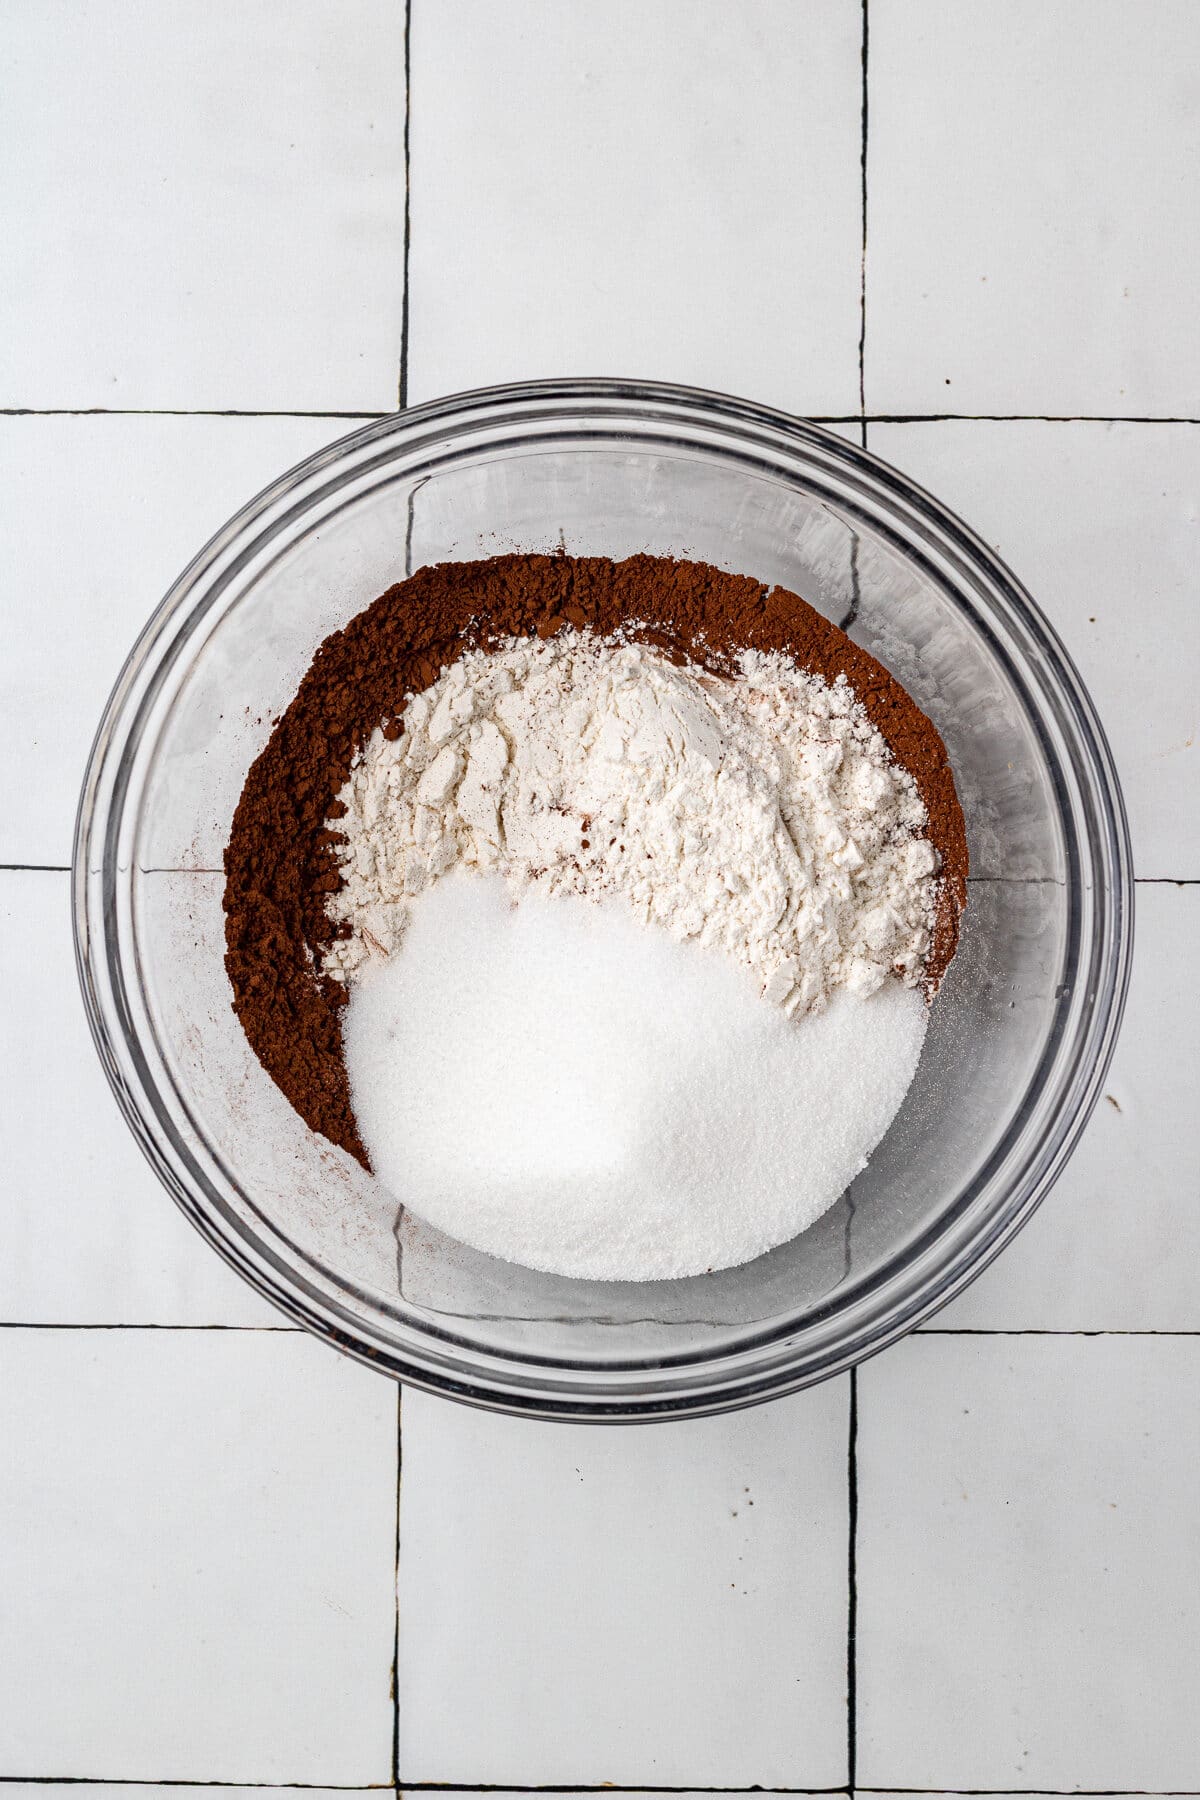
Whisk dry ingredients together!
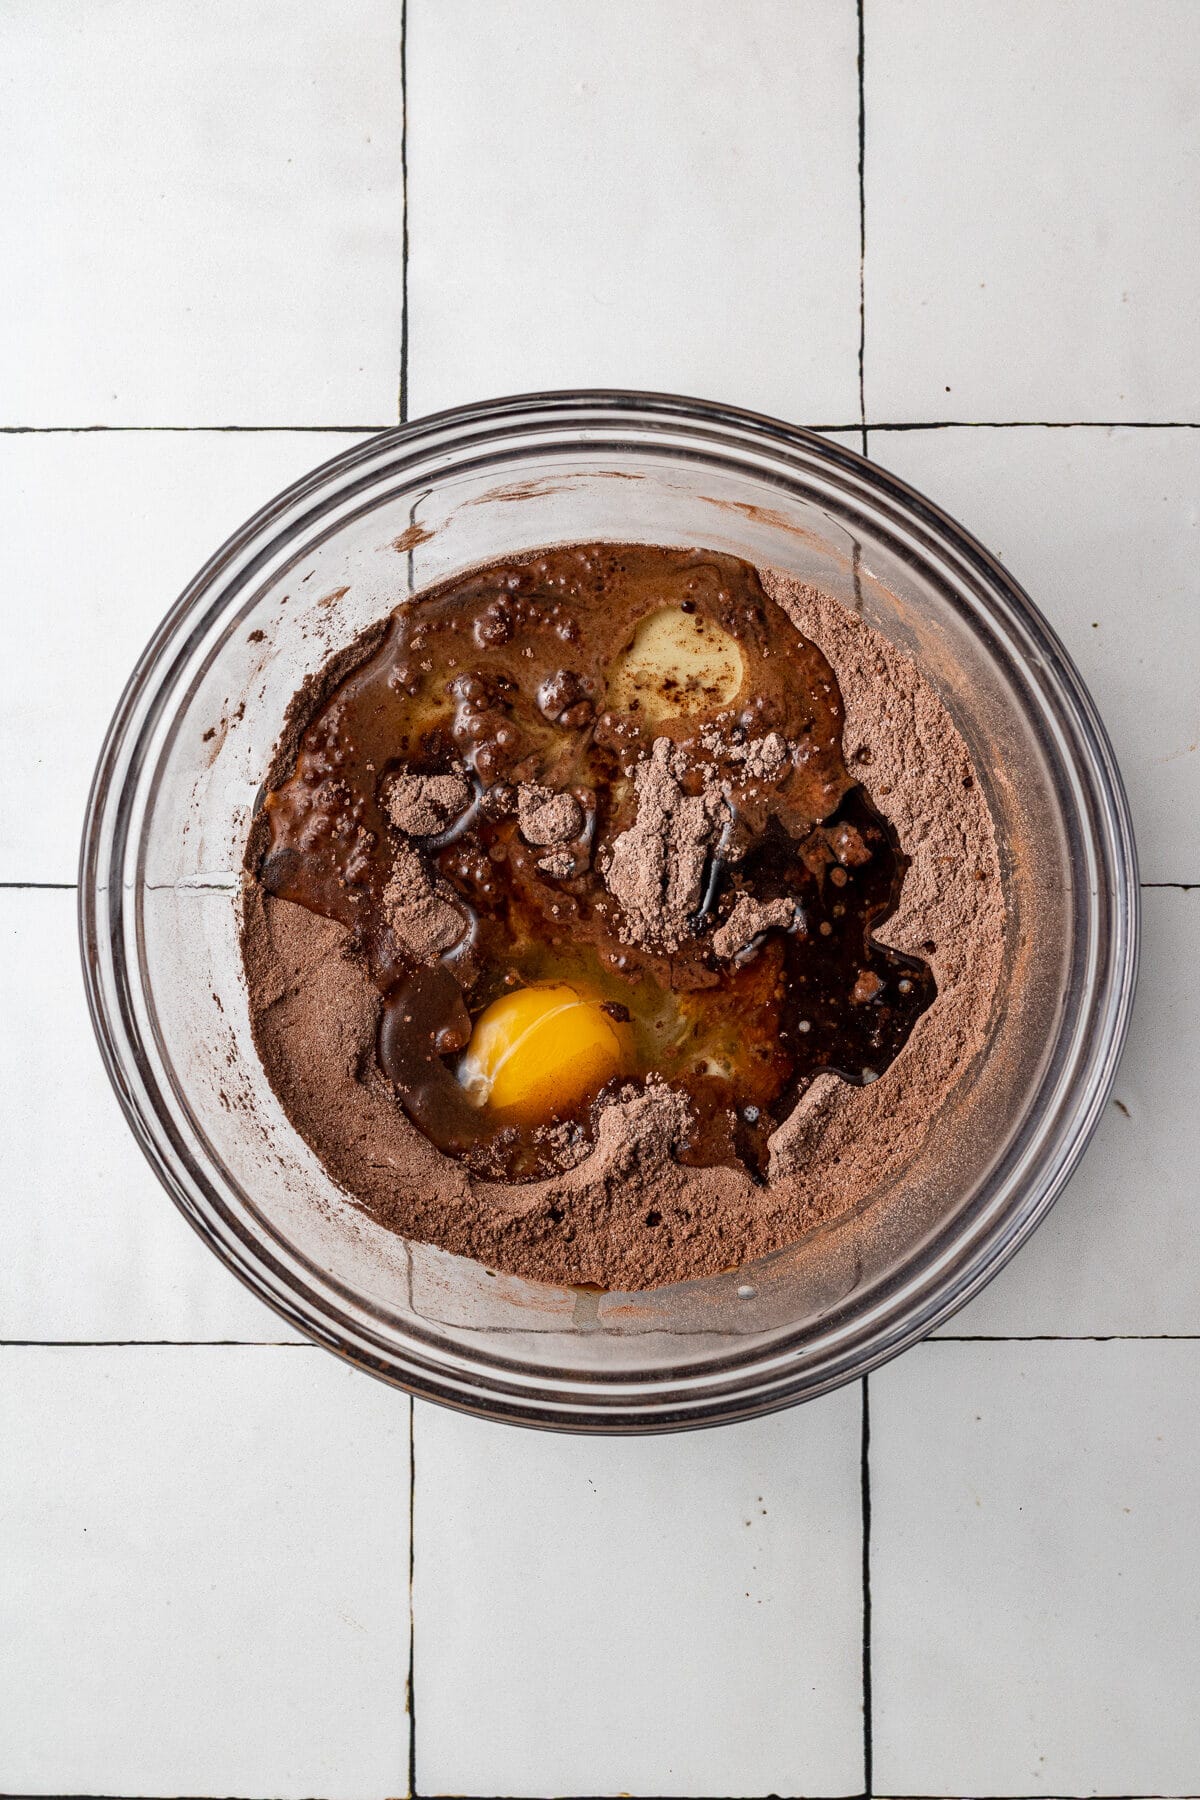
Add in wet ingredients.
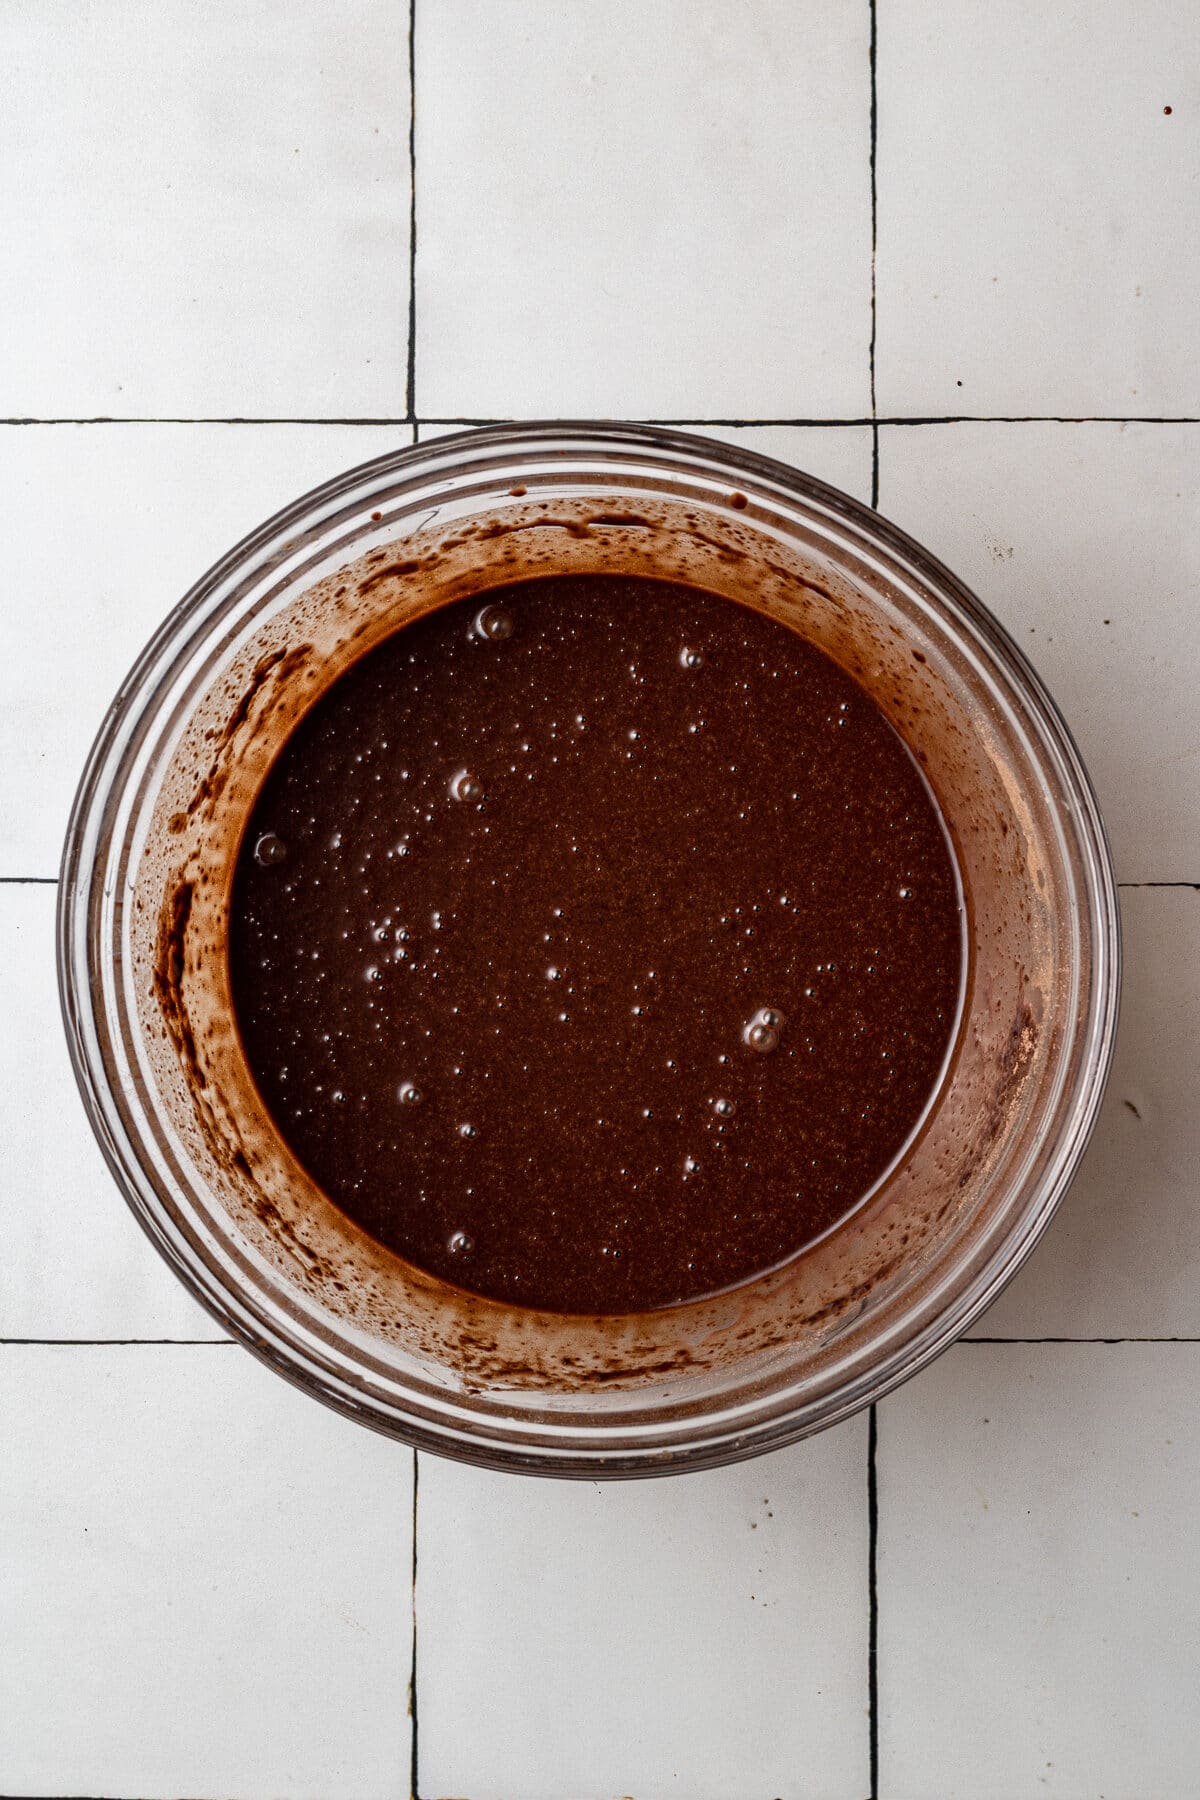
Whisk until combined, then bake!
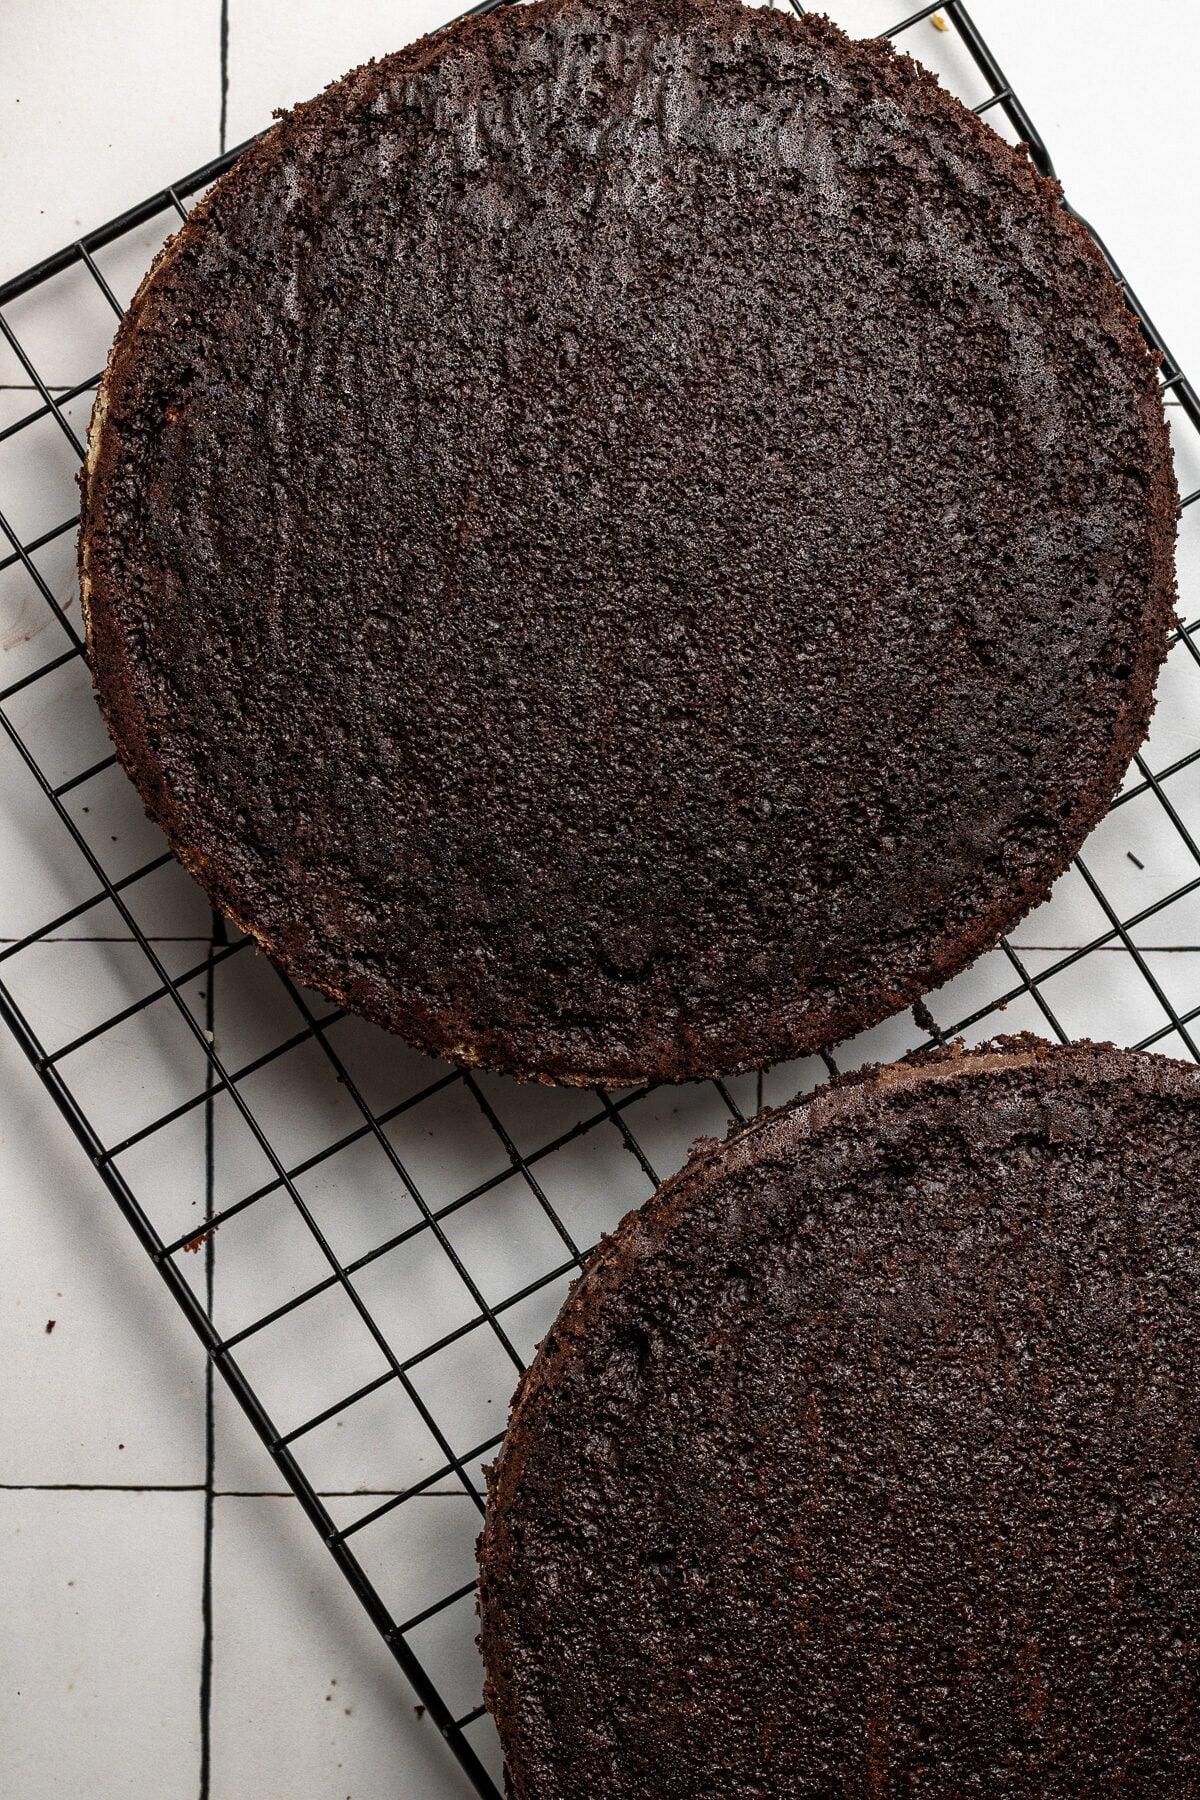
Cool the cakes while you make the buttercream, then assemble!
Expert Tips
- Number one tip: properly measure your flour! The cake texture will not be as light and fluffy and the cake could turn out dry if you over-measure your flour.
- Do not over-mix! This can lead to a dense cake texture. The cake batter only needs to be mixed until the dry ingredients are just incorporated.
- Check on the cakes early to make sure that they are not over-baked (over-baking will lead to dry cake).
- Let the cakes cool for at least 20 minutes in the pan before trying to remove them. Run a butter knife around the outside of the cake before flipping it upside down onto the cooling rack.

More Cake Recipes You’ll Love


If you make this recipe, let me know how it went in the comments below, I’d love to hear from you! You can also tag me on Instagram or Facebook so I can check it out!
Baking FAQ
These are the topics I’m asked about most frequently:
You can get these answers and more in my frequently asked questions post!

Dairy Free Chocolate Cake
Ingredients
Dairy Free Chocolate Cake
- 1½ cups (187.5 g) all-purpose flour
- 1¼ cup (250 g) granulated sugar
- ½ tsp salt
- 1 ½ tsp baking soda
- ½ tsp baking powder
- ¾ cup (64.5 g) unsweetened cocoa powder
- 2 eggs
- 1 cup (225 ml) water, hot
- ½ cup (107.5 ml) canola oil (or sunflower oil)
- ½ cup (125 ml) dairy free milk of choice (I use unsweetened soy milk)
- 1 tsp vanilla extract
Dairy Free Chocolate Buttercream
- 1 cup (210) vegan butter
- ½ cup (125 g) vegetable shortening OR vegan butter, (SEE NOTES)
- 1 ¼ cup (107.5 g) cocoa powder
- 2¾-3 cup (330 g) icing sugar
- 1 tsp vanilla extract
- 1-2 tbsp dairy free milk of choice, (as needed)
Instructions
- Preheat the oven to 350°F and prepare two 8 inch round cake pans. Spray the inside with cooking spray, then cut round pieces of parchment paper so that they fit in the bottom of each pan (do not skip the parchment paper lining!)
- Whisk flour, cocoa powder, sugar, salt, baking powder, baking soda together in a large bowl.
- Add in the eggs, vanilla, oil, and milk. Pour in the hot water and mix until smooth.
- Divide the batter evenly between the two cake pans and bake on the middle rack of the oven for 20-26 minutes or until a toothpick inserted in the middle of the cakes comes out clean.
- Let the cakes cool in the pans for 20 minutes, then run a butter knife around the outside of the cake to loosen it from the pan and flip upside down onto a cooling rack to cool completely.
- Make the buttercream. In the bowl of a standing mixer or handheld mixer, beat vegan butter and vegetable shortening together until combined. Beat in the cocoa powder until smooth.
- Add in the vanilla extract, then add the icing sugar, 1/4 cup at a time until desired consistency is reached. If the buttercream is too thick, add in milk 1 tablespoon at a time to thin it out to the consistency you want. If it's too thin, add in more confectioner's sugar (powdered sugar) 1/4 cup at a time.
- Once the cakes have cooled completely, frost them and enjoy!


Notes
The calorie information provided for this recipe is an estimate. The accuracy of the calories listed is not guaranteed.
yum x10! gives any chocolate cake a run for its money (non-dairy-free ones included).
I recommend substituting the hot water for the same amount of freshly brewed coffee – brings the cake to another level.
works great gluten free – just substitute the flour for Bob’s Red Mill 1:1 gluten free flour.
Thanks so much for your review and cooking notes! So glad that you enjoyed this recipe!
I have to eat dairy free due to a baby with a dairy allergy and this cake is so good that everyone in my extended family wanted the recipe! Can’t wait to make more recipes from this website. It’s been my best dairy free find. Thank you!!!!
Hi Meghan, so glad you enjoyed it! Thank you for your comment!
I don’t know if we messed up the icing recipe and mis-measured something but it tasted like too much cocoa powder and was not sweet and was very bitter. The cake part was good.
Hi Amanda, thanks for your commen! I’m so glad the cake was good! I’d recommend adjusting the amount of confectioners sugar to achieve your desired level of sweetness for the buttercream! You can use milk or a milk-alternative to smooth out the texture.
this was the best cake! do you have a moust vanilla cake recipe
Yes! Here is my vanilla cake version (just use to the same dairy free butter brand in this if you’re DF)!
Easy to follow, tasty dairy free cake. Really moist.
Easy bake and tasted great. I used a vanilla almond creamer, because I didn’t want to buy 2L of non dairy milk, and it worked well still. My 5 year old did all of the large measurements without oversight and, again, still worked well.
So happy to hear this recipe worked for you and your daughter 🩵
Would I be able to make a wedding cake 12″, 8″, 6″ and use fondant icing on it, if so how long would it last when iced?
Hi Selina! This cake is very very moist and light, and while I don’t know much about fondant – it is my understanding that fondant tends to work best on a firm cake. If you want to see what the cake is like texture-wise, you could always make 1/2 the recipe and decide for yourself!
This turned out fantastic! I substituted extra virgin olive oil as I had no other oil. The cake turned out super moist and the buttercream was velvety and smooth. Everyone was surprised a dairy free cake could be so scrumptious and soft! Will make again!
Glad this worked for you! Thank you for your review!
I have just made this and the mixture was sooo watery it leaked out of the cake tin all over the place. Disaster. Anyone else had this?
Hi Aster – the batter is runny, yes. I don’t recommend using a springform pan to make this chocolate cake. In order to avoid this issue, a cake pan should be used.
Amateur tip: when claiming dairy-free recipes it’s useful to not include butter in the ingredient list…
Hi Sarah! If you’re new to dairy free baking, I have some good news for you – there is such a thing as dairy free butter! It’s found in most regular grocery stores. It’s amazing for baking and I use it in all my recipes. Enjoy!