Red Velvet Cheesecake Cookies
This post contains affiliate links. Read the full disclosure here.
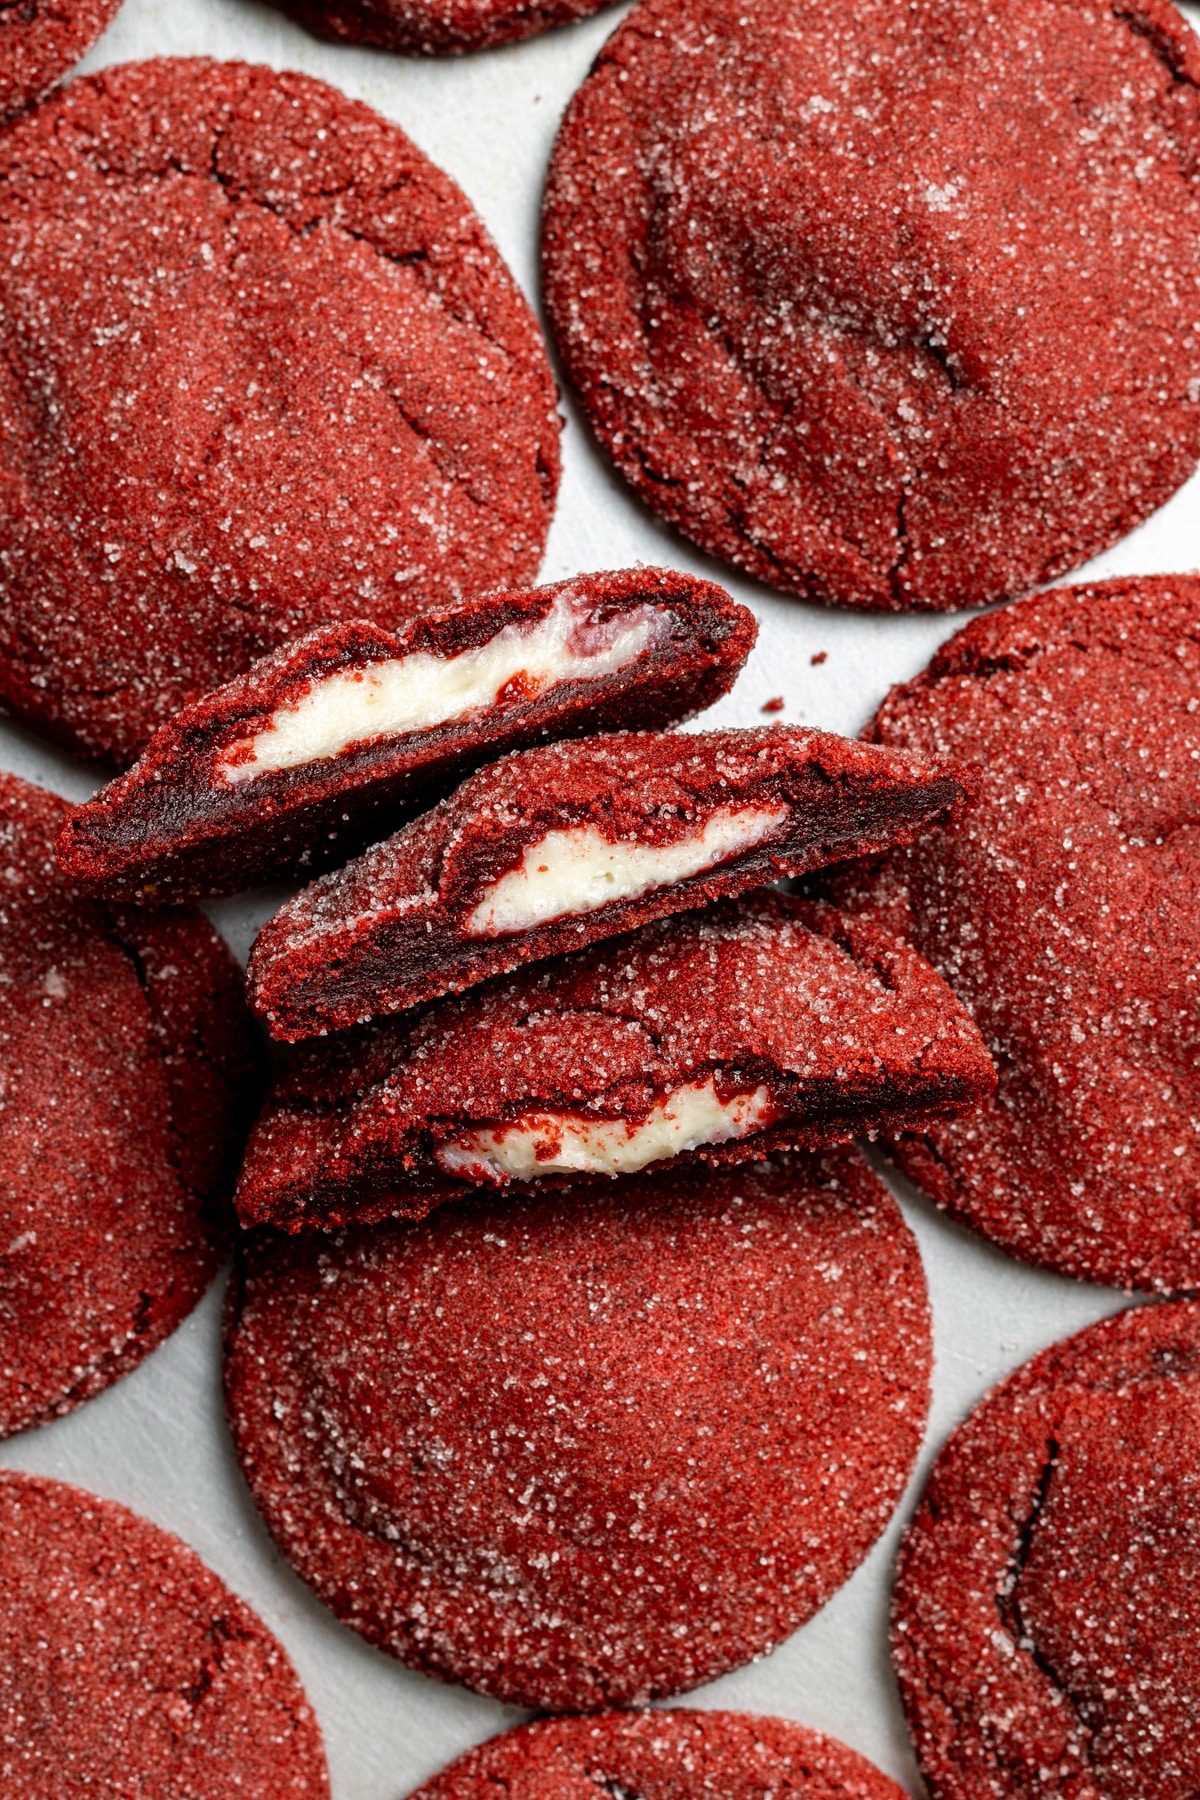
These soft and chewy red velvet cheesecake cookies are the ultimate cookie! They’re stuffed with a cheesecake filling and are so easy to make. It’s like having a big slice of red velvet cake with cream cheese frosting!

These stuffed red velvet cookies are based off of my popular Oreo red velvet cookies and my pumpkin cheesecake cookies! Red velvet and cream cheese is one of my favourite flavor combinations, I can’t get enough of it!
These cookies are perfect for Valentine’s Day, Christmas, or just a regular day!
Featured Reader Review
“These were a hit at our house, the perfect valentines treat! I will probably make them for Canada Day too!”
Morgan
These red velvet cream cheese cookies might look like regular red velvet sugar cookies, but once you take a bite you’ll see it has a dreamy cheesecake filling.
Why You’ll Love My Red Velvet Cheesecake Cookies
- You only need simple ingredients to make this recipe!
- It takes just 15 minutes to prepare these red velvet cheesecake cookies.
- Each red velvet cookie is stuffed with a delicious cheesecake filling.
- You can easily make these red velvet cream cheese cookies dairy free by using vegan cream cheese and vegan butter.
- These cookies can easily be frozen, so you’ve always got some cheesecake cookies on hand!
Ingredients Needed

- Butter: feel free to use regular butter or vegan butter.
- Flour: I tested these cookies with all purpose flour. If you need these cookies to be gluten free you can use all purpose gluten free 1-1 baking flour.
- Cocoa Powder: be sure to use unsweetened cocoa powder!
- Red food coloring: different brands will have different intensities, so add the food coloring slowly to your cookie dough.
- Cream Cheese: I’ve tested these red velvet cheesecake cookies with regular and vegan cream cheese. If using vegan cream cheese, I recommend using the brand Violife or another brand which has a coconut base.
Step By Step Instructions
Note: Full ingredient measurements and instructions can be found in the recipe card at the bottom of this page.

Step 1: Start by making the cheesecake filling. Line a baking sheet or plate with parchment paper. Whisk the cream cheese with the icing sugar in a small bowl until combined and smooth.
Step 2: Place 16 heaping teaspoons of the cream cheese filling onto the parchment paper. Slightly flatten each ball. Freeze for at least one hour or until almost frozen solid.
Step 3: Once the cheesecake filling is almost solid, line two large baking sheets with parchment paper. Set aside.
In the bowl of a stand mixer with the paddle attachment, or in a large bowl with a handheld mixer, combine the butter and sugars for 1-2 minutes until light and fluffy.
Step 4: Add the egg, food colouring and vanilla extract. Beat until just combined. Start off with just 1 teaspoon of food colouring and add more if needed!
Step 5: Add the dry ingredients – flour, cocoa powder, salt and baking soda. Mix until a dough forms.
Step 6: Preheat the oven to 350°Fahrenheit/175°Celsius. Roll the dough into 2 tablespoon sized balls and place on the baking sheets, making sure there is plenty of room between each cookie dough ball.
Step 7: Take the cream cheese balls out of the freezer and gently press one onto the centre of each cookie dough ball. Cover the cream cheese with the dough, wrapping it around the cream cheese completely.
Step 8: Roll each cookie dough ball in the extra granulated sugar.
Once you’ve assembled one batch of cookies on the first baking sheet, place it in the fridge while you repeat the steps with the second batch of cookies.
Step 9: Bake the cookies one sheet at a time for 9-12 minutes. Remove the baking sheet from the oven once the edges look set.
Leave the cookies to cool on the baking sheet for 5 minutes, then transfer to a wire cooling rack to cool completely.
Expert Tips
- Measure your flour properly: Measure your flour using either a kitchen scale or the scoop and level method. If you add too much flour to the cookie dough you’ll end up with a dry and crumbly cookie.
- Food coloring: different brands will give different intensities of color, so I recommend starting with 1 teaspoon of red food coloring and then add more if needed.
- Give the cream cheese filling enough time in the freezer: don’t skip this part and make sure the cheesecake filling is almost frozen solid before using them.
- Bakery worthy cookies: once the cookies are out of the oven you can use a large glass or biscuit cutter to gently scoot them into a perfect round shape.
Storage Instructions
I recommend eating these on the day that you baked them! You can store them in the fridge in an airtight container for up to 4 days, but they may soften up. You can freeze the baked cookies in an airtight container for up to 2 months. Let them thaw at room temperature when ready to eat!
More Recipes You’ll Love


If you make this recipe, let me know how it went in the comments below, I’d love to hear from you! You can also tag me on Instagram or Facebook so I can check it out!
Baking FAQ
These are the topics I’m asked about most frequently:
You can get these answers and more in my frequently asked questions post!

Red Velvet Cheesecake Cookies
Video
Ingredients
Cheesecake Filling
- 8 Tablespoons (113 g) cream cheese, softened (4 oz), (regular or vegan) SEE NOTES
- 4 Tablespoons (30 g) powdered sugar (icing sugar/confectioners sugar), SEE NOTES if using vegan cream cheese
Red Velvet Cookies
- ½ cup (105 g) butter, softened, (regular or vegan)
- ¾ cup (150 g) light brown sugar
- ¼ cup (50 g) granulated sugar
- 1 egg
- 1½ teaspoon vanilla extract
- 1-2 teaspoons liquid red food coloring
- ¾ teaspoon salt
- ½ teaspoon baking soda
- 1½ cup (187 g) all-purpose flour
- 2 Tablespoon (11 g) unsweetened cocoa powder
- ½ cup granulated sugar , (for rolling)
Instructions
- Line a baking sheet or plate with parchment paper. In a small bowl, use a whisk or mixer to mix the cream cheese with the icing sugar until smooth and combined.
- Place 14 heaping teaspoons of cream cheese on the baking sheet or plate. Slightly flatten each ball of cream cheese. Freeze for at least one hour, or until frozen almost completely solid.
- When the cream cheese is frozen almost solid, line two large baking sheets with parchment paper and set aside.
- In the bowl of a standing mixer with the paddle attachment or a handheld mixer, mix butter and sugars until light in color and fluffy (1-2 minutes).
- Add in the egg, food coloring and vanilla extract, and beat until just combined. Different brands of food coloring will be darker than others, so start with just 1 teaspoon and add more as needed.
- Mix in the dry ingredients (flour, cocoa powder, salt, and baking soda) until a dough forms.
- Preheat the oven to 350°F. Roll the dough into 2 tablespoon-sized balls of dough and place on the baking sheets, allowing lots of room between each ball of dough.
- Remove the cream cheese balls from the freezer and gently press one into the centre of each cookie (you can also use the back of a teaspoon to make an indent). Cover the cream cheese ball with the dough, wrapping it around the cream cheese to cover it completely (photos are in post above for reference)
- Roll each ball of dough in granulated sugar until they are coated completely.
- Once you've finished assembling one baking sheet of cookies, place them in the fridge while the oven finishes preheating, then repeat the steps with the second batch of cookies.
- Bake the cookies one sheet at a time for 9-12 minutes. Remove them from the oven when the edges look set.
- Leave the cookies on the baking sheet for 5 minutes, then transfer to a cooling rack to cool completely. Enjoy!
Equipment

Notes
The calorie information provided for this recipe is an estimate. The accuracy of the calories listed is not guaranteed.
These cookies are super easy to make, and taste wonderful! In my opinion they taste better after being refrigerated for a little bit, but are still good fresh out of the oven!
I am so happy you loved the cookies Kaylee!
These were a hit at our house, the perfect valentines treat! I will probably make them for Canada Day too!
I am so happy to hear that Morgan! Thanks so much for the review!
They turned out just like the picture and taste even better!
Yay! I am so happy that you loved them!!