Brownie Blondies
This post contains affiliate links. Read the full disclosure here.
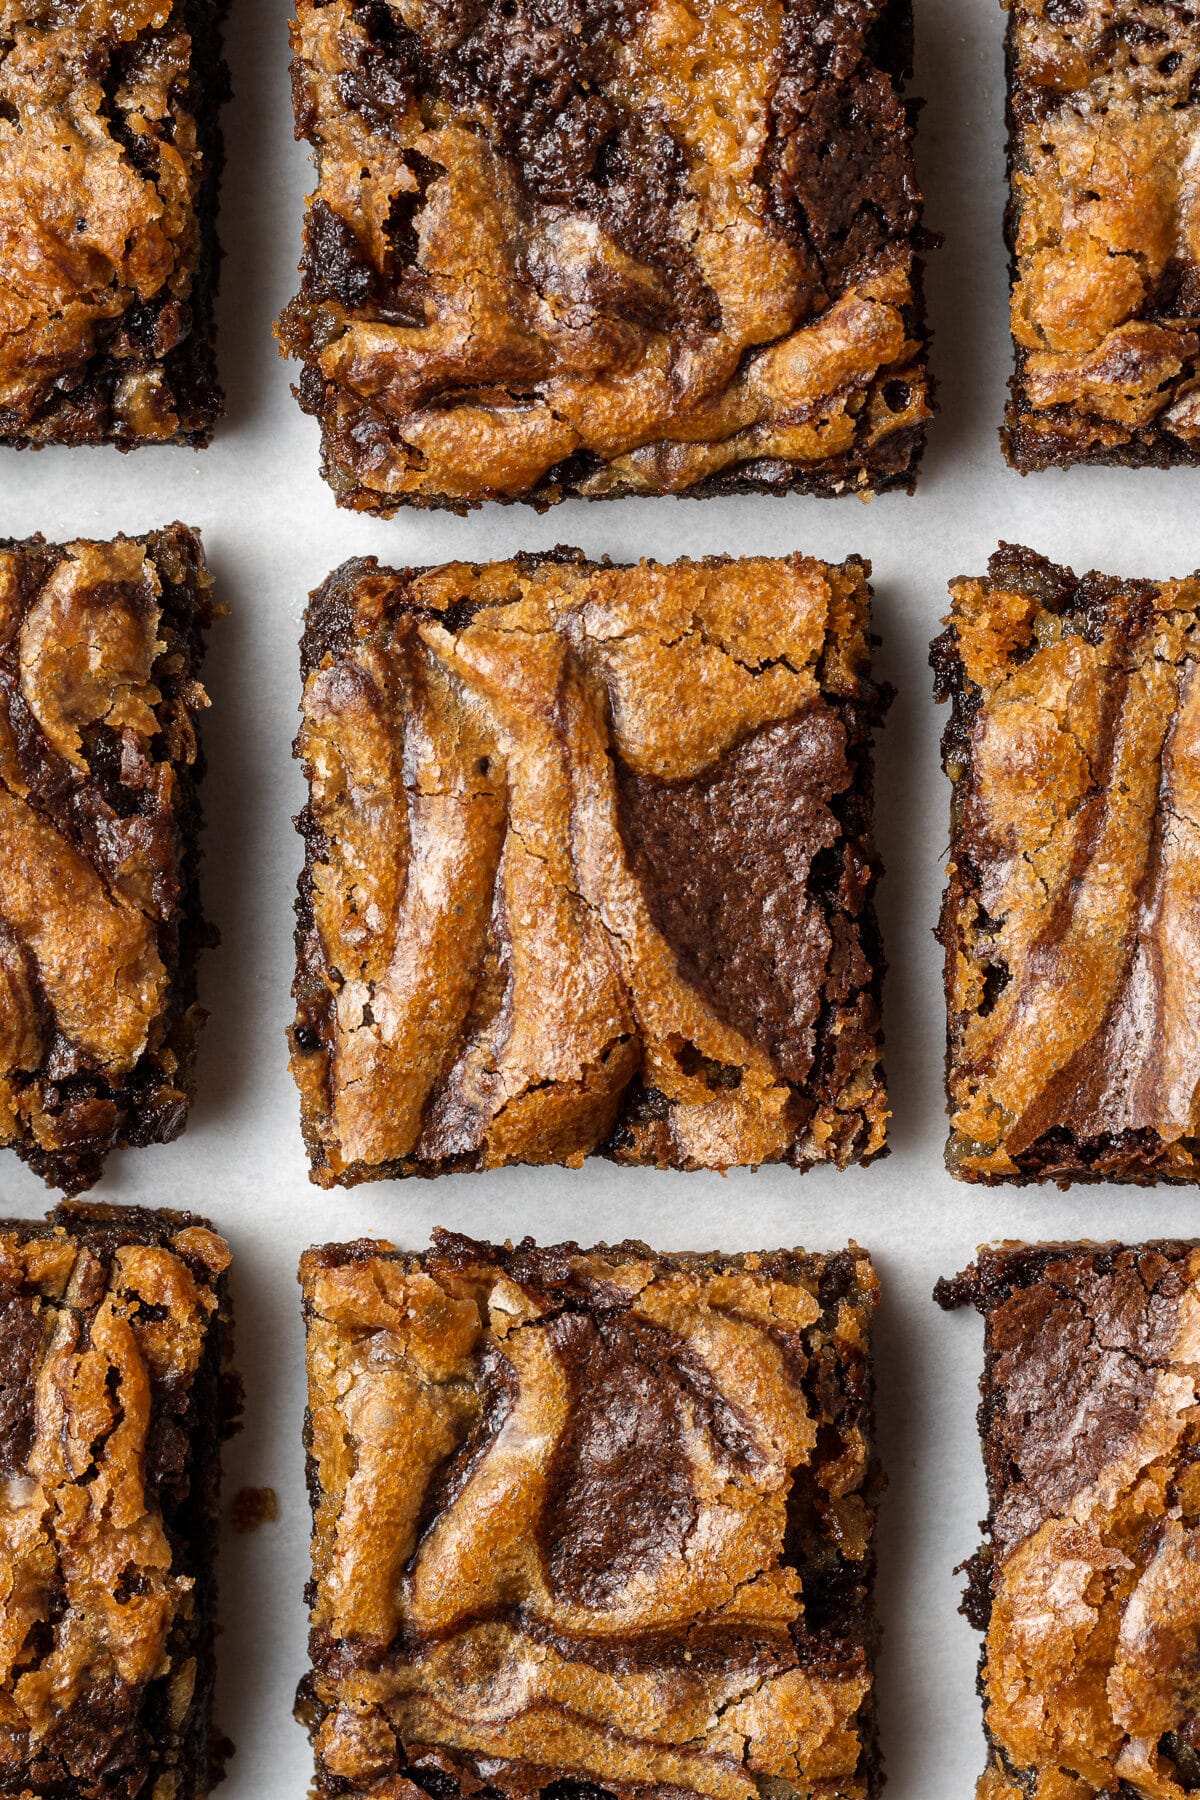
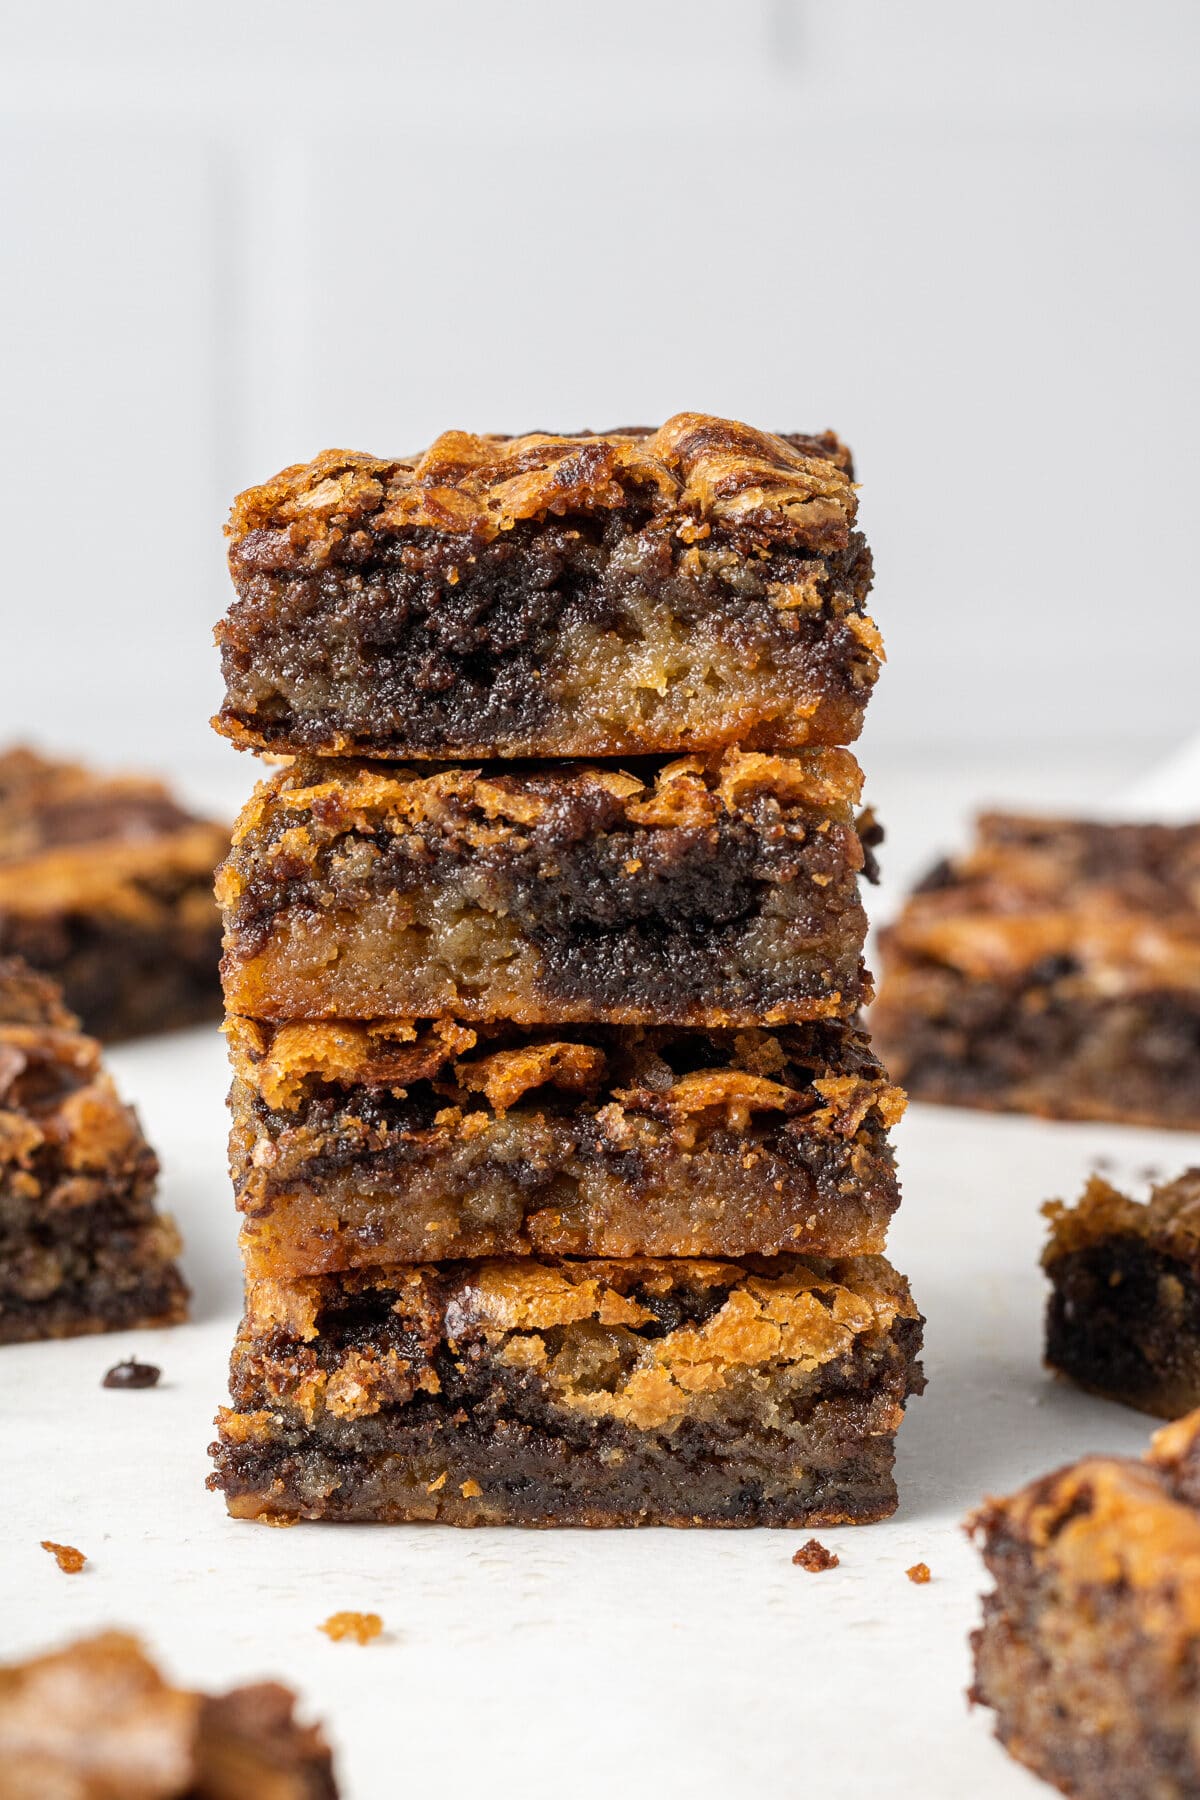
These brownie blondies are the perfect combination of blondies and brownies. They’re gooey and fudgy with notes of brown sugar and caramel – you’ll never have to choose between the two desserts again! Easy to make, 8 ingredients, and no mixer required!

Choosing between blondies and brownies is a regular dilemma for me. I crave the chocolatey fudgy taste of brownies but I also love the brown sugar, caramel flavor of blondies.
And so that’s how brownie blondies were born! If blondies and brownies had a baby, this would be it, and I have to admit – I might like these brownie blondies more than regular brownies or regular blondies on their own.
Why These Brownie Blondies Work
- They’re gooey, with notes of caramel and brown sugar from the blondie batter and so much fudgy chocolate flavor from the brownies.
- These brownie blondies have the perfect crinkle top that we all know and love!
- Even though two batters might seem like a bit of work, brownie batter and blondie batter require almost all the same ingredients, so making the two batters is easy! Just swirl them together in the pan and voila!
- You can make this recipe using regular dairy butter or dairy free butter – it’s been tested both ways!
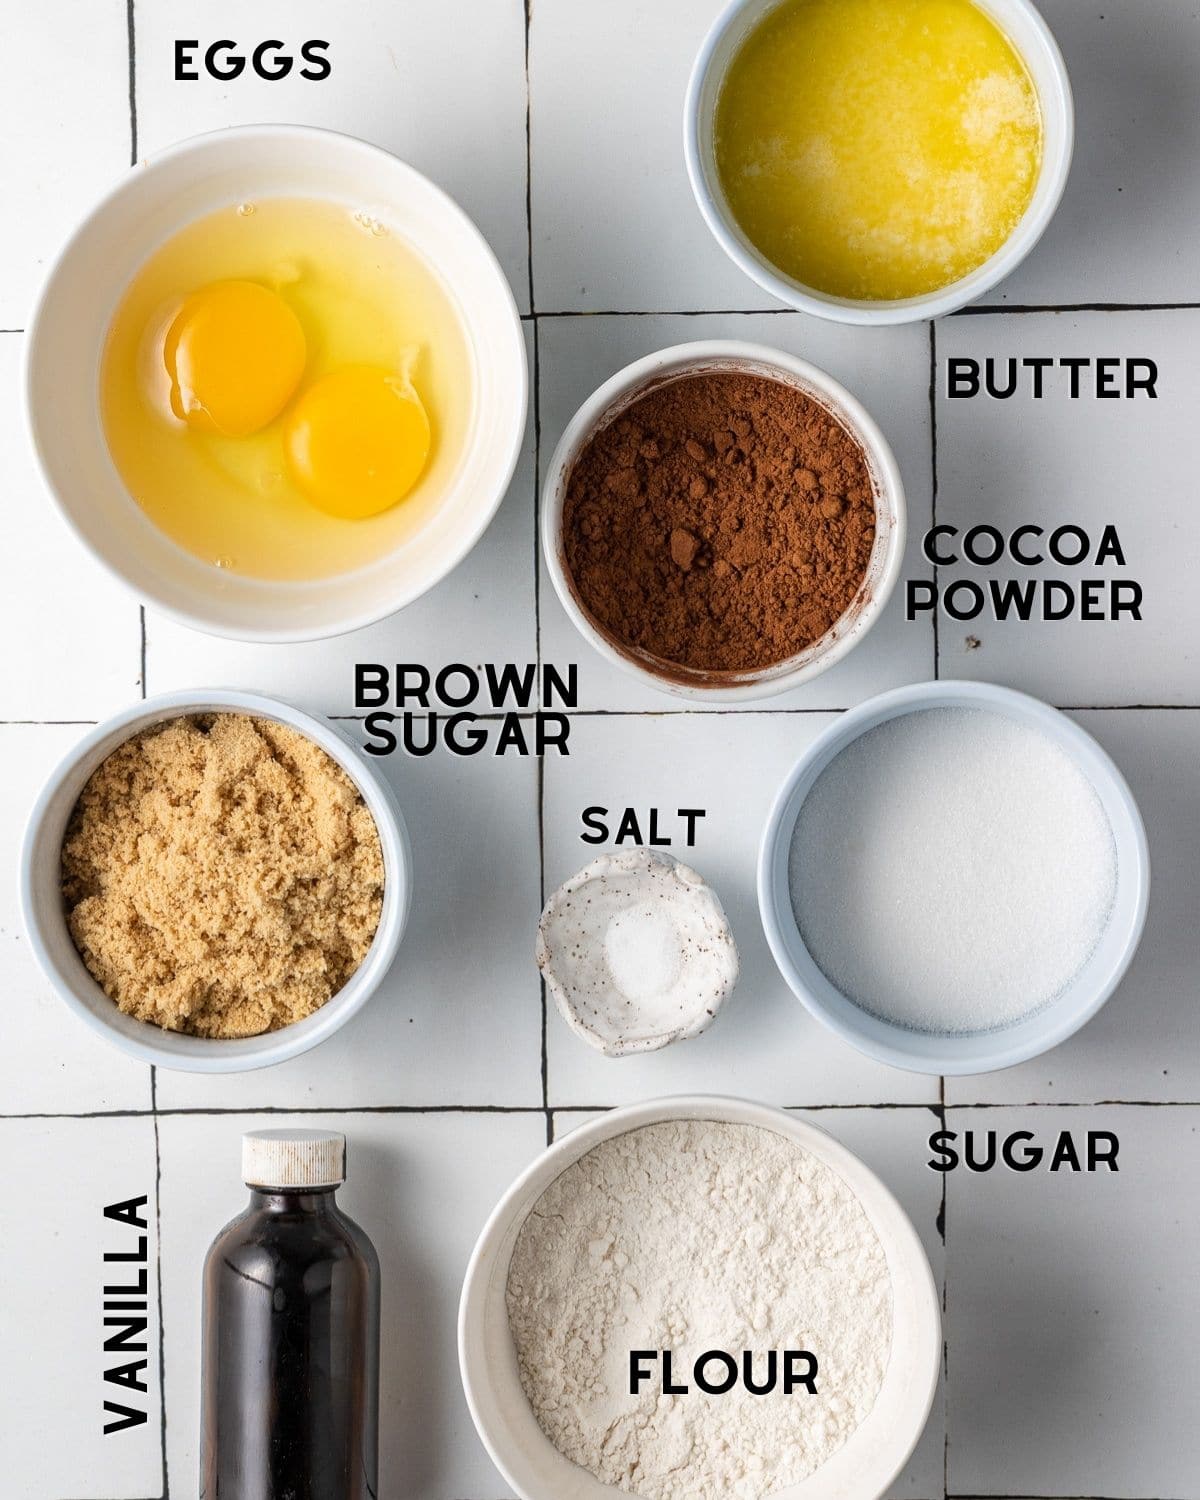
Ingredients Needed
- Butter: you can use regular butter or dairy free/vegan butter in this recipe.
- Cocoa powder: I recommend using unsweetened dutch processed cocoa powder, but you can use natural cocoa powder if that’s what you have on hand.
- Flour: This recipe uses all purpose flour. I don’t recommend substituting this as the recipe hasn’t been tested with other types of flours.
- Brown sugar: Light brown sugar is what gives these brownie blondies their caramel flavor, so I don’t recommend substituting. The one exception is that you can use dark brown sugar instead of light brown sugar.
Step By Step Instructions
Note: Full ingredient measurements and instructions can be found in the recipe card at the bottom of this page.
STEP ONE: Prepare an 8×8 inch square baking pan. Line it with parchment paper and leave some hanging over the sides to make it easier to remove the brownie blondies from the pan later. Preheat the oven to 350°F.
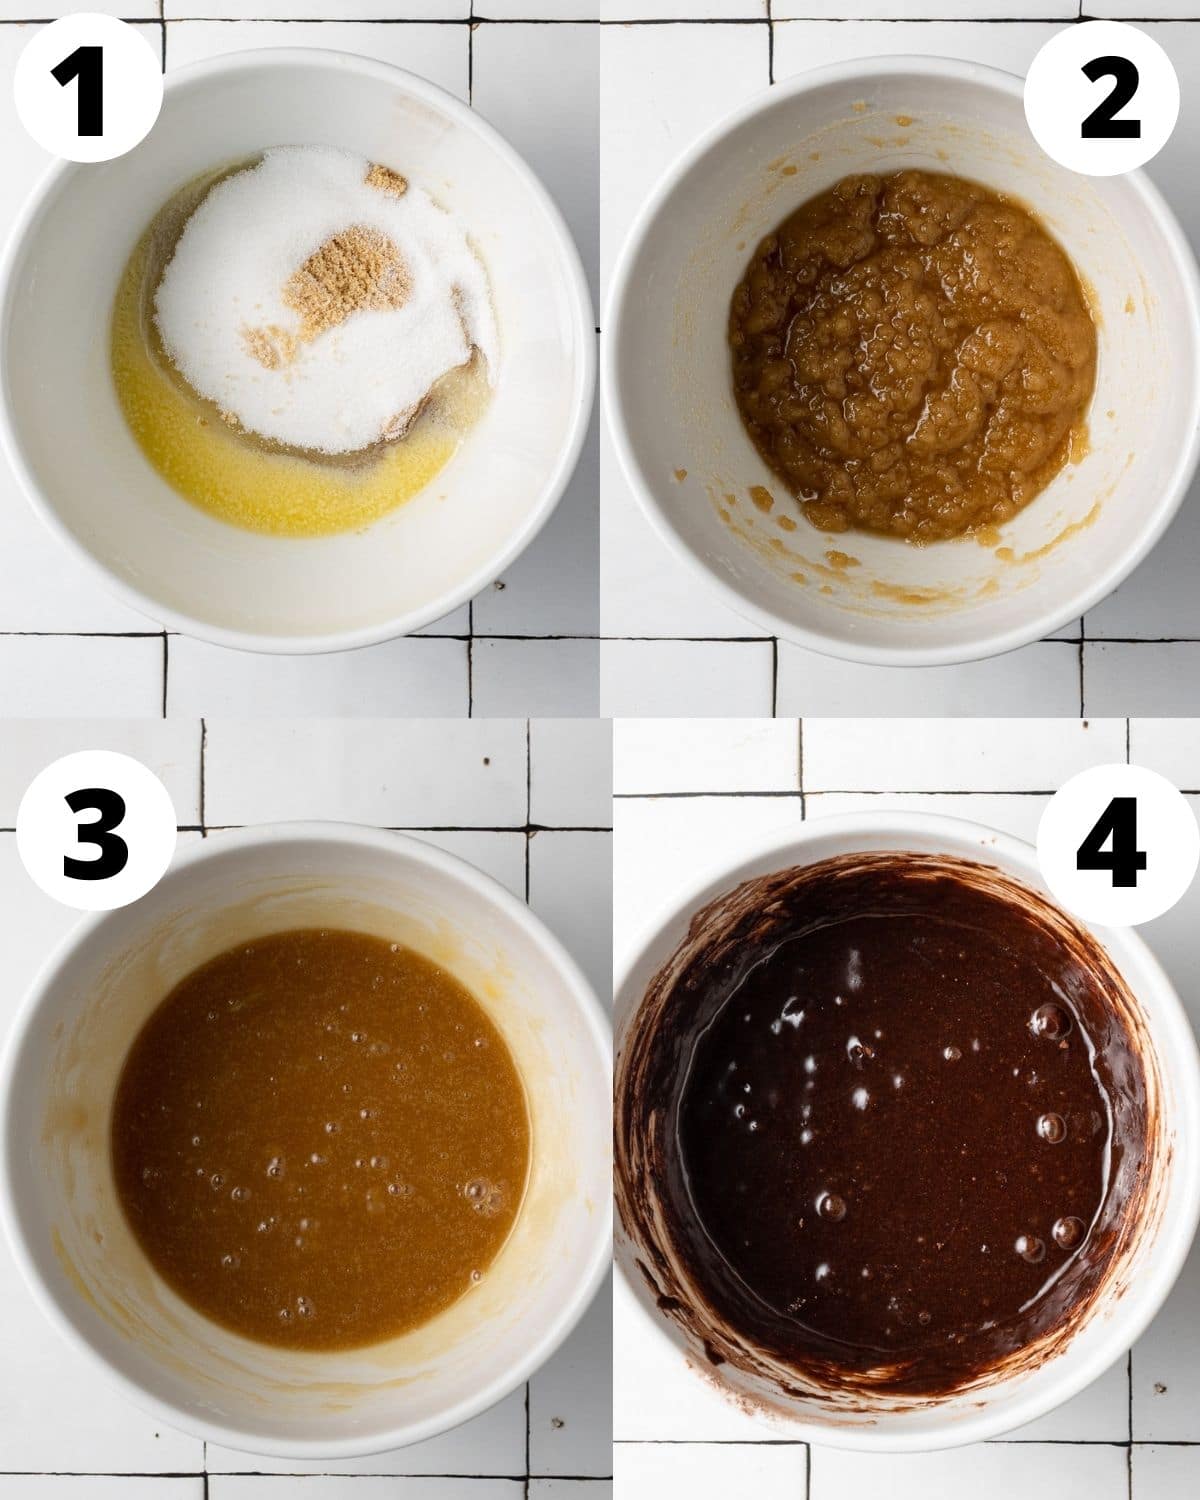
STEP TWO: To make the brownie batter, melt the butter in a large microwave safe bowl. Add in the brown sugar and white sugar, then whisk well until the mixture pulls away from the sides of the bowl like a paste.
STEP THREE: Whisk in the egg and vanilla extract. Whisk well, then add in the flour, cocoa powder, and salt. Whisk until just combined and set aside.
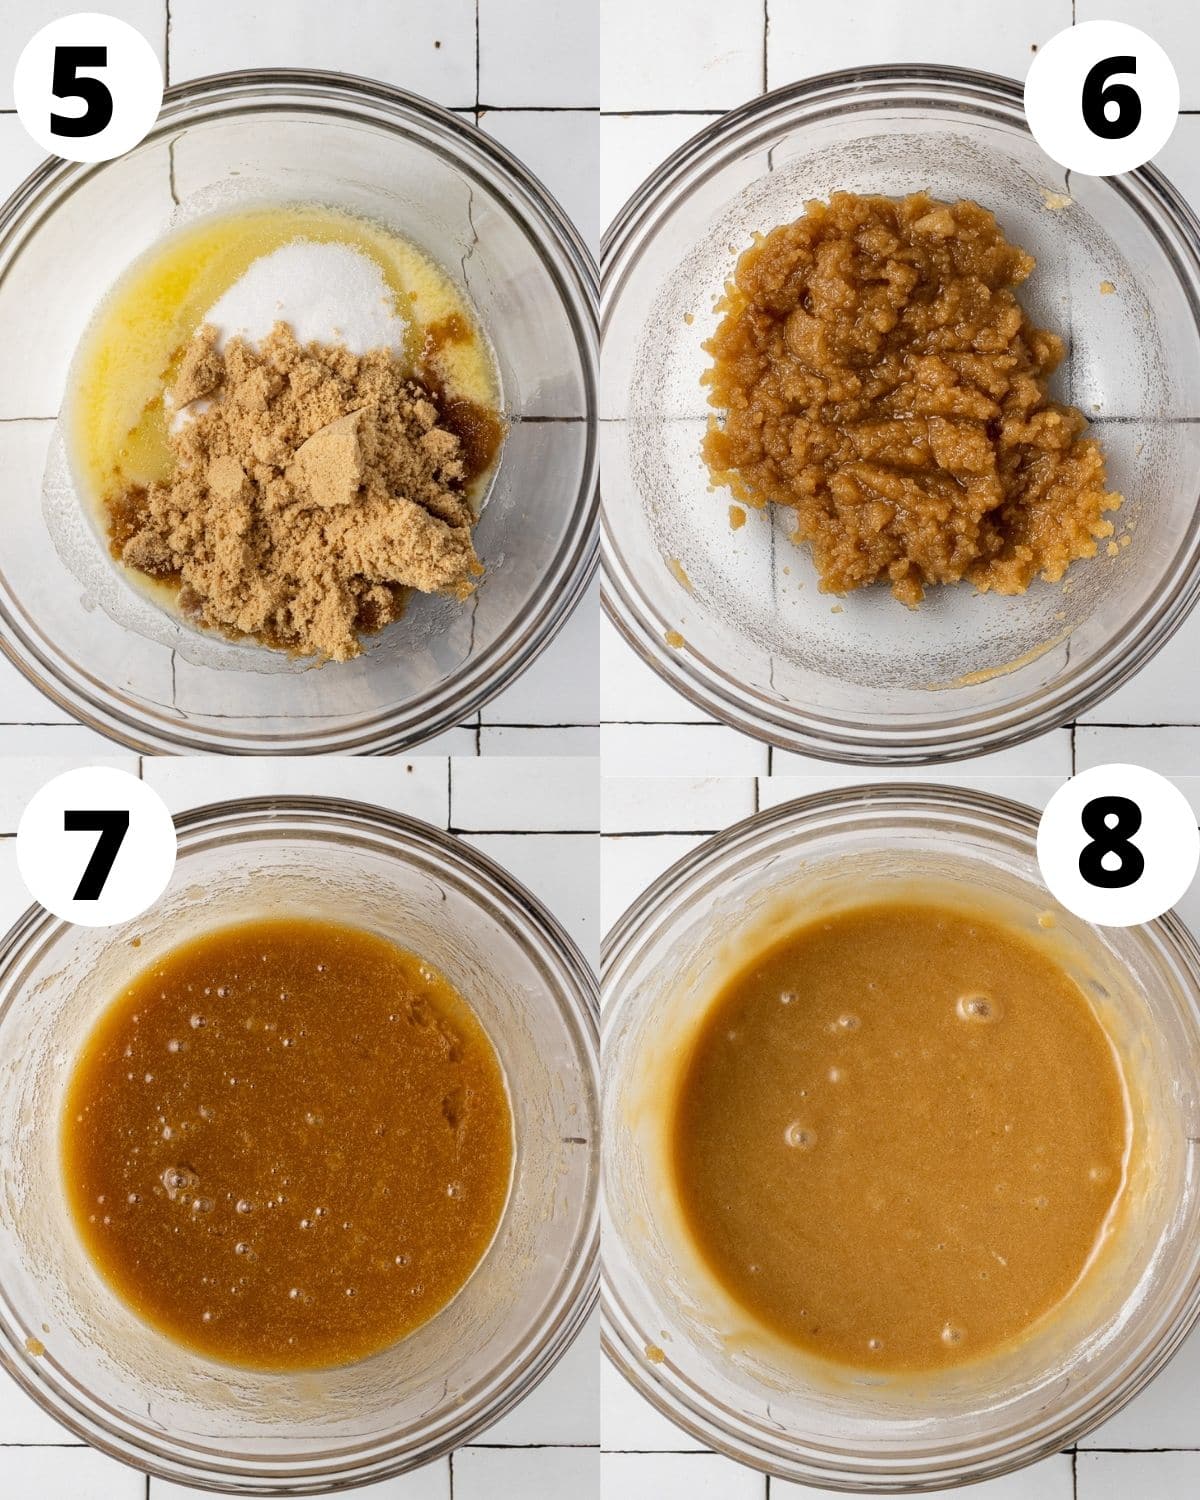
STEP FOUR: Make the blondie batter in a separate bowl following all the same steps as above, except the dry ingredients are just flour and salt (no cocoa powder).
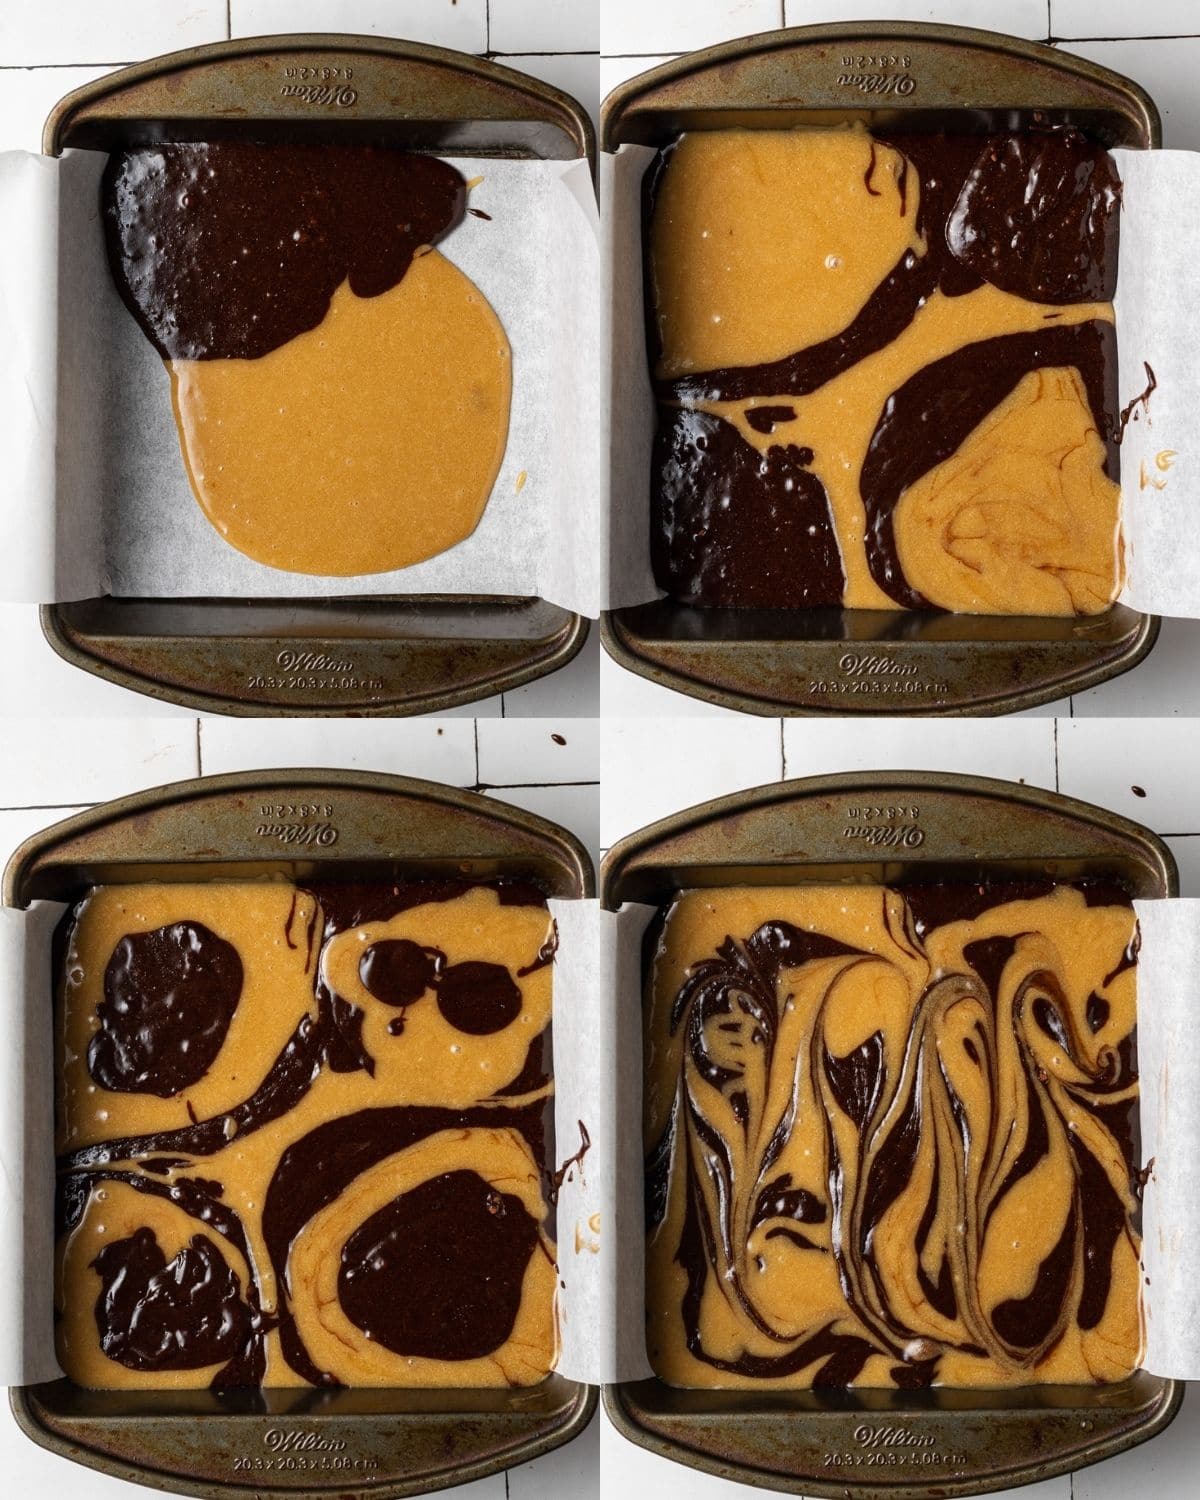
STEP FIVE: Scoop around 1/4 cup of the blondie batter into one corner of the 8×8 lined pan, then use a different measuring cup to scoop 1/4 cup of brownie batter into the opposite corner. Alternate in a checker pattern (see step by step pictures below), always adding brownie on top of blondie and vice versa. The batters will seep together a little bit – that’s okay.
STEP SIX: Take a knife and make a swirl in the top of the batter, starting at one end of the pan down to the other. Bake for 25-35 minutes or until a toothpick inserted in the middle of the brownie blondies comes out mostly clean with just a few wet crumbs (see picture below). Let them cool completely in the pan before slicing.

Expert Tips
- Properly measure your flour – please! Use a $15 kitchen scale (this is the most accurate way) or the fluff, scoop, and level method.
- Do not over-mix the batter! Only mix until the dry ingredients are just combined.
- Be sure to whisk the butter and sugars together until they are paste like and pull away from the sides of the bowl, and whisk the eggs in well. This helps create the crackly top as well.
- Don’t mix the two batters together too much with the knife, or else they will be too blended and you won’t have the two distinct flavors.
- Use two different measuring cups to scoop the brownie batter and blondie batter into the pan so that the batters don’t mix together.
- I highly recommend using an 8×8 metal baking pan. The brownie blondies will bake more evenly, and baking them in a glass pan will take longer as well.
- Don’t over-bake the brownie blondies – if the toothpick comes out clean, you’ve likely over baked them and they won’t be gooey and soft like they should be! I like to start checking on them early, at around the 28 minute mark.
- Don’t slice the brownie blondies until they have completely cooled – trust me. Slicing into them while they are still warm is a great way to ruin brownie blondies as they will be a gooey, liquidy mess!
Storage Instructions
The brownie blondies should be stored un-sliced in the baking pan covered tightly with tin foil. They will stay fresh for up to 5 days (if you can make them last that long!).
If they’ve already been sliced, you can store them in an air tight container at room temperature.
I don’t recommend freezing these bars!
MORE BLONDIES YOU’LL LOVE


If you make this recipe, let me know how it went in the comments below, I’d love to hear from you! You can also tag me on Instagram or Facebook so I can check it out!
Baking FAQ
These are the topics I’m asked about most frequently:
You can get these answers and more in my frequently asked questions post!

Brownie Blondies
Video
Ingredients
Brownies
- 6 tbsp butter, melted , (regular or dairy free)
- 6 tbsp (75 g) light brown sugar
- ½ cup (100 g) granulated sugar
- 1 egg
- ½ tbsp vanilla extract
- 6 tbsp (30 g) unsweetened cocoa powder, SEE NOTES
- ⅛ tsp salt
- 6 tbsp (48 g) all-purpose flour, SEE NOTES
Blondies
- 6 tbsp butter, melted, (regular or dairy free)
- ½ cup (100 g) light brown sugar
- 6 tbsp (79 g) granulated sugar
- 1 egg
- ½ tbsp vanilla extract
- ⅛ tsp salt
- ¾ cup (94 g) all-purpose flour, SEE NOTES
Instructions
Brownies
- Preheat the oven to 350°F and line an 8×8 square baking pan with parchment paper, leaving parchment paper hanging over the sides of the pan so that you can easily remove the brownie blondies from the pan later.
- Melt the butter in the microwave or in a small pan over the stove. Transfer the melted butter to a medium sized bowl.
- Add in the light brown sugar and granulated sugar. Whisk the butter and sugars together. Keep whisking until the mixture resembles a paste that pulls away cleanly from the side of the bowl when you mix it.
- Add the eggs and vanilla and whisk well.
- Pour the flour, cocoa powder, and salt into the bowl and mix with the whisk until just combined. Do not over-mix! Set aside while you make the blondies.
Blondies
- In another medium bowl, add melted butter, brown sugar, and granulated sugar. Again, whisk the butter and sugars together until it resembles a paste that pulls away cleanly from the side of the bowl.
- Add in the eggs and vanilla, then whisk well.
- Add the flour and salt into the bowl and mix with the whisk until just combined. Again, do not over-mix!
- Use a measuring cup to scoop about 1/4-1/3 cup of brownie batter into one corner of the baking pan. Use a different measuring cup to scoop the 1/4-1/3 cup of blondie batter into the space beside it. They will start to spread together since the batter is runny – that's okay.
- Add another scoop of brownie batter to the corner opposite where the other scoop of brownie batter was, then if there is room, do the same with the blondie batter. Add a scoop of brownie batter over top of the blondie batter, then a scoop of blondie batter over top of one of the brownie batter areas, and alternate this way until all batter is gone. (Process photos are in the post above for reference).
- Take a butter knife and lightly draw an "S" shape in the top of the batter with the tip of the knife, creating a marble effect (Photo in post above for reference). This step is optional, as it just creates a prettier look on top. Bake for 25-35 minutes or until a toothpick inserted in the middle of the brownie blondies comes out with just a few wet crumbs on it (but not covered in batter).
- Let cool completely in the pan before slicing!
Equipment

Notes
The calorie information provided for this recipe is an estimate. The accuracy of the calories listed is not guaranteed.
These turned out so perfectly, and thank you for the detailed instructions it really helped making the overall dessert picture-perfect
Glad to hear these worked for you!
Hi
I make this recopie and I Lovet. The only problem is all the edges are very crispy almost burnt. I had to get it out before time. What could it be?
Hi Jessica. Your oven temperature could be too hot even if it says its the right temperature. I recommend getting an oven thermometer so you can be sure of the most accurate temp!
Hi Gabby, may i ask? Why Blondies always contains lots of flour? Its not Cakey for the result? I wanna try but im afraid it will be Cakey. I love chewy, crispy, Brownies, also for Blondies. Please info me, thank you.
These blondies shouldn’t be cakey at all. The blondie recipe has more flour than the brownie recipe because the brownies have cocoa powder as well. Both the blondies and the brownies have the same amount, in Tablespoons, of dry ingredients.
Hi Jessica! Your oven temperature could be too hot even if it says its the right temperature. I recommend getting an oven thermometer so you can be sure of the most accurate temp!
These are my FAVORITE! I love them so much! Even when I overmixed and the blondie batter was a little runny they baked up perfectly. I recommend having some friends to share these with if you don’t want to eat the whole pan by yourself in less than a day (I speak from experience)!! I’ve doubled the recipe and they turned out great!
Thanks so much for your review Cynthia 🤗
This is an amazing recipe. I’ve used it dozens of times (I always make a double batch!) and my whole family loves them. I’m a newbie baker and my “assistants” are kids, so you can definitely consider this recipe fool-proof! I’ve also used both butter and margarine (sticks) and both turned out great! Thanks for sharing!
Yay! I am so happy to hear this, thank you for taking the time to come back and leave a review!
What size pan do you recommend if you double the recipe. Has anyone tried and add ins like walnuts or shredded coconut?
To double the recipe use a 9×13 pan. I haven’t tried with those add ins but they should work fine!
These are ABSOLUTELY amazing! I have to make them sparingly because the pan only last for two days between me, my husband, and four year old. The batter has been a different consistency a couple times I’ve made them but they always come out delicious! Thank you so much for this recipe!!
I’m so happy you all love them so much! Thanks for the review!
These were delicious!!! I did want to ask you though, my brownie batter was much thicker than the blondie batter which made it really difficult to spread. Also I struggled with the parchment paper moving all over the pan. Any thoughts or suggestions?
Hi Kathy! I always like to use metal binder clips to hold the parchment paper in place, I find that does the trick! So happy you loved the brownie blondies!
OMG these turned out so well – made them with my 9 year old son! The blondies were so gooey and the brownies were so rich – the perfect combo. We will be baking these regularly in our home!
Hi Krystin! I’m so happy to hear that you both loved the recipe! Thank you so much for taking the time to come back and leave a review! 🙂
Other alternative for egg
Absolute best blondies! 10/10 cookie dough diaries is the OG for brownie blondies, cant get enough of them!
Hi Tayler! So happy to hear that you loved these! Thanks so much for the review!
I have made this and it turned out AMAZING. I was a bit scared to not over bake it since I used a bigger tray but all the notes and tips helped a lot, I mean, you really went the extra mile with alll the informations and I cannot thank you enough. This recipe will definitely become a thing for me from now on ( plus my mom already asked for the recipe haha). Thank you again ?
Hi Iris! This totally made my day! I’m so happy that you found the tips and information helpful and that you loved the recipe! Thanks so much for taking the time to leave a review 😀
Oh my gosh these are the best brownie blondies ever!! I had never heard of this before until I found this blog, definitely bookmarking it for bake sales.
Hi Laure! Thank you so much for the review, I’m so glad that you loved them!
I had never heard of these before and DAMN was i missing out. they are unreal!!!
Hi Garth! I’m so glad you loved them! Thanks so much for taking the time to leave a review 🙂
hi there! just wanted to check, if i were to bake these in a higher loaf pan, do i bake them for longer too? mine turned out way too greasy despite re-baking several times… is there a reason?
Hi! Bake time would definitely be different in a loaf pan – they would need to be baked much longer since a standard loaf pan is about half the size of an 8×8 – so you’re adding the full amount of batter to a pan half the size. That was likely the issue!
hi gabby thanks for your reply!
may i also check, how can i keep the sides crispy? mine often turn soft after a while..
Made these off a whim and man am I glad I did! They were perfect and they tasted amazing! One of my new favorite recipes.
Hi Delaney! This made my day! I am so happy to hear that you loved the recipe, thanks so much for taking the time to come back and leave a review 🙂
I made these last night and they are totally as advertised! The fudgy texture is the BOMB and they were super simple to make. Definitely my new go to!
Hi Cara! I am so happy to hear that you loved them and found them easy to make! Thanks so much for leaving a review 🙂
These are incredible! So fudgy and gooey, and exactly what I was looking for! thank you for the recipe!
Hi Steph! Yay, I am so thrilled that you loved them! Thanks for the review 🙂
These are the BOMB. Best of both worlds with the blondies & brownies. Highly recommend.
Hi Kristin! Woohoo! So happy that you loved the brownie blondies! Thanks so much for leaving a review 🙂
I’m never making regular brownies again. These are so easy and so amazingly delicious!!
Hi Sarah! I’m so happy that you loved them and found the recipe easy to follow! Thanks so much for the review 🙂
I honestly hate baking, but one night my bf and I were scrolling the “for you” page in Instagram and stumbled across these blondies. Really simple recipe to follow and the ooey gooey texture is well worth it. I will not be buying boxed brownie mix anymore. I was a bit worried because my consistency wasn’t as runny, or loose, as the pictures but the key was not to over bake. 10 out of 10.
Hi Alisha! I am so happy that you both loved the recipe so much! Thanks so much for taking the time to come back and leave a review 😀
Made these for a picnic. My son ate half the pan before I put them on a plate. They were chewy and rich. Will make again.
I’m so happy they were a hit! Thank you for the review!
Made last night and these are pretty incredible. The texture looked a little strange and seemed underdone after 35 min in oven, but after letting rest they are perfectly gooey and absolutely delicious. The only alteration I made was adding chocolate chips to the blondie batter. Will make this recipe again!
Hi Brooke! I’m so happy that you loved the brownie blondies – and chocolate chips sound like a perfect addition! Thanks so much for taking the time to come back and leave a review! 🙂
The texture is to die for! I typically struggle between over or undercooking my brownies but these were easy to achieve the perfect amount of gooey goodness!
Hi Jill! I’m thrilled to hear that you loved the brownie blondies 🙂 Thanks for trying them out!
I’ve been using a brownie recipe for years without trying anything new but gave these a try and won’t go back! Definitely an amazing go-to recipe!
Hi Ardit! I’m so happy that you tried something new and it paid off! I’m glad that you loved the recipe, thanks for stopping by!
El azúcar moreno claro, es el que nosotros aquí en México conocemos como mascabado?
If you don’t have light brown sugar, regular brown sugar is okay too!
I loved the combo of the two batters – they balanced each other perfectly! The instructions and pictures were also so easy to follow. These will be made often in my house!
Hi Janna! I’m so happy to hear that you loved the recipe – and thanks so much for taking the time to leave a review! 🙂
Can you use flax eggs? Thanks!
Hi Suzanne! Substituting for eggs in brownies/blondies can be tough, but that might work fine. I haven’t tested this recipe myself with flax eggs, so I can’t say for sure how they will turn out! If you try it I’d love to hear how it goes ? Good luck!