Dairy Free Chocolate Cake
This post contains affiliate links. Read the full disclosure here.
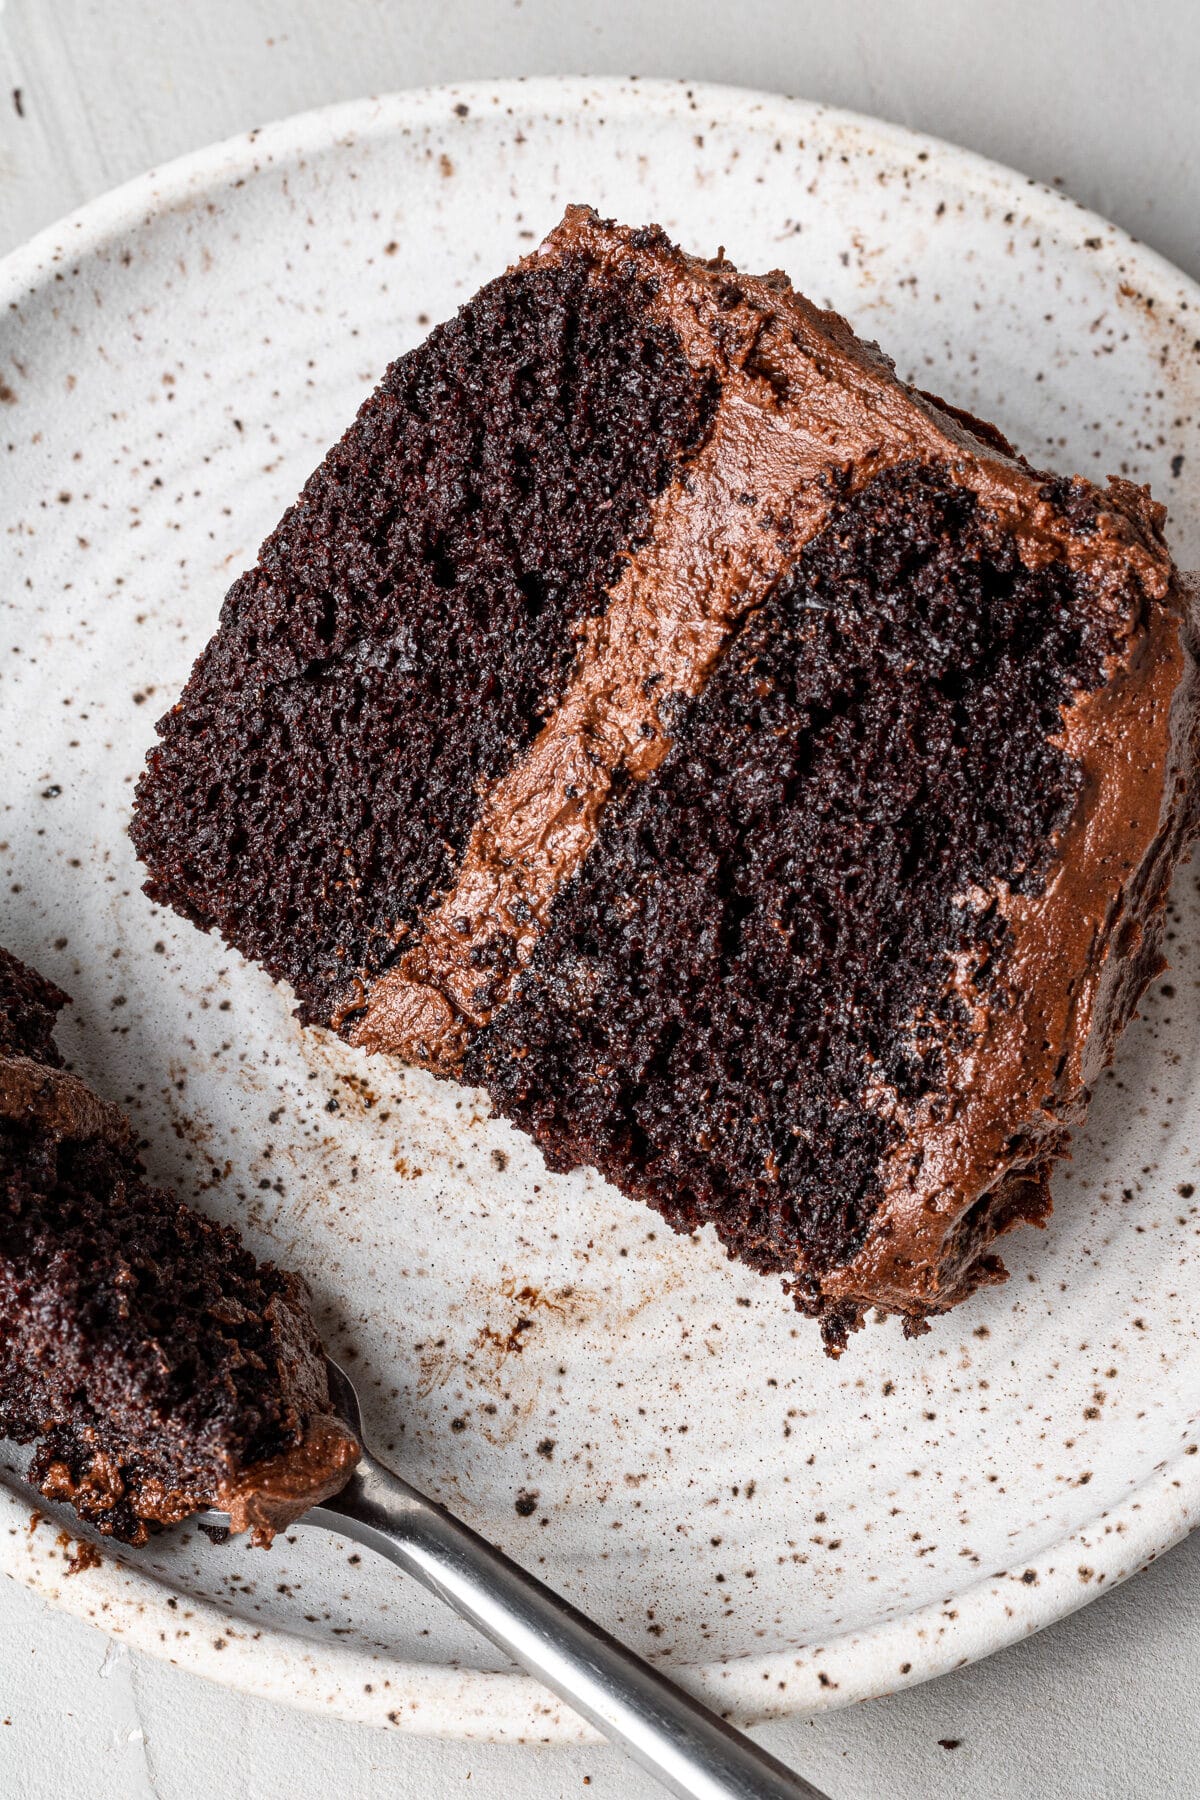
This is the BEST dairy free chocolate cake ever! It’s moist, fluffy, with rich chocolate flavor and a fudgy chocolate buttercream. It’s the perfect dairy free cake recipe that will keep you coming back for more!
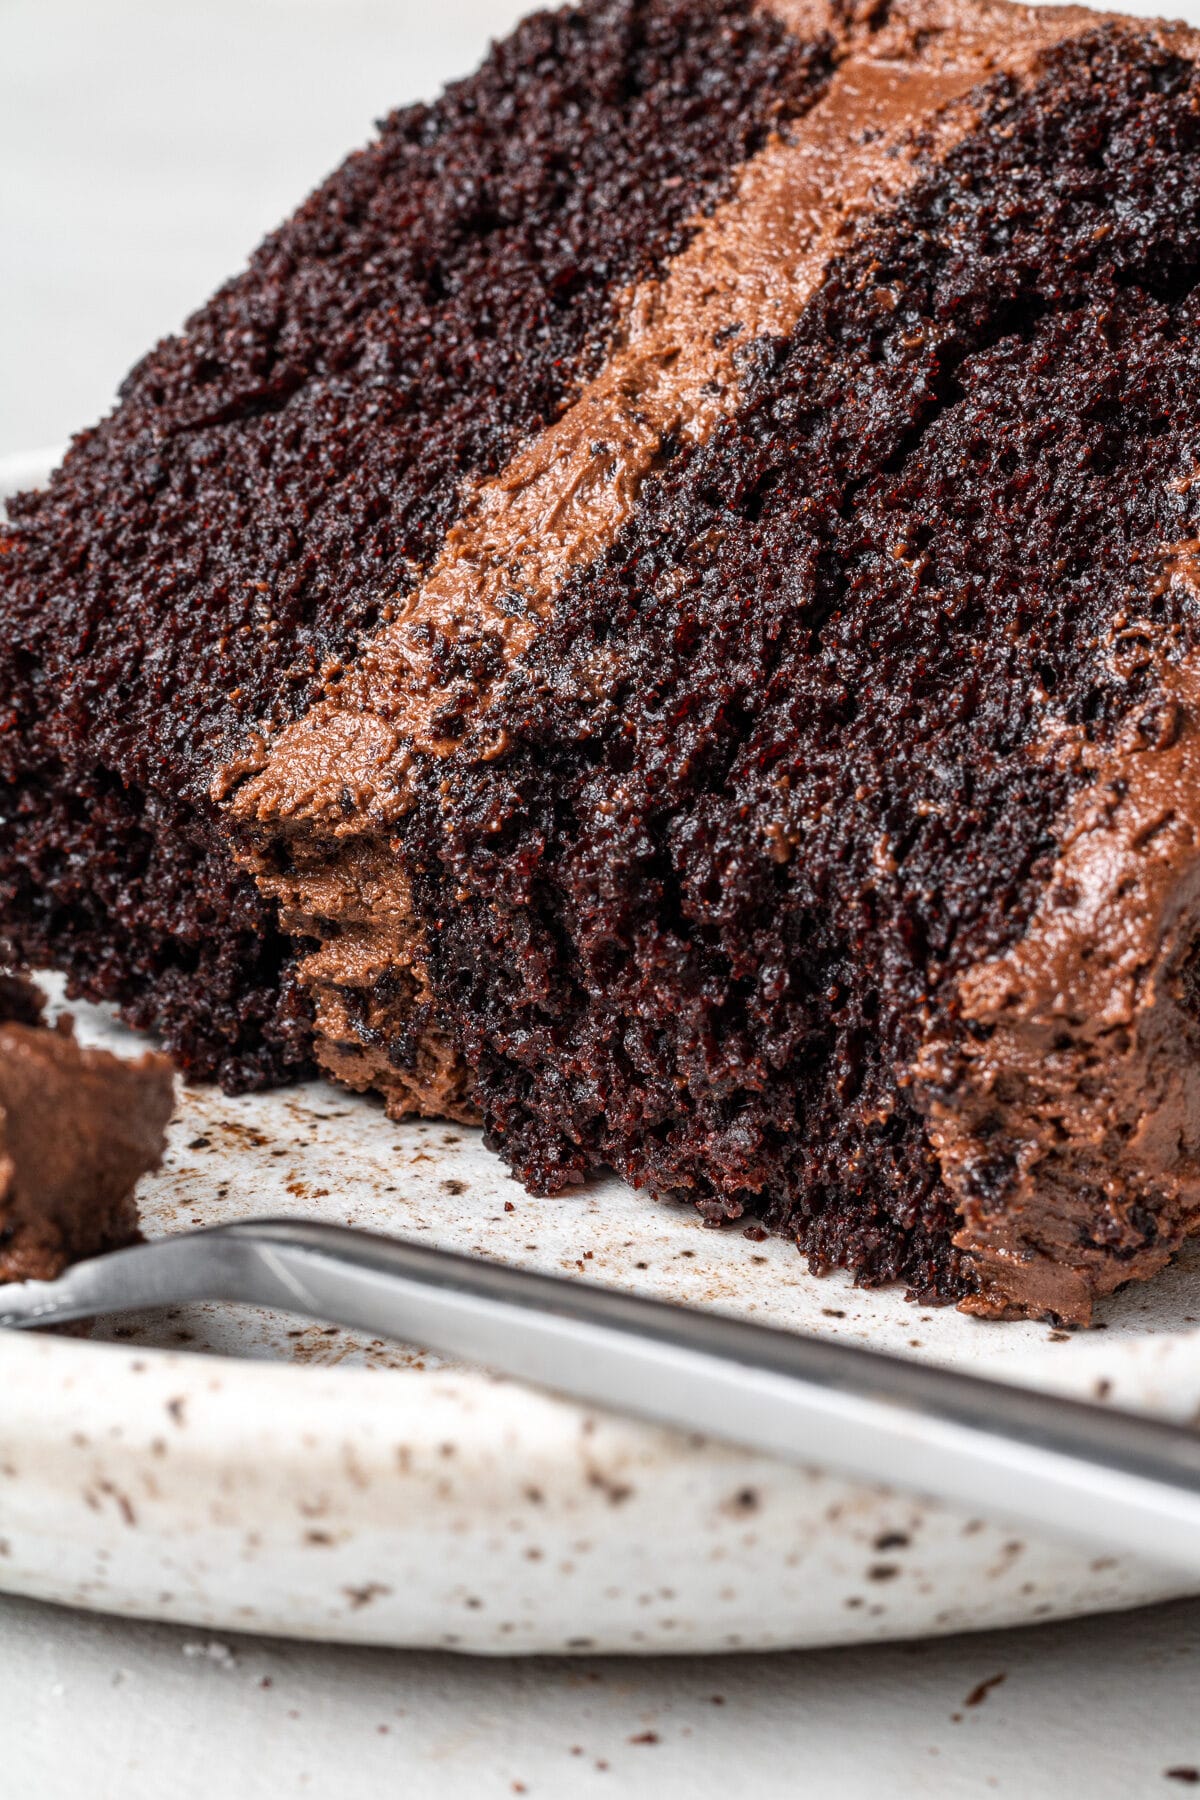
This double layer dairy free chocolate cake is fluffy, decadent and rich and incredibly hard to stop eating! I’m not ashamed to admit I sometimes just sit in front of the entire cake and go at it with a fork (and no, I am not kidding!).
I love this recipe so much that I used it as my own wedding cake! Seriously, this is the only chocolate cake recipe you’ll need. It’s a perfect go-to recipe for weddings, birthdays, holidays, or any other occasion!
Just like my dairy free vanilla birthday cake, I promise no one will ever know it’s dairy free!
Featured Reader Review
“Made this for a dairy free friend’s birthday. Turned out beautiful, delicious and decadent! Cake set well and frosting was easy to work with. People couldn’t believe it was dairy free. I used almond milk and a dairy free butter.”
Liz
Why This Dairy Free Chocolate Cake Works
- You can easily adapt this recipe to fit different pan sizes (instructions are further down in the post).
- While I’ve used a chocolate buttercream here, you can also pair it with a dairy free vanilla frosting.
- The recipe uses oil instead of butter to create the ultimate moist and light crumb.
- Did I mention how easy it is to make? Seriously – one bowl and no mixer required for the cake layers!
Ingredients Needed
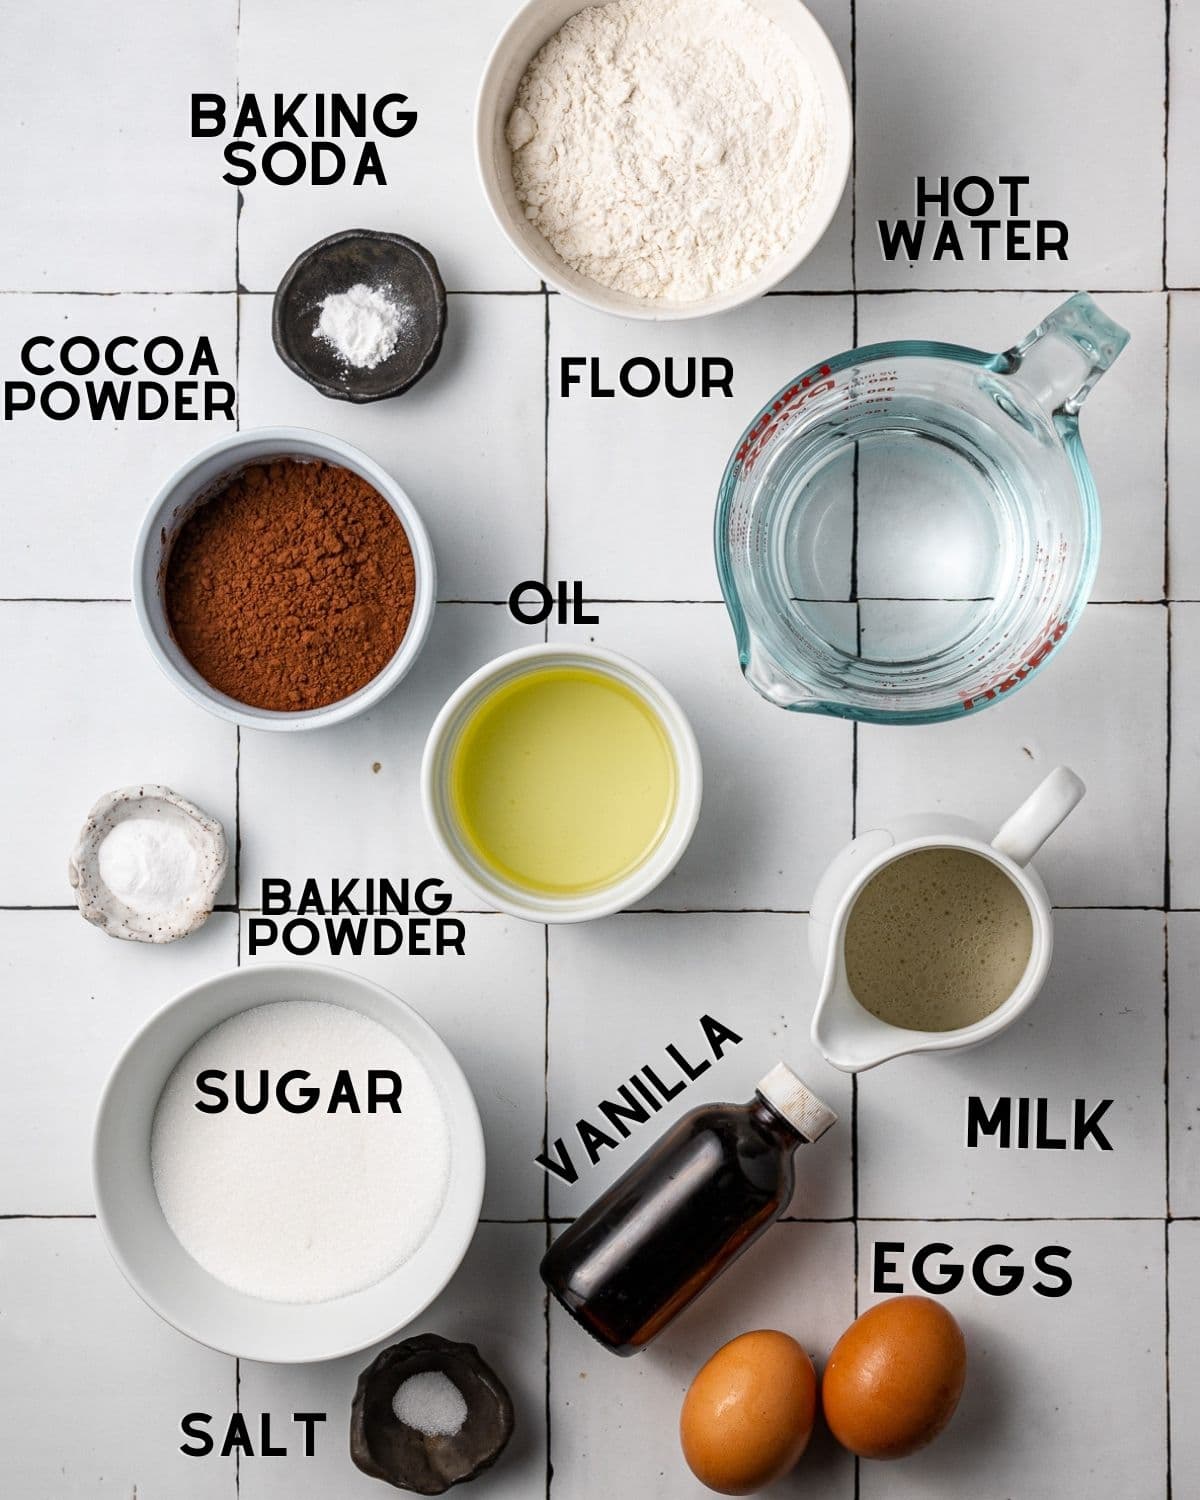
- Dairy free milk: I’ve tested this recipe with various dairy free milks, and they all work great. I personally like to use soy or oat.
- Oil: You can also use any neutral oil in this recipe, like canola, sunflower oil, or vegetable oil.
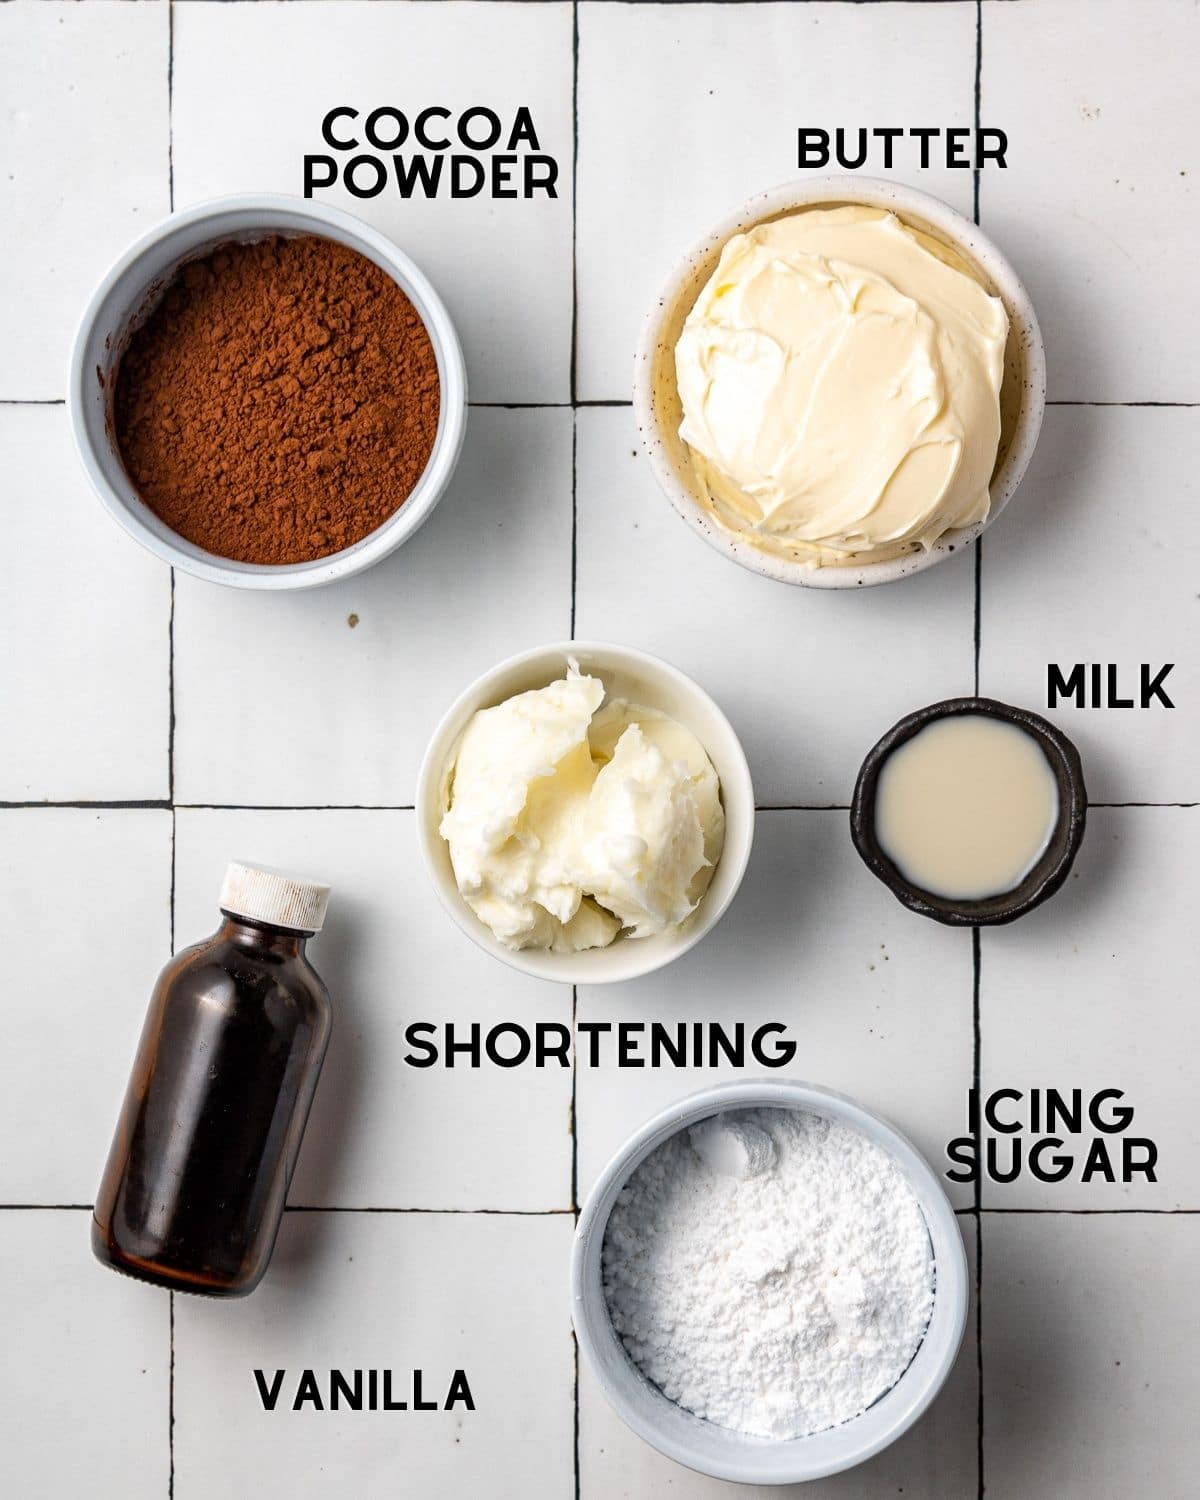
- Vegetable Shortening: I always use shortening in my buttercream recipes. It makes the buttercream more firm and easy to frost or pipe the cake with. When I tested this recipe with a few different dairy free butters, there were some that were firmer than others. If your dairy free butter is the texture of margarine, vegetable shortening can help firm it up, but you can replace this with dairy free butter if desired.
How To Make This Cake
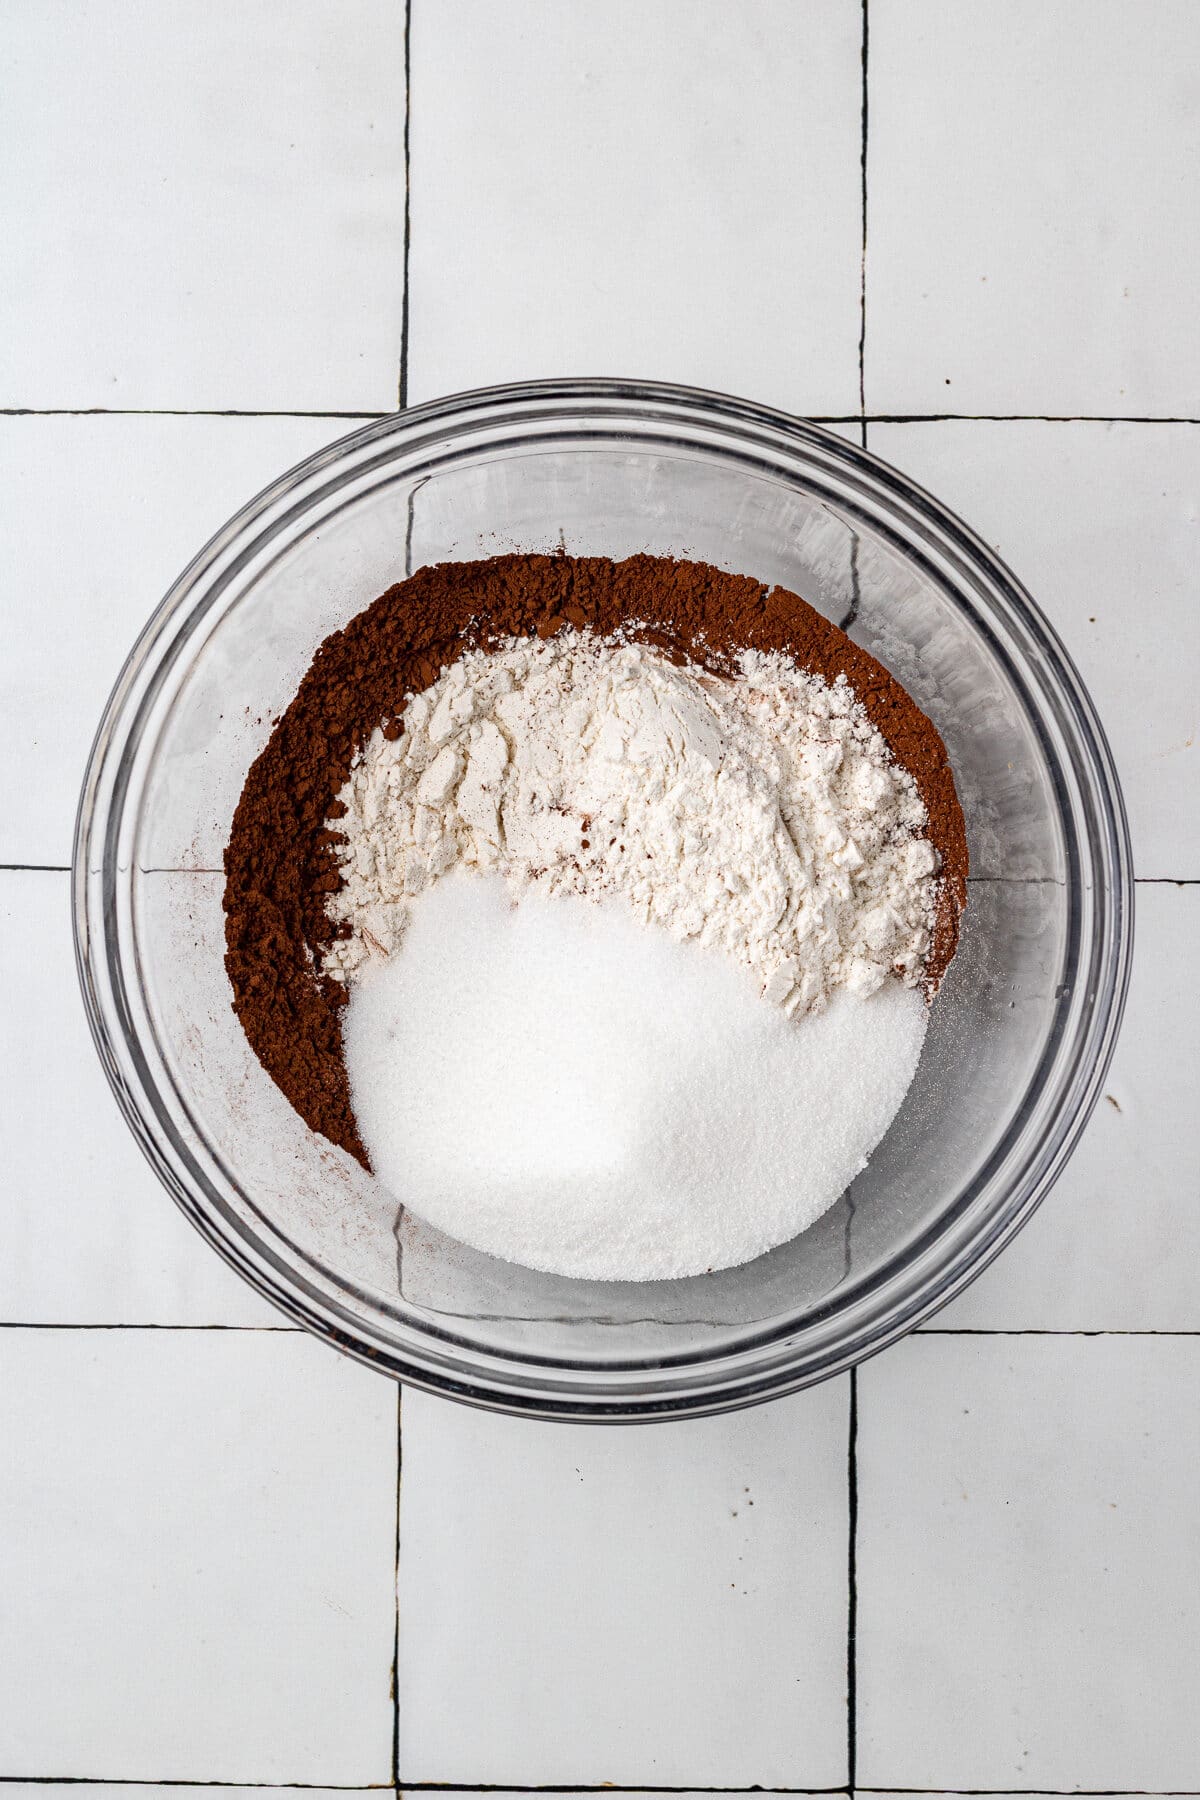
Whisk dry ingredients together!
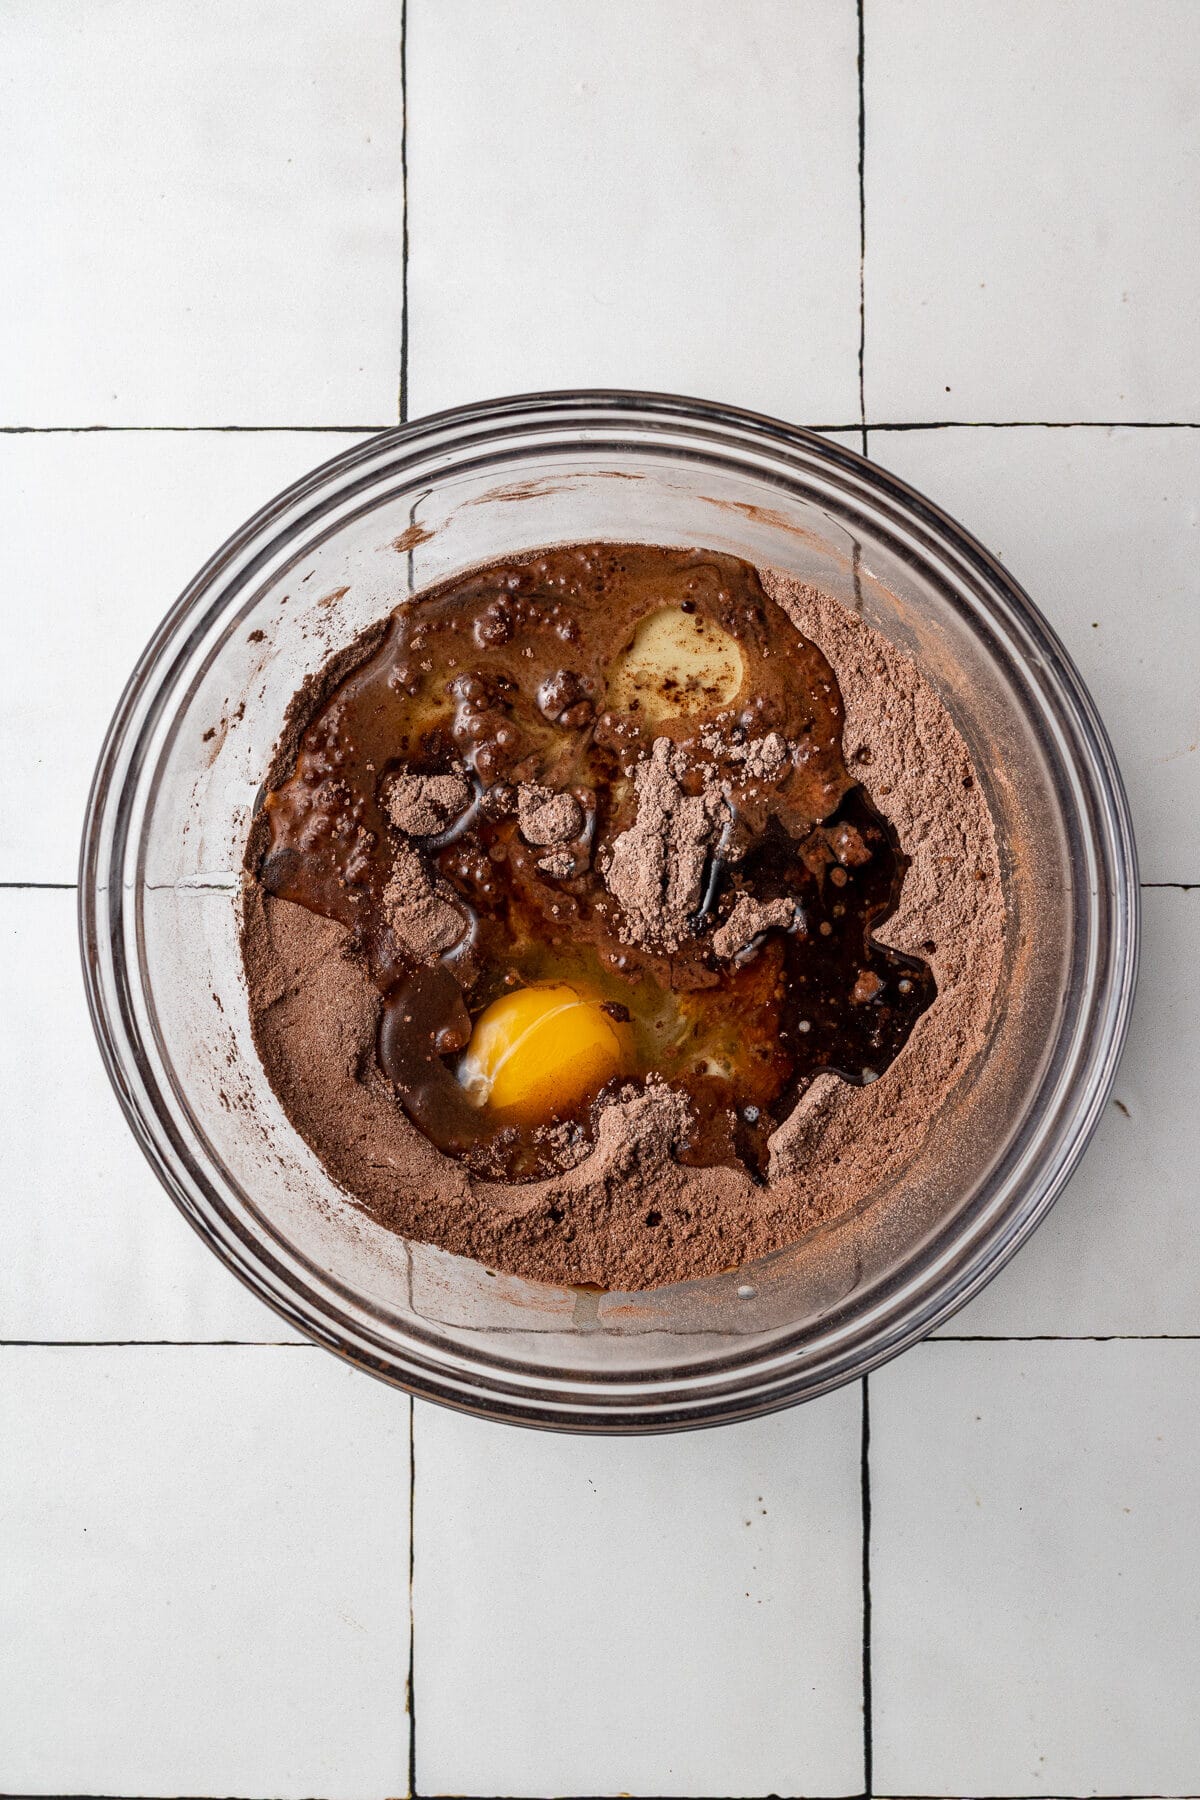
Add in wet ingredients.
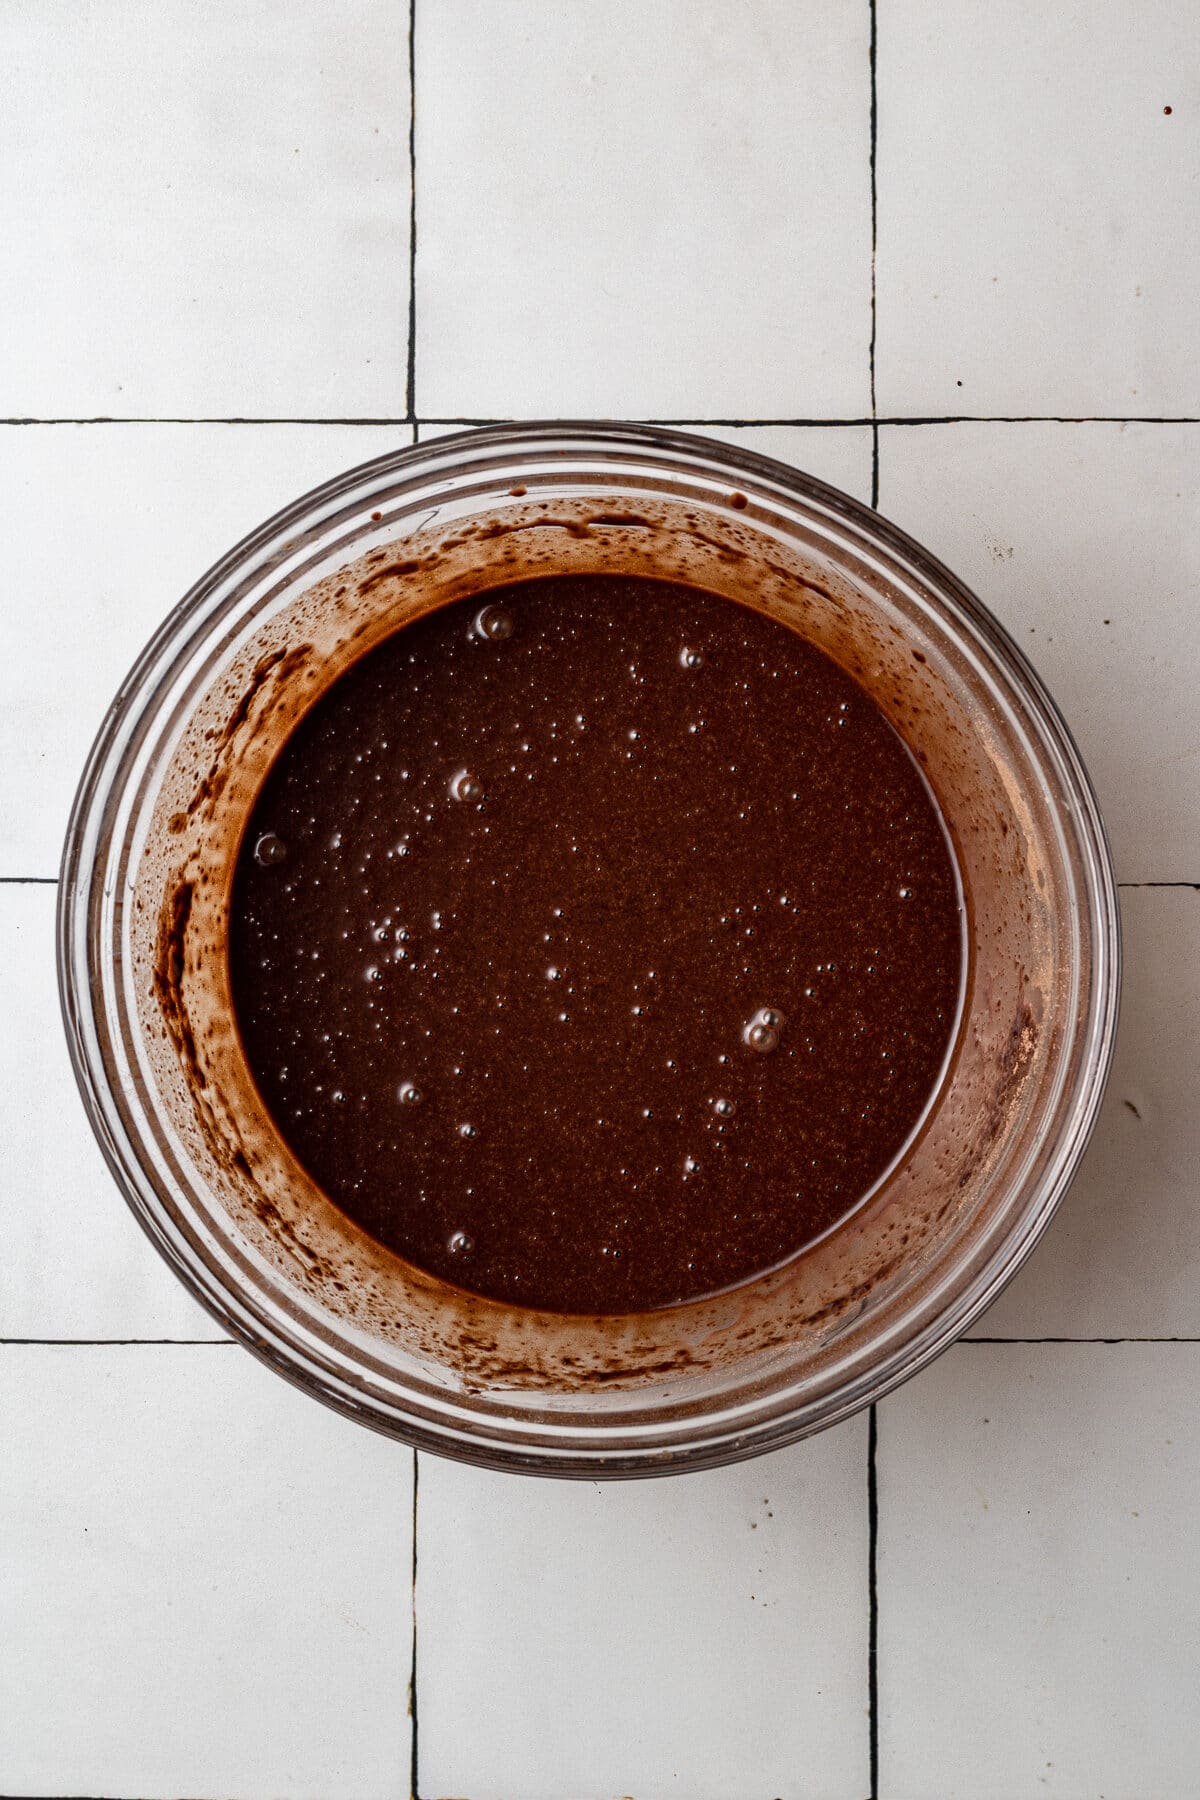
Whisk until combined, then bake!
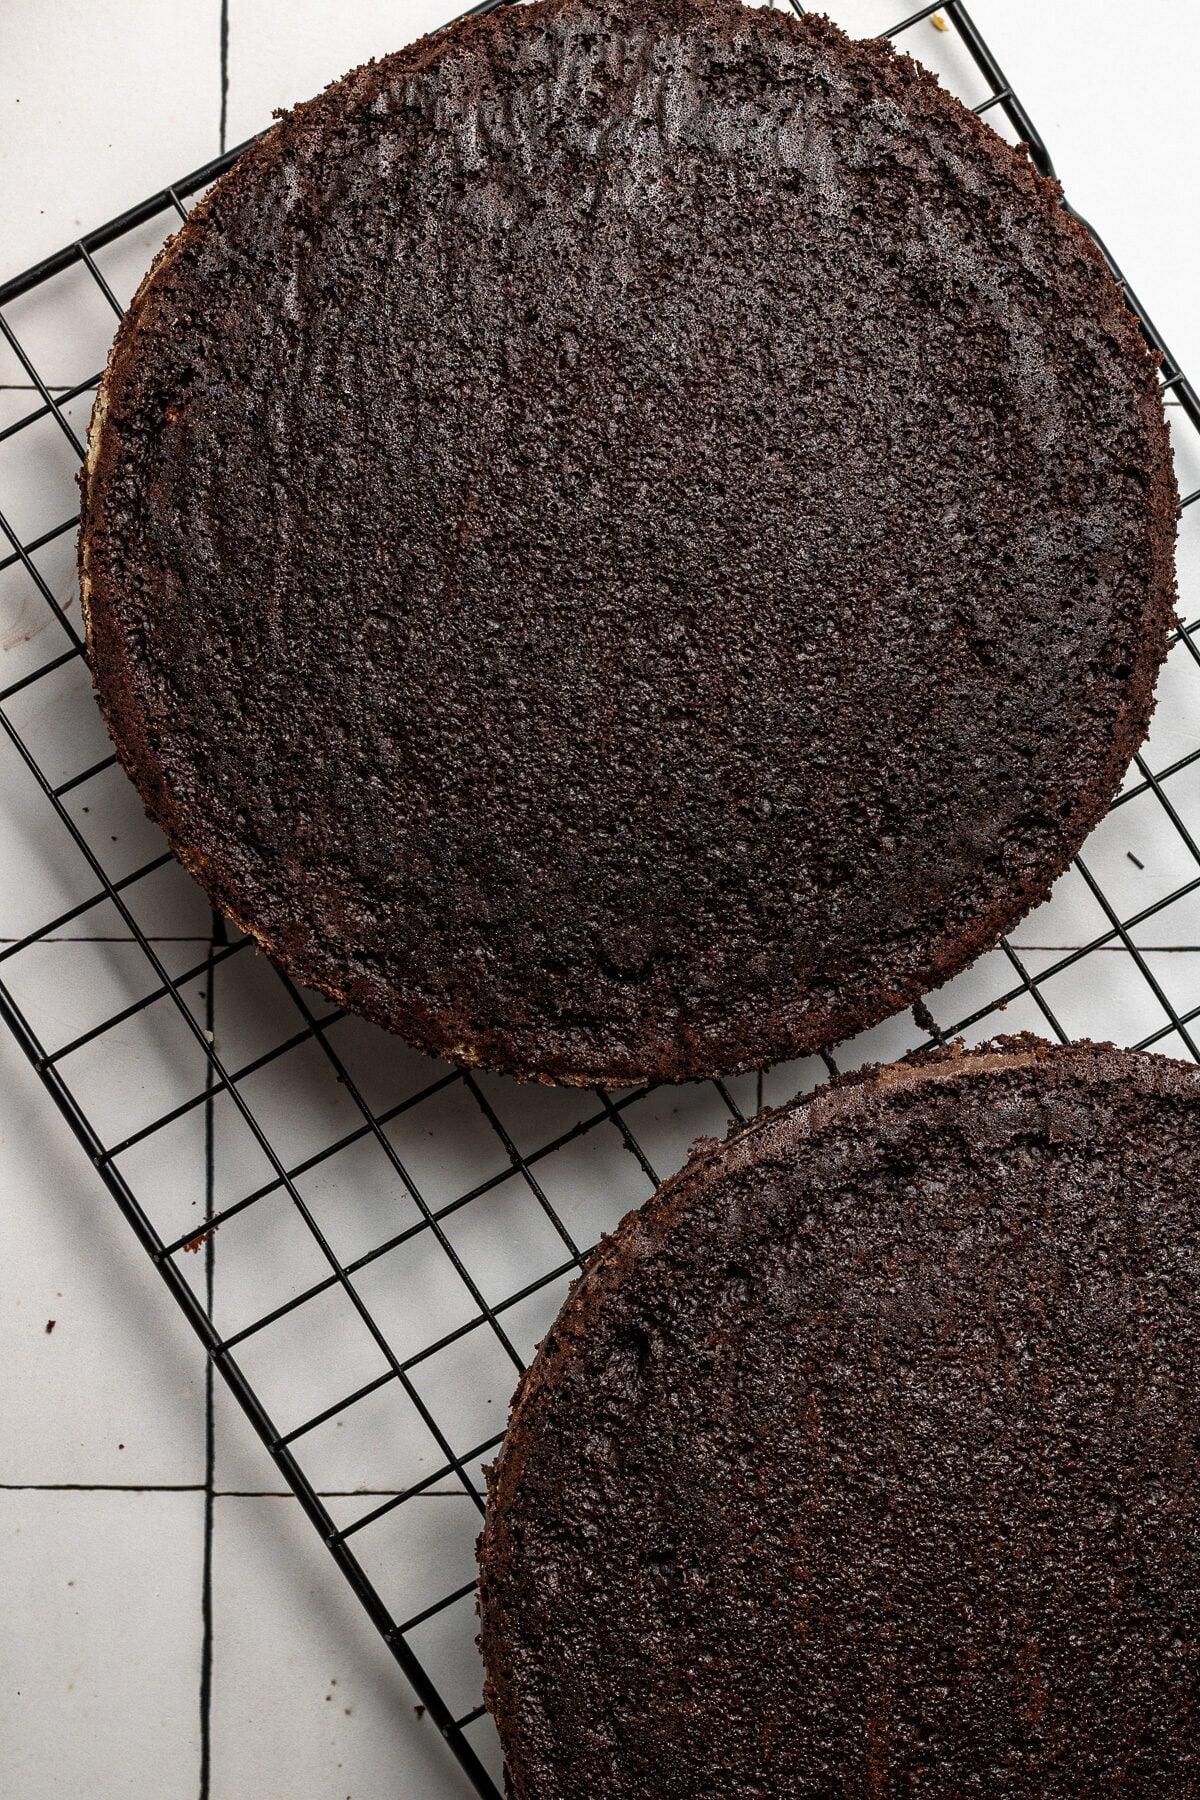
Cool the cakes while you make the buttercream, then assemble!
Expert Tips
- Number one tip: properly measure your flour! The cake texture will not be as light and fluffy and the cake could turn out dry if you over-measure your flour.
- Do not over-mix! This can lead to a dense cake texture. The cake batter only needs to be mixed until the dry ingredients are just incorporated.
- Check on the cakes early to make sure that they are not over-baked (over-baking will lead to dry cake).
- Let the cakes cool for at least 20 minutes in the pan before trying to remove them. Run a butter knife around the outside of the cake before flipping it upside down onto the cooling rack.

More Cake Recipes You’ll Love


If you make this recipe, let me know how it went in the comments below, I’d love to hear from you! You can also tag me on Instagram or Facebook so I can check it out!
Baking FAQ
These are the topics I’m asked about most frequently:
You can get these answers and more in my frequently asked questions post!

Dairy Free Chocolate Cake
Ingredients
Dairy Free Chocolate Cake
- 1½ cups (187.5 g) all-purpose flour
- 1¼ cup (250 g) granulated sugar
- ½ tsp salt
- 1 ½ tsp baking soda
- ½ tsp baking powder
- ¾ cup (64.5 g) unsweetened cocoa powder
- 2 eggs
- 1 cup (225 ml) water, hot
- ½ cup (107.5 ml) canola oil (or sunflower oil)
- ½ cup (125 ml) dairy free milk of choice (I use unsweetened soy milk)
- 1 tsp vanilla extract
Dairy Free Chocolate Buttercream
- 1 cup (210) vegan butter
- ½ cup (125 g) vegetable shortening OR vegan butter, (SEE NOTES)
- 1 ¼ cup (107.5 g) cocoa powder
- 2¾-3 cup (330 g) icing sugar
- 1 tsp vanilla extract
- 1-2 tbsp dairy free milk of choice, (as needed)
Instructions
- Preheat the oven to 350°F and prepare two 8 inch round cake pans. Spray the inside with cooking spray, then cut round pieces of parchment paper so that they fit in the bottom of each pan (do not skip the parchment paper lining!)
- Whisk flour, cocoa powder, sugar, salt, baking powder, baking soda together in a large bowl.
- Add in the eggs, vanilla, oil, and milk. Pour in the hot water and mix until smooth.
- Divide the batter evenly between the two cake pans and bake on the middle rack of the oven for 20-26 minutes or until a toothpick inserted in the middle of the cakes comes out clean.
- Let the cakes cool in the pans for 20 minutes, then run a butter knife around the outside of the cake to loosen it from the pan and flip upside down onto a cooling rack to cool completely.
- Make the buttercream. In the bowl of a standing mixer or handheld mixer, beat vegan butter and vegetable shortening together until combined. Beat in the cocoa powder until smooth.
- Add in the vanilla extract, then add the icing sugar, 1/4 cup at a time until desired consistency is reached. If the buttercream is too thick, add in milk 1 tablespoon at a time to thin it out to the consistency you want. If it's too thin, add in more confectioner's sugar (powdered sugar) 1/4 cup at a time.
- Once the cakes have cooled completely, frost them and enjoy!


Notes
The calorie information provided for this recipe is an estimate. The accuracy of the calories listed is not guaranteed.
I am so impressed with this chocolate cake! I’ve made several different recipes found online of chocolate cakes and all the ones I have tried before this one always seemed bitter and/or dry to me. This cake is so moist and has a perfectly sweetened chocolate flavor to it. This is going to be my new go-to chocolate cake recipe. Thank you for this amazing recipe and helping me create a birthday cake for my sister-in-law in a pinch!
I am so happy you loved it Amber! It’s my favorite too, thanks so much for taking the time to leave a review! 🙂
Cannot thank you enough for this recipe! My daughter is allergic to dairy and wanted a chocolate cake for her birthday. This was the best chocolate cake I have ever made, including ones with real dairy!! It is definitely akin to the chocolate cake from Matilda – fluffy, moist, perfectly
Balanced sweetness, and SO chicolatey!! I’ve printed this recipe out in case it ever disappears from the internet – that would be a tragedy!
Hi Jenny! What a wonderful review! This really made my day, thank you so much for taking the time to let me know how much you loved the cake! It’s my personal favorite too, so it won’t be disappearing from the internet 😀
This recipe is DELICIOUS! Made it as a birthday cake for my daughter and it was a huge hit with the whole family. Thank you for the recipe!
Yay! I am so happy to hear that you all loved it! And thank you for taking the time to leave a review 🙂
Hiya, just wanted to let you know the metric tab is not working correctly, it translates 1 1/2 cups of flour as 185g and 1 1/4 cups of sugar as 250g. The batter looked extremely thin when I made it using the metric tab measurements and it was only then I noticed that the measurements using the metric tab are a bit off.
Hi Rachel, those are the correct metric measurements for flour and sugar, I manually entered them myself. The batter is supposed to be thin, don’t worry the cake turns out perfectly 🙂
I made this and everyone who tried it said it was the best chocolate cake they’d ever had. At first I didn’t believe them but then I tried it myself and I was honestly shocked. I have tried a lot of chocolate cake recipes over the years and I’ve never found one that I felt I could actually eat the entire thing by myself while standing over the kitchen sink. It’s incredibly moist, somewhat fudgy, just the right amount of chocolate, not dense or dry. This is a winner and is my new go-to chocolate cake recipe!
Hi Michelle! YAY! This is such an incredible compliment, thank you so much for taking the time to share your feedback! 🙂
Please can I use normal milk instead of dairy free
Yes you can use regular milk, this recipe has been tested both ways. Enjoy!
Okay thank you very much ?? off I go to make mine
Please can I use liquid milk
Please I need the reply as soon as possible
Thank you
Could this be made as a vanilla cake? Would there be any substitutions for leaving out the cocoa?
Hi Elly – this unfortunately can’t be made as a vanilla cake. Replacing the cocoa powder with flour won’t work, but you can check out my mini vanilla cake recipe or my vanilla cupcakes and adjust those to make them into a cake!
Can you please tell me what “icing sugar” is? Is this powdered sugar? Thank you.
yes, powdered sugar/confectioner’s sugar!
Is this the cake from Matilda? omg so good
Hi Sarah! Lol I like to think so! So happy you loved the cake 😀
Amazing!!! Used vegan butter and oat milk for the recipe. This cake is the best cake I’ve ever had (including ones with dairy)!!
Hi Christina! YAY! This is so great to hear! This is my favorite cake ever too!! Thanks so much for taking the time to come back and leave a review 😀
First time I tried this, I was scrambling to find a recipe to make for my best friend’s birthday (ironically on New Year’s), and she wanted something with chocolate but dairy-free. It was a hit! Recently I made this into cupcakes for another friend’s birthday and they were a hit! 🙂
I used all vegan butter for the buttercream frosting as I don’t use vegetable shortening a lot, used regular soy milk, and vegetable oil! Came out very light and moist. Also made the buttercream a day in advance and microwaved it for about 10-15 seconds to soften it up before frosting (keep a close eye on it when you soften it), and it worked out!
Thank you for this, my lactose intolerant people greatly appreciate it <3
Hi Amira! This totally made my day! I’m so happy that you love the recipe 🙂 Thank you so much for sharing and for taking the time to come back and leave a review!
Can this be made into a 9×13?
Hi Susan! Yes it can be 🙂 The instructions for doing so are in the “Notes” section of the recipe card above. Enjoy!
The best chocolate cake i have ever made. Everyone loved it. It was so fulffy and tasty and very easy to do.
Hi Christine! This totally made my day, I’m so glad you loved it! Thanks so much for taking the time to leave a review 🙂
I put the recipe into cupcakes, and WOW! The cake is so quick and easy to put together and came out delicious! I was worried at first since the batter was thin, but it gave a perfectly textured moist cake. This will definitely be my go to for chocolate cake.
Hi Courtney! I am so happy to hear that you loved the recipe, found it easy to follow, and I’m honored for it to have become your new go-to! Thank you so much for taking the time to come back and leave a review 🙂
I was a little worried after mixing everything to see how thin the batter was, and how little was in each pan (I have 9″ cake pans). Trust the recipe! My cakes rose beautifully and turned out great. Thank you for this great recipe!
Hi Christine! Thanks so much for the review! The batter is definitely supposed to be on the thinner side – I’m so happy you loved the cake!
Hi. Best regards from Venezuela. I can’t see the ingredients. Could you indicate me where are they?
Hi! The ingredients and quantities, as well as instructions are all listed in the recipe card above this comment section.
What size are your “cups” could you tell me the metric weight please
Hi Rachel, if you click the “Metric” tab underneath the word “Ingredients” in the recipe card above, you’ll see all the metric measurements. Enjoy!
This recipe has become my GO TO for everything chocolate cake related. It tastes AMAZING, the texture is soft and moist and the recipe itself is adjustable. For instance I used whole milk in the cake and all butter in the frosting.
It os so moist I suggest a little freezer time before assembling just for novices like me. Makes for a easier and much neater application of the filling and frosting.
My entire chocolate addicted family loved this cake above all others ever baked. This is going in my personalized family cookbook so we can enjoy for years and generations to come
Hi Tondra! We are so happy to hear that you and your family love the recipe so much! Thank you so much for the kind words and for taking the time to come back and leave a review 🙂
Hi Gabby, may I know what’s the ratio to reduce to 6″ pan size? Can’t wait to find try out. Thanks.
Hi Michelle! Here is a post for how to convert 8 inch cakes into 6 inch cakes. There is some math involved in that method though! A 6 inch round cake pan holds around 4 cups of batter, and an 8 inch round cake pan holds around 6 cups. If it was me, I would likely just keep the recipe as is, divide the batter between two 6 inch cake pans, and either make a 3rd 6 inch round cake with the remaining batter, or just use the leftover batter to make a few cupcakes 🙂 Good luck!
Fantastic treat, suggest making extra so you can keep some for yourself. Everyone loved it.
Hi Andrew! I’m happy to hear that you loved the cake and that it was a hit 🙂 Thanks so much for taking the time to come back and leave a review!
Hi Gabby,
Amazing pictures and easy to follow instructions. Thanks for sharing!
What’s the temperature in degrees Celsius for baking please?
Hi Marie! So glad you found the recipe easy to follow! The oven temperature in celsius is 180°C 🙂 Enjoy!
I am not vegan…could I use lard instead of vegetable shortening????? Will it be the same consistency as yours?
Hi Monika! If you are using regular (not dairy free) butter, then I would recommend just replacing the vegetable shortening with more butter. I haven’t tried making buttercream with lard, but I would imagine that it would have a similar texture. It might add a flavor to the buttercream though.
Is the calorie count of 447 per slice?