Oreo Red Velvet Cookies
This post contains affiliate links. Read the full disclosure here.
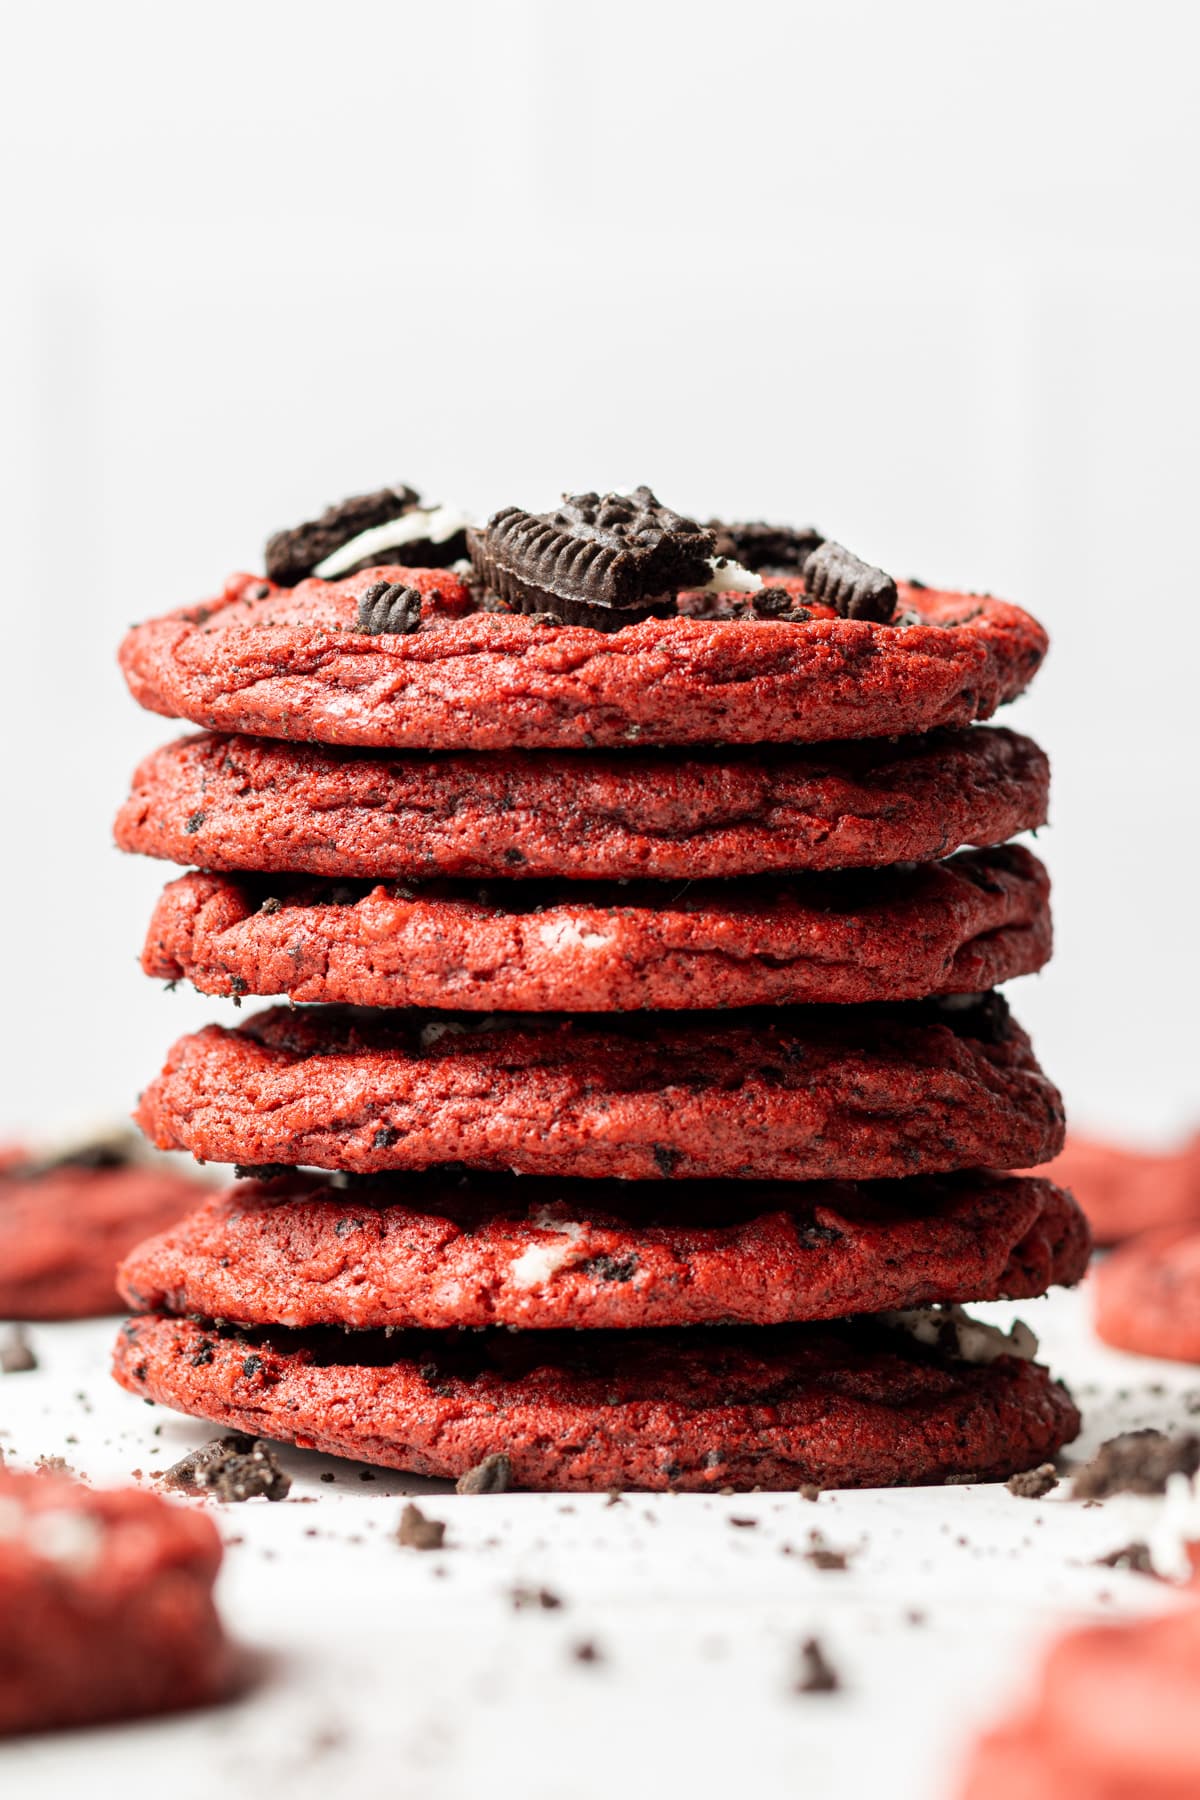
These Oreo red velvet cookies have slightly crispy edges and a gooey middle. Loaded with Oreo cookie pieces, they’re ready in 22 minutes, made in one bowl, and there’s no dough chilling required! I’ve also tested this recipe both with dairy ingredients and with dairy free ingredients to make sure it works both ways.
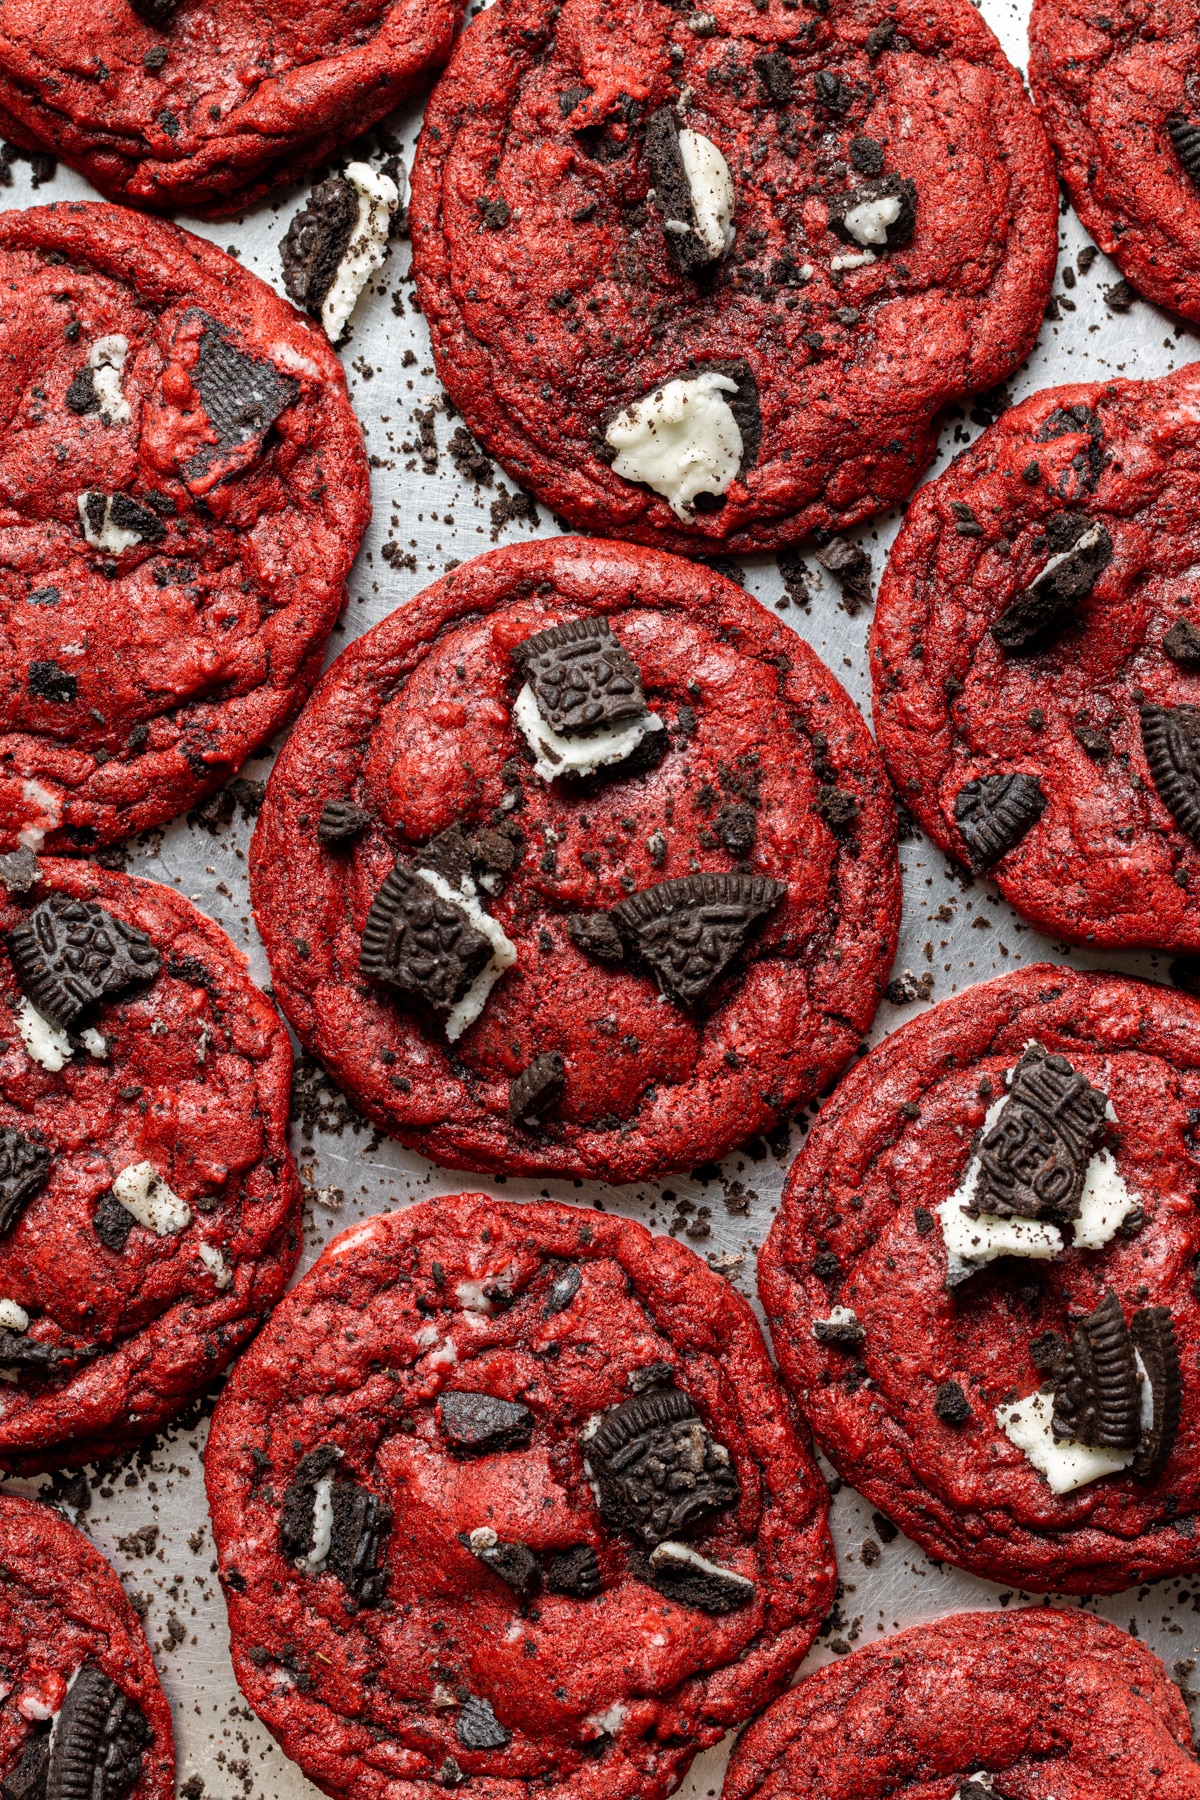
Inspired by my red velvet Oreo cake, these red velvet cookies with Oreos are a colorful version of my oreo chocolate chip cookies. They’re the perfect cookies for the holidays, Christmas, Valentine’s Day, or just any regular day of the year!
The cookies have a subtle hint of chocolate flavor and bits of Oreo cookie in every bite. The final recipe doesn’t call for chocolate chips but I did test them with chocolate chips and they were delicious!
Featured Reader Review
“This recipe was amazing! Nothing complicated, simple ingredients and no chill time – winning. Although the recipe calls for 18 cookies, I made them a bit large and turned out with 16. Love!”
Sugi
Ingredient Notes
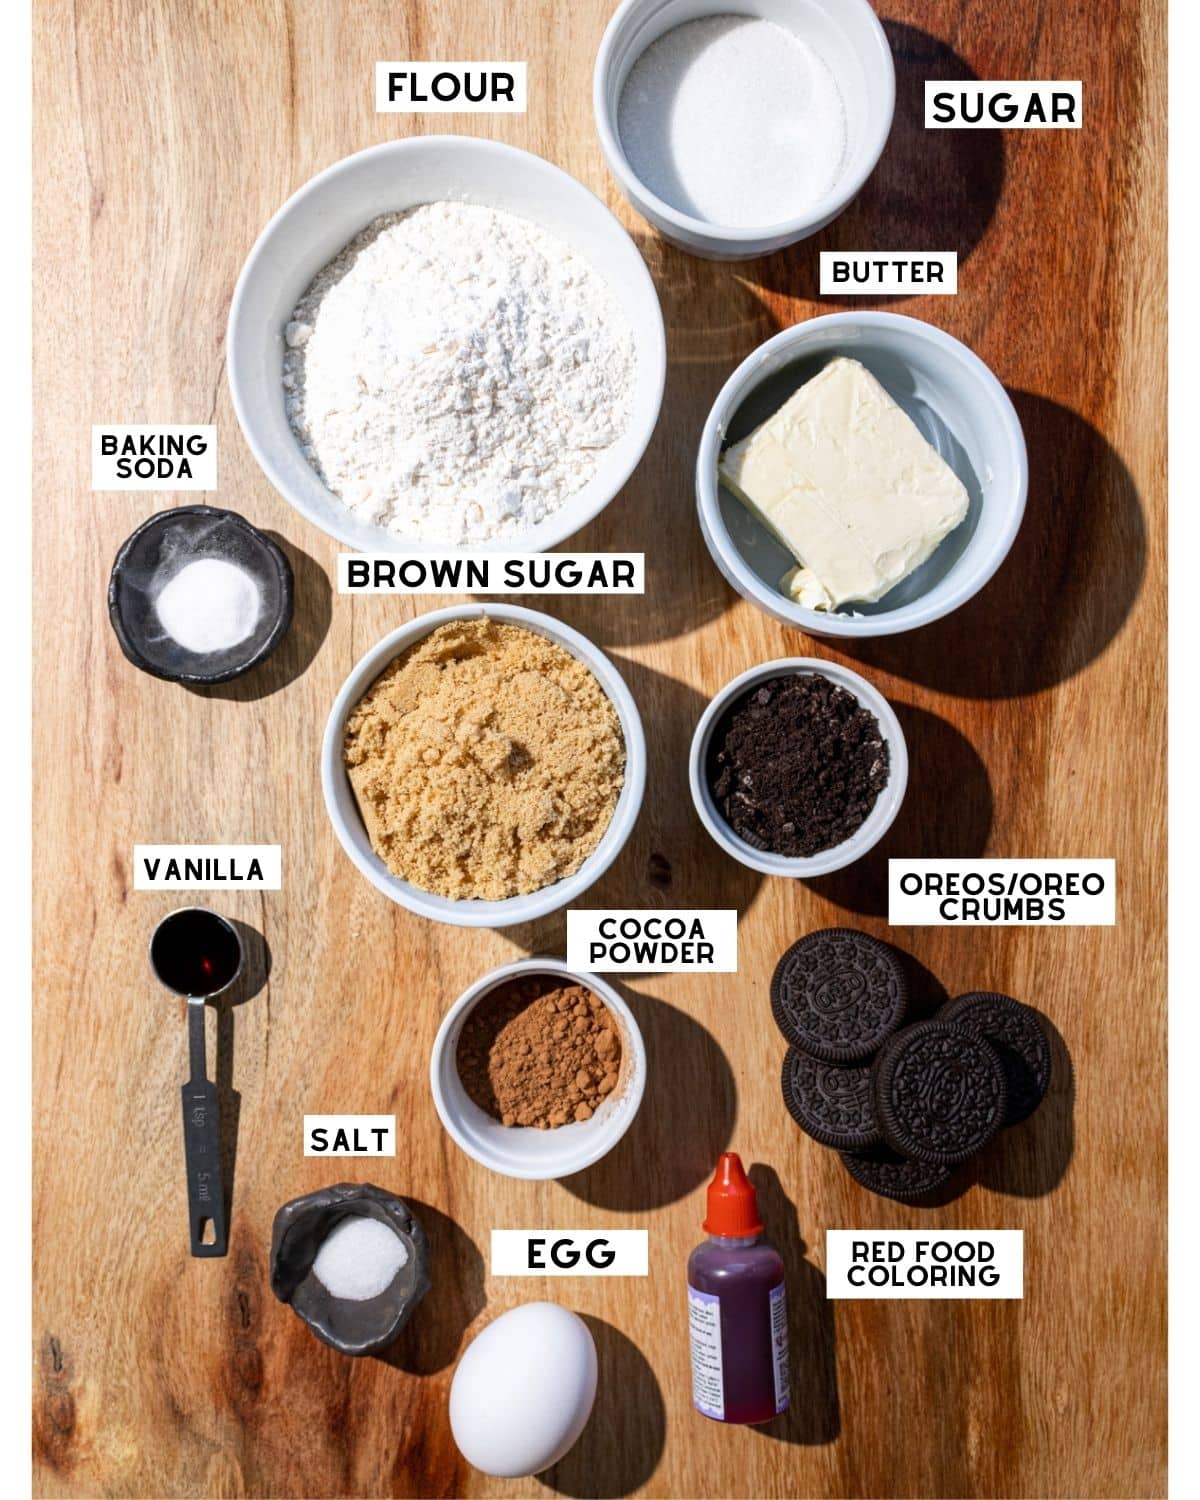
- Butter: feel free to use regular butter or vegan butter.
- Red food colouring: I’ve only tested these oreo red velvet cookies with liquid food colouring and not gel food colouring, so you may need to adjust the amounts depending on which you are using.
- Oreos: I’m using classic Oreos here, but feel free to use any Oreo flavor you want (for minty flavor, try mint Oreos!). You can also use gluten free Oreos.
How To Make These Cookies
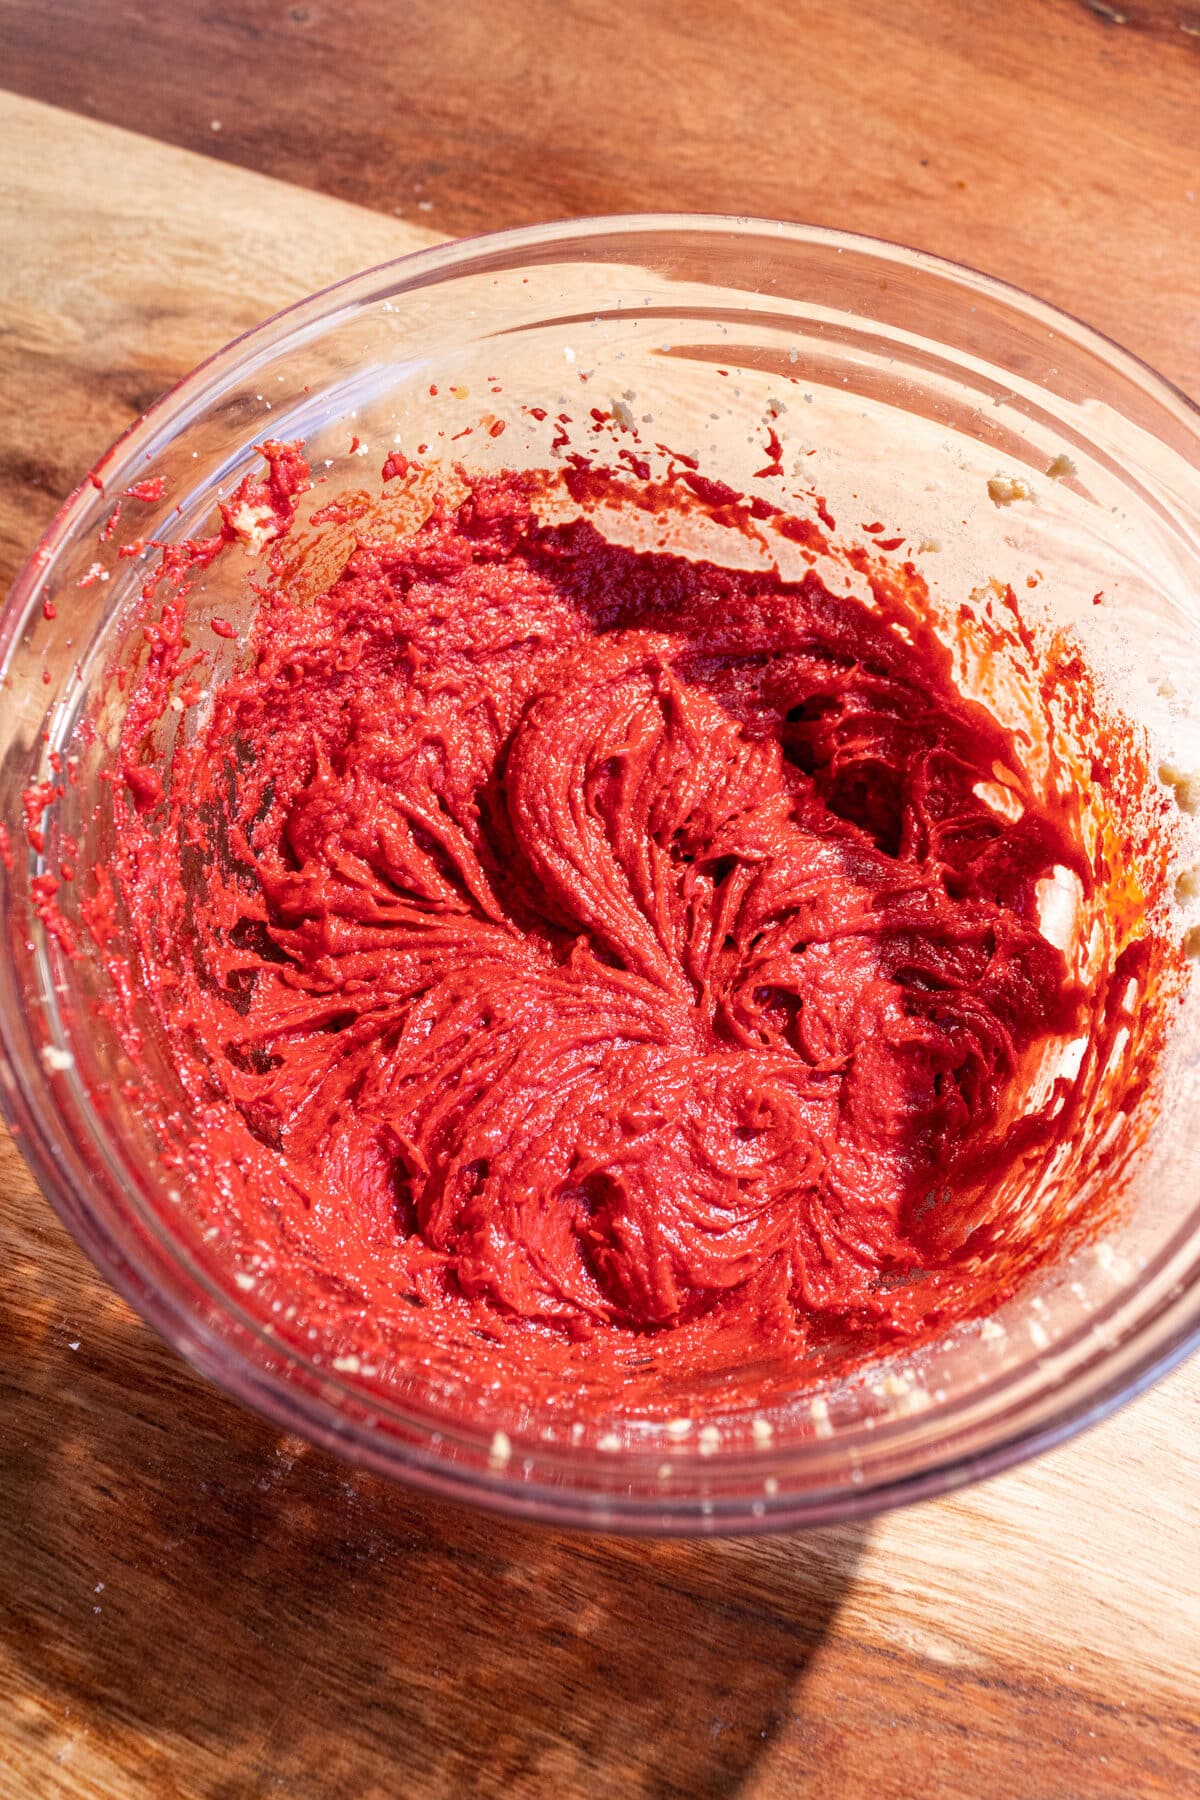
Mix butter, sugars, vanilla, egg, and food coloring!
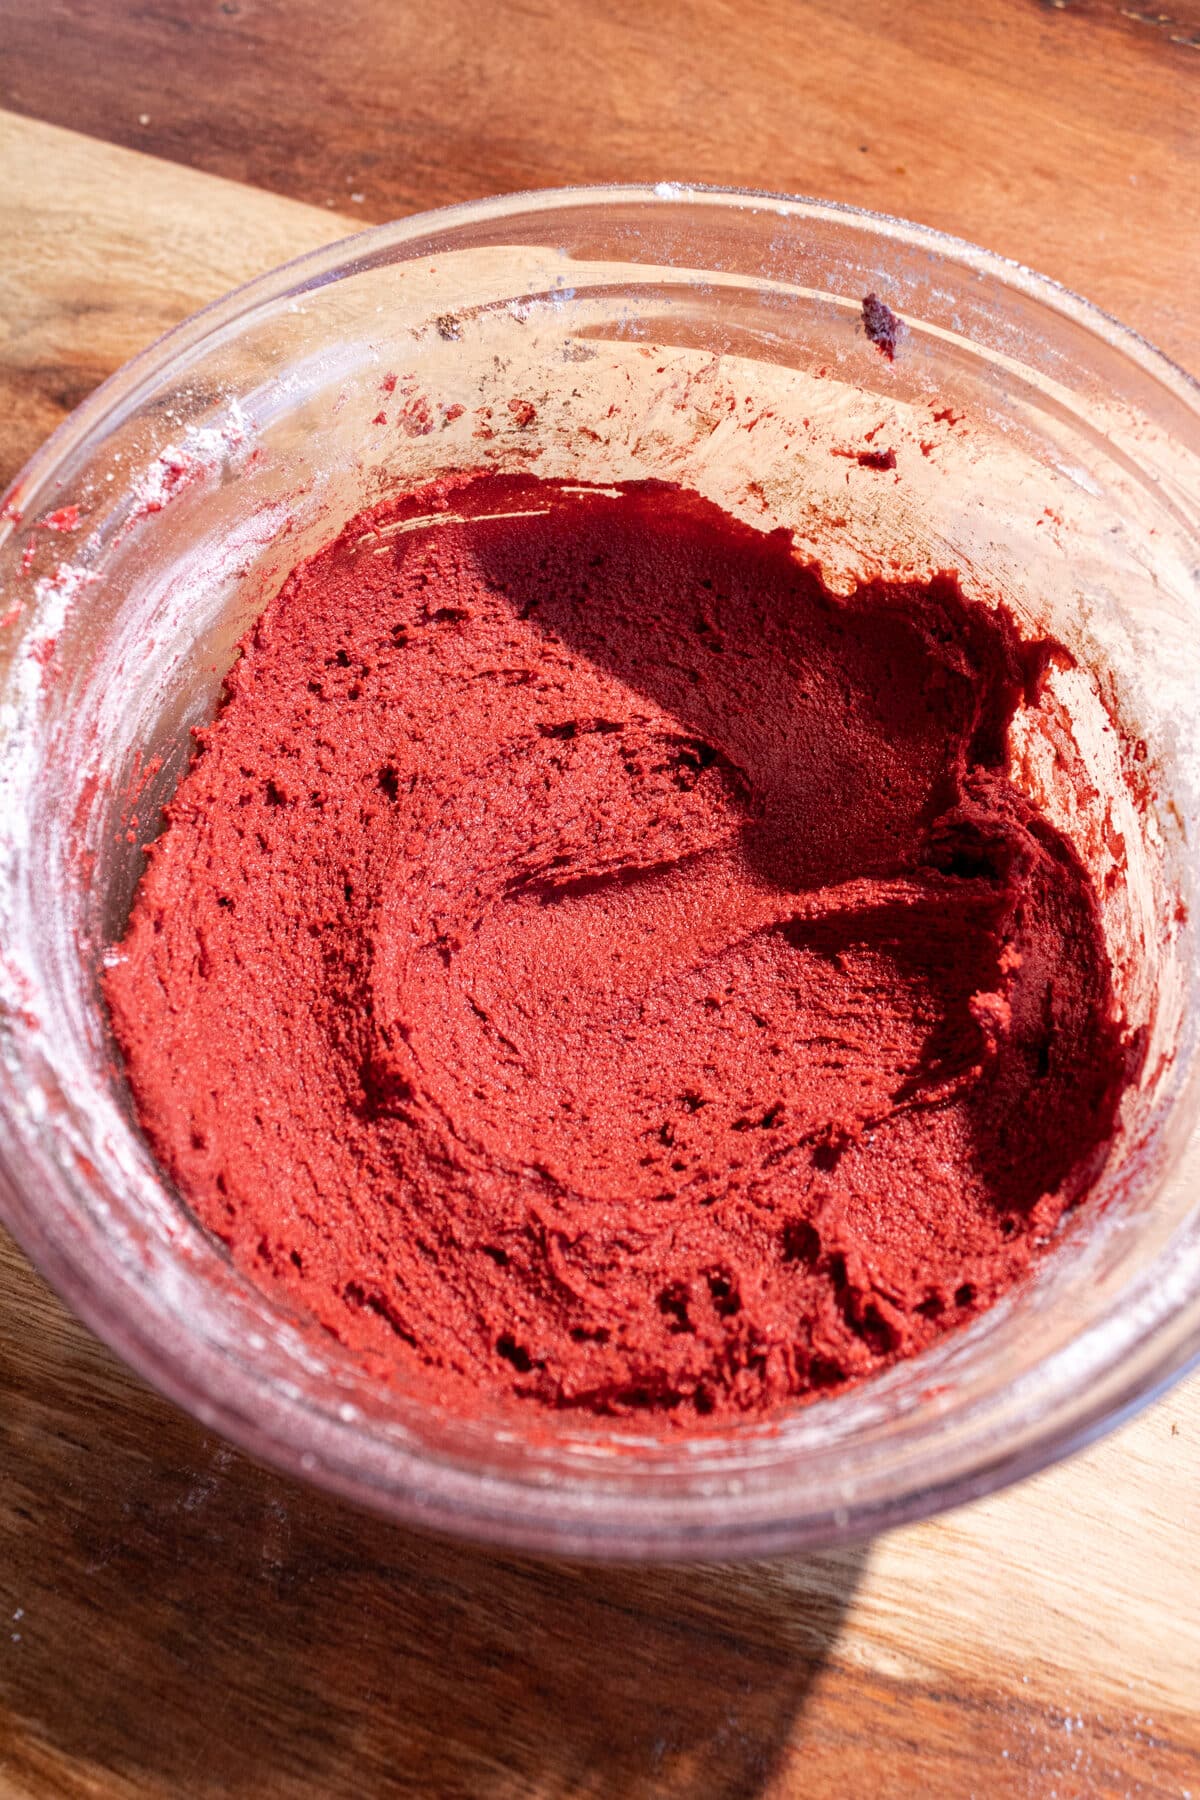
Add in dry ingredients.
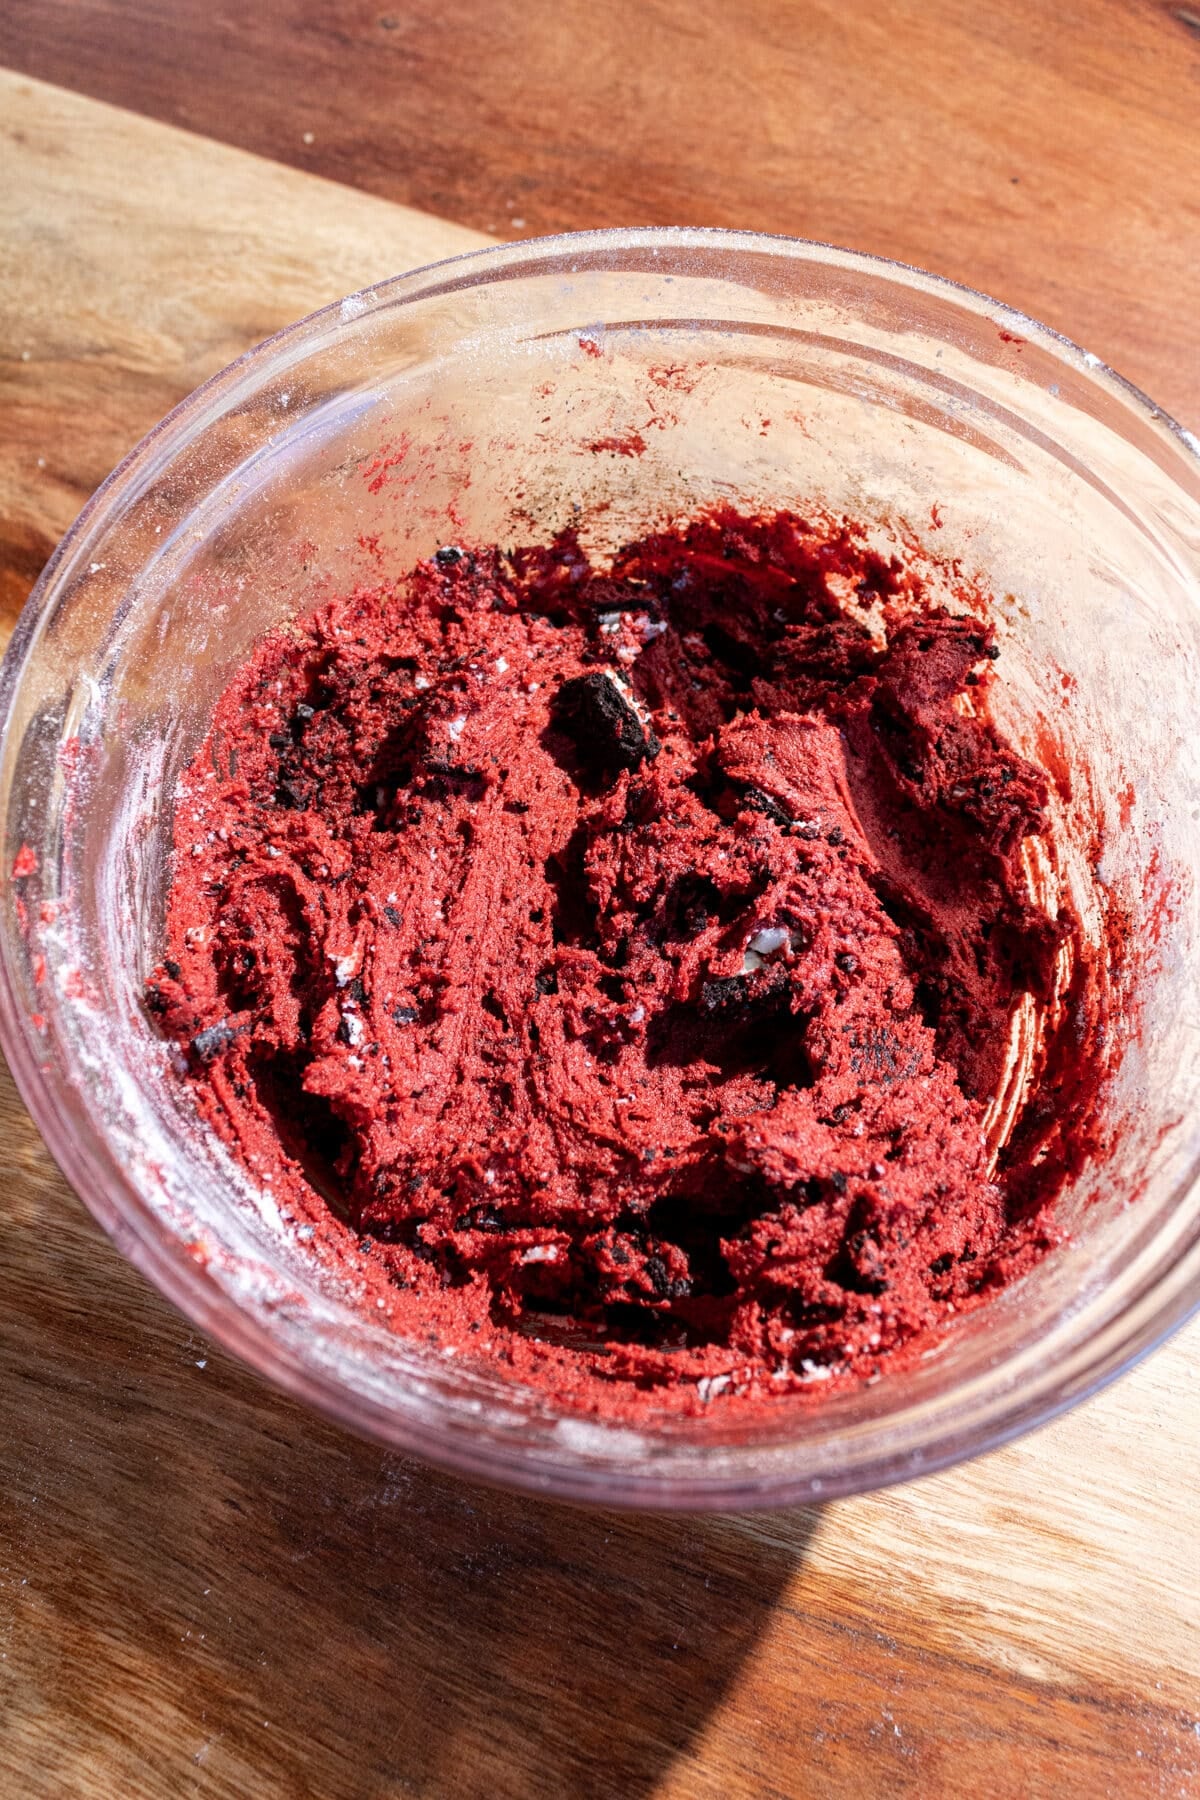
Stir in Oreo crumbs and pieces.
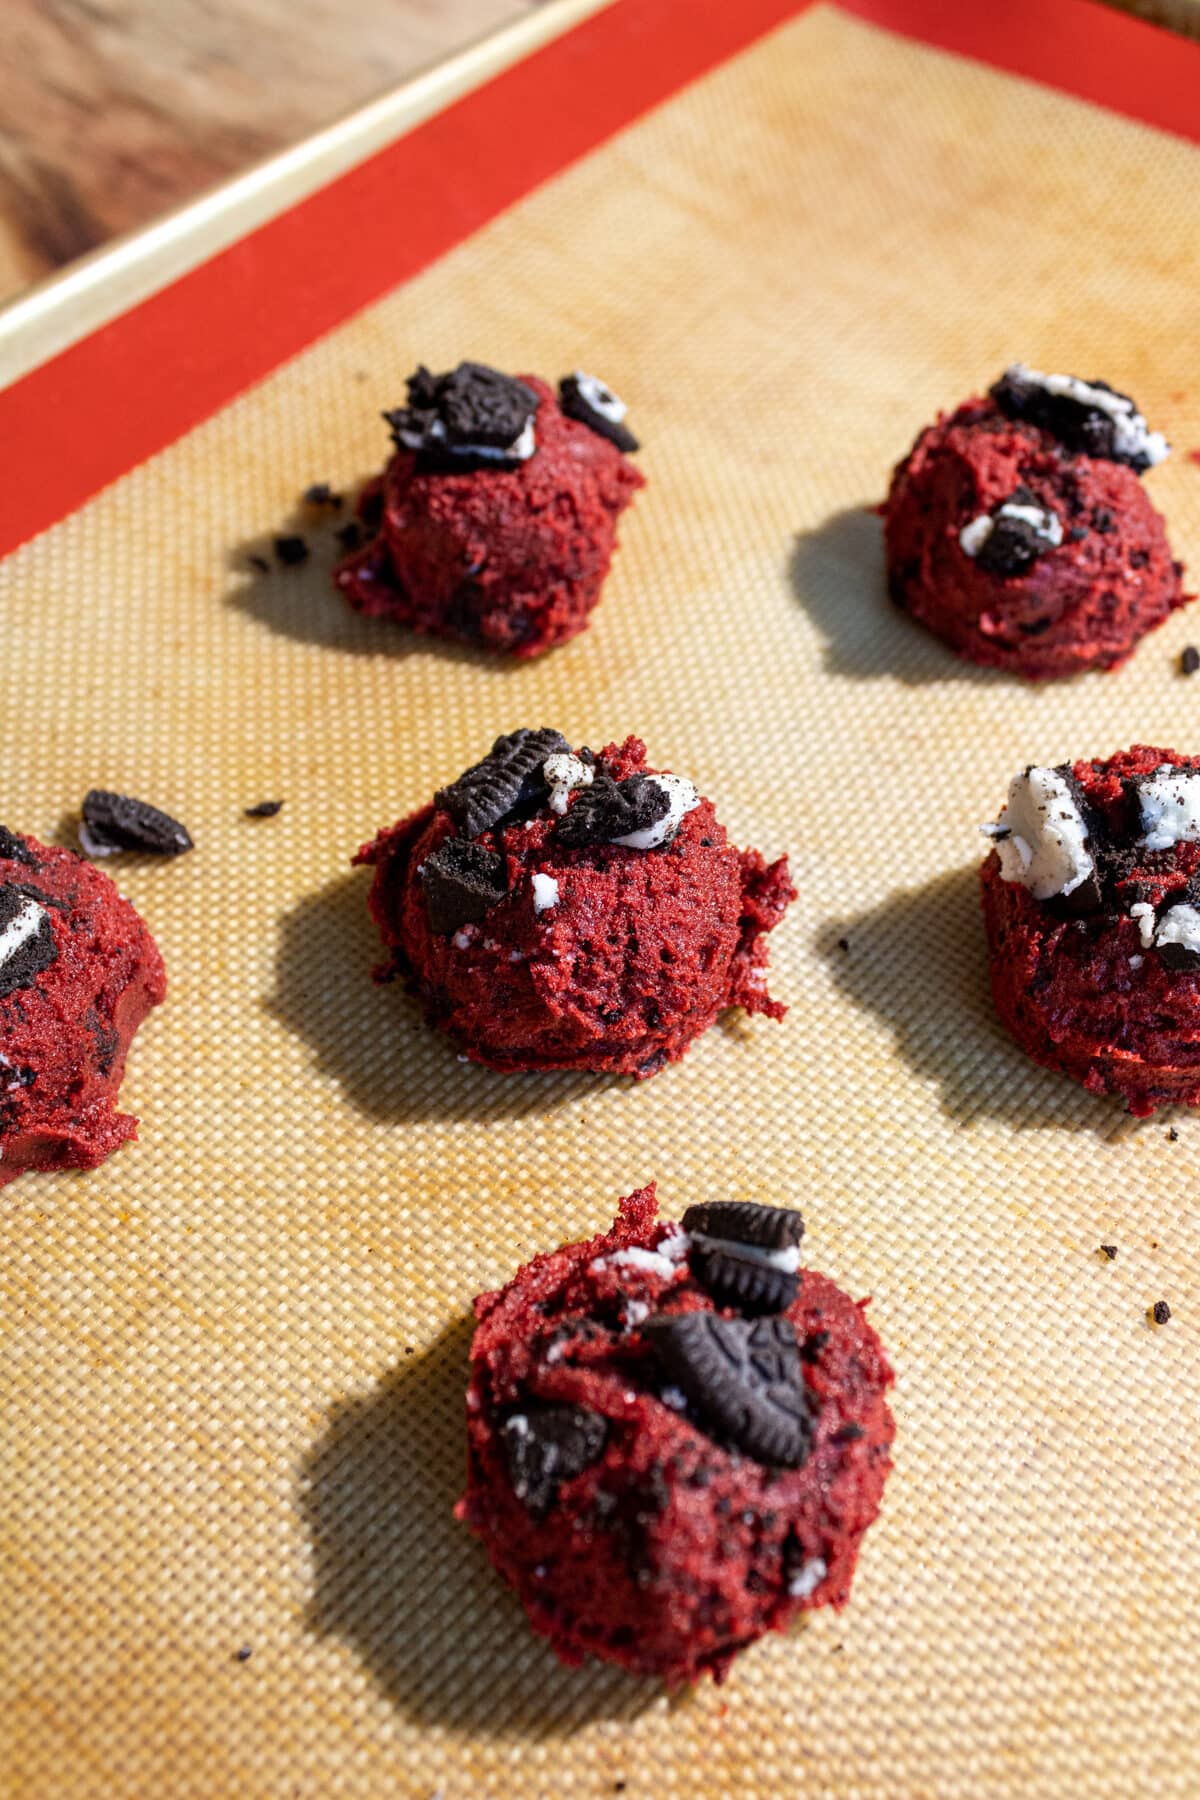
Scoop, top with more Oreos and then bake!
Recipe Developer Expert Tips
- Start off slow with the food coloring: different brands will give you a different intensity of red, so I recommend starting off with just a teaspoon and going from there! You can always add more if the dough isn’t as red as you would like. I also noticed when recipe testing that different brands produce different shades of red, with some being more pink-toned.
- For some extra gooey chocolatey goodness, add white chocolate chips or even semisweet chocolate chips!
- Get bakery worthy cookies: set aside some extra chopped up Oreos. Place those on top of the cookie dough balls just before baking!
More Recipes You’ll Love


If you make this recipe, let me know how it went in the comments below, I’d love to hear from you! You can also tag me on Instagram or Facebook so I can check it out!
Baking FAQ
These are the topics I’m asked about most frequently:
You can get these answers and more in my frequently asked questions post!

Oreo Red Velvet Cookies (No Chill)
Video
Ingredients
- ½ cup (105 g) butter, softened, (regular or vegan)
- ¾ cup (150 g) light brown sugar
- ¼ cup (50 g) granulated sugar
- 1 egg
- 1½ teaspoon vanilla extract
- 1-2 teaspoons liquid red food coloring
- ¾ teaspoon salt
- ½ teaspoon baking soda
- 1½ cup (187 g) all-purpose flour
- 2 Tablespoon (11 g) unsweetened cocoa powder
- ¼ cup (27 g) Oreo crumbs, (or 3 crushed oreos)
- 5 Oreo cookies, roughly chopped
Instructions
- Preheat oven to 350°F and line 2 baking sheets with parchment paper.
- Measure out your Oreo crumbs, or make your own by finely chopping 3 Oreo cookies, or placing them in the food processor or blender until crumbs form. You can also add the Oreos to a ziploc bag and roll over them with a roll pin until you have fine crumbs. Roughly chop the remaining 5 Oreo cookies and set aside.
- In the bowl of a standing mixer with the paddle attachment or a handheld mixer, mix butter and sugars until light in color and fluffy (1-2 minutes). Add in the egg, food coloring and vanilla extract, and beat until just combined. Different brands of food coloring will be darker than others, so start with just 1 teaspoon and add more as needed.
- Mix in the dry ingredients until a dough forms. Add in the Oreo crumbs, and crushed Oreos and mix until just combined.
- Use a medium cookie scoop or spoon to make 1.5-2 tablespoon sized balls and place them on the baking sheet around 3-4 inches apart. Stick a few more pieces of Oreos on top if desired.
- Bake the cookies one sheet at a time for 8-11 minutes. Remove them from the oven when the edges look set. They will look under-baked in the middle!
- Leave the cookies on the baking sheet for 5 minutes, then transfer to a cooling rack to cool completely. Enjoy!
Equipment

Notes
The calorie information provided for this recipe is an estimate. The accuracy of the calories listed is not guaranteed.
Made these pretty easily and everybody loved them!
This recipe was amazing! Nothing complicated, simple ingredients and no chill time – winning. Although the recipe calls for 18 cookies, I made them a bit large and turned out with 16. Love!
Thank you for your review ✨
Hi! Looking to try these but to bake them in a bakery size (large cookie scoop, 3tbsp) how long would you recommend baking these for? Just an extra 2 minutes? Thank you! Can’t wait to give them a try!
Hi Sarah! An extra 2 minutes is perfect to start and then I’d just check on them and add one more minute at a time until they look done!
Can I use gel food coloring?
Yes! Just adjust the amount based on how red you want the cookies to be
wow these cookies were amazing!! soooo easy to make and it was the perfect texture and perfect flavour too :))
I am so happy you loved them Celine!
I tried the recipe and these were the best cookies ever! My Family and friends loved it! keep up with these recipes they are amazing!
Hi Rossi! I am so happy you and you family loved the cookies so much, thank you!
Can I use unsalted butter ?
Yep! Keep in mind they’ll be slightly sweeter with unsalted.
Loved this recipe! Def one of my favorites
Yay! I’m so happy to hear that Melanie!
Egg replacement??
Also Plzz share same for every recipe. ?
You can use a flax egg to replace the egg in these cookies!
The flavor is amazing!!! Mine did not spread very much. They were a bit puffy and I had to flatten them.
Any suggestions on how I can fix that?
Hi Paige! I’m so happy you loved the cookies! It sounds like the dough was either over-mixed or the flour was over-measured. I would highly suggest using a food scale to measure your dry ingredients next time!
This was the best red velvet cookie I’ve ever made & tasted. The recipe turned this color to be so fluffy and moist! Make sure to cram your butter and sugar for only 3mins and omg you will love it.
Hi Laiza! Yay! So happy to hear you loved the cookies!!
Not even exaggerating but these cookies are seriously bomb and easy to make! It’s my first time baking red velvet cookies and I’ll definitely try ‘em again 🫶🏻
I am so happy to hear that you loved them so much Lina! Thank you for the review!
Made them gluten-free and boy oh boy they are perfection!
Hi Katie! I am so happy to hear that you loved the cookies so much, thank you!!
No even exaggerating but these cookies are seriously bomb and easy to make! It’s my first time baking red velvet cookies and I’ll definitely try ‘em again🫶🏻
Gave these cookies a try and they came out great. People in the office loved them. Very hard to find a true homemade red velvet recipe at times so glad I found this
Hi Steven! I am so happy to hear that you all loved the cookies. Thanks for the review!
Hello can I use dutch processed powder instead of regular cocoa powder.
Yes dutch processed cocoa powder is best!
Can you substitute the 1 egg for 1 flax egg?
Yes!
Just letting you know that the recipe instructions says to add chocolate chips, but the ingredients don’t list it.
How many eggs in this recipe? It doesn’t say. Is it 1 egg?
1 egg, yes!
mmm so good i added chocolat chips too
Hi Martha! So happy you loved the cookies!