Chocolate Biscoff Cookies
This post contains affiliate links. Read the full disclosure here.
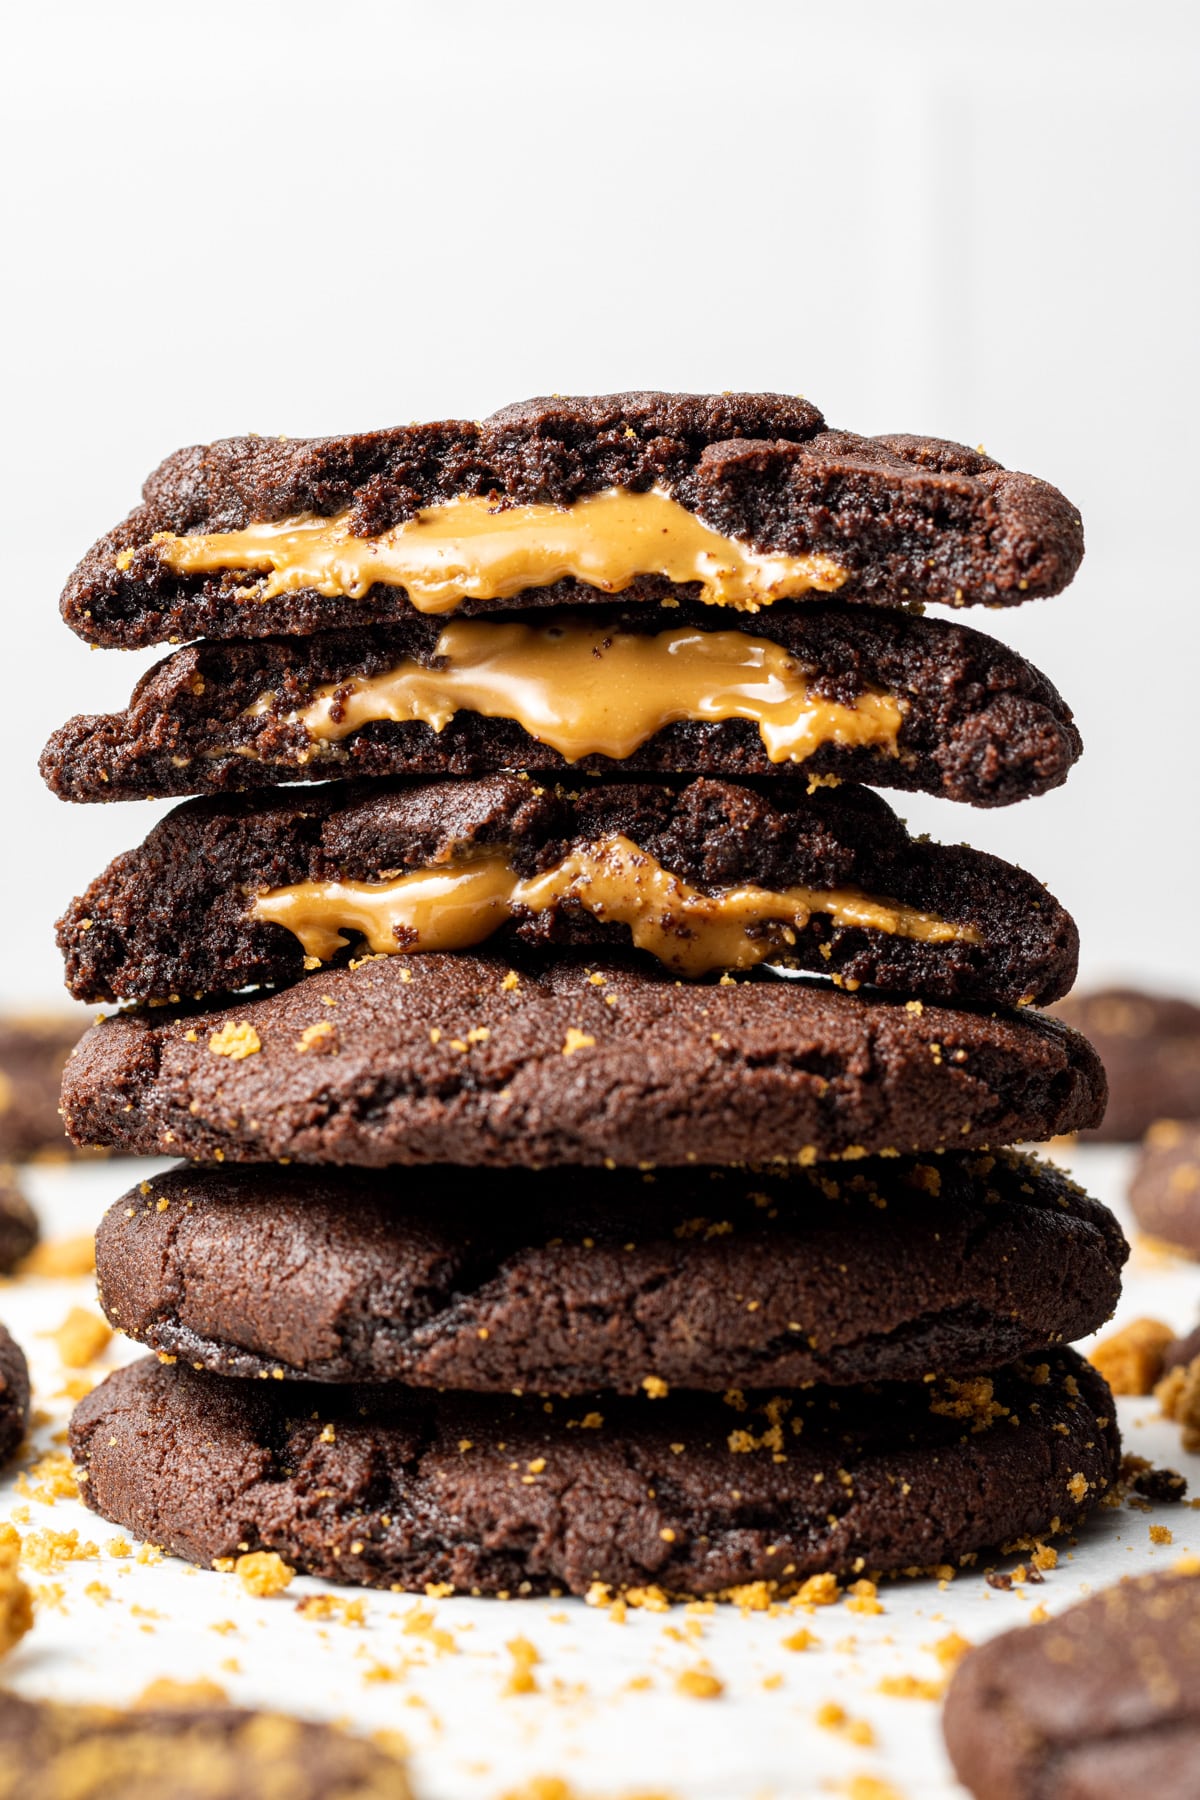
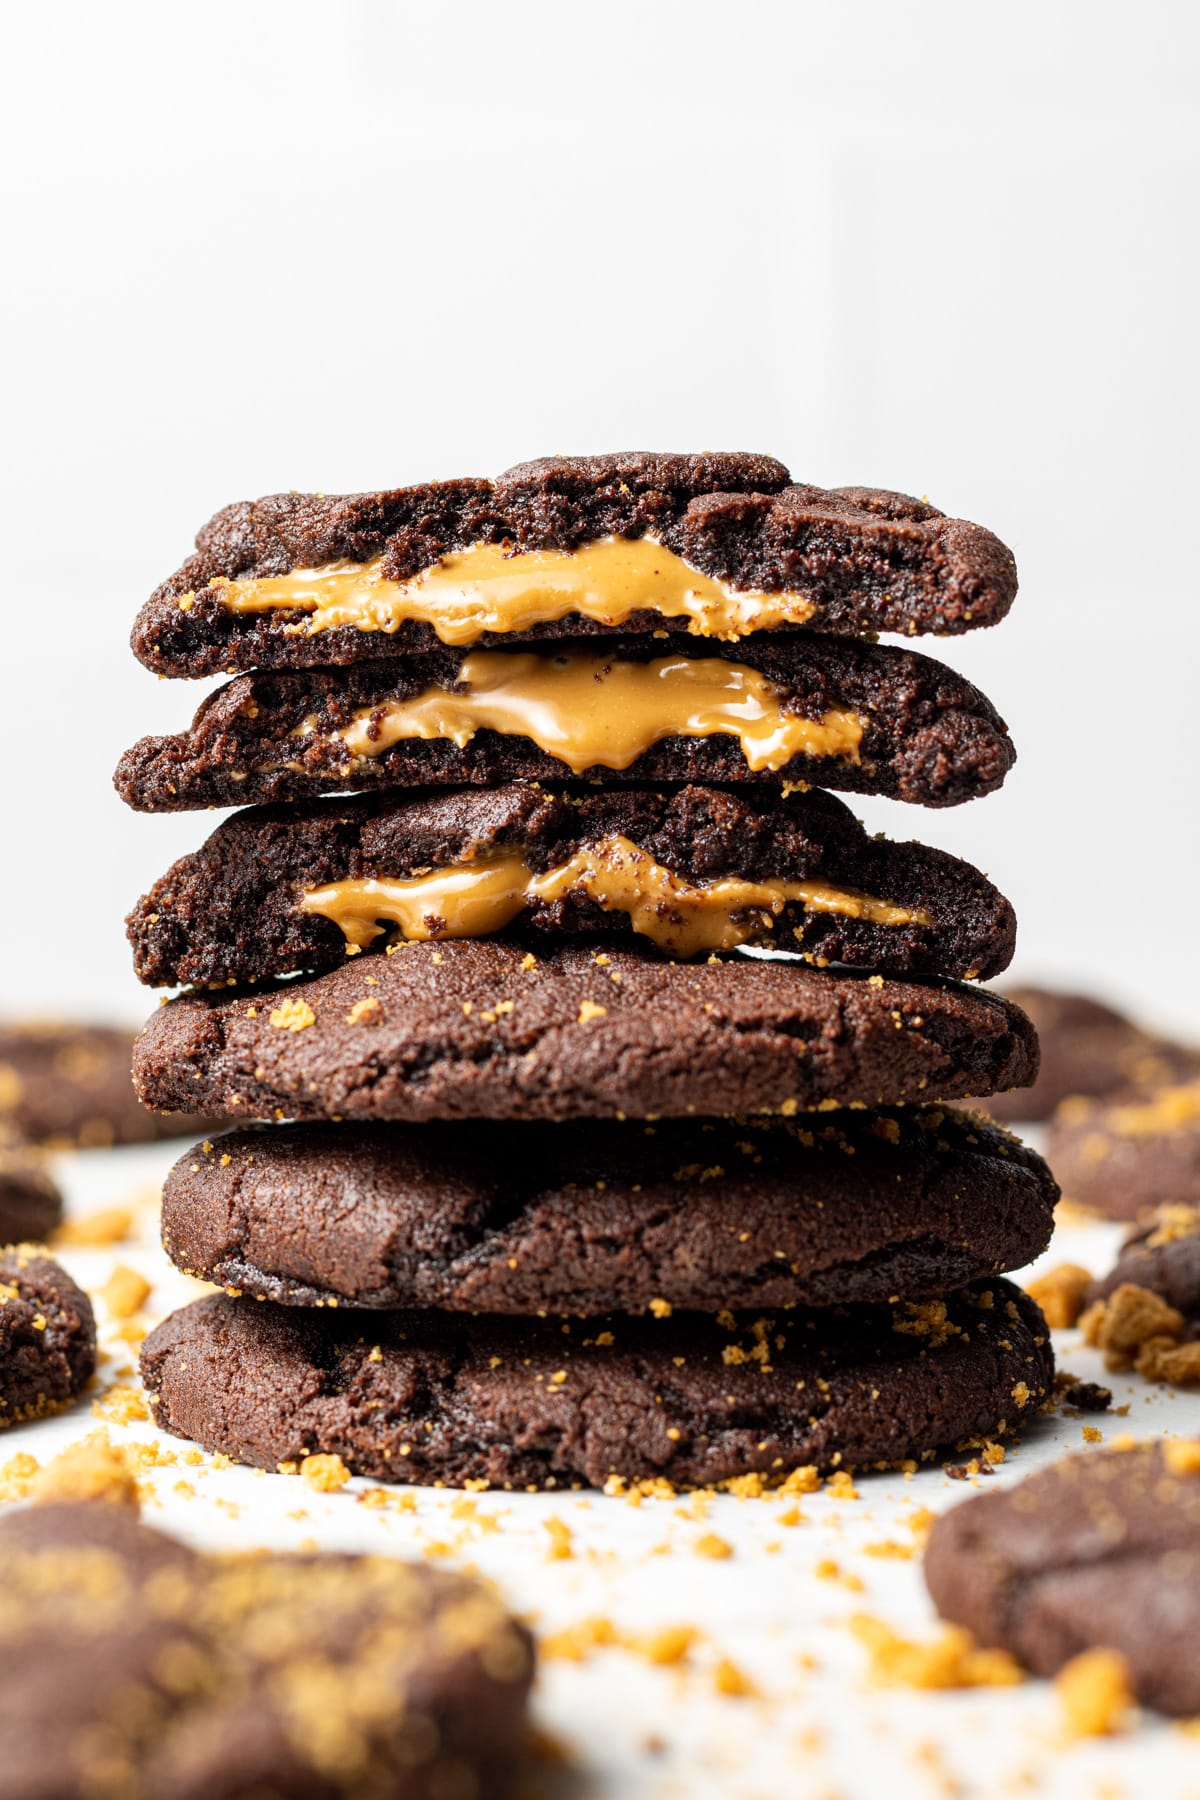
These are the best chocolate biscoff cookies ever! A soft, rich, and fudgy chocolate cookie filled with a gooey cookie butter center makes a match made in heaven!
If you’ve been around Cookie Dough Diaries blog, you’ll notice I LOVE cookie butter. My biscoff brownies and biscoff butter cookies are reader favorites for a reason!
These cookies combine the fudginess of a brownie with delicious biscoff cookie butter flavor and they are absolutely decadent!
Why You’ll Love These Chocolate Biscoff Cookies
- The combination of chocolate and cookie butter is absolutely heavenly!
- These cookies are freezer friendly and easy to make!
- I’ve provided multiple options for how to make the cookies, so you can feel free to get creative.
Ingredients Needed
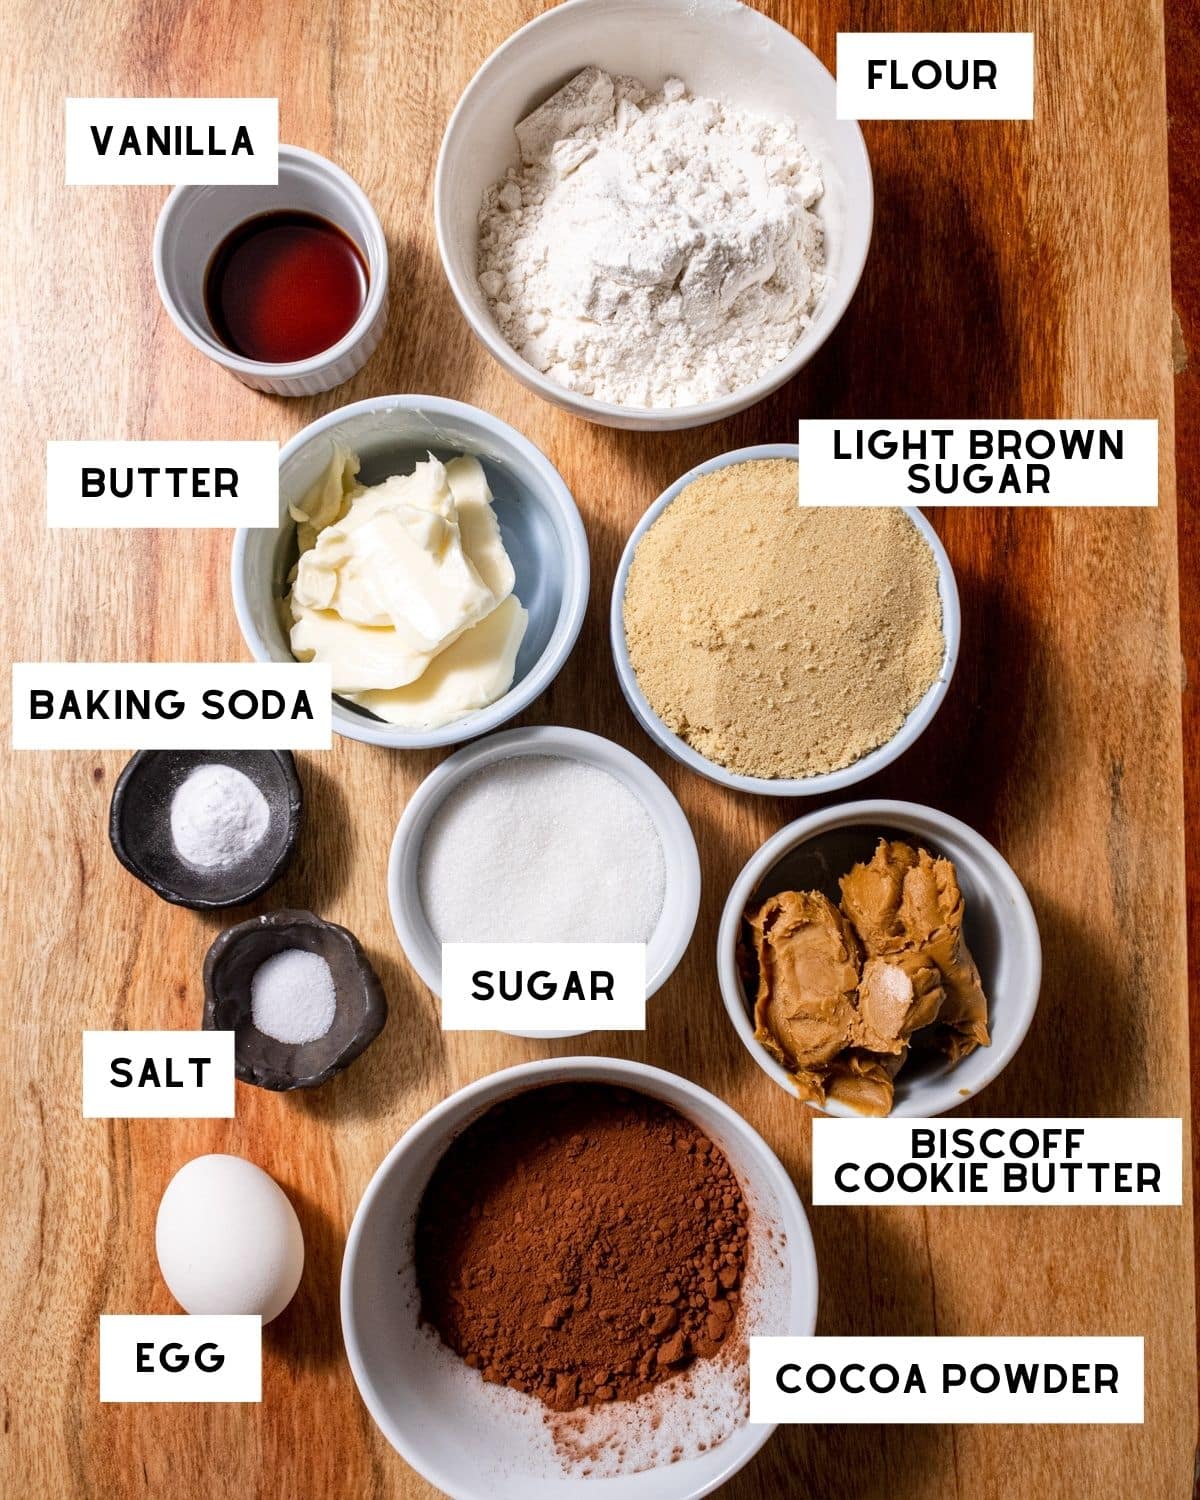
- Biscoff Spread (Cookie Butter): There are a few different brands of cookie butter, so you don’t have to use the Biscoff brand! Trader Joe’s even makes their own cookie butter! I use smooth but you can also use crunchy.
- Butter: You can use regular butter or vegan/dairy free butter – the recipe has been tested both ways!
- Cocoa powder: I recommend using unsweetened cocoa powder.
Step By Step Instructions
Note: Full ingredient measurements and instructions can be found in the recipe card at the bottom of this page.
Step One: Scoop 16 balls of cookie butter on a baking sheet or plate lined with parchment paper. Place in the freezer for 1 hour, or until the cookie butter is frozen. When it’s ready, leave in the freezer while you make the cookie dough.
Step Two: Preheat oven to 325°F and line 2 baking sheets with parchment paper.
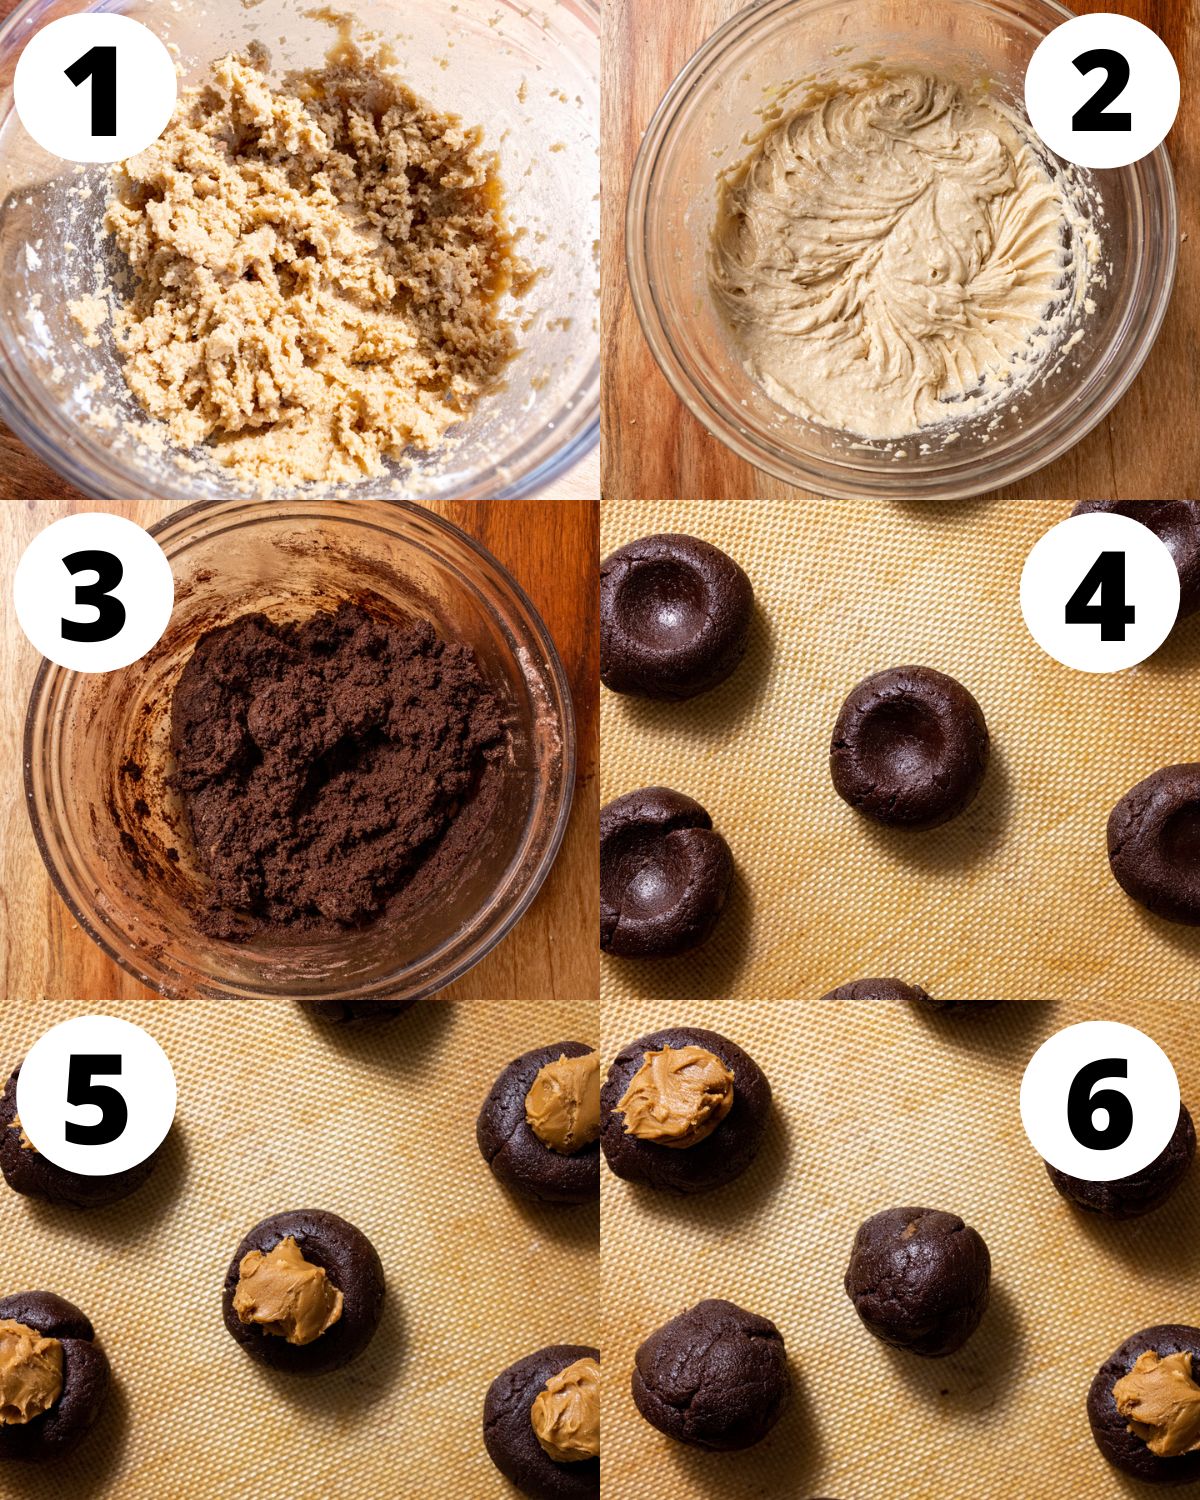
In the bowl of a standing mixer with the paddle attachment or a handheld mixer, combine butter and sugars, mixing until light and fluffy.
Step Three: Add in the eggs and vanilla extract, and beat until just combined (do not over-mix!).
Step Four: Mix in the cocoa powder, flour, baking soda, and salt until a dough forms. Don’t over-mix!
Step Five: Scoop 2 Tablespoon sized balls of dough and place them on the baking sheet. Make a small teaspoon-sized indent in each one.
Step Six: Remove the cookie butter from the freezer and place one ball into each of the indented cookie dough balls.
The cookie butter will start to soften right away so try to move quickly! If possible, assemble 5-6 cookies at a time, placing the plate of cookie butter back into the freezer in between.
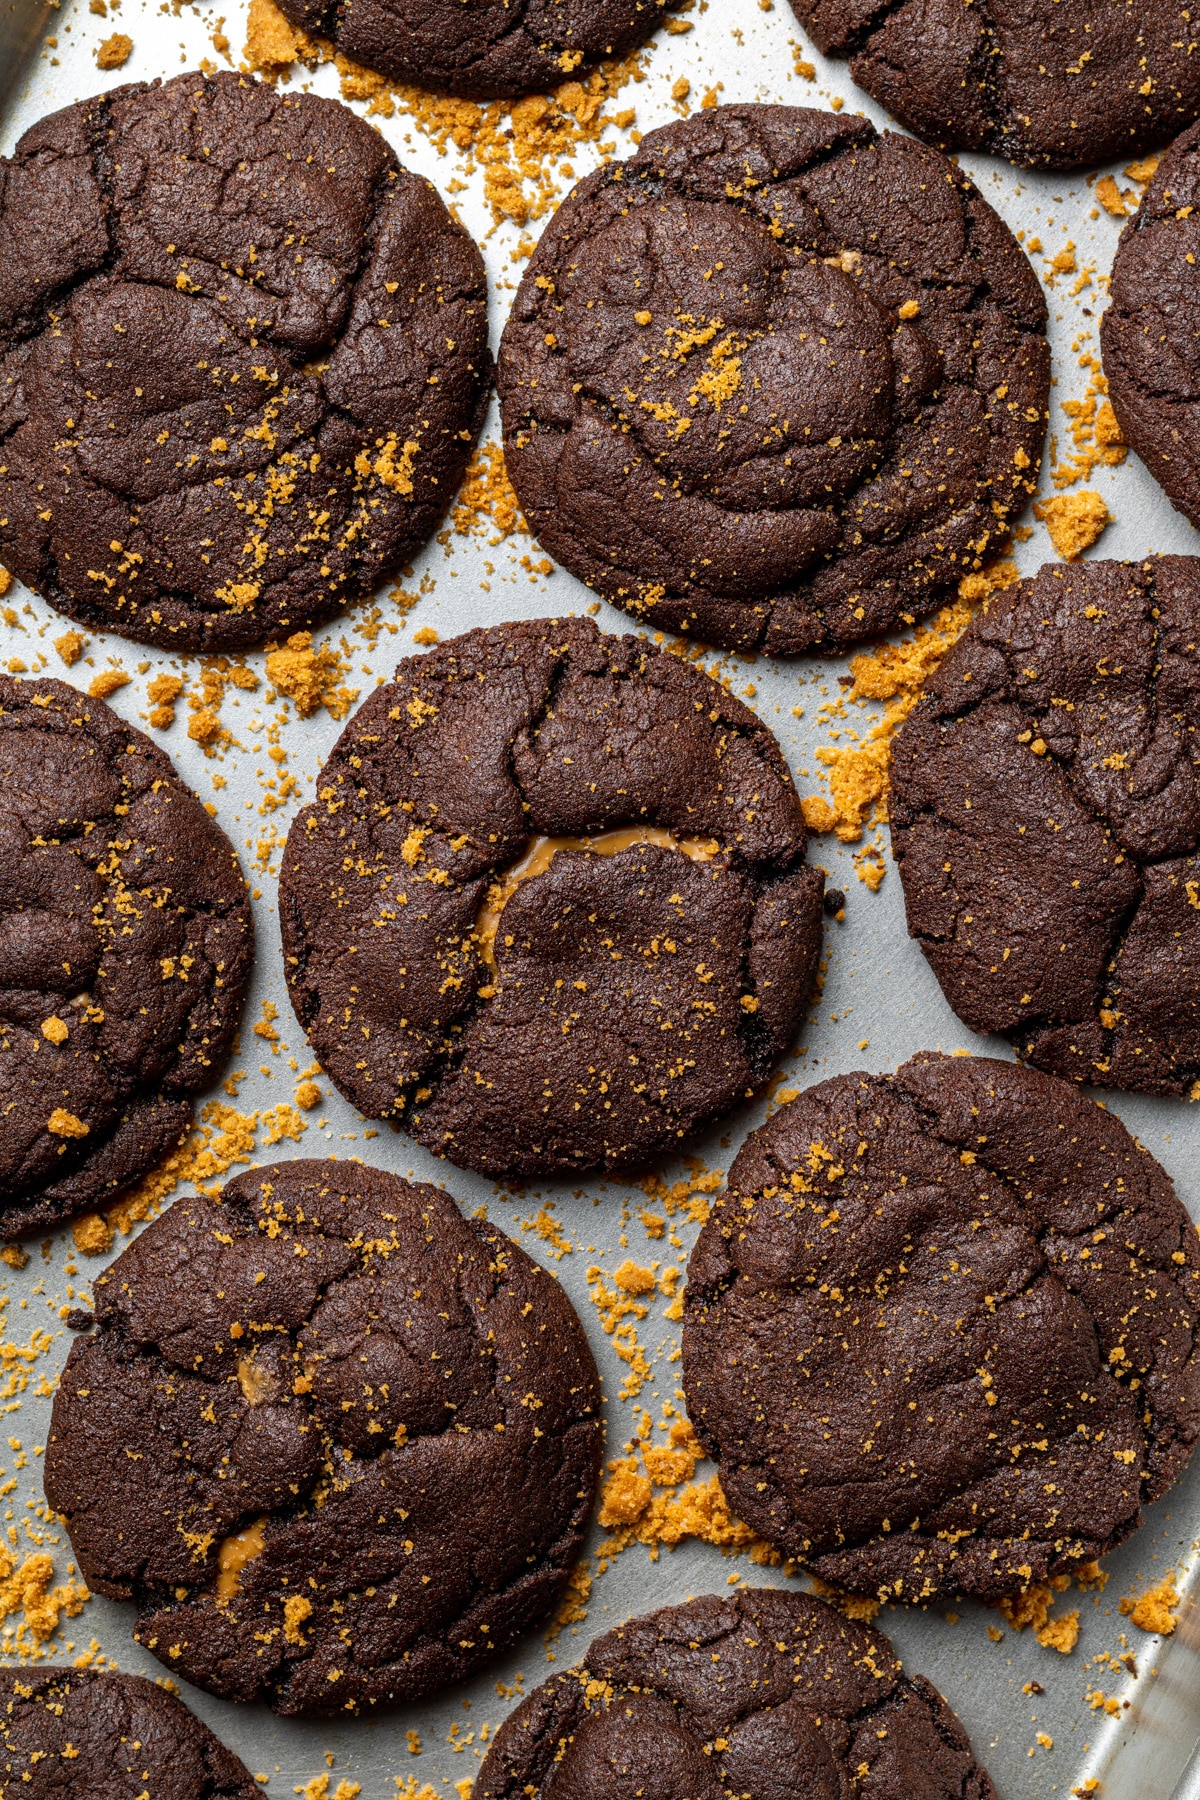
Step Seven: Seal the biscoff balls by wrapping the cookie dough around them and roll the dough into a ball. Bake for 8-11 minutes, or until the edges and tops look set. Don’t over-bake or else the cookies will not stay soft.
Let the cookies cool on the baking sheet for 10 minutes before transferring them to a wire rack to cool completely.
Alternate ways to make Chocolate Biscoff Cookies
There are a few fun ways to make cookie butter stuffed cookies, and I tried them all. I can tell you they will all give you a perfect ratio of cookie butter to chocolate cookie.
1. Fold the biscoff cookie butter directly into the dough. After the dry ingredients have been mixed in, quickly stir in the balls of biscoff cookie butter. Scoop the dough and bake!
2. Place one puddle of cookie butter on top of the dough: Instead of folding the cooking butter into the dough, scoop the dough as normal then make a small dent in the top. Place 1.5 tsp-sized piece of cookie butter into it. This will create a gooey puddle of cookie butter on top of the cookie.
3. Make BIG cookies: This recipe will yield about 10 large, thick cookies. After folding the cookie butter into the dough, use a large cookie scoop or spoon to form the cookie dough into 3 tablespoon-sized balls. These may need to bake 1-3 minutes longer than the regular sized cookies.
Expert Tips
- Work quickly: Make sure your oven is preheated and the dough is ready before taking the cookie butter out of the freezer. Once it’s out of the freezer, you’ll have to work fast because it starts to soften up again really quickly.
- Be sure to cream the butter and sugars together until light in colour and fluffy. This helps incorporate air into the cookies and will make a big difference in texture!
- Properly measure your cocoa powder and flour. See below for how to properly measure flour in baking! For the cocoa powder, you can scoop it out of the container, then run the back of a butter knife over the top to flatten it out.
- Don’t over-mix the batter once the dry ingredients are mixed in. Only mix in the dry ingredients until they are just combined.
- For cookies that stay soft for days, be sure to under-bake them slightly!
Storage Instructions
These cookies should be stored in an airtight container at room temperature and will stay fresh for up to 4 days. They are freshest the day that they are baked though!
More Recipes You’ll Love


If you make this recipe, let me know how it went in the comments below, I’d love to hear from you! You can also tag me on Instagram or Facebook so I can check it out!
Baking FAQ
These are the topics I’m asked about most frequently:
You can get these answers and more in my frequently asked questions post!

Chocolate Biscoff Cookies
Ingredients
- ½ cup (105 g) butter (vegan or regular)
- 1 cup (200 g) light brown sugar
- ½ cup (100 g) granulated sugar
- ½ tbsp vanilla extract
- 1 egg
- ¾ cup (64 g) unsweetened cocoa powder
- 1 cup (125 g) flour
- ½ tsp salt
- ½ tsp baking soda
- ½ cup (150 g) biscoff cookie butter
Instructions
- Scoop 16 heaping teaspoons of cookie butter on a baking sheet or plate lined with parchment paper. Place in the freezer for 1 hour, or until the cookie butter is frozen. When it's ready, leave in the freezer while you make the cookie dough.
- Preheat oven to 325°F and line 2 baking sheets with parchment paper.
- In the bowl of a standing mixer with the paddle attachment or a handheld mixer, combine butter and sugars, mixing until light and fluffy.
- Add in the eggs and vanilla extract, and beat until just combined (do not over-mix!).
- Mix in the cocoa powder, flour, baking soda, and salt until a dough forms. Don't over-mix!
- Scoop 2 Tablespoon sized balls of dough and place them on the baking sheet. Make a small teaspoon-sized indent in each one.
- Remove the cookie butter from the freezer and place one ball into each of the indented cookie dough balls. The cookie butter will start to soften right away so try to move quickly! If possible, assemble 5-6 cookies at a time, placing the plate of cookie butter back into the freezer in between.
- Seal the biscoff balls but wrapping the cookie dough around them and roll the dough into a ball. Bake for 8-11 minutes, or until the edges and tops look set. Don't over-bake or else the cookies will not stay soft.
- Let the cookies cool on the baking sheet for 10 minutes before transferring them to a wire rack to cool completely.
Equipment

Video
Notes
The calorie information provided for this recipe is an estimate. The accuracy of the calories listed is not guaranteed.
Hi if I want to make biscoff cookies eggless what do you suggest to replace egg with???
You can try using a flax egg, but I haven’t tested it myself so I can’t say how it will turn out
My husband bought cookie butter and I had no idea what to do with it. This recipe was quick, easy and delicious!! I did a few without the cookie butter and used the recipe for double chocolate chip. Both cookies were amazing!
Yay! I am so happy to hear that you loved them Cait! Thanks so much for taking the time to come back and leave a review! 🙂
This was such a simple recipe and the cookies were AMAZING!! Everyone loved them ?
Hi! Yay! I’m so happy to hear that the cookies were a hit, thanks so much for taking the time to come back and leave a review! 🙂
Made these for a group of friends and they keep asking me to make them again and share the recipe! Definitely a keeper!
Hi Jill! I’m so happy to hear that you loved the cookies and that they were a hit! Thanks so much for taking the time to come back and leave a review 🙂
I made this x2 for my Christmas cookie boxes! Everyone loved them! They were so rich and delicious!
Hi Mikyla! This is so great to hear and I’m so happy that they were a hit! Thanks so much for giving the recipe a try! 🙂