Oreo Brownies
This post contains affiliate links. Read the full disclosure here.
These extra fudgy Oreo brownies are perfect for Oreo lovers! All you’ll need are 10 ingredients and they’re made in just one bowl. They have a perfect crinkle top and Oreo deliciousness in every bite!

These Oreo fudge brownies are based off of my popular dairy free brownie recipe. These brownies are simple to make but pack a punch of chocolate flavor. They’re loaded up with Oreo cookie pieces and chocolate chips!
These Oreo brownies are also perfect for those with food allergies as you can easily make them dairy free or gluten free.
Why You’ll Love These Oreo Brownies
- You only need 10 simple ingredients that you probably already have in your pantry.
- These Oreo brownies are made in just one bowl, so minimal clean up and no fancy equipment required!
- The brownies are loaded up with Oreo pieces, and I’ve added extra Oreo pieces on top of the brownies to get that bakery style look.
- This brownie recipe uses just two eggs and instead of melted chocolate I use cocoa powder, making it a much more budget friendly recipe.
Ingredients Needed
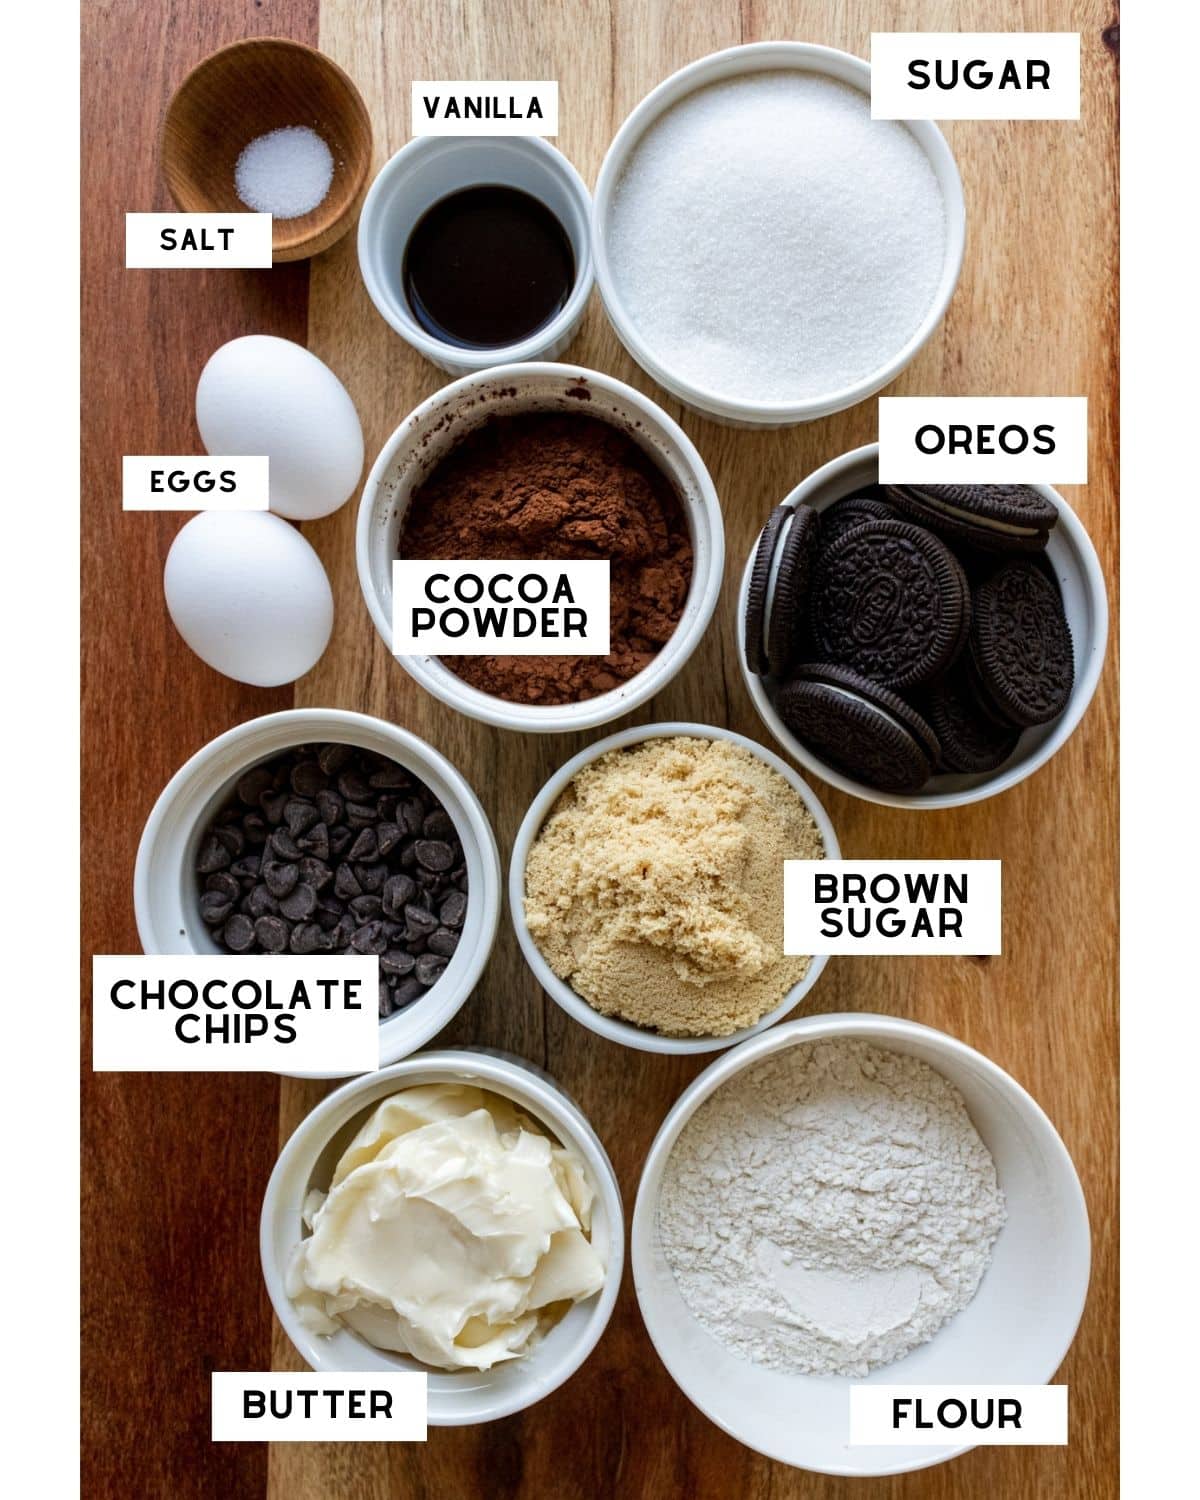
- Butter: you can use regular butter or dairy free butter to make these brownies – they’ve been tested both ways!
- Oreos: if you want these brownies to be gluten free make sure to use gluten free Oreos! Did you know Oreos are actually dairy free? So if you need these Oreo brownies to be dairy free then you can just use regular Oreos!
- Flour: I used all purpose flour for this recipe, but if you’re gluten free make sure to use gluten free 1-1 all purpose baking flour.
- Chocolate Chips: feel free to use semi sweet chocolate chips or white chocolate chips. You can also use a chopped up chocolate bar instead.
- Cocoa Powder: I’ve used unsweetened dutch processed cocoa powder but if you only have natural cocoa powder on hand you can use that instead.
Step By Step Instructions
Note: Full ingredient measurements and instructions can be found in the recipe card at the bottom of this page.

Step 1: Preheat the oven to 350°Fahrenheit and line an 8×8 baking pan with parchment paper. Make sure the paper is hanging over the sides of the pan so you can easily remove the brownies once they’ve cooled. Roughly chop your Oreos and set aside.
Step 2: In a large bowl, whisk together the melted butter, granulated sugar and light brown sugar. Whisk until the mixture forms almost a paste and is quite thick – this is going to give you that crinkly brownie top!
Step 3: Add the eggs and vanilla extract, whisking once more.
Step 4: Add the dry ingredients – the flour, cocoa powder and salt. Whisk until just combined – you don’t want to over mix the brownie batter as that would change the texture of the brownies!
Step 5: Stir in the chopped oreos and chocolate chips.
Step 6: Pour the brownie batter into your prepared pan. Add more oreos and chocolate chips on top if you like! Bake for 30-40 minutes. A toothpick inserted in the middle of the brownies should come out with some wet crumbs. Let the brownies cool completely in the pan before removing and slicing.

Expert Tips
- Measure your flour and cocoa powder – make sure you’re either using a weighing scale or the scoop and level method to measure the flour and cocoa powder. Adding too much of either can lead to a dry and cakey brownie!
- Cool the brownies – Make sure the brownies are completely cool before removing from the pan and slicing them. If you cut into them too early they might still be gooey and fall apart!
- Use white chocolate chips – To get a cookies and cream look for the brownies use white chocolate chips instead of semisweet chocolate chips!
- Switch up the Oreos – Instead of regular Oreos, swap them out for seasonal Oreos or flavors like mint or peanut butter Oreos.
Storage Instructions
Once sliced, store the Oreo brownies in an airtight container at room temperature for 4-5 days.
You can freeze the brownies by wrapping them tightly in plastic wrap and freezing them in a ziploc bag for up to 2 months. Let them thaw at room temperature before enjoying!
More Oreo Recipes You’ll Love


If you make this recipe, let me know how it went in the comments below, I’d love to hear from you! You can also tag me on Instagram or Facebook so I can check it out!
Baking FAQ
These are the topics I’m asked about most frequently:
You can get these answers and more in my frequently asked questions post!

Oreo Brownies
Video
Ingredients
- ¾ cup (158 g) butter, melted, (regular or dairy free)
- ¾ cup (150 g) light brown sugar
- 1 cup (200 g) granulated sugar
- 2 eggs
- 1 Tablespoon vanilla extract
- ¼ teaspoon salt
- ¾ cup (64.5 g) unsweetened cocoa powder
- ½ cup + 2 Tablespoons (79 g) all-purpose flour
- ½ cup (90 g) semisweet chocolate chips or chopped chocolate, (or white chocolate if desired)
- 14 Oreo cookies, roughly chopped, (plus more for topping)
Instructions
- Preheat the oven to 350°Fahrenheit and line an 8×8 baking pan with parchment paper. Make sure the paper is hanging over the sides of the pan so you can easily remove the brownies once they’ve cooled. Roughly chop your Oreos and set aside.
- In a large bowl, whisk together the melted butter, granulated sugar and light brown sugar. Whisk until the mixture forms almost a paste and is quite thick – this is going to give you that crinkly brownie top!
- Add the eggs and vanilla extract, whisking once more.
- Add the dry ingredients – the flour, cocoa powder and salt. Whisk until just combined – you don’t want to over mix the brownie batter as that would change the texture of the brownies!
- Stir in the chopped oreos and chocolate chips.
- Pour the brownie batter into your prepared pan. Add more Oreos and chocolate chips on top if you'd like! Bake for 30-40 minutes.
- A toothpick inserted in the middle of the brownies should come out with some wet crumbs, but not completely covered in batter. Let the brownies cool completely in the pan before removing and slicing.

Notes
The calorie information provided for this recipe is an estimate. The accuracy of the calories listed is not guaranteed.
I am in awe in how these turned out!! they were so delicious and fudgy like wow!! topped it off with chopped oreos and the crinkle top just looked BEAUTIFUL.. so good!!
Yay!! I’m so happy to hear that! Thank you for the review!
I found this recipe on Tiktok & it looks so good that i eager to give it a try. I loveeeeee how Gabby provide videos, pictures & even recipes for us to try it. Bless her kind souls! The recipe & the ingredients also VERY simple & easy to get. I’ve tried this recipe guys & it turns out as pretty (not as pretty as hers ofc cause I’m an amatuer but still, I think I pull this off?) 🤪 plus the taste also so damn gewddd!!! I enjoy this brownies with Oreo Ice Cream, whipped cream & drizzle some Salted Caramel sauce. It’s just a pure bliss 🤯 You guys shud try! This is not a scam 😆 I’m so happyyyyy to see my brownies turns so good wish I could share my brownies photos here too ❤️❤️❤️ Thanks a lot Gabby! 🥰🥰
Hi Amira! I am so happy you loved the brownies so much! Thank you for the review! 😀
I followed your steps exactly for a double batch, which was a hit at two separate parties! Your tips for Oreo bits sticking out of a crunchy top took them to the next level. Thanks for sharing the recipe! I’ll be making them again.
I am so happy to hear that the brownies were a hit! Thank you so much for the review 😀
I made these and they were delicious, although came out a different texture to the other brownies I tried. I use the metric measurements. But I noticed an error afterwards, it says only 79g flour when it should be around 137g.
Hi Melissa! Thank you so much for catching that error – 79 grams is the correct metric measurement! Sorry about that, and I hope you’ll give them another try!
If I wasn’t a T1D, I’d be eating an entire 13” x 9” x 2” pan of these all by myself in one sitting.
I’m so happy you love them Laura!