Dairy Free Brownies
This post contains affiliate links. Read the full disclosure here.
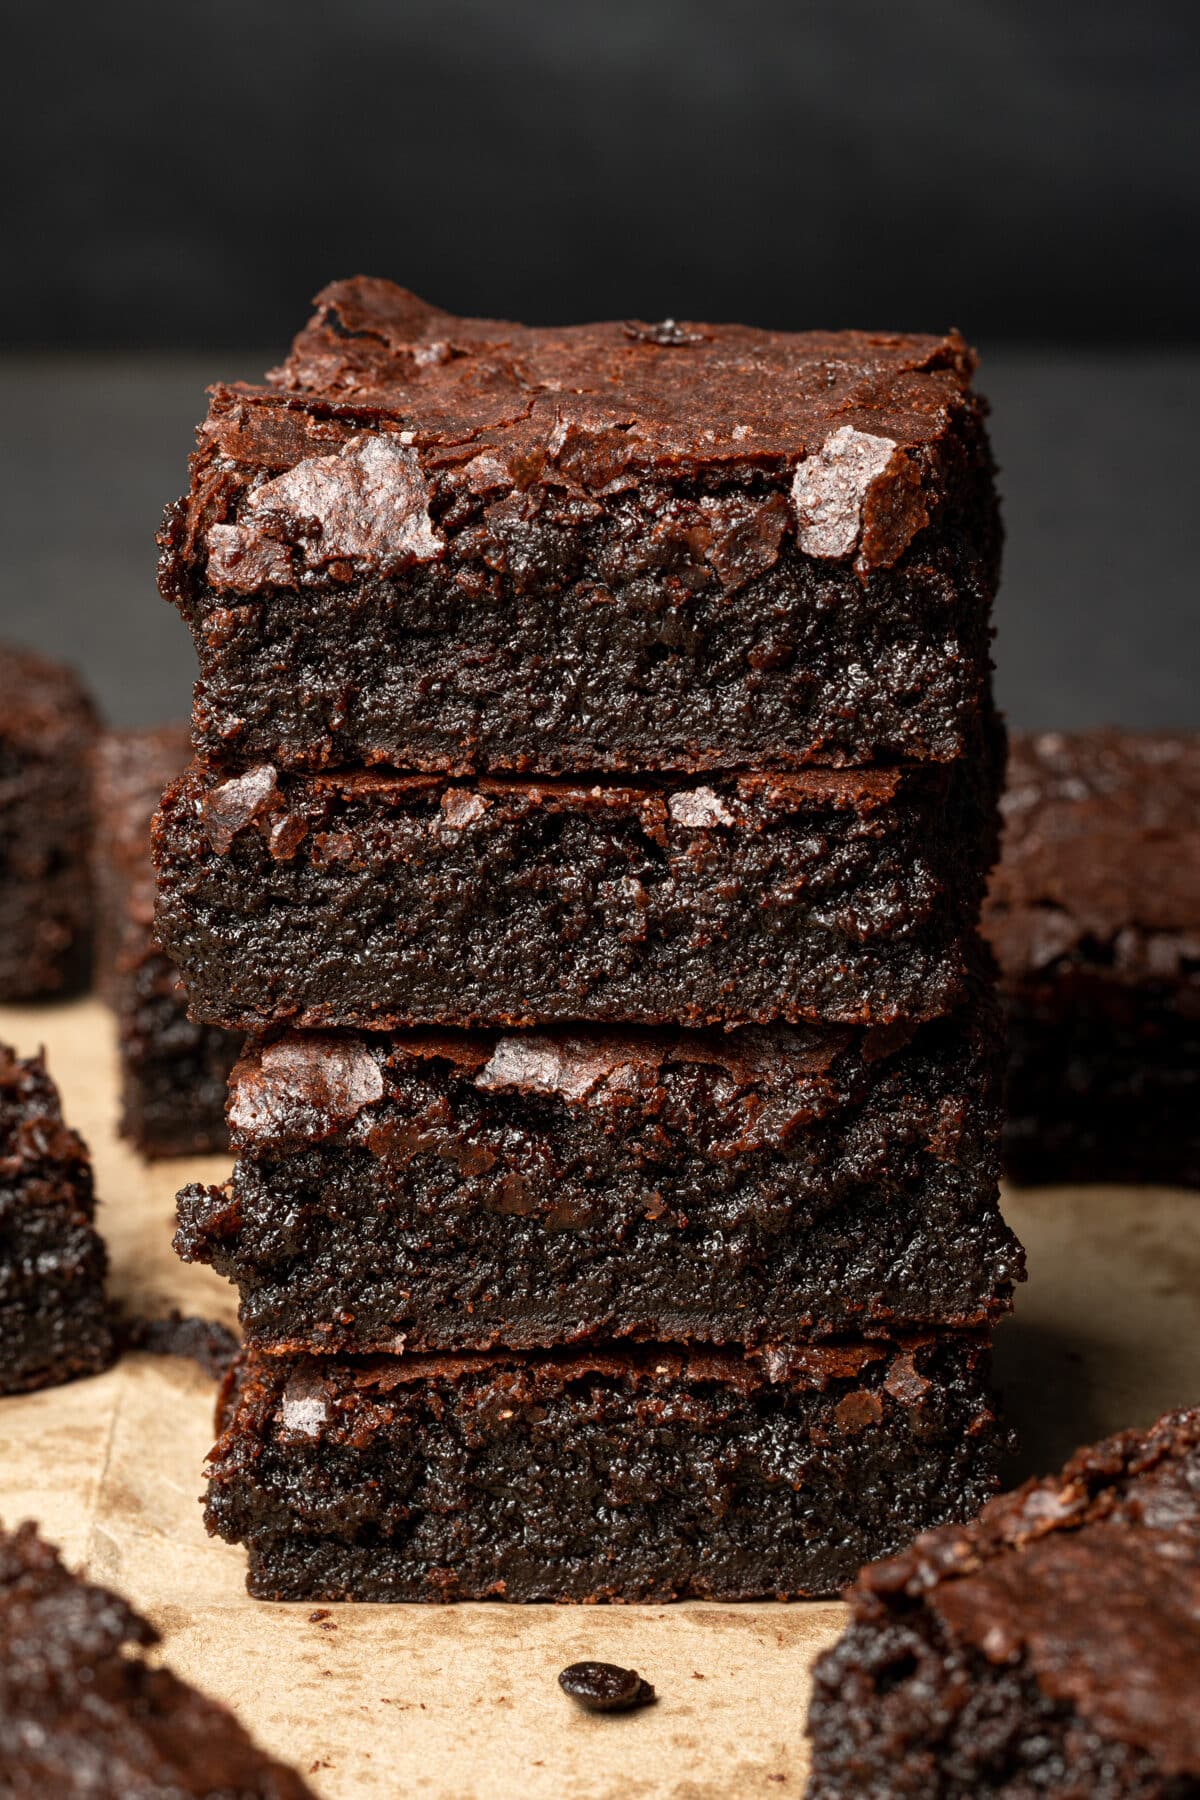
These are the BEST dairy free brownies ever! They’re so easy to make, super fudgy with the perfect crinkle top just like bakery brownies! They’re made entirely with cocoa powder (no melted chocolate) and all you need are 8 ingredients and one bowl!
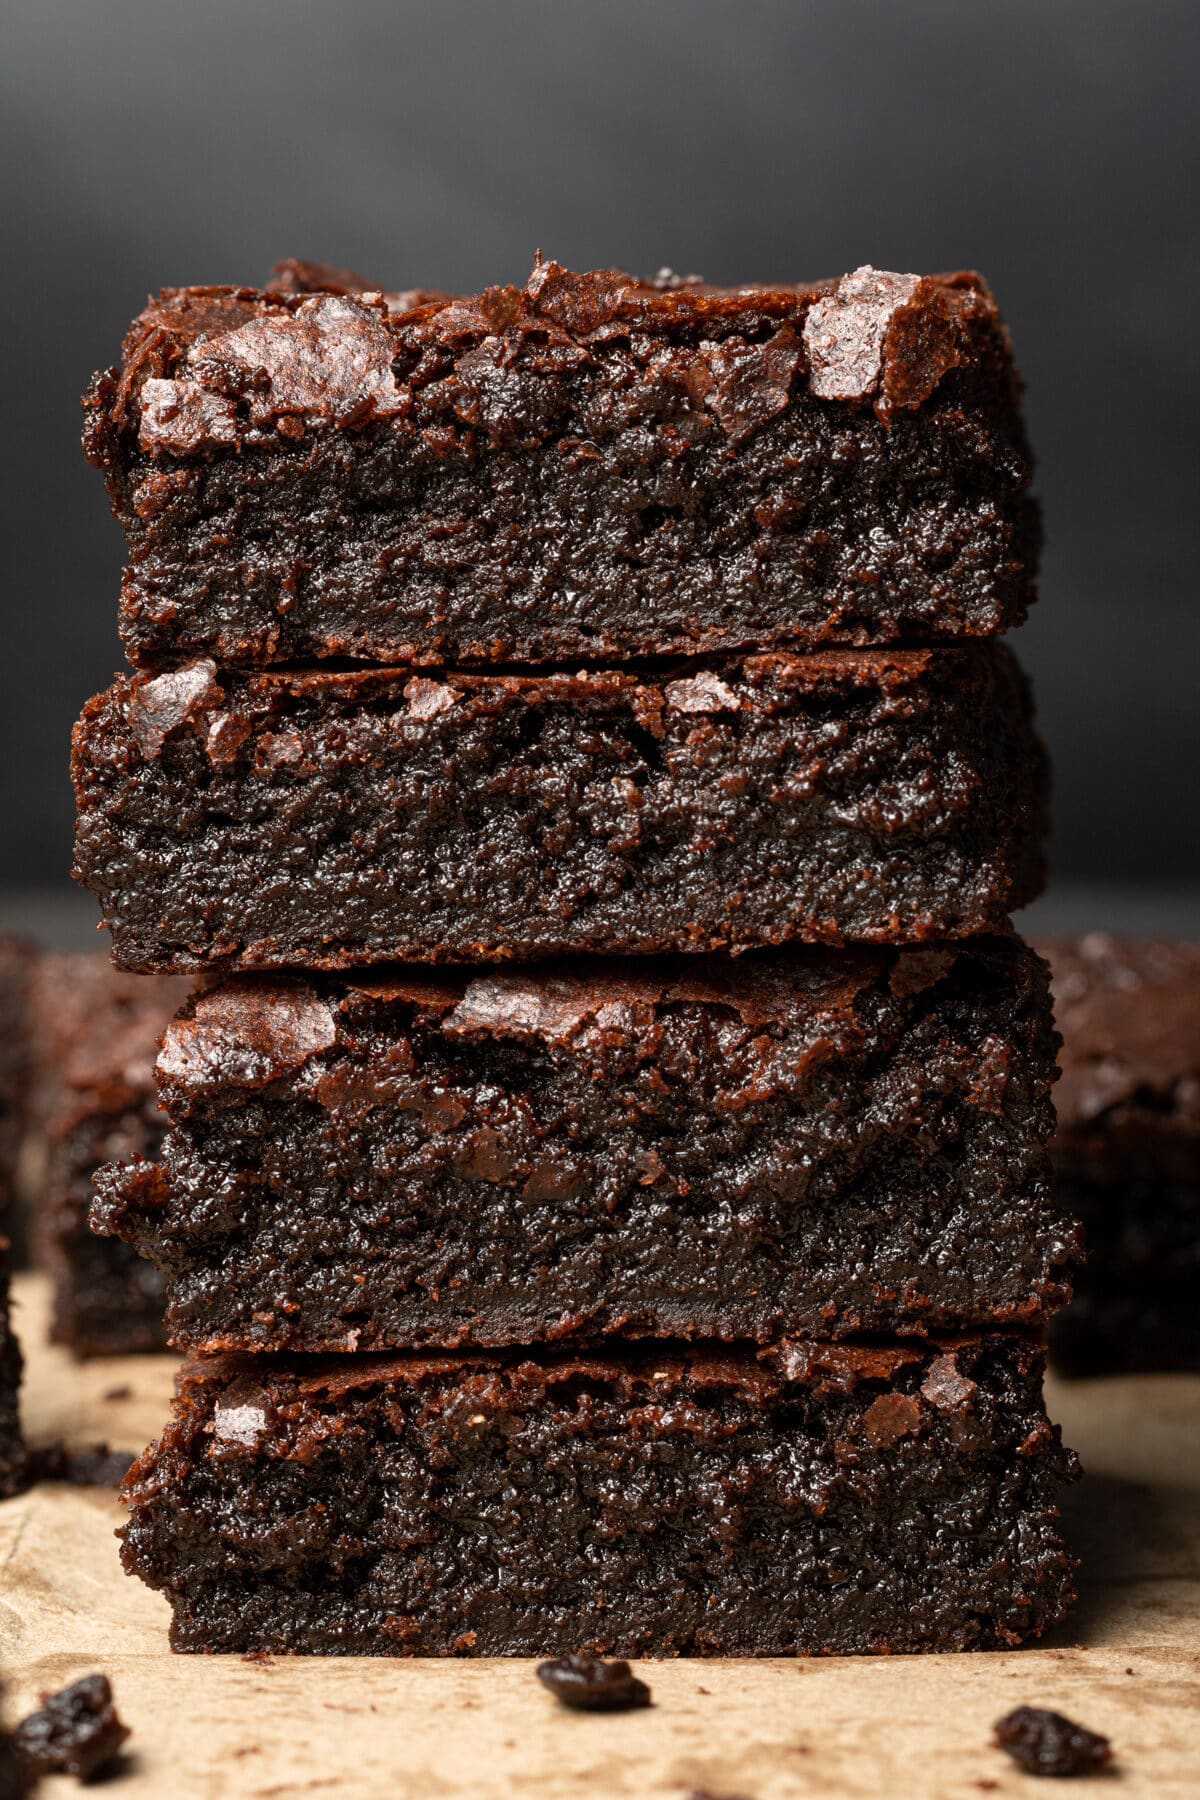
I promise you I’m not exaggerating when I say a pan of these dairy free brownies does not last a full 24 hours in my house. That being said, they stay gooey and fudgy for days after they’re baked!
Featured Reader Review
“Best recipe for the fudgiest brownies ever!! Baked it for my friends and they absolutely loved it. I stored the leftovers in a container and there were good to go for 5+ days.”
Nour
Brownies are my weakness – I make the small batch version of these brownies all the time and sometimes when I feel a bit lazy I’ll just make edible brownie batter.
I am constantly getting requests from my friends and family for these brownies – they’re the best chocolate brownies I’ve ever had (dairy free or not!) and making brownies from scratch has never been easier.
Why You’ll Love These Brownies
- No need to melt chocolate for these brownies Cocoa powder has no extra ingredients, so it delivers a rich, bold chocolate flavour. Using all cocoa powder means you’ll have that velvety, fudgy texture for days after the brownies are baked.
- This recipe is super budget friendly since it only uses 2 eggs (many brownie recipes use 4).
- These fudgy brownies are versatile. They are completely dairy free but dozens of readers have made them with regular butter and they turn out just as delicious!
Ingredient Notes
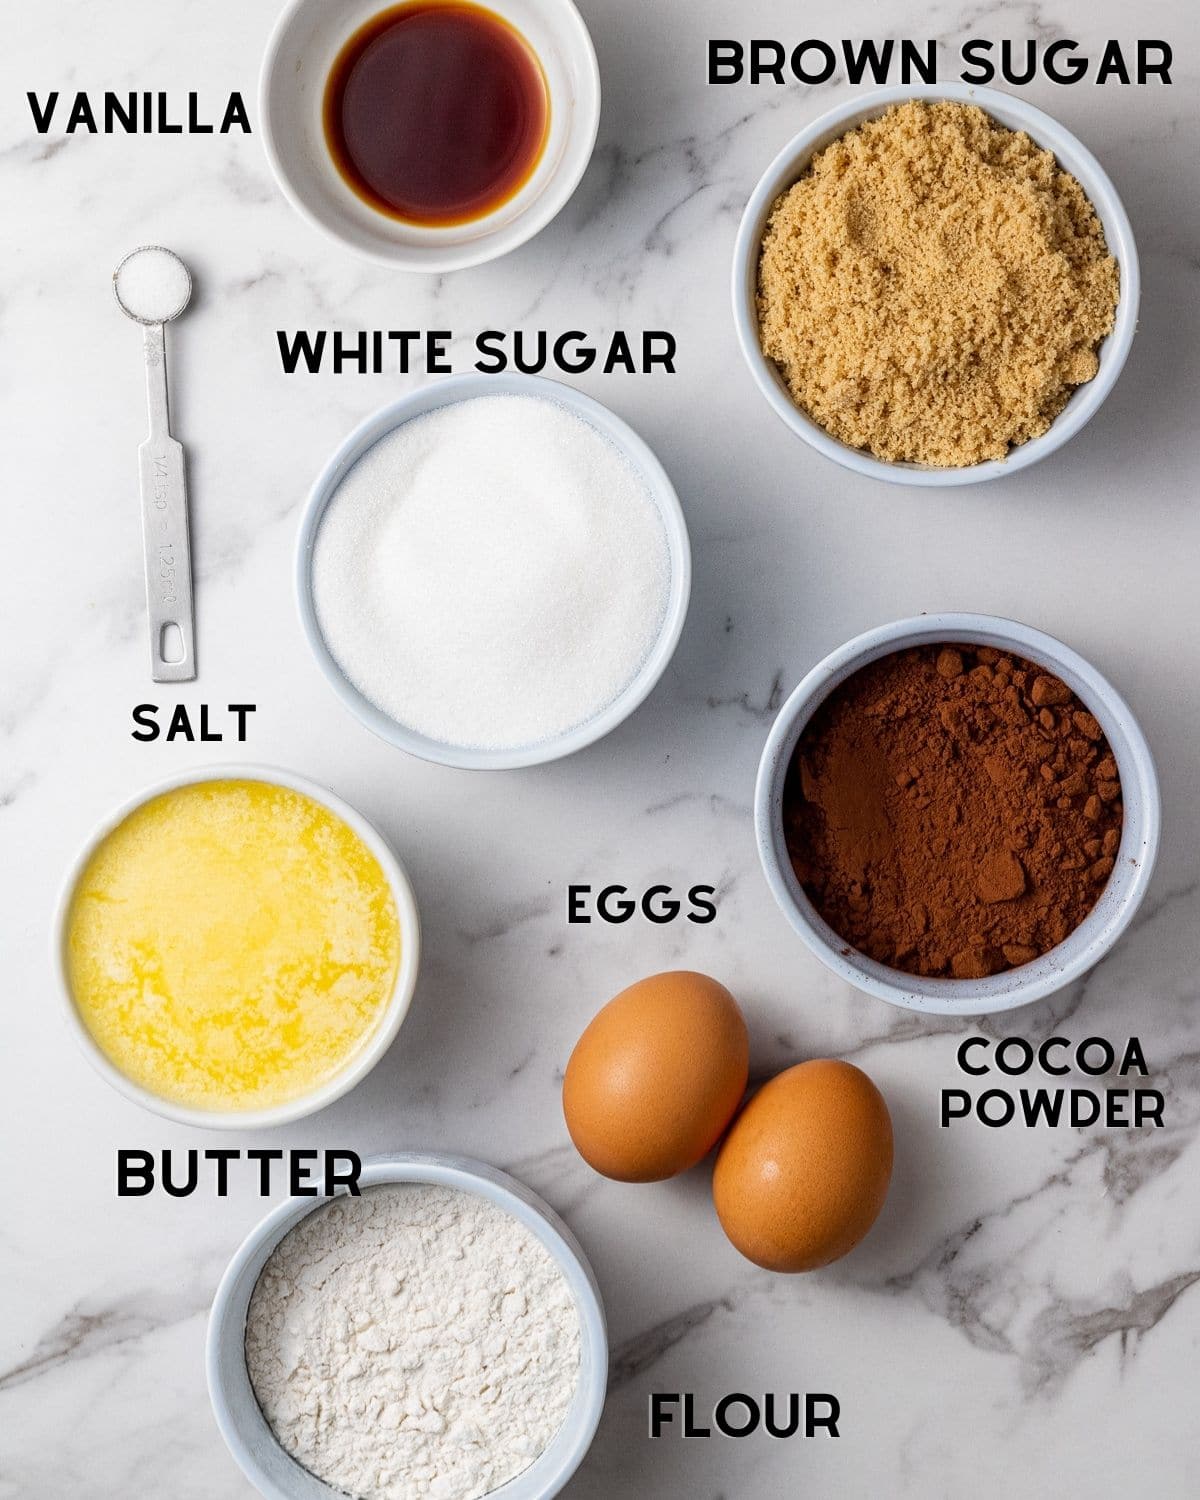
- Butter: you can use regular butter or dairy free butter for this recipe.
- Cocoa powder: In my testing process, I found that unsweetened dutch processed cocoa powder works best because it’s richer and has deeper chocolate flavor. However, you can use natural cocoa powder if that’s what you have on hand.
How To Make These Brownies
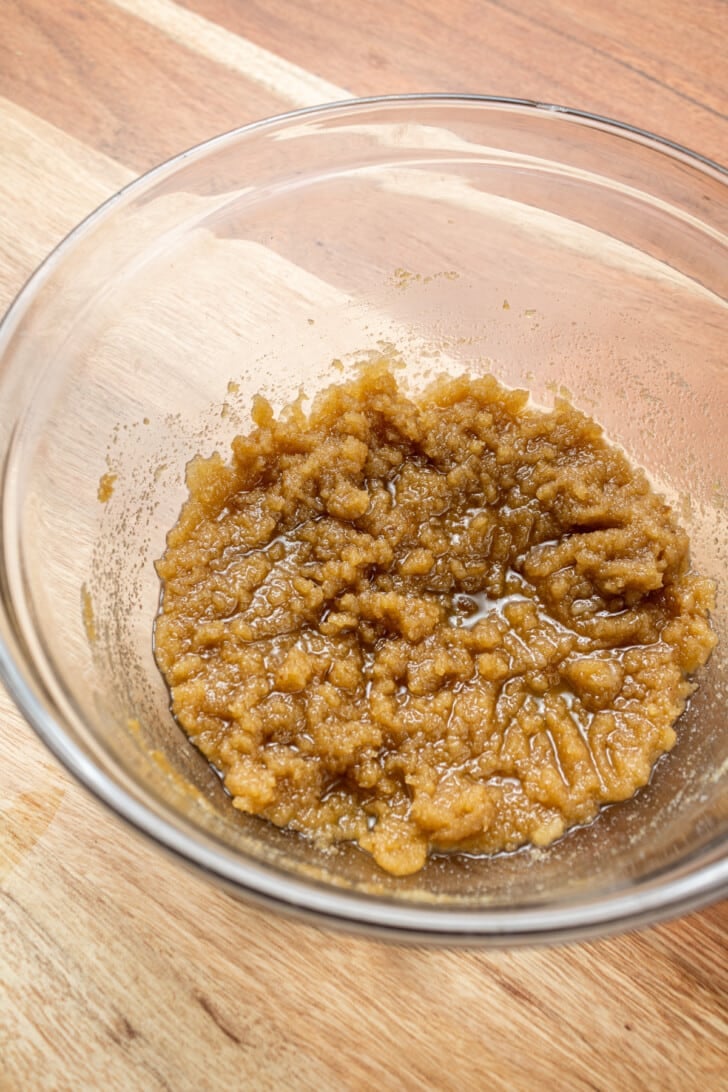
Whisk melted butter and sugars until it forms a paste!
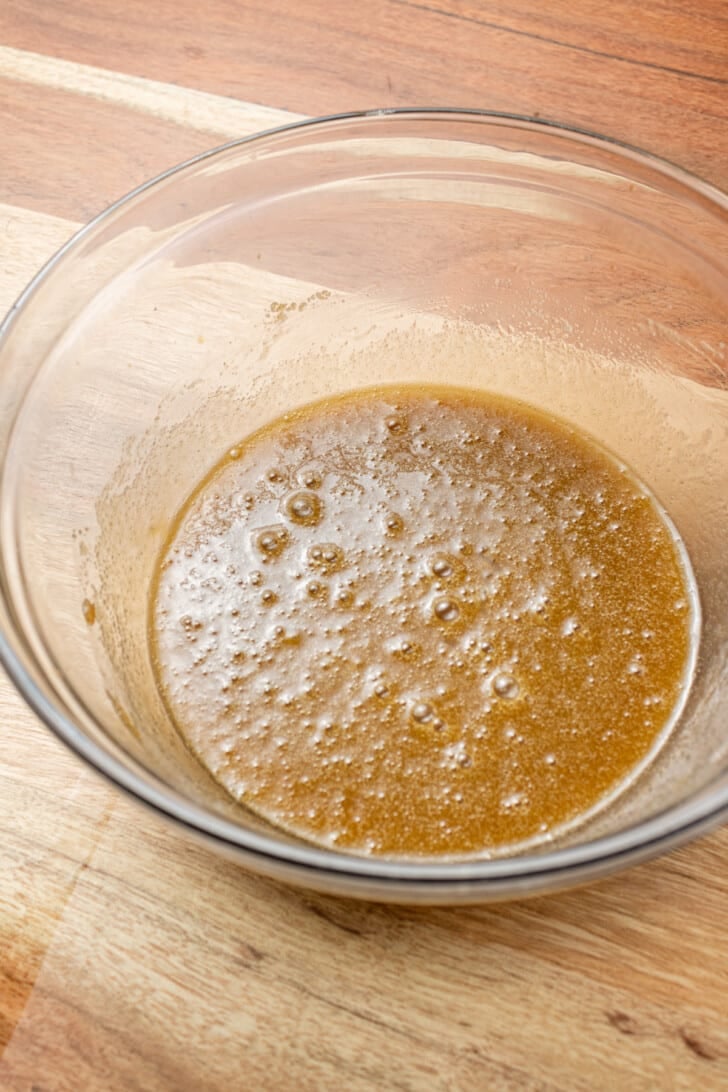
Add in eggs and vanilla.
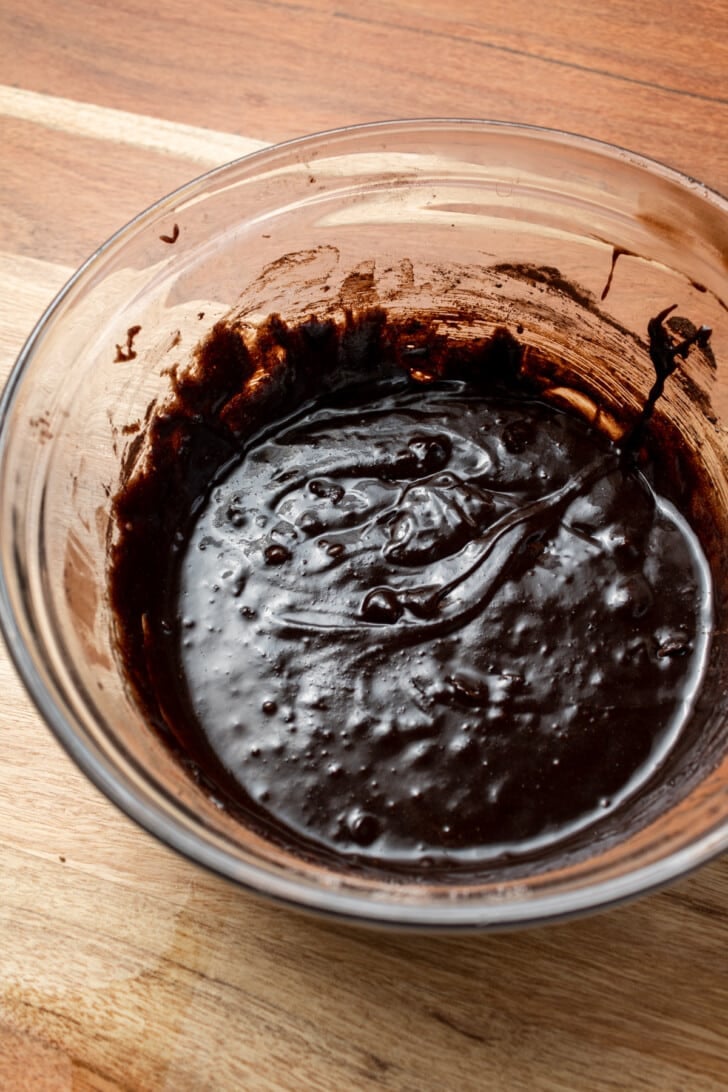
Add in your dry ingredients!

Bake and enjoy!
How do you know when brownies are done baking?
I will admit, it can be very hard to tell when brownies are done baking. Luckily I’ve outlined a few important tips below to set you up for brownie success.
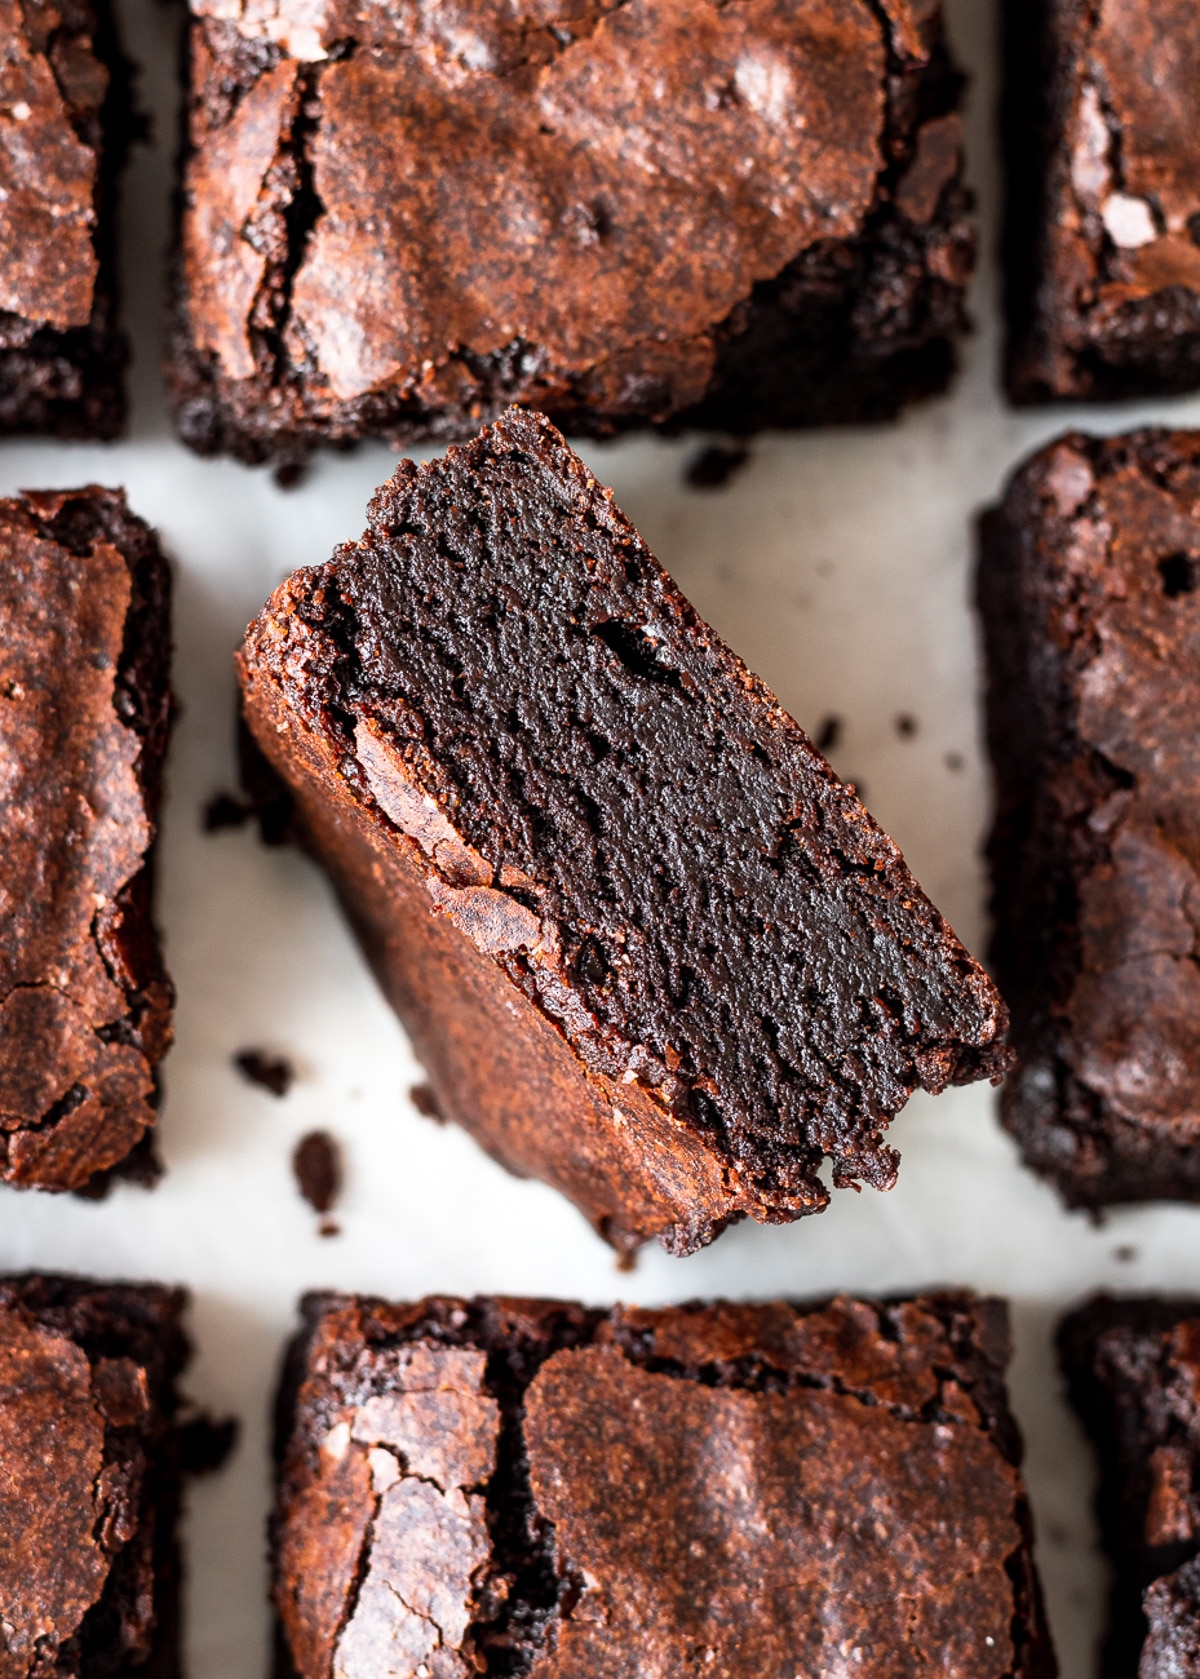
The top is cracked. You know that classic crinkly top that a brownie gets? Watch for that! There might not be a TON of cracks but overall it’s got to be crinkly throughout the surface.
Shake the pan: The middle shouldn’t jiggle. If the middle of the pan jiggles, they are definitely not ready!
Toothpick test: this one is tricky but it’s the best tip. Insert a toothpick in the middle of the brownies. If it comes out covered in wet batter, bake them a little longer (4 minutes at a time).
You want the toothpick to come out with what looks like a few wet crumb pieces on it, but not completely covered in wet batter. You do not want to toothpick to be clean!
Start checking them early. You want to start checking on the brownies after about 30 minutes. If you wait 40 minutes to check on them, depending on your oven, they could be over-done already.
If they aren’t ready after 30 minutes, check them every 4 minutes or so until they are. Don’t worry about opening the oven a few times.
Recipe Developer Tips
- Weigh your flour and cocoa powder – If you over-measure your flour or cocoa powder, the brownies won’t be as gooey and chewy, and will be more cake-like.
- Don’t over-mix – The texture of brownies is be largely affected by how much you mix the batter. Brownies are one of the few desserts that I don’t use my standing mixer for, because I want to be really careful about how much I’m mixing them. When you add in the dry ingredients, use a whisk to mix the brownies just until you don’t see anymore dry ingredients, then stop.
- Don’t over-bake – Over-baking your brownies will lead to tough brownies – no one wants that! See tips above on how to tell if brownies are done baking.
- Let the brownies cool completely before slicing them – I know it’s hard, but I urge you to resist! Because the brownies are super fudgy, they need some time to set and firm up before you can neatly slice them. Otherwise you’ll have a big gooey mess on your hands.
More Brownie Recipes You’ll Love


If you make this recipe, let me know how it went in the comments below, I’d love to hear from you! You can also tag me on Instagram or Facebook so I can check it out!
Baking FAQ
These are the topics I’m asked about most frequently:
You can get these answers and more in my frequently asked questions post!

Dairy Free Brownies
Video
Ingredients
- 3/4 cup (158 g) butter (regular or dairy free), melted
- 3/4 cup (150 g) light brown sugar
- 1 cup (200 g) granulated sugar
- 2 eggs
- 1 tbsp vanilla extract
- 3/4 cup (64.5 g) cocoa powder
- 1/4 tsp salt
- 1/2 cup + 2 tbsp (79 g) all-purpose flour, SEE NOTES
Instructions
- Preheat the oven to 350°F and line an 8×8 square baking pan with parchment paper. Leave parchment paper hanging over the sides of the pan so that you can easily remove the brownies from the pan later.
- Melt the vegan butter in the microwave or in a small pan over the stove. Transfer the melted butter to a medium sized bowl.
- Add in both the sugars and use a whisk to whisk the butter and sugars together. Keep whisking until the mixture resembles a paste that pulls away cleanly from the side of the bowl when you mix it. (this contributes to the crinkly top in the brownies)
- Add the eggs and vanilla and mix again.
- Pour the dry ingredients (cocoa powder, salt, and flour) into the bowl and mix with the whisk until just combined (it should only take about a minute). This is important, because over-mixing at this stage will affect the texture of the brownies!
- Pour the batter into the lined baking pan using a spatula to scrape all the batter out of the bowl.
- Bake for 30-40 minutes*. Begin checking the brownies at 30 minutes by inserting a toothpick in the middle. The top of the brownies should be crinkly and the toothpick should not come out clean (over-baking the brownies will make them tough). The brownies are ready when the toothpick has a few wet crumbs, but not wet batter.
- Let the brownies cool completely before slicing (they need time to set and if you cut them too early they will make a gooey mess). Enjoy!

Notes
The calorie information provided for this recipe is an estimate. The accuracy of the calories listed is not guaranteed.
These brownies are amazing! They have that perfect chewy brownie texture that everyone loves. And they were SO easy to make! Thank you for sharing this recipe!
Thank you for your comment Cheree! So glad that you loved the brownies. They have the BEST texture!