Nutella Blondies
This post contains affiliate links. Read the full disclosure here.
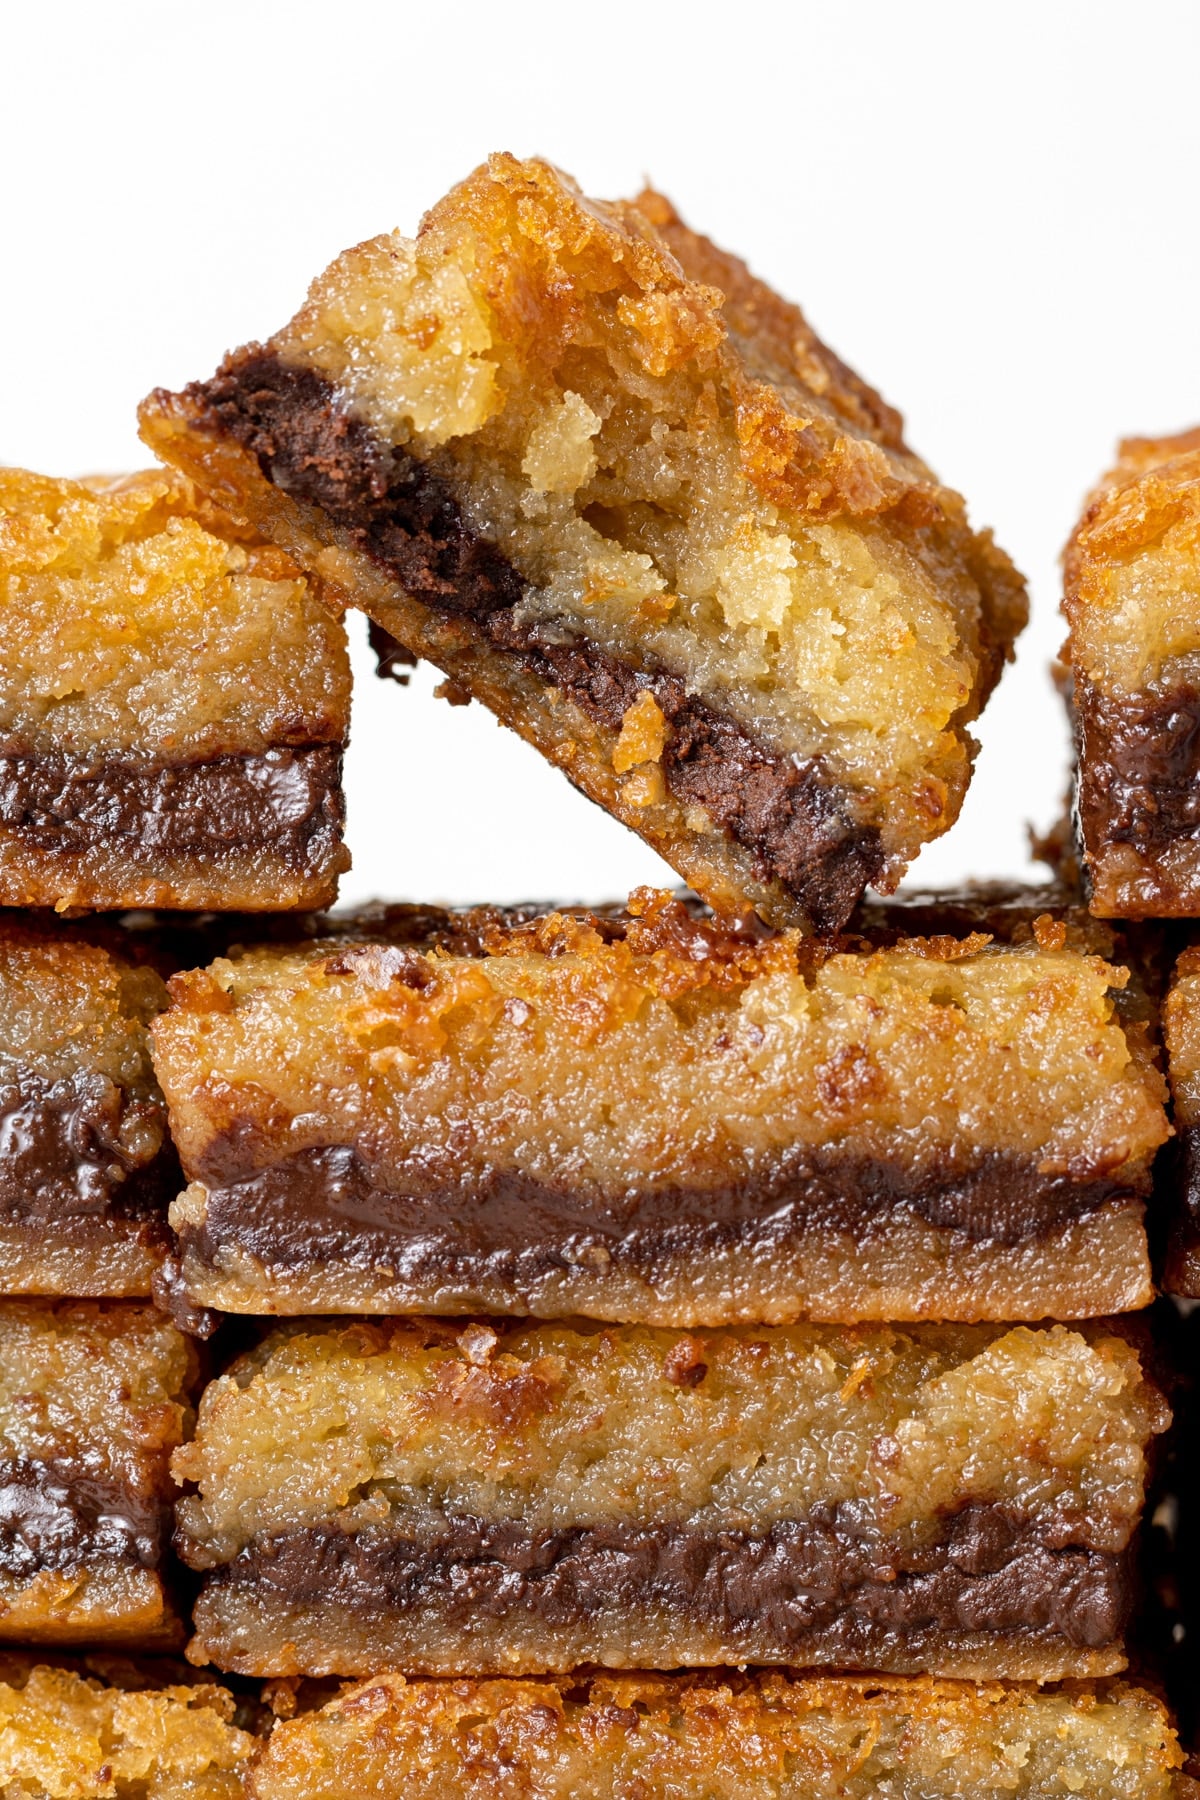
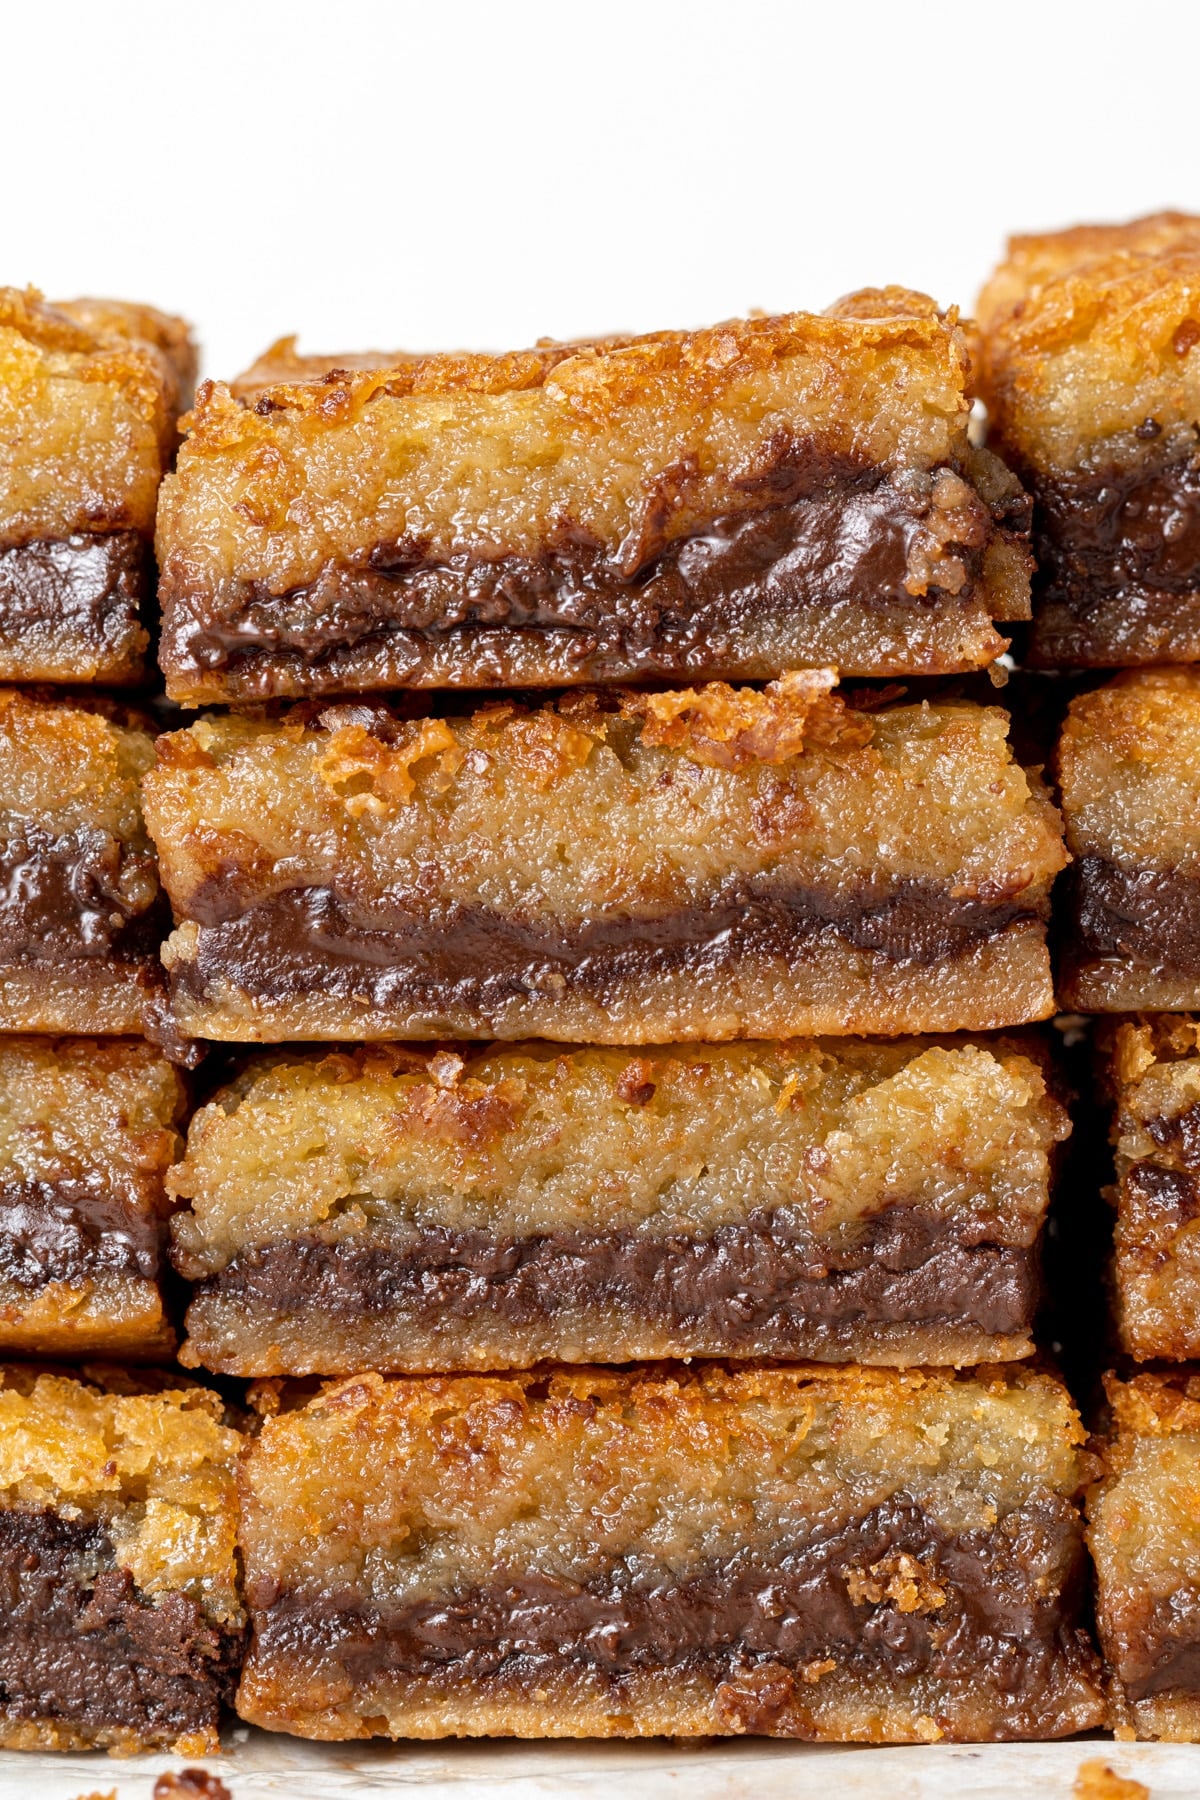
These Nutella blondies are gooey, delicious, and stuffed with a thick layer of chocolate hazelnut spread. 8 ingredients, one bowl, and so easy to make!

These Nutella stuffed blondies are perfect for when you want a blondie, but also could really use a dose of chocolate.
They’re an absolute dream and can be made using regular classic chocolate hazelnut spread like Nutella or a dairy free version.
I know what you’re thinking – Nutella isn’t dairy free! You’re right, it isn’t. I use a dairy free and vegan chocolate hazelnut spread alternative to make them, not brand name Nutella.
But rest assured that it has been tested with Nutella and will be just as delicious if you aren’t dairy free!
Why These Nutella Blondies Work
- The blondie base of this recipe is adapted from my Chocolate Chunk Blondies, which uses both brown sugar and white sugar. Brown sugar creates that chewy texture and gives the blondies a slight caramel flavor.
- A minimal amount of flour keeps these blondies soft and gooey, and lets the chocolate hazelnut spread shine!
- The chocolate hazelnut spread is chilled in the freezer for around 10 minutes so that it easily peels off in a thick, even layer that goes right in between two layers of blondie batter.
Ingredients
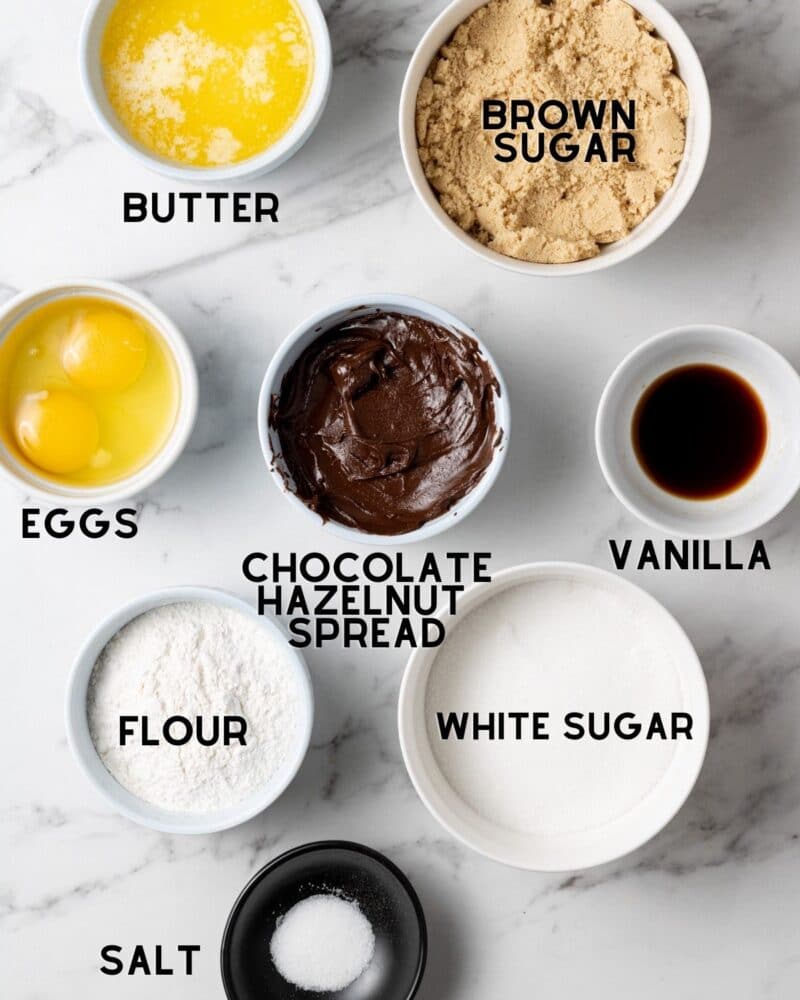
All you need to make these Nutella blondies is 8 simple ingredients! A few notes about the ingredients:
- Butter: you can use dairy free/vegan butter or you can use regular dairy butter for this recipe. Measure before melting!
- Chocolate Hazelnut Spread: this recipe has been tested using vegan chocolate hazelnut spread, as well as classic (not dairy free) Nutella, so you can use either! More notes on dairy free options are in the FAQ section at the bottom of this post.
- Flour: these blondies use all-purpose flour. As always, be sure to properly by using a scale or using the scoop and level method.
Step By Step Instructions
Note: Full ingredient measurements and instructions can be found in the recipe card at the bottom of this page.
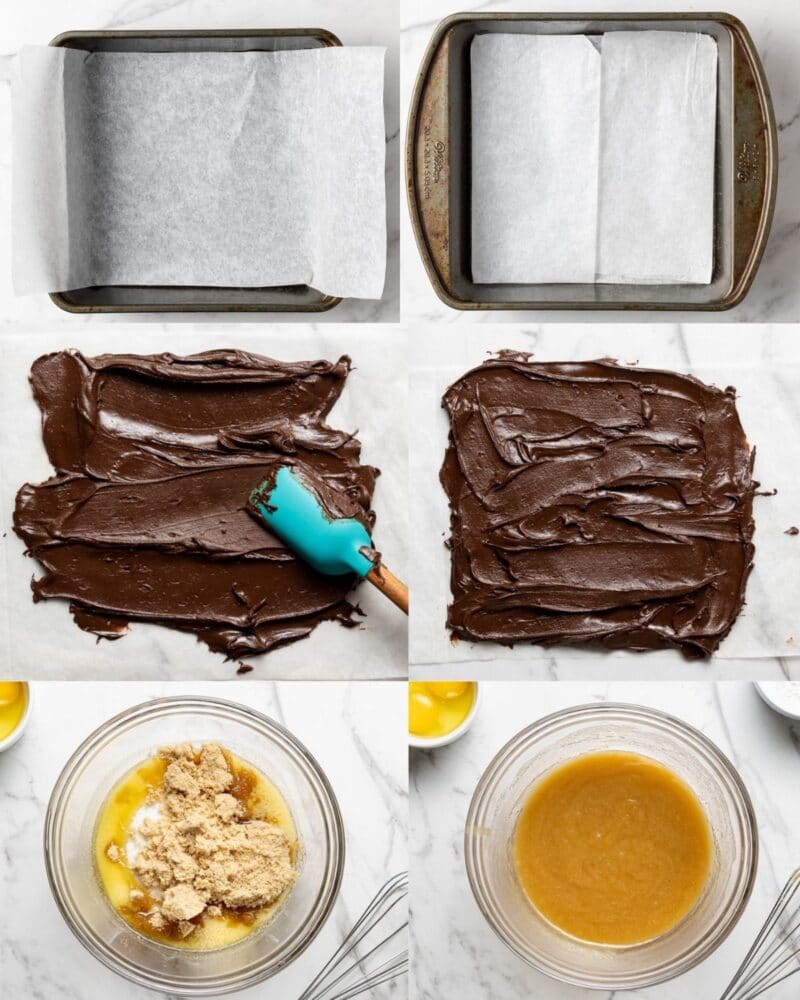
STEP ONE: Cut parchment paper into the shape of a square pan, leaving some paper hanging over the edges. Put the parchment paper into the pan and fold the edges inward to form creases (see photo below). This is so that you can create a layer of Nutella that fits perfectly into the pan.
STEP TWO: Remove parchment from the pan and place it on the countertop. Spread the chocolate hazelnut spread around until it covers the square area in the shape of the pan. Transfer the parchment paper to a flat surface such as a cutting board, baking sheet, or cooling rack, then put it in the freezer while you make the blondie batter.
STEP THREE: Prepare an 8×8 square pan by lining it with parchment paper and leaving some hanging over the edges to make it easier to remove the blondies later. Preheat oven to 350°F.
STEP FOUR: Place the butter in a medium sized bowl, then melt it in the microwave (you can also melt it over the stove then transfer to a mixing bowl). Whisk the sugars in and continue to whisk until the mixture resembles a paste. It should pull cleanly away from the side of the bowl as you whisk.
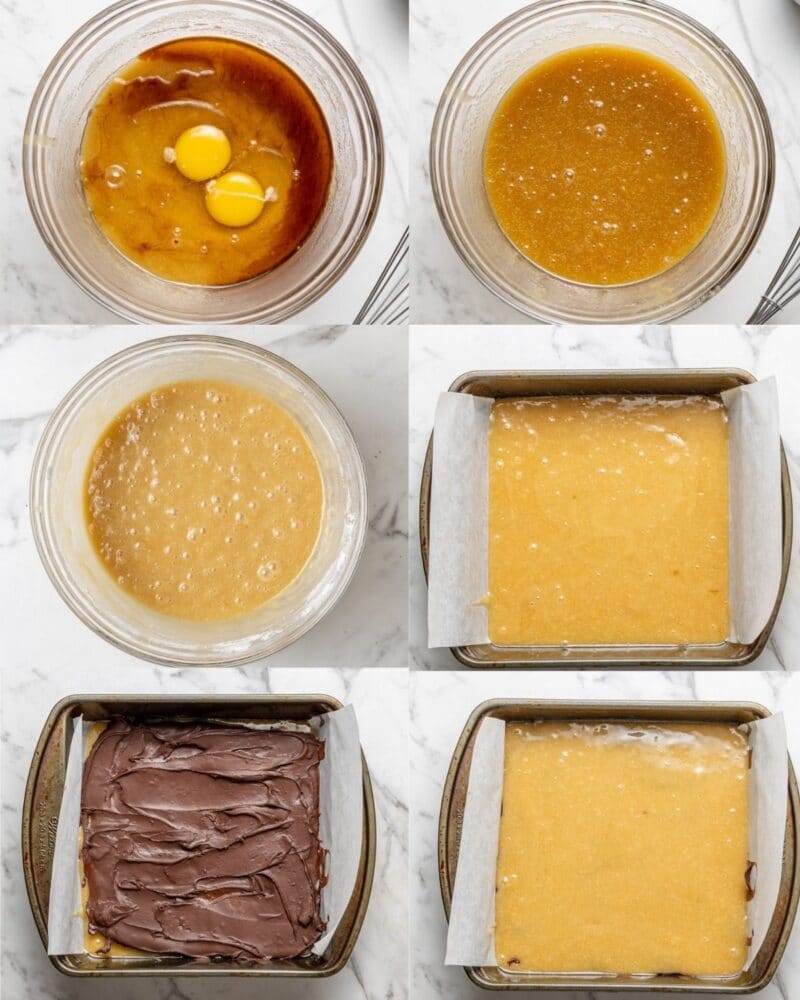
STEP FIVE: Whisk in the eggs and vanilla until combined. Add in flour and salt and mix until just combined, being careful not to over-mix.
STEP SIX: Pour half of the blondie batter into the the prepared pan. Remove chocolate hazelnut spread from the freezer and carefully peel it off of the parchment paper. It should peel off fairly easily in one piece (if not, freeze for another 5 minutes or so). Place the layer of chocolate hazelnut spread over the blondie batter.
STEP SEVEN: Pour the remaining blondie batter over the Nutella layer, spreading it towards the edges of the pan.
STEP EIGHT: Bake blondies for 30-45 minutes. They’re ready when a toothpick inserted in the middle of the pan has a few wet crumbs on it, but isn’t covered in batter. The middle definitely shouldn’t be jiggly, but if the toothpick is completely clean then they are over-baked!
Note: Full ingredient measurements and instructions can be found in the recipe card at the bottom of this page.
Dairy Free Options
Unfortunately the classic Nutella is not dairy free. I use this vegan chocolate hazelnut spread. It’s so good, I can eat it with a spoon.
Here are a few other dairy free options:
–Justins Chocolate Hazelnut Spread
–Artisana Hazelnut Cacao Spread
-You can also use homemade vegan nutella!
Featured Reader Review
“This recipe is absolute genius! Every single thing about it, from the excellent, easy directions to the most amazing blondie I’ve ever eaten, has made me such a fan of Cookie Dough Diaries. Thank you, Gabby!”
John
Expert Tips
- The chocolate hazelnut spread doesn’t need to be completely frozen. It should be just firm and solid enough that you can easily peel it off the parchment paper in one big slab. If the spread is still too soft after you finish making the batter, leave it in for a few minute longer.
- I always like to use an aluminium non stick 8×8 square pan to make blondies or brownies, but if you’re using a glass baking dish, the blondies will take longer to bake.
- Always line your baking pan with parchment paper and lightly grease the sides that aren’t covered in parchment! It makes life so much easier when you want to take the blondies out of the pan.
- To tell when blondies are ready, stick a toothpick into the middle of them – it shouldn’t be completely covered in batter. They’re ready when the toothpick has just a few wet crumbs on it. The blondies will continue to set once they are removed from the oven, and the longer you leave them in the less gooey they’ll be.
- Let the blondies cool completely before removing them from the pan! I know it’s hard to wait when that delicious smell is filling the kitchen, but trust me! They continue to firm up as they cool so if you try to cut into them too early you could end up with a gooey mess. Have another snack in the meantime, I won’t judge 😉
- If you want that classic crinkle top, you really have to make sure to whisk the melted butter, sugar, and egg very well. I takes some arm strength, but keep whisking until the mixture looks almost paste-like and starts to pull away from the sides of the bowl.
- Don’t over-mix the dry ingredients! Stop mixing as soon as the flour disappears.
Storage Instructions
Nutella blondies should be stored at room temperature for 3-5 days in an airtight container, or you can leave them un-sliced in the pan, cover in plastic wrap or a reusable wrap. You can also refrigerate them to make them last a few days longer. They will firm up a bit in the fridge.
More Recipes You’ll Love


If you make this recipe, let me know how it went in the comments below, I’d love to hear from you! You can also tag me on Instagram or Facebook so I can check it out!
Baking FAQ
These are the topics I’m asked about most frequently:
You can get these answers and more in my frequently asked questions post!

Nutella Blondies
Ingredients
- ¾ cup (158 g) butter (regular or vegan), melted
- ¾ cup (150 g) light brown sugar
- ¾ cup (150 g) granulated sugar
- 2 eggs
- 1½ tsp vanilla extract
- 1½ cup (188 g) all-purpose flour
- ½ tsp salt
- ¾ cup chocolate hazelnut spread, (regular Nutella or dairy free, I use this vegan chocolate hazelnut spread )
Instructions
- Cut a piece of parchment paper so that it fits into your an 8×8 square baking pan, leaving some hanging over the edges. Place it in the pan and fold the parchment that is overhanging to form a crease in the shape of the square pan.
- Remove the parchment from the pan and place it on a flat surface like a cookie sheet, cutting board, or cooling rack. Spread the chocolate hazelnut spread onto the parchment in the shape of the square pan, so that it will fit into the baking pan in one piece. Freeze for around 20 minutes, then begin making the blondies.
- Preheat the oven to 350°F and line with parchment paper. Leave parchment paper hanging over the sides of the pan so that you can easily remove the blondies from the pan later.
- Melt the butter in the microwave or in a small pan over the stove. Transfer the melted butter to a medium sized bowl.
- Add in both the sugars and use a whisk to whisk the butter and sugars together. Keep whisking until the mixture resembles a paste that pulls away cleanly from the side of the bowl when you mix it. This helps create the crinkle top!
- Add the eggs and vanilla and mix again.
- Pour the flour and salt into the bowl and mix with the whisk until just combined (do not over mix!).
- Pour half of the batter into the lined baking pan, then take the chocolate hazelnut spread out of the freezer, peel it from the parchment (it should come off easily and in one piece*), and place the whole piece on top of the blondie batter.
- Pour the remaining blondie batter on top of the cookie butter into the pan and smooth into an even layer.
- Bake for 30-45 minutes*. Begin checking the blondies at 30 minutes by inserting a toothpick in the middle. The top of the blondies should be crinkly and the toothpick should not be covered in batter. The blondies are ready when the toothpick has a few wet crumbs.
- Let the blondies cool completely before slicing. Enjoy!
Equipment

Notes
The calorie information provided for this recipe is an estimate. The accuracy of the calories listed is not guaranteed.
A message from my granddaughters as a holiday gift to anyone making this recipe: Swap out 1 cup of melted semi-sweet chocolate for the Nutella (but treat it the same way.) Add 1 tsp. peppermint extract and 1 1/2 cups Andes peppermint crunch (not quite the whole bag) to the batter. Just before baking, sprinkle on top some more peppermint crunch and a handful of chocolate chips. Sprinkle a hint of Maldon salt flakes on top right when it comes out in 25 to 30 minutes. Like peppermint fudge, but 83 times better. My granddaughters have named their invention (excuse me, Gabby! their *adaption*!) Polar Express Blondies. Happy Holidays, everyone!
These blondies continue to be the favorite dessert at any event to which I bring them. I add a layer of about 1/2 cup toasted and crack hazelnuts sprinkled on the batter before laying on the Nutella layer. So good. Recently, because if some is good, more is better, I asked an AI deal called Perplexity to reconfigure the ingredient amounts to worl in a 9 by 9 inch pan. I tried out their adjusted recipe and it worked like a charm. I’m glad to provide their scaled ingredient amounts if anyone would like them.
Thanks John! So glad to hear these are a favorite ✨
Yes please John I would love the 9 c 9 version . Tk u
Here is the 9×9 pan version of the ingredient list. (One small addition: I sprinkle some toasted and chopped hazelnuts on the first blondie layer before covering with the frozen Nutella square.) The rest of the process is, of course, exactly as proscribed by the genius Gabby. Enjoy!
Nutella Hazelnut Blondie Bars – Perplexed to 9 x 9
Ingredients:
• 216g (15 ¼ T.) unsalted butter, cut into 1 T. chunks, microwave-melted in a medium glass bowl
• 203g (about 1 C.) brown sugar
• 189g (about 1 C.) granulated sugar
• 2 eggs plus 1 extra yolk, room temp.
• 2 tsp. vanilla extract
• 211g (about 1 ½ C.) AP flour
• 1 ¼ tsp. DCK or 1/2 tsp. table salt
• 1 C. Nutella
• 1/2 C. hazelnuts, peeled and toasted, then roughly chopped or cracked
A family at whose home I eat Sunday dinners quite frequently are now blatant about the conditions for my invitation: bring Gabby’s Nutella Blondies. (Nutella’s stock has to have risen with the amount I now purchase!) And I have a question related to the technique rather than the ingredients. Do you suppose I could mash up some banana, make a frozen square as you do with the Nutella, and make a batch of these blondies with that as the surprise in the middle? I haven’t the experience to know if it would work and would hate to waste a good batch of Gabby Blondie finding out my fantasy is hopeless! Thanks for the help.
Hi John! Glad to hear these blondies are a hit! I haven’t tested them this way and because banana has such a different consistency than nutella and other spreads, I wouldn’t recommend it as it could just become mush in the oven
I am not an avid baker, I usually bake when the mood hits and rarely is it ever the same thing but goodness did I really enjoy these. I’ve already made them twice in a month. Second time I added some lemon zest and it made taste even better.
Hi Lizzy! So happy to hear you baked these twice – love the idea of lemon zest!
So yummy! This was a hit at my work holiday party today! Thanks so much 🙂
Hi Erin! So glad to hear these were a hit! Thank you for your review 🤗
Yummy! We live at 10,000 feet so I baked at 365° for 35 minutes and added 1/4 cup extra flour and 1/4 cup of water and they turned out great!
I’m so glad to hear that they were a hit! 🙂
This recipe is absolute genius! Every single thing about it, from the excellent, easy directions to the most amazing blondie I’ve ever eaten, has made me such a fan of Cookie Dough Diaries. Thank you, Gabby!
Hi John! This comment made my day! Thanks so much for the kind words and I’m so glad you loved the blondies 🙂
Tried this recipe tonight and it worked out great! I made them with a GF all-purpose flour and it turned out perfectly. Baked for probably 40-43 minutes total and the bottom is nice and chewy and tastes like toffee and the rest of it is so squishy and buttery and friggin delicious! I definitely have to use parchment next time as they are VERY stuck to the pan even with greasing! Anyways, my first time on this site and these were delish so thanks for the reliable recipe! Will definitely be making V.2 soon
Hi Sarah! Yay I am so happy that you loved the blondies and that they worked out with the GF flour! I definitely recommend using parchment paper for any brownies or blondies so hopefully that helps next time 😀
So good! My family gave them a 10 out of 10
Hi Andrea! Yay I’m so happy to hear that the blondies were a hit! Thanks so much for taking the time to leave a review 🙂
Hi Gabby, I am getting ready to make these and saw in the expert tips it says to let cool completely in the oven, is that correct or should it state in the pan? Thanks, Carl
Hi Carl! Ooops! That’s a typo. You can remove them from the oven, but let them cool completely in the pan before slicing. Enjoy!
Baked for 37 minutes, the top half above the Nutella didn’t bake except the crust, add 10 minutes… same… add 10 more… same… 10 more minutes still raw! What did I do wrong? Bottom cooked, Nutella is well Nutella and the top crust was perfect! But that section between Nutella and top crust, lawd! Any tips? Ain’t going to lie, I ate a raw one. They were still delicious! But I’d really like to be able to have a solid brownie!
Hi Kerri, this sounds like an issue with your oven temperature. I would recommend using an oven thermometre to see what the actual temperature of your oven is (it’s very common for oven temperatures to be a bit off). If you didn’t use an aluminium 8×8 baking pan, that’s another thing I would suggest for next time!
What is 3/4 cup melted butter in grams.
Just want to clarify when putting toothpick into blondie, it should still have few batter on it so it is still gooey when eating?
Would it taste nice as a cakey blondie or is it best as gooey?
Hi Amina, you’ll need 158 grams of butter for the blondies. The toothpick should still have a few wet crumbs on it, but it shouldn’t be covered in wet batter. The cakey vs gooey is up to your personal preference. I personally like a gooey blondie and that’s how this recipe was developed to turn out! Enjoy!
What can I use instead of eggs? A flax egg, apple sauce or Aquafaba?
Hi Robin! Substituting for eggs in blondies can be tough. I think the best alternative would be to try to use 2 flax eggs instead. I haven’t tested this recipe myself without eggs, so I can’t say for sure how they will turn out! If you try it I’d love to hear how it goes ? Good luck!
If I needed a larger batch, could i do this in a 9×13 and just double the recipe?
Hi Valerie! Absolutely! They might just be a little bit thicker which isn’t a bad thing 🙂 We’d love to hear how it goes!
I just baked these with my daughter and they were so easy and delicious! My whole family loved them!
Hi Jillian! Yay! I’m so happy to hear that the blondies were a hit! Thanks so much for taking the time to come back and leave a review 🙂
These were beyond delicious and came together so quickly! My five year old is my favorite sous chef and she gave these 2 thumbs up!
Hi Alicia! Yay! I’m so happy to hear that you and your little sous chef both loved the blondies 🙂 Thanks so much for taking the time to come back and leave a review!
I just made these and they were wonderful. Will have to rethink my strategy with the Nutella though. I was under a time constraint and knew pretty quickly the Nutella wouldn’t be firm enough to peel. I ended up scraping the half-firm Nutella off and plopping it on the batter. Too stiff to spread, so put it in the hot oven to soften. Next time I will plan ahead better so the Nutella will get harder-haha. Thanks for the recipe!
Hi Tina! I am so happy to hear that you loved the blondies and that they were still delicious without the nutella being layered. Thanks so much for the review and I’m sure next time they’ll be perfect 🙂
I made these for my Daughter, because I’m not a fan of Nutella I thought I wouldn’t like them. They were so good I will make them again for sure !
Hi Lynn! Yay, I am so happy to hear that! Thank you so much for trying out the recipe and for taking the time to come back and leave a review! 😀
BEST DESSERT EVER
Brought to a birthday party and they were a hit, I was told by a guest that they should be served in a high end cafe! Will definitely make again. Perfect gooey blondies
Thanks Gabby! x
Hi Tait! What an awesome compliment – I’m so happy to hear that they were a hit 🙂 Thank you for trying the recipe and taking the time to leave a review!
Delicious!!
Thank you! I’m so happy you loved them!