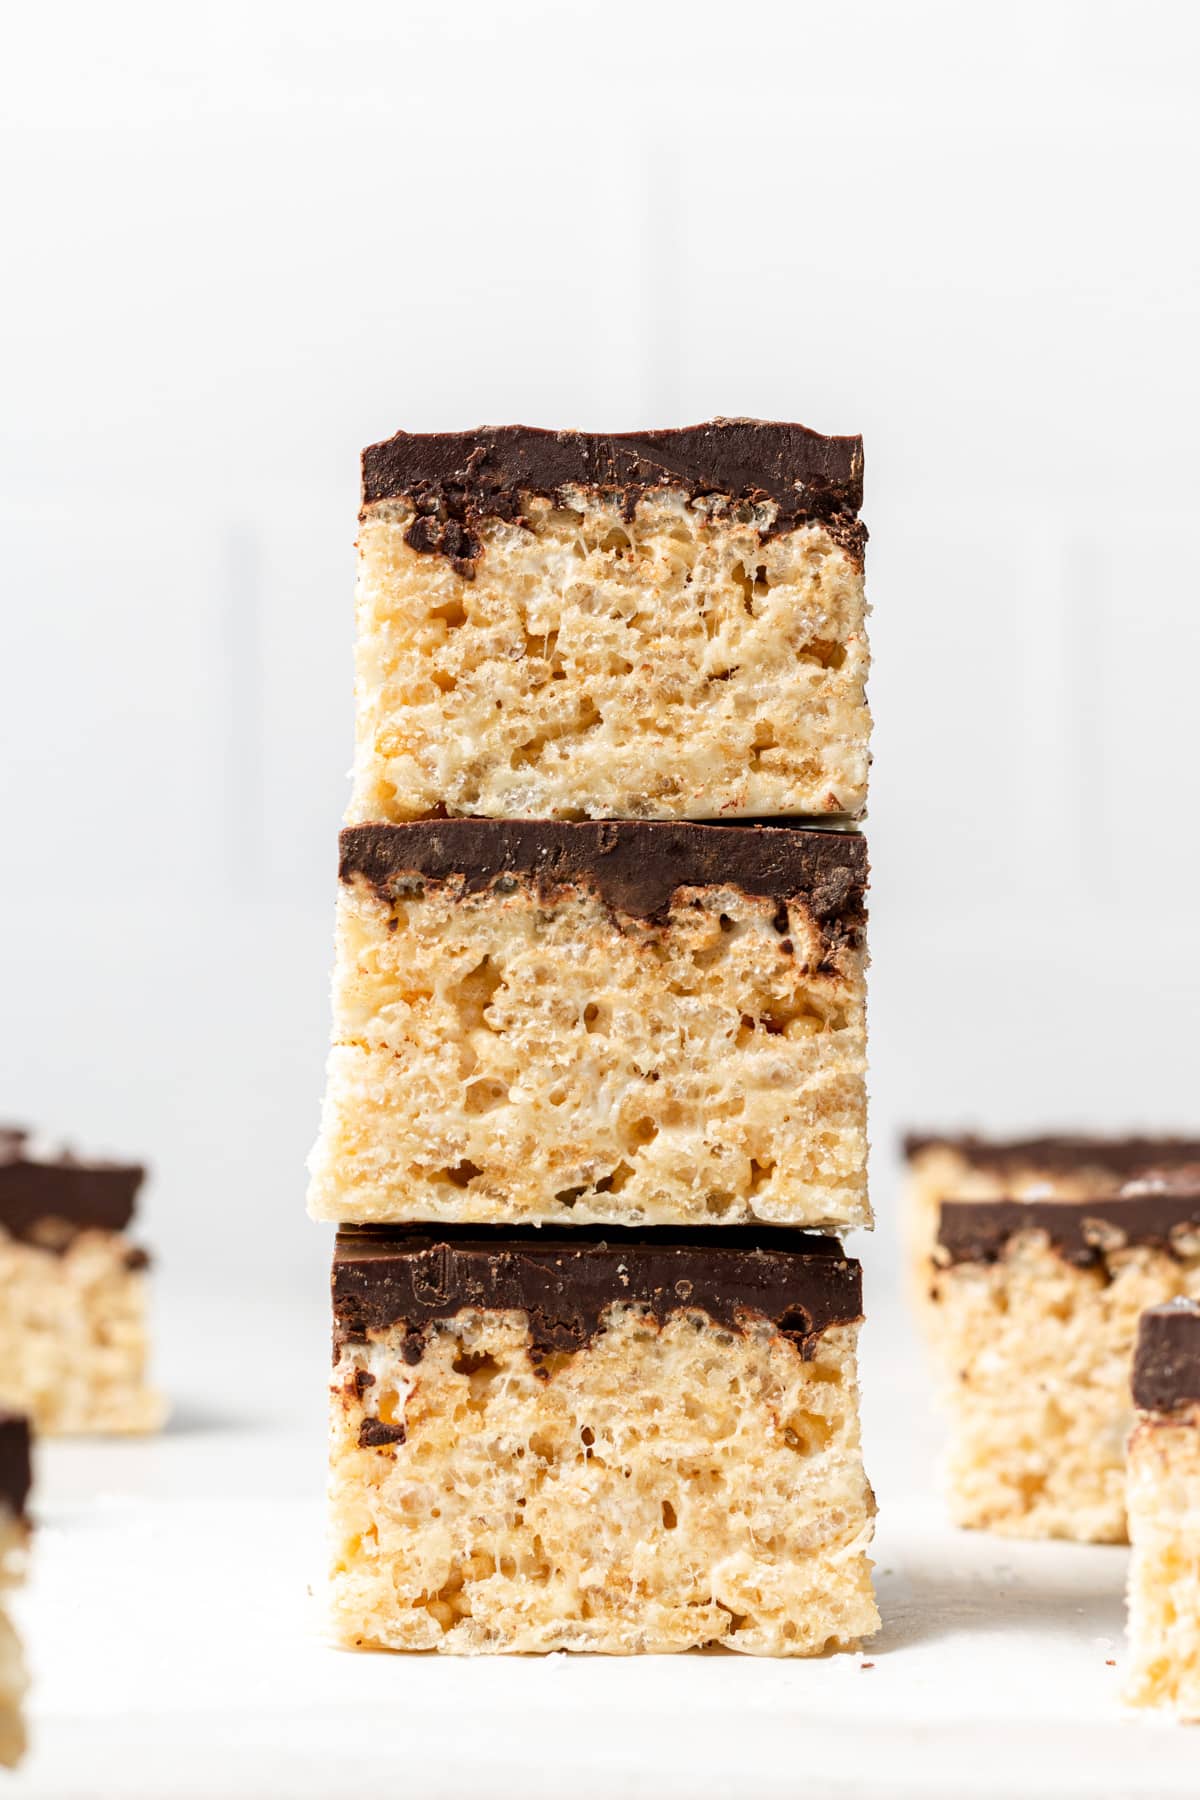
Chocolate Covered Rice Krispie Treats
This post contains affiliate links. Read the full disclosure here.
These chocolate covered rice krispie treats are a delicious spin on everyone’s favorite childhood treat! Made with just 6 simple ingredients, this easy no-bake recipe is a real crowd pleaser.

There is nothing more nostalgic to me than a gooey and chewy rice krispie square! Like my chocolate peanut butter rice krispie treats, these chocolate covered rice krispie treats are extra crunchy and gooey. They’re then covered in a thick layer of rich, velvety chocolate.
This is the perfect no bake recipe that can easily be whipped up in the kitchen when you’re short on time, but the chocolate makes it feel slightly more sophisticated and special.
These are perfect for bake sales, birthdays, or serving a crowd (you can easily double the recipe!)
Featured Reader Review
“Such a bake sale hack! Whipped these up last minute- bless!”
Jill
After all, is there anything that doesn’t taste better covered in chocolate?! If you want even more chocolate, try my gooey chocolate rice krispie treats!
Ingredient Notes

- Butter: you can use regular butter or dairy free butter here if you’re dairy free, I’ve tested this recipe both ways. For the chocolate coating, you can swap the small amount of butter for oil if needed. You’ll want to use a neutral oil or refined coconut oil.
- Mini Marshmallows: mini marshmallows will melt faster than regular marshmallows, and I like to stir some extra ones in at the end so that you get bites of whole marshmallow mixed into the rice krispie squares! But if you don’t have any you can use regular sized ones and even chop them up before adding to the mixture.
How To Make These Rice Krispie Treats
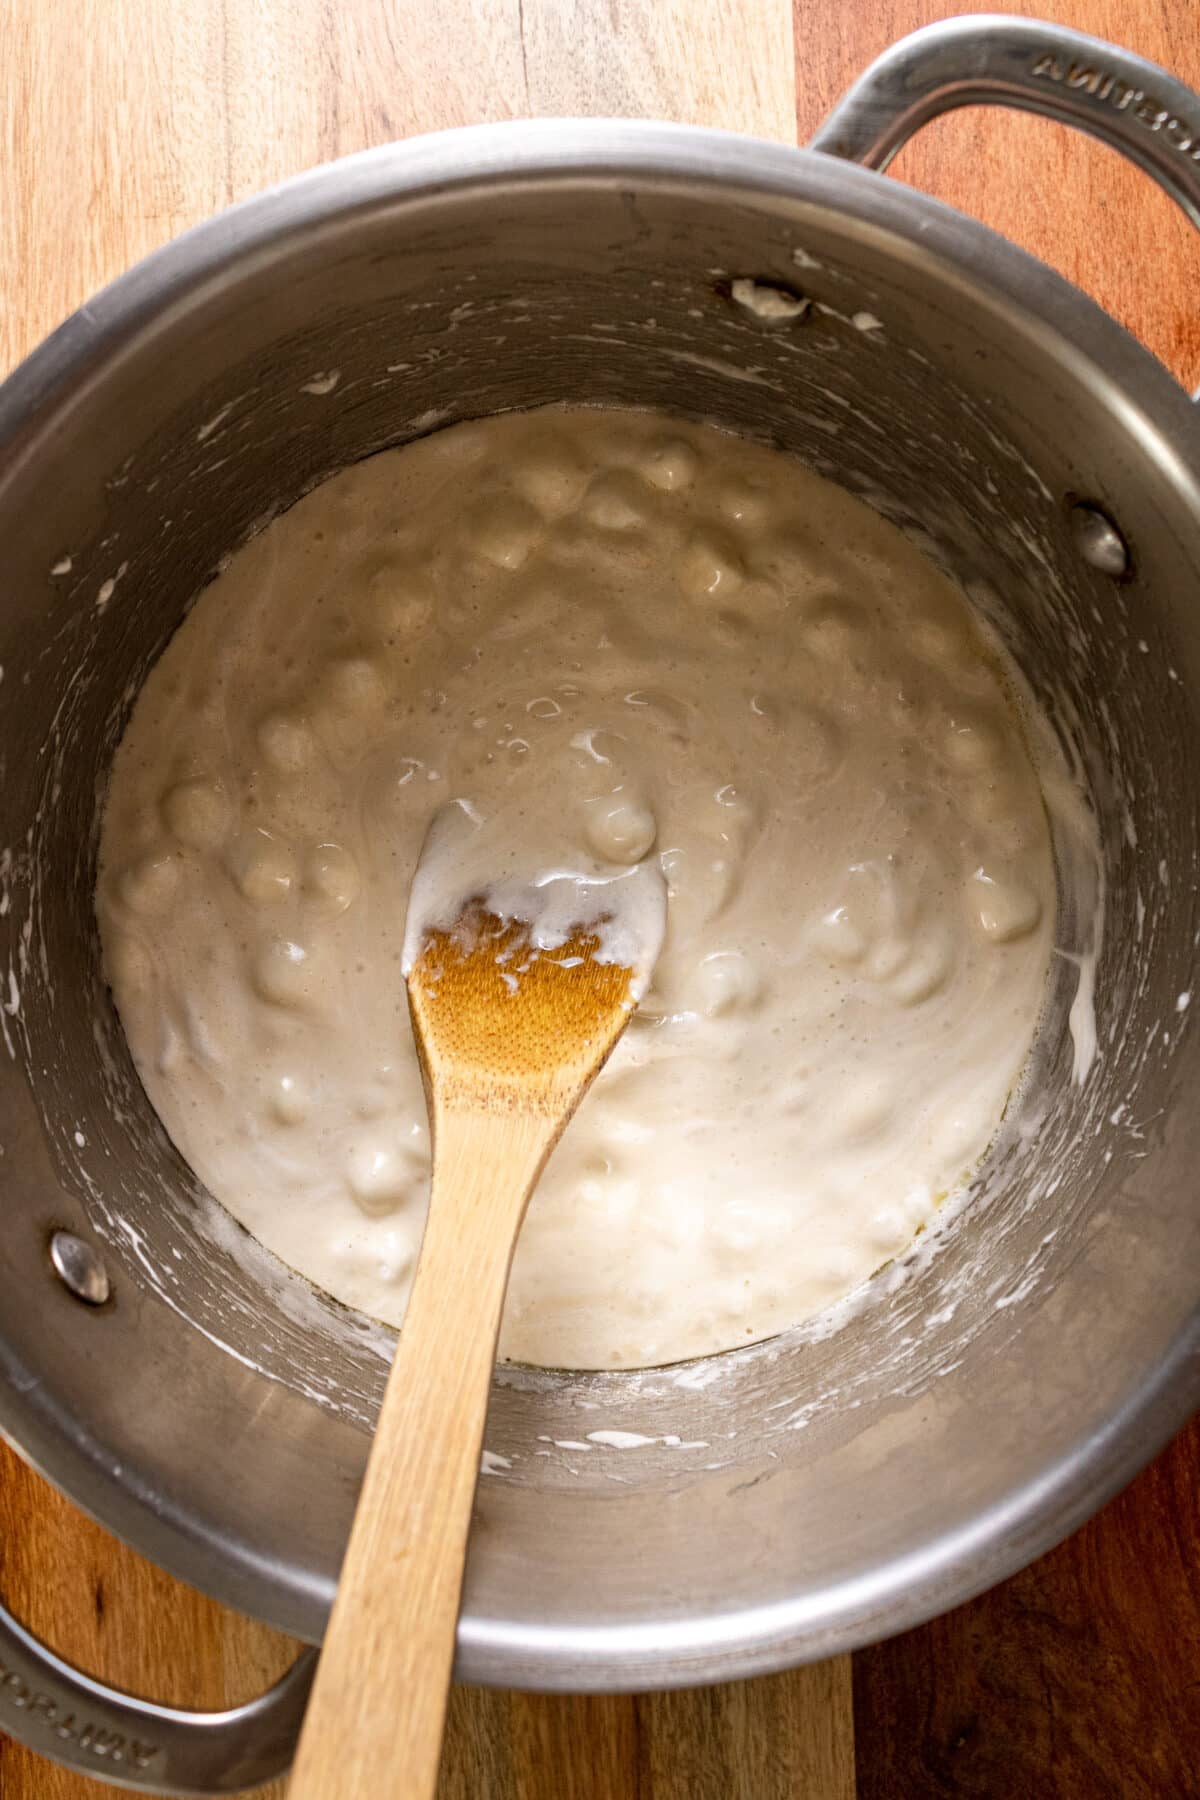
Melt butter and marshmallows then add vanilla!

Stir in rice krispies and extra marshmallows!
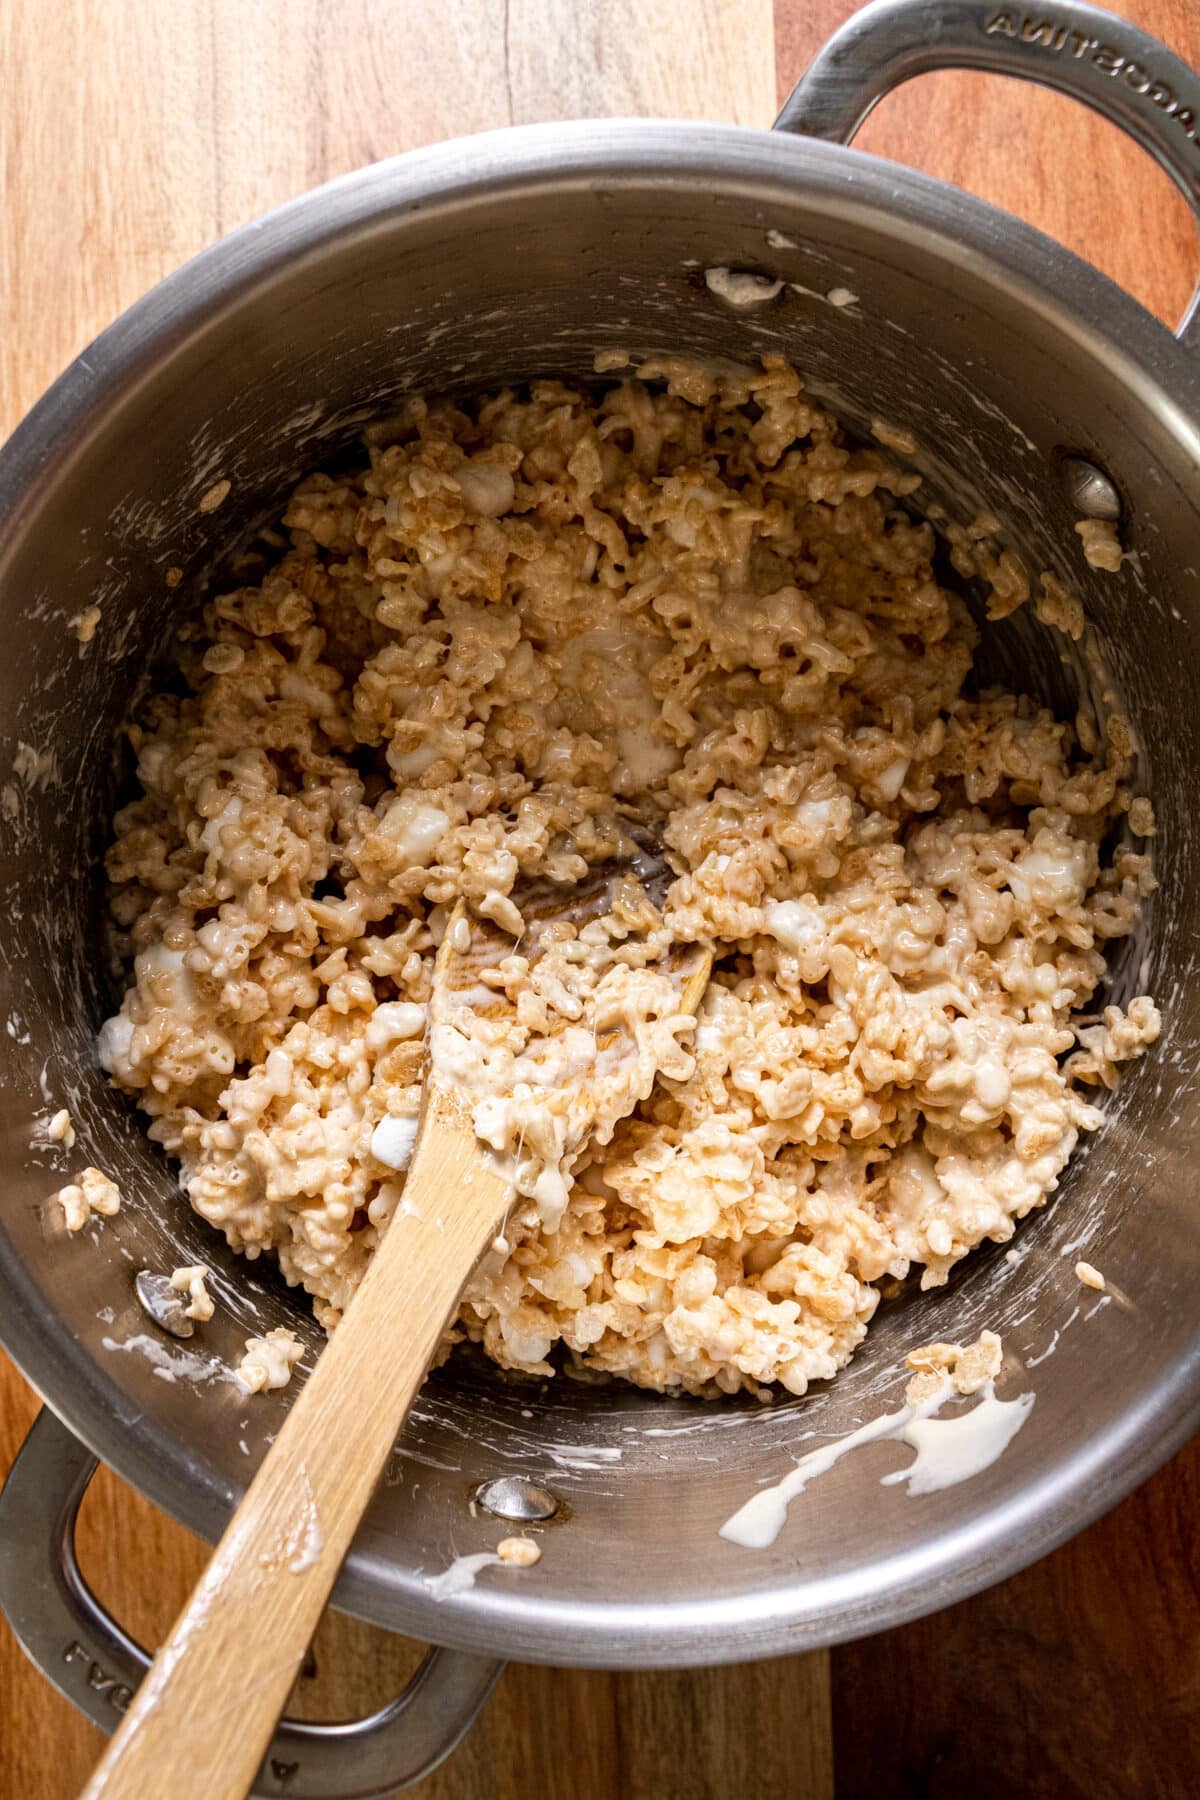
In should look like this!
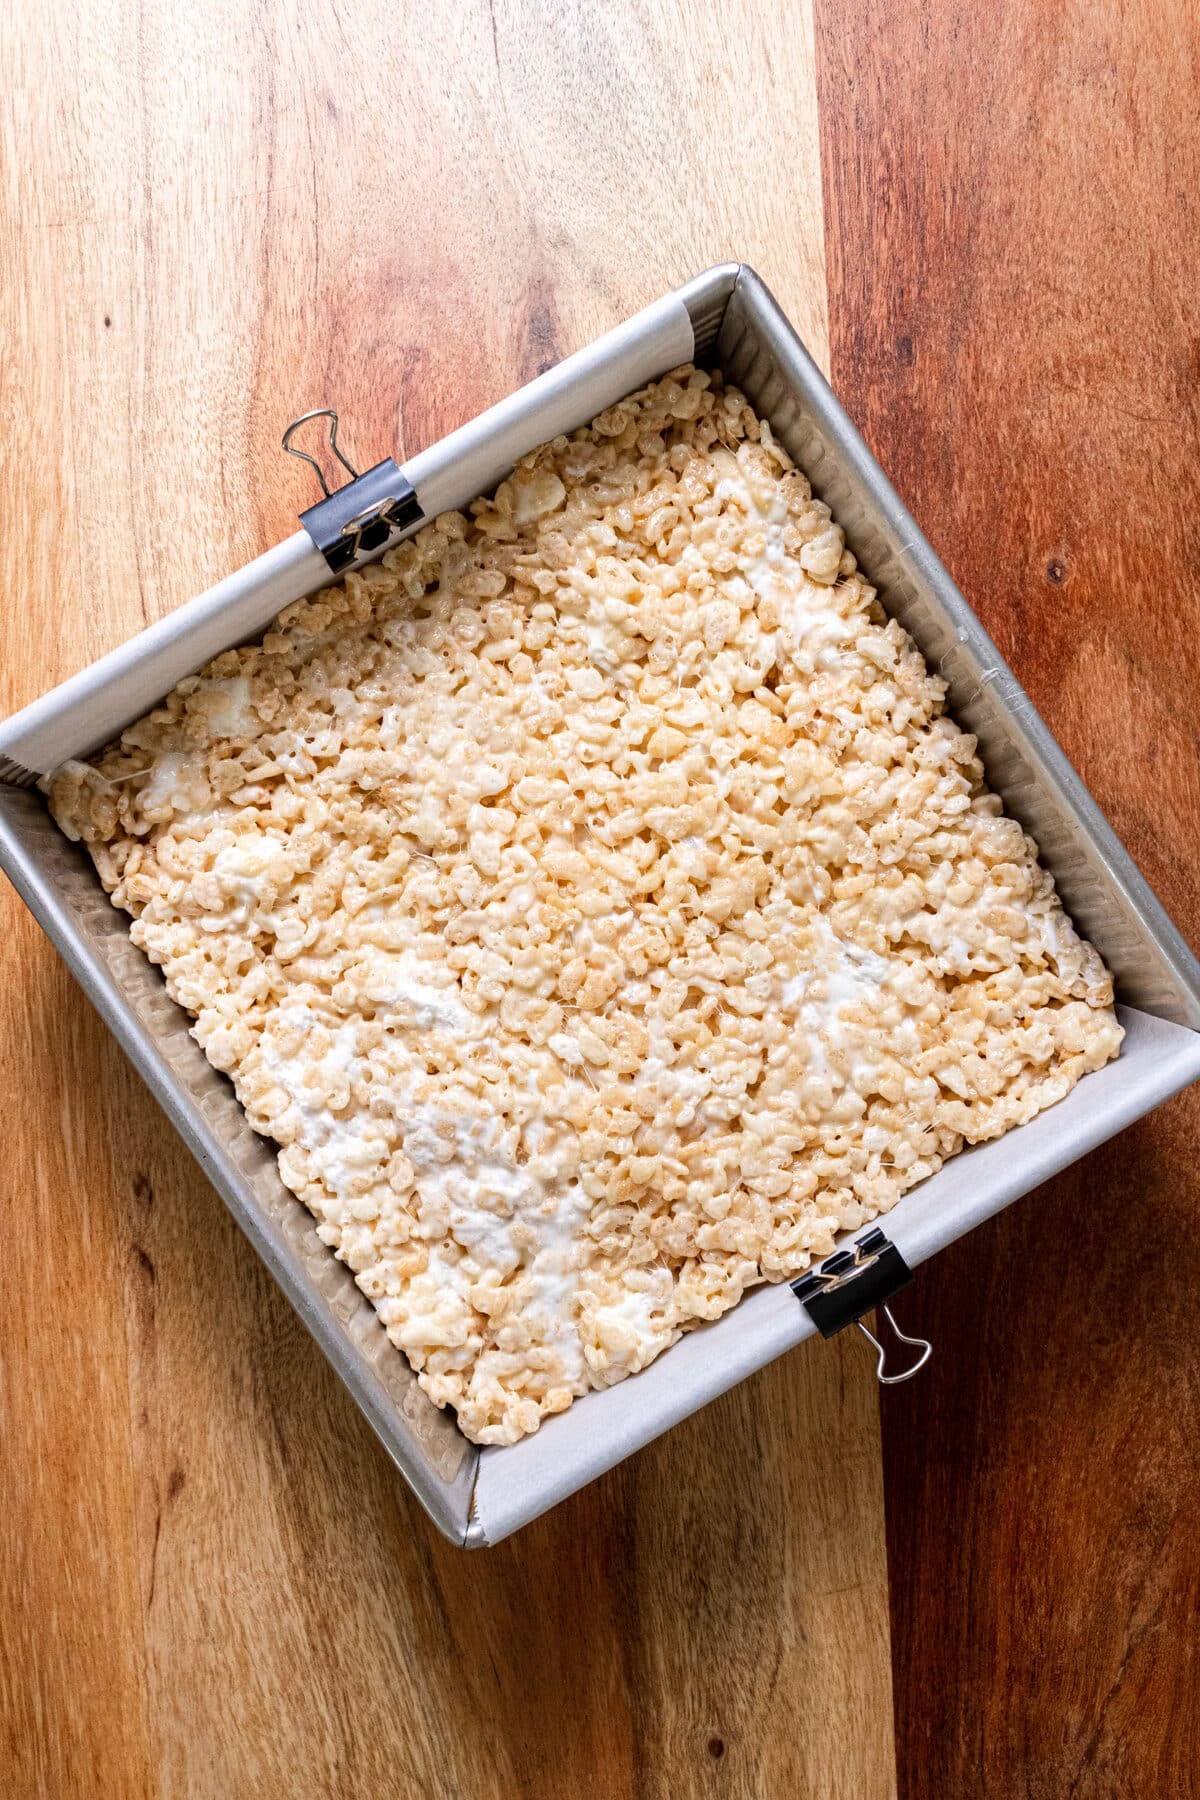
Transfer rice krispie treats to your baking pan.
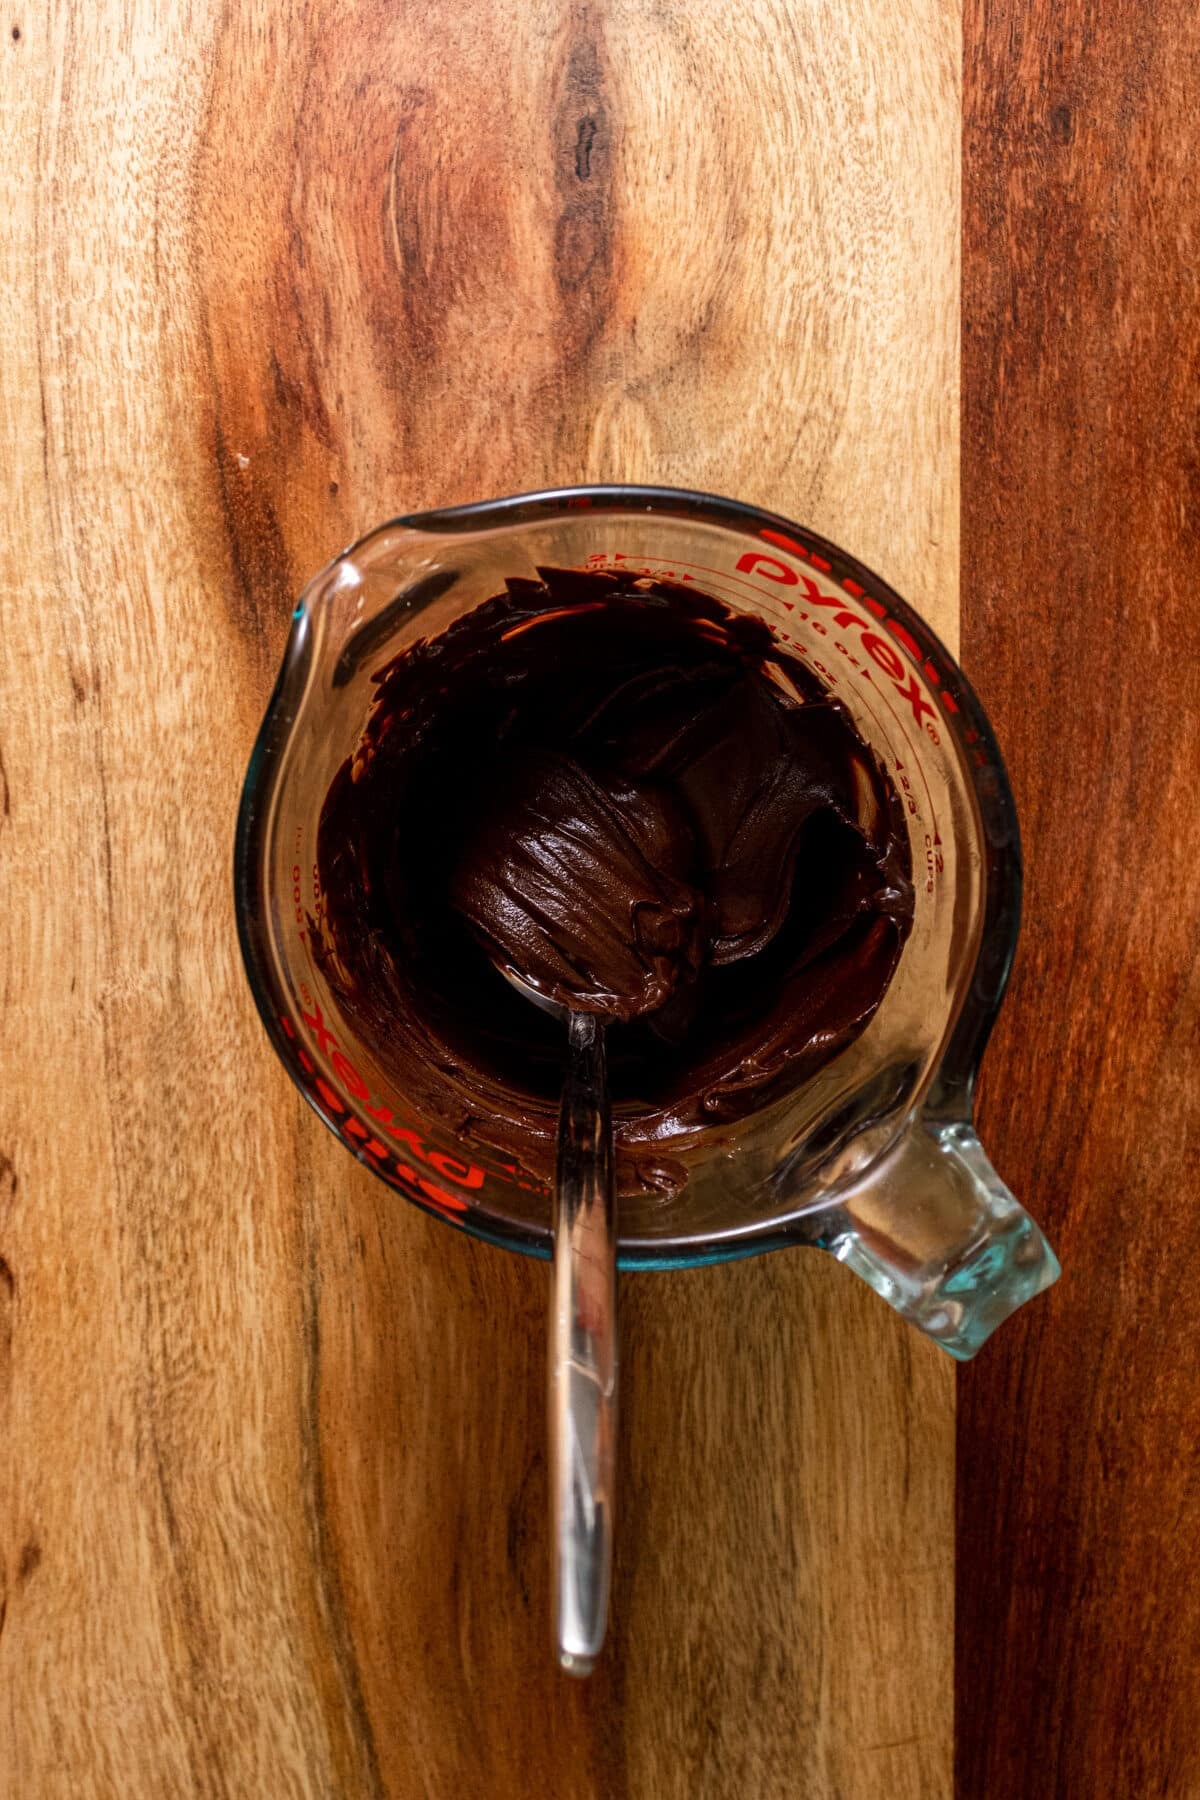
Melt butter and chocolate.
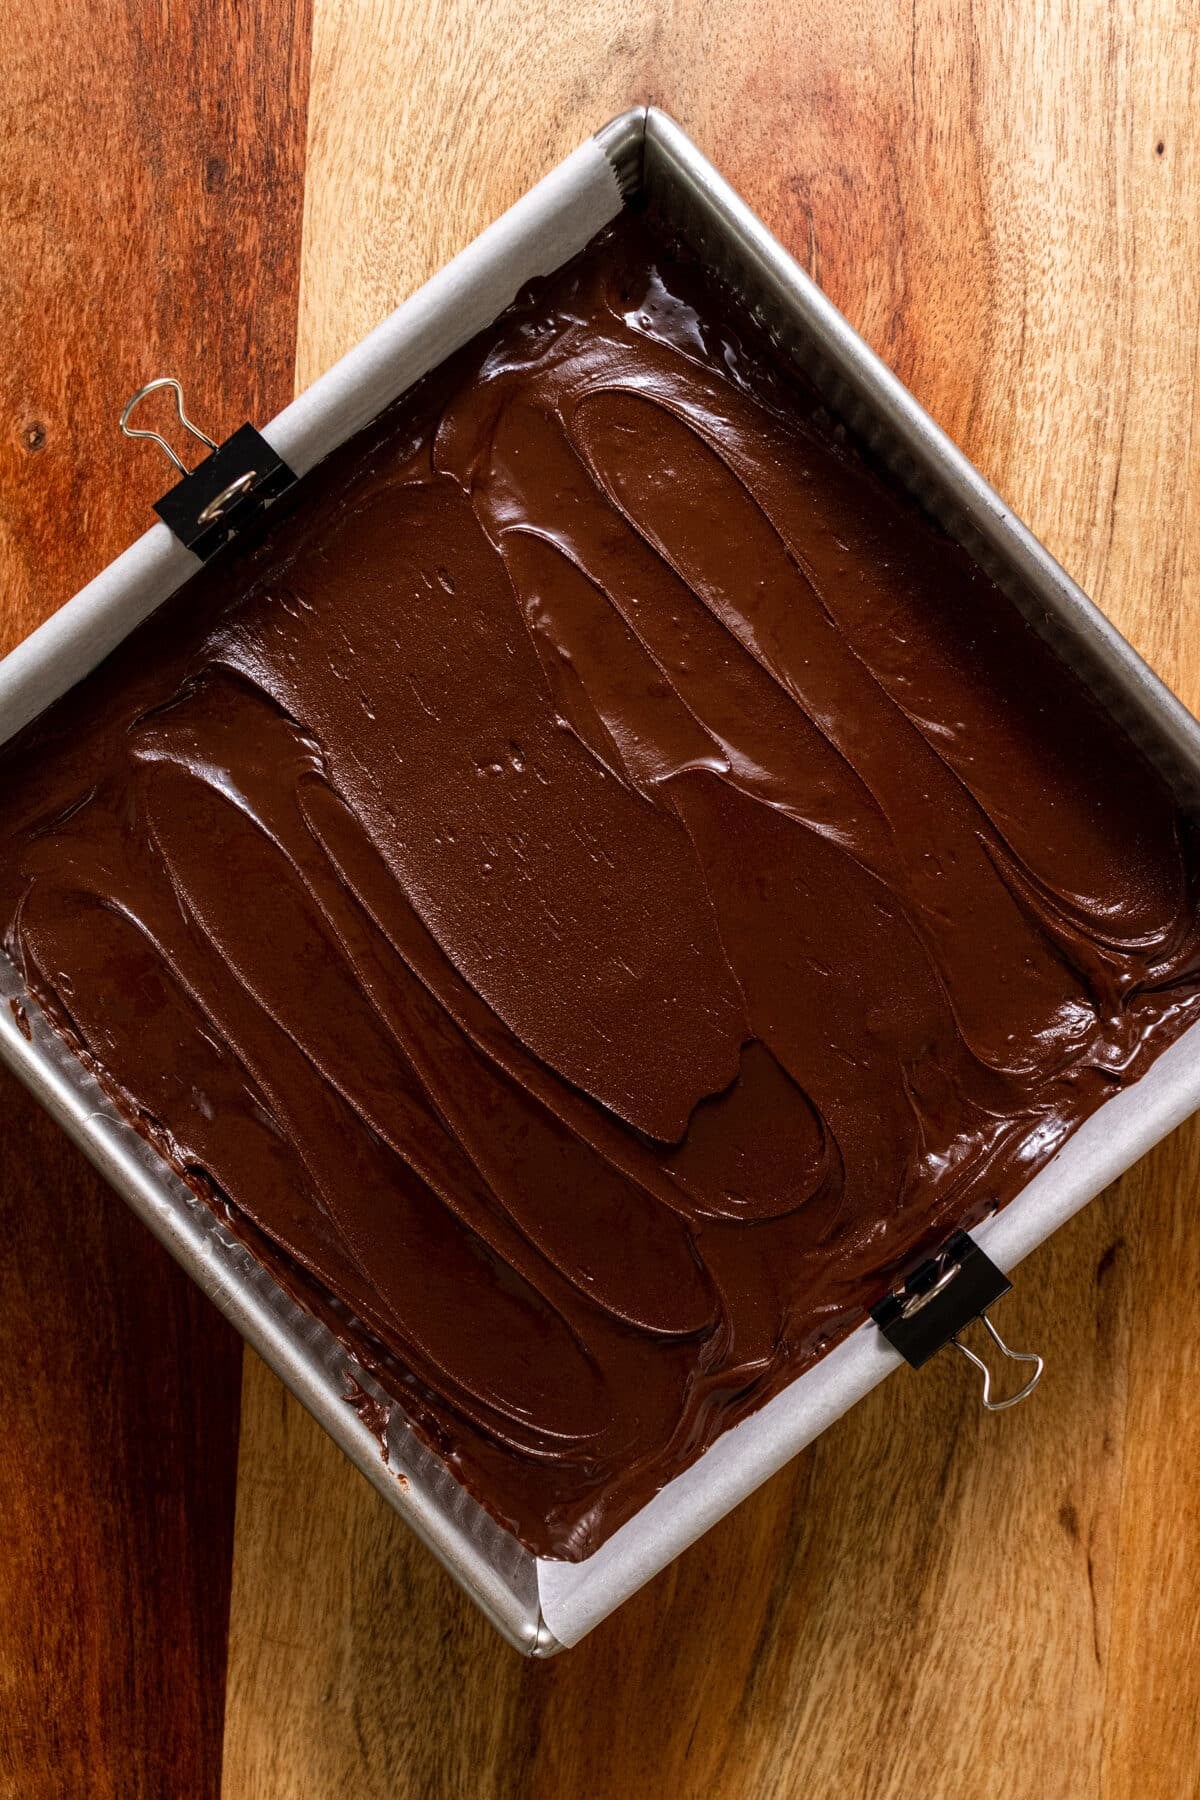
Spread it over the treats then let it set!
Recipe Developer Tips
- Don’t press down too hard on the rice krispie treats once you pour it into the pan. If you do that they’ll get hard and dense.
- If you’re making this in a 9×9 pan instead of an 8×8, just note that the bars will be slightly thinner!
- If using regular marshmallows, don’t stir the 1 cup of large marshmallows in whole. Chop them into smaller pieces first.
More Recipes You’ll Love


If you make this recipe, let me know how it went in the comments below, I’d love to hear from you! You can also tag me on Instagram or Facebook so I can check it out!
Baking FAQ
These are the topics I’m asked about most frequently:
You can get these answers and more in my frequently asked questions post!

Chocolate Covered Rice Krispie Treats
Video
Ingredients
- 6 Tablespoons (80 g) butter, (regular or dairy free)
- 7 cups (315 g) mini marshmallows, separated
- 1 teaspoon real vanilla extract
- 5 cups (140 g) Rice Krispies cereal
Chocolate Coating
- 1 cup (200 g) semisweet chocolate chips or chopped chocolate, (or white or milk chocolate, regular or vegan)
- 1½ Tablespoon butter, (regular or dairy free)
- flakey sea salt or sprinkles, for topping, (optional)
Instructions
- Line an 8×8 or 9×9 baking pan with parchment paper.
- In a large pot, melt the butter over medium heat.
- Add 6 cups of marshmallows (leaving one cup to the side!) and stir with the melted butter until the marshmallows have melted. Stir in the vanilla extract.
- Add in the rice krispie cereal and remaining cup of marshmallows. Stir quickly until combined.
- Pour the rice krispie mixture into your lined pan and use a greased spatula or your hands to gently press the mixture down into an even layer.
- In a small microwave safe bowl, melt the butter and chocolate in 20 second increments, stirring after each one, until completely melted.
- Pour the melted chocolate over the cereal and use an offset spatula to spread into an even layer. Sprinkle over sea salt or sprinkles! Let the chocolate covered rice krispie treats set completely before removing and slicing.
Equipment

Notes
The calorie information provided for this recipe is an estimate. The accuracy of the calories listed is not guaranteed.
Dreamy. Creamy. Delicious. I doubled the chocolate – for an 8×8 pan. lol Perhaps a bit too much choc – but I’m not angry. Thanks for this recipe 😊
Thanks Lana! Glad you enjoyed!
Yummy!!
Perfect. Used a 9×13 for more surface area and thinner treats. 1 cup of chocolate + 2 tbls butter and only covered half so the non-chocolate folks had no excuse. (Noticed even though they complained . . . There were quite a few “excursions” from plain to chocolate). Excellent.
Tip – the large metal (pasta-boiling) pan was perfect for melting and mixing; and if you put water in it afterwards and heat it up, it cleans in a jiffy.
Such a bake sale hack! Whipped these up last minute- bless!
Thanks for your review Jill 🩵
If you put them in the refrigerator so the chocolate will cool faster, won’t it cause the treats to harden?
Hi Kimm! You’re only putting these in the fridge briefly to help speed up the chocolate cooling process so the treats shouldn’t harden.
So yummy and easy to make!
I’m so happy you loved them so much Linda!