Dairy Free Brownies
This post contains affiliate links. Read the full disclosure here.
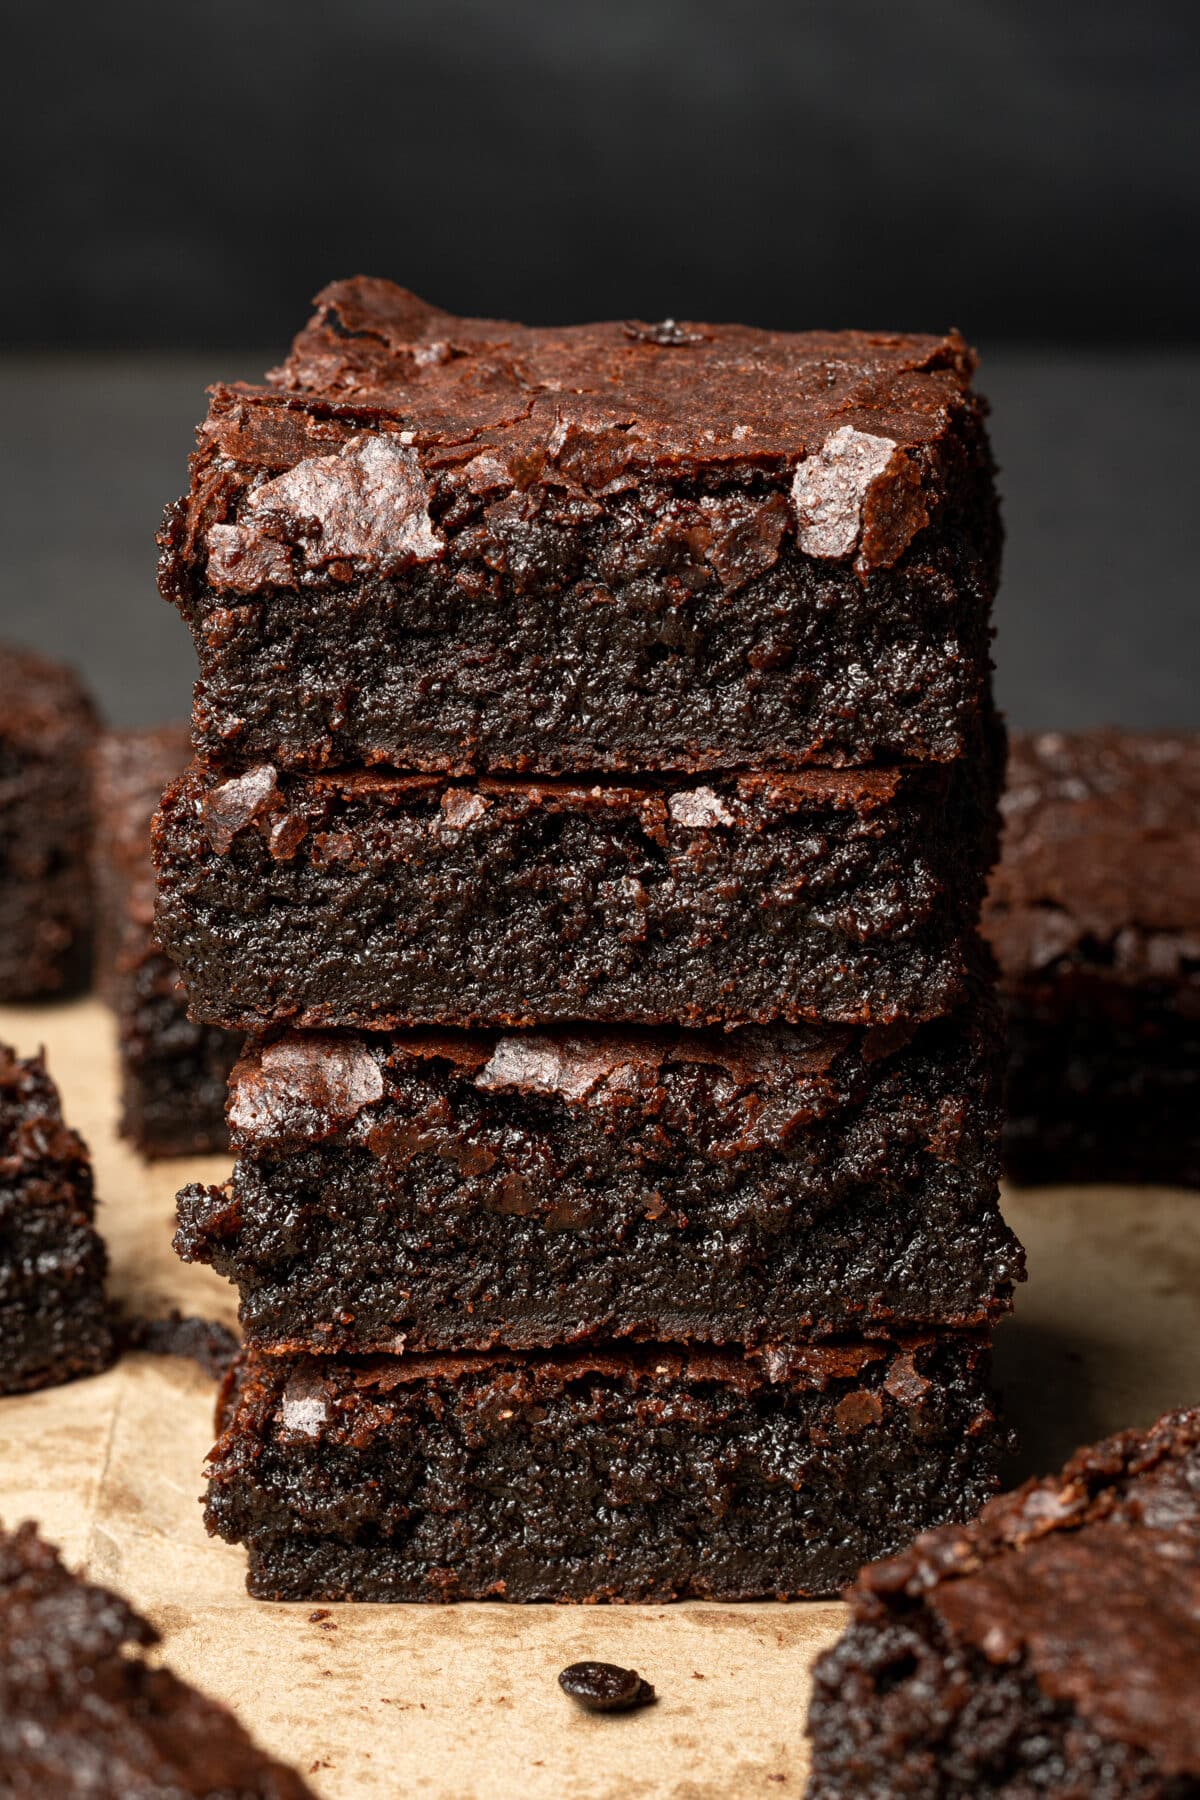
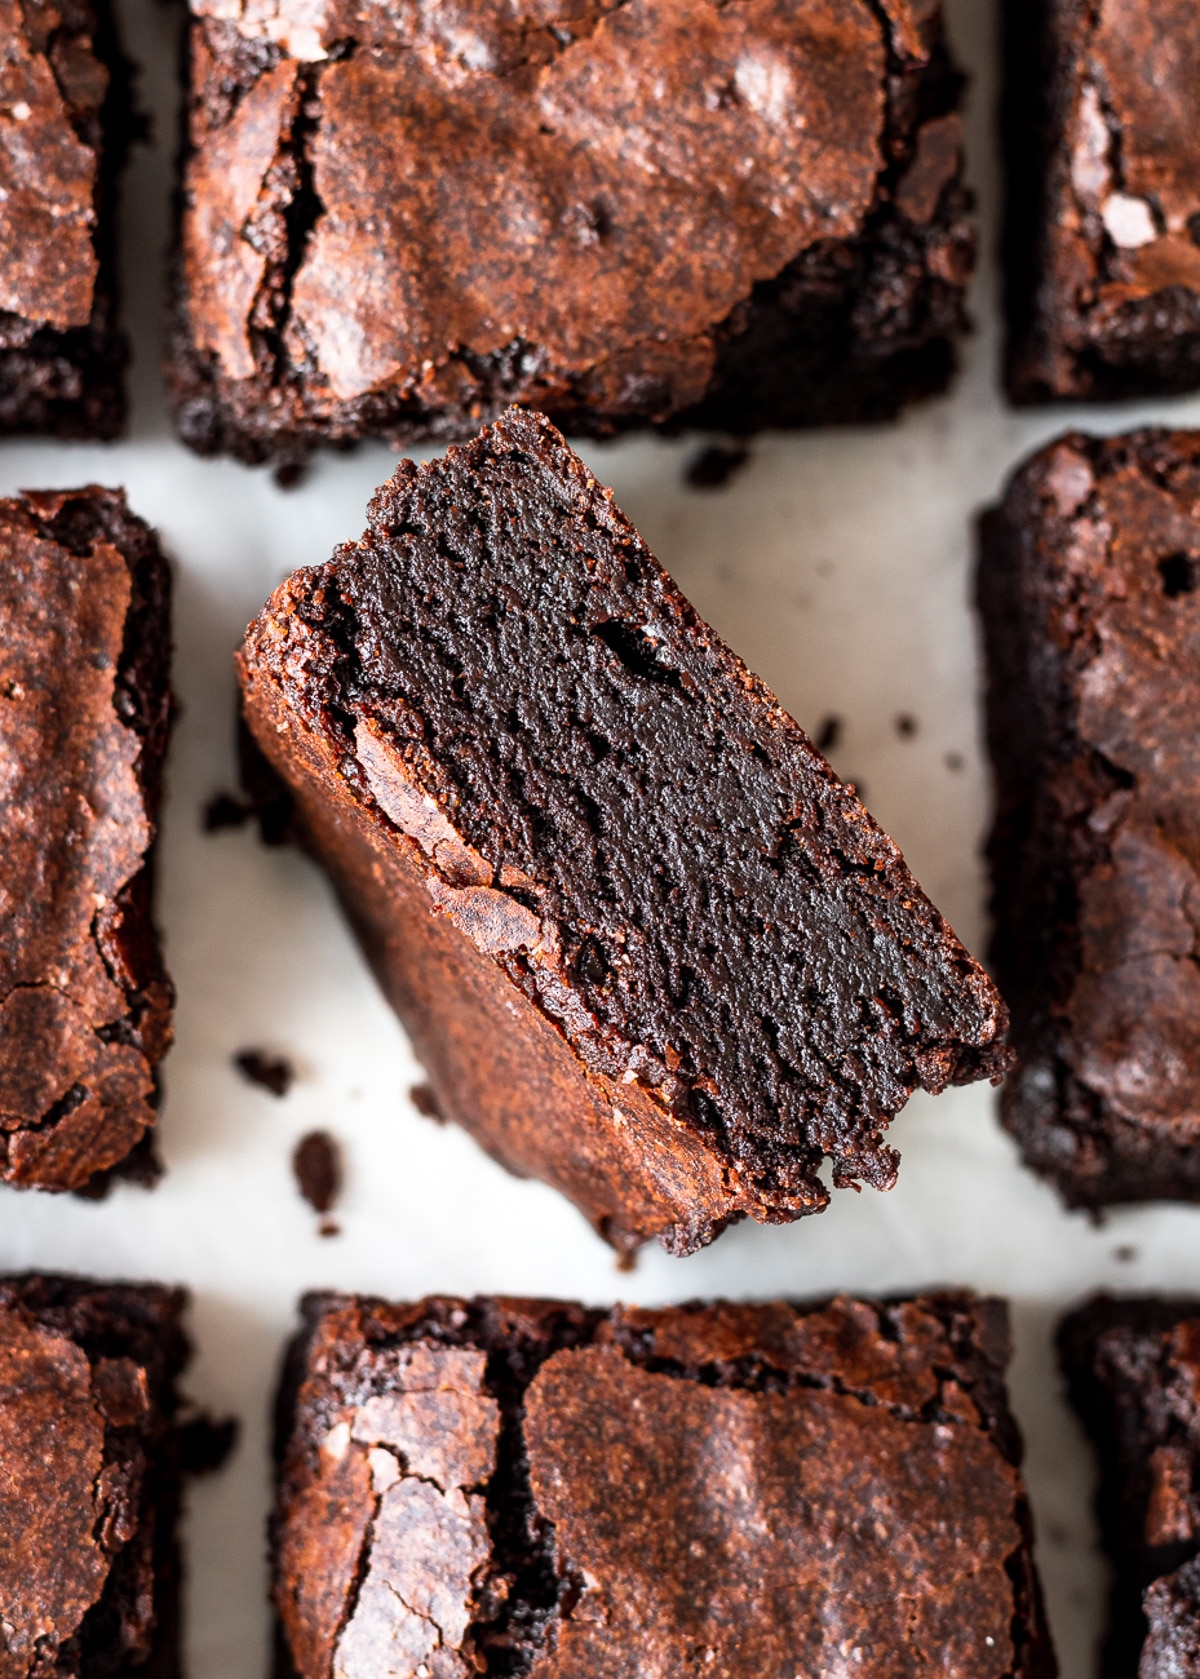
These are the BEST dairy free brownies ever! They’re so easy to make, super fudgy with the perfect crinkle top just like bakery brownies! They’re made entirely with cocoa powder (no melted chocolate) and all you need are 8 ingredients and one bowl!
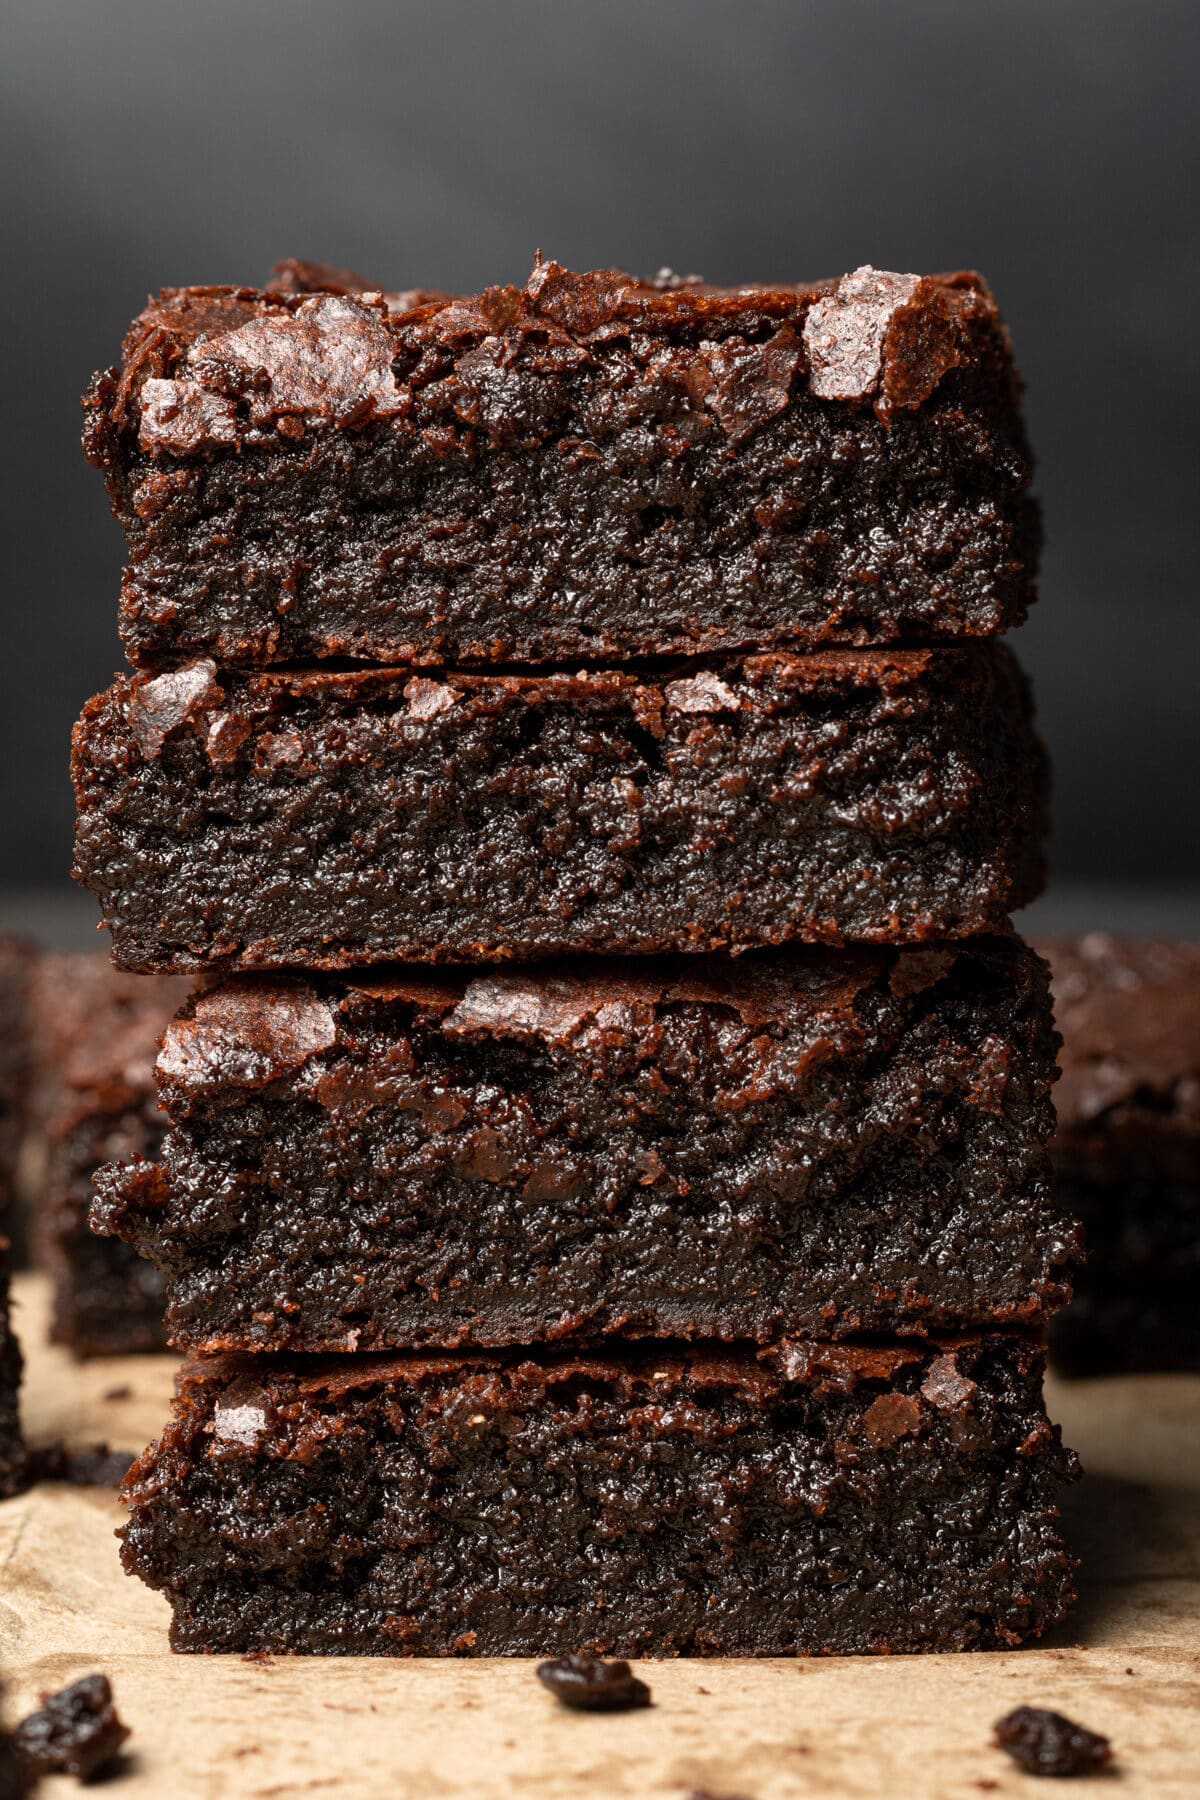
I promise you I’m not exaggerating when I say a pan of these dairy free brownies does not last a full 24 hours in my house. That being said, they stay gooey and fudgy for days after they’re baked!
Featured Reader Review
“Best recipe for the fudgiest brownies ever!! Baked it for my friends and they absolutely loved it. I stored the leftovers in a container and there were good to go for 5+ days.”
Nour
Brownies are my weakness – I make the small batch version of these brownies all the time and sometimes when I feel a bit lazy I’ll just make edible brownie batter.
I am constantly getting requests from my friends and family for these brownies – they’re the best chocolate brownies I’ve ever had (dairy free or not!) and making brownies from scratch has never been easier.
Why You’ll Love These Brownies
- No need to melt chocolate for these brownies Cocoa powder has no extra ingredients, so it delivers a rich, bold chocolate flavour. Using all cocoa powder means you’ll have that velvety, fudgy texture for days after the brownies are baked.
- This recipe is super budget friendly since it only uses 2 eggs (many brownie recipes use 4).
- These fudgy brownies are versatile. They are completely dairy free but dozens of readers have made them with regular butter and they turn out just as delicious!
Ingredient Notes
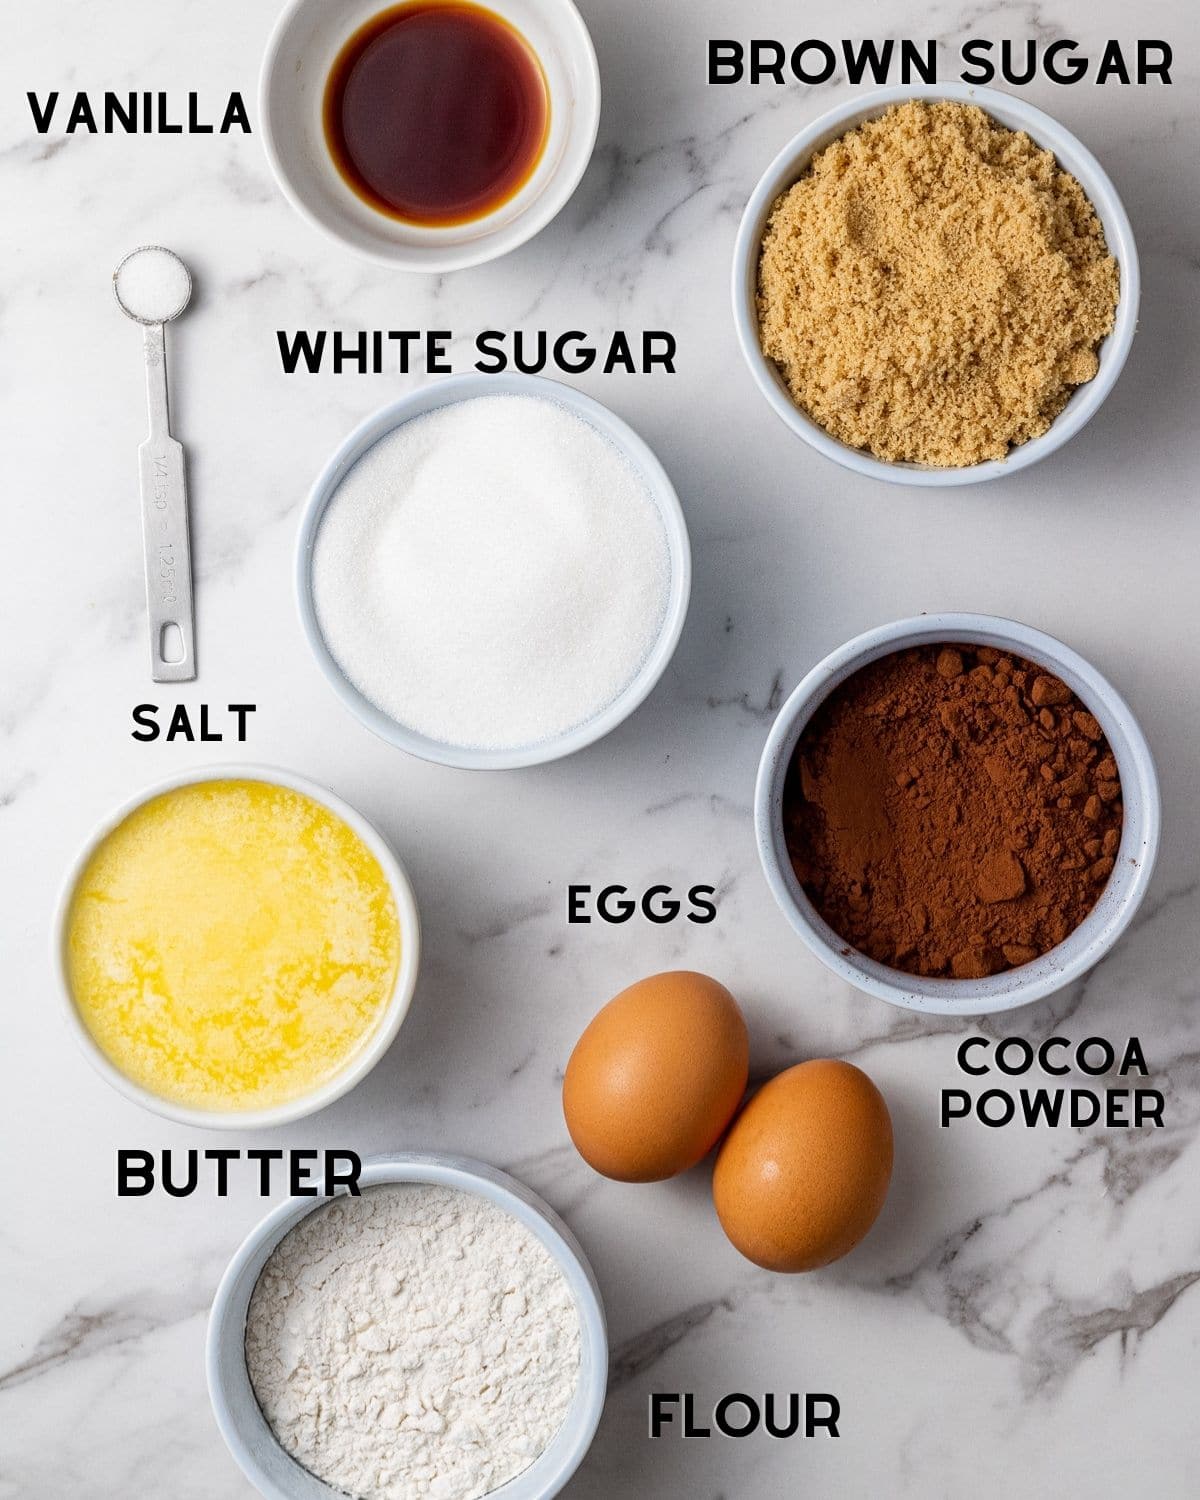
- Butter: you can use regular butter or dairy free butter for this recipe.
- Cocoa powder: In my testing process, I found that unsweetened dutch processed cocoa powder works best because it’s richer and has deeper chocolate flavor. However, you can use natural cocoa powder if that’s what you have on hand.
How To Make These Brownies
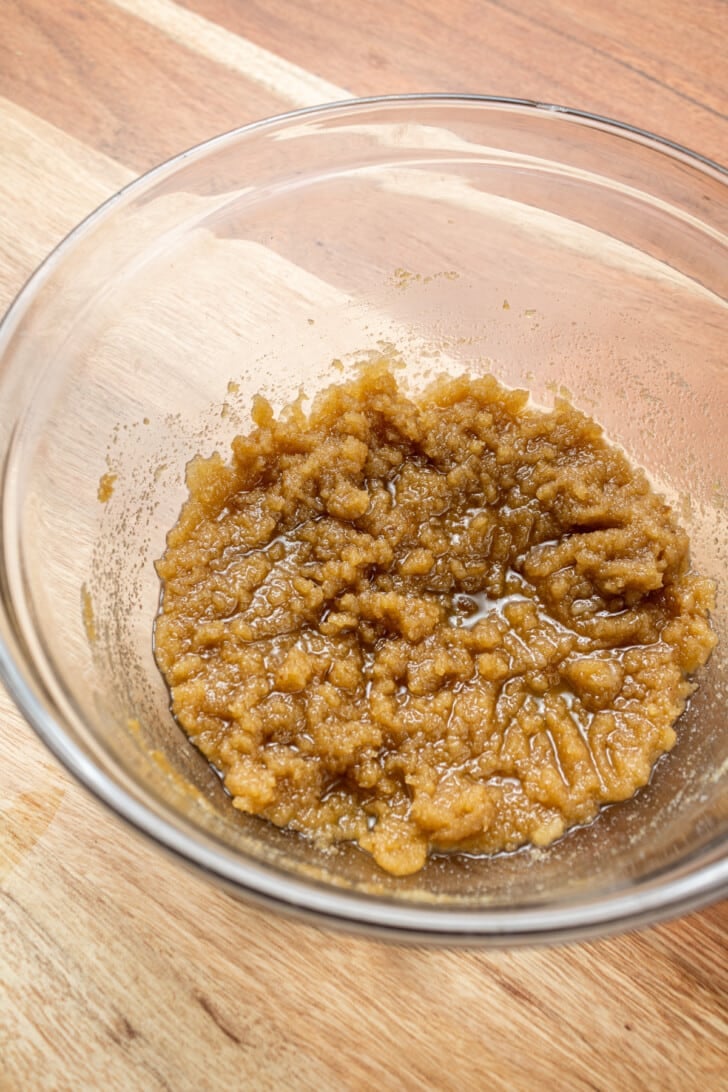
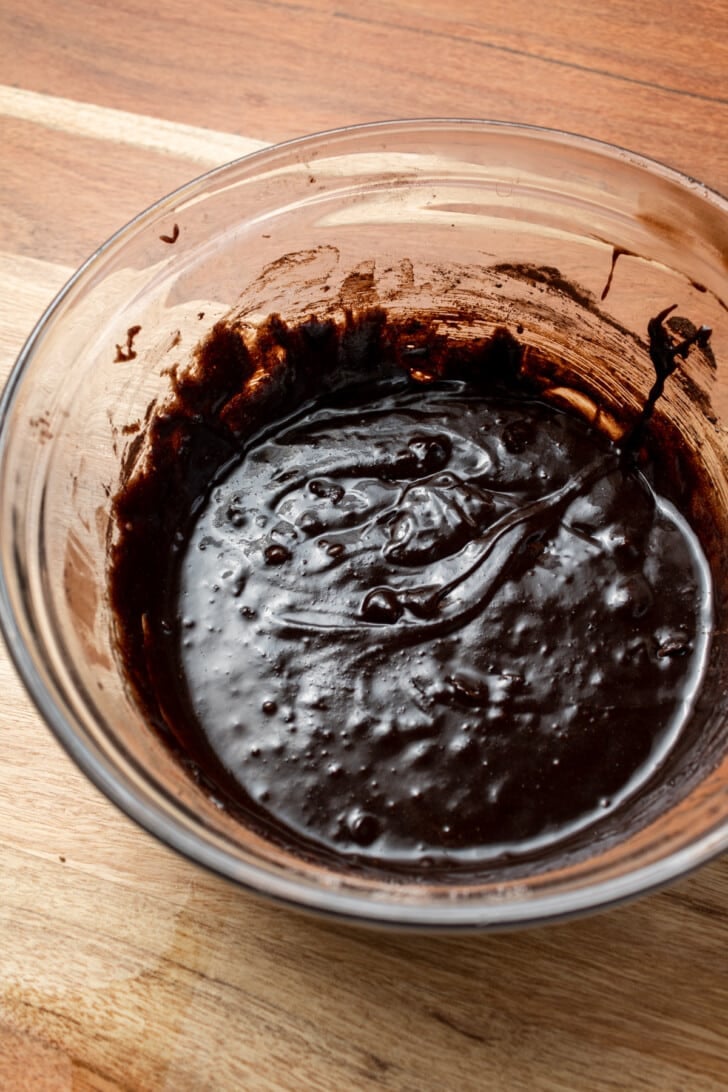
Whisk melted butter and sugars until it forms a paste!
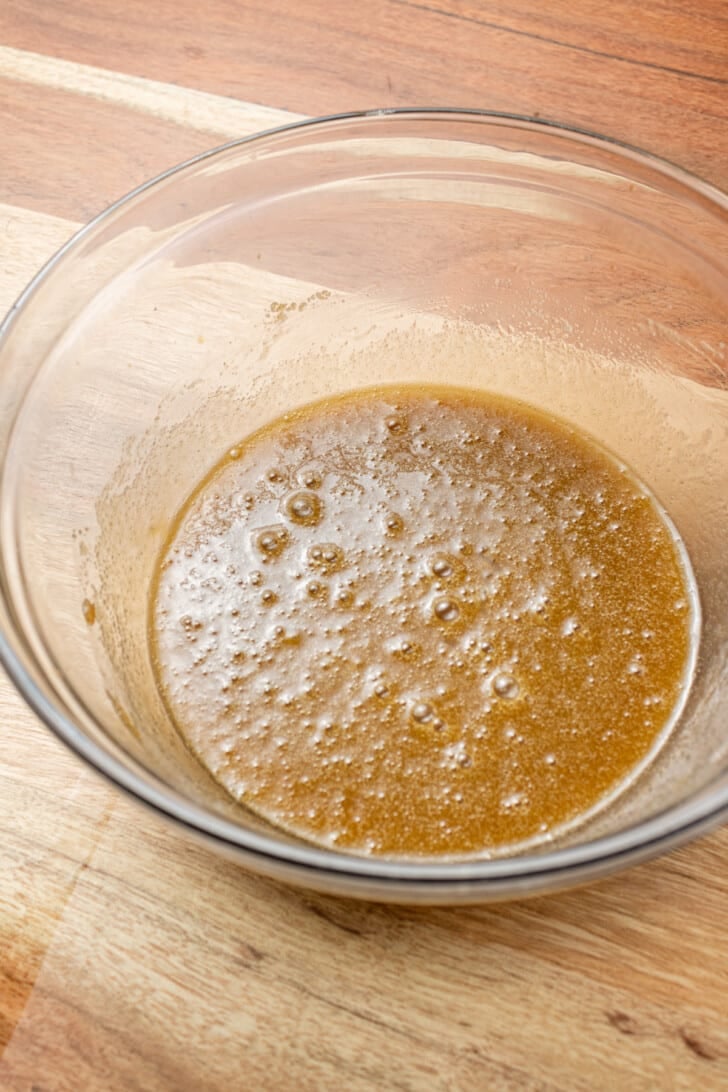
Add in eggs and vanilla.
Add in your dry ingredients!

Bake and enjoy!
How do you know when brownies are done baking?
I will admit, it can be very hard to tell when brownies are done baking. Luckily I’ve outlined a few important tips below to set you up for brownie success.
The top is cracked. You know that classic crinkly top that a brownie gets? Watch for that! There might not be a TON of cracks but overall it’s got to be crinkly throughout the surface.
Shake the pan: The middle shouldn’t jiggle. If the middle of the pan jiggles, they are definitely not ready!
Toothpick test: this one is tricky but it’s the best tip. Insert a toothpick in the middle of the brownies. If it comes out covered in wet batter, bake them a little longer (4 minutes at a time).
You want the toothpick to come out with what looks like a few wet crumb pieces on it, but not completely covered in wet batter. You do not want to toothpick to be clean!
Start checking them early. You want to start checking on the brownies after about 30 minutes. If you wait 40 minutes to check on them, depending on your oven, they could be over-done already.
If they aren’t ready after 30 minutes, check them every 4 minutes or so until they are. Don’t worry about opening the oven a few times.
Recipe Developer Tips
- Weigh your flour and cocoa powder – If you over-measure your flour or cocoa powder, the brownies won’t be as gooey and chewy, and will be more cake-like.
- Don’t over-mix – The texture of brownies is be largely affected by how much you mix the batter. Brownies are one of the few desserts that I don’t use my standing mixer for, because I want to be really careful about how much I’m mixing them. When you add in the dry ingredients, use a whisk to mix the brownies just until you don’t see anymore dry ingredients, then stop.
- Don’t over-bake – Over-baking your brownies will lead to tough brownies – no one wants that! See tips above on how to tell if brownies are done baking.
- Let the brownies cool completely before slicing them – I know it’s hard, but I urge you to resist! Because the brownies are super fudgy, they need some time to set and firm up before you can neatly slice them. Otherwise you’ll have a big gooey mess on your hands.
More Brownie Recipes You’ll Love


If you make this recipe, let me know how it went in the comments below, I’d love to hear from you! You can also tag me on Instagram or Facebook so I can check it out!
Baking FAQ
These are the topics I’m asked about most frequently:
You can get these answers and more in my frequently asked questions post!

Dairy Free Brownies
Video
Ingredients
- 3/4 cup (158 g) butter (regular or dairy free), melted
- 3/4 cup (150 g) light brown sugar
- 1 cup (200 g) granulated sugar
- 2 eggs
- 1 tbsp vanilla extract
- 3/4 cup (64.5 g) cocoa powder
- 1/4 tsp salt
- 1/2 cup + 2 tbsp (79 g) all-purpose flour, SEE NOTES
Instructions
- Preheat the oven to 350°F and line an 8×8 square baking pan with parchment paper. Leave parchment paper hanging over the sides of the pan so that you can easily remove the brownies from the pan later.
- Melt the vegan butter in the microwave or in a small pan over the stove. Transfer the melted butter to a medium sized bowl.
- Add in both the sugars and use a whisk to whisk the butter and sugars together. Keep whisking until the mixture resembles a paste that pulls away cleanly from the side of the bowl when you mix it. (this contributes to the crinkly top in the brownies)
- Add the eggs and vanilla and mix again.
- Pour the dry ingredients (cocoa powder, salt, and flour) into the bowl and mix with the whisk until just combined (it should only take about a minute). This is important, because over-mixing at this stage will affect the texture of the brownies!
- Pour the batter into the lined baking pan using a spatula to scrape all the batter out of the bowl.
- Bake for 30-40 minutes*. Begin checking the brownies at 30 minutes by inserting a toothpick in the middle. The top of the brownies should be crinkly and the toothpick should not come out clean (over-baking the brownies will make them tough). The brownies are ready when the toothpick has a few wet crumbs, but not wet batter.
- Let the brownies cool completely before slicing (they need time to set and if you cut them too early they will make a gooey mess). Enjoy!

Notes
The calorie information provided for this recipe is an estimate. The accuracy of the calories listed is not guaranteed.
Delicious!! Even those who can eat “regular” brownies love these gooey dairy-free brownies:)
I also used 1/2 cup of oil instead and these were amazing. I am making more this weekend. Have not had this amazing of a dessert since I stopped dairy.
Glad to hear you enjoyed these dairy free brownies!
I didn’t have butter and substituted the same weight of neutral oil and these came out amazing
My daughter is dairy free and always misses out on chocolate treats. This was perfect! I didn’t have dairy free butter so just used 1/2 cup oil worked a treat!
Haven’t tried them yet but just started baking this recipe as my fiancé is allergic to dairy.
As a breakfast sweet treat would I be able to switch the flour for quick oats?
If you want to use oats, I would use my chocolate baked oats recipe!
Made these with dairy free butter and king Arthur cup for cup flour and they are absolutely delicious 🤤 thank you! I didn’t get the same crackly top, but I did reduce the granulated sugar by 1/4 C and that might be why. Such a good base recipe though and I look forward to making them again!
Hi, I am going to make these when friends are over on Friday night.
Can I make the mixture in advance and keep in the fridge and then cook a few hours later?
Thanks ☺️
Hi Haylely! Yes refrigerating the batter a few hours before or even the night before shouldn’t be a problem. You may just need to add an extra minute or two for baking time!
Can I check what is the whitish bits within the brownie after baking ?
Hi! There shouldn’t be any white bits in the brownie. Maybe your sugars were hardened when you mixed them in?
Hiya, I switched the plain flour, for gluten free plain flour and made the best dairy and gluten free brownies and everyone at work loves them x 😄
Amazing!!! As far as storage, if I cut them do they still last in a container for 3-4 days at room temp or should I refrigerate them ?
Thank you Riley! If they’ve already been sliced, I would store them at room temperature in an airtight container for up to 4 days.
Not dairy free if they have eggs…
Hi Julie! This is a common misconception, actually; A dairy-free diet is one that has no animal milk in it, or any products made from milk, so eggs are not classified as a dairy product. Therefore this recipe is in fact dairy free 😊
Made these tonight and looking and smelling great.
And you’re correct – these are absolutely dairy-free. I think because grocery stores put eggs in the “dairy” section has confused a lot of people. But my daughter is allergic to dairy and not eggs, and she’s so happy to try these!
Yep many people confuse eggs for dairy, so happy you and your daughter gave these brownies a try!
It was easy to make and tastes wonderful! I halved the original recipe, and it is still perfect. I definitely recommend it!
Hi Madison! Thank you so much for your review, I’m so happy you enjoyed these!
I decided to try this because a few of my colleagues are lactose intolerant and I felt bad that they could never enjoy my desserts, they really enjoyed it and everyone asked for the recipe. I’m making it again today!
Hi Mandy! So happy these brownies were able to work for your colleagues! Thank you for your review!
These brownies were really delicious I needed to substitute duck eggs for regular and added two more tablespoons of flour to compensate for the larger eggs.
Hi Chris! I’ve never tried baking with duck eggs, but glad they worked out for you with this recipe! Thank you for your lovely review!
My go to recipe for Brownies is now this recipe! I used butter for mine and oh wow! Never going back to the Bakers. Once cooled (and eaten to some degree), I cut up and froze the remainder as I cook for one. These freeze very well!
Thank you for your kind review! Glad you enjoyed 🥰
Genuinely the best brownies I’ve ever made!
So happy you enjoyed these Ash! Thank you for your review 😊
You talked about using a kitchen scale but I don’t see the measurements in grams .
I’ve made your Small Batch Brownie recipe and they were delicious .
So glad you enjoyed the small batch recipe! All the metric measurements are under the ‘Metric” Tab (toggle from the US Customary tab), beside the Ingredients headline! Enjoy 🙂
Best recipe for the fudgiest brownies ever!! Baked it for my friends and they absolutely loved it. I stored the leftovers in a container and there were good to go for 5+ days.
Yay! So happy you loved them! Thanks for the review!
Best thing that happened to my 3-day old dairy free life lol! Is it possible to replace sugar with sweetener to make it sugar free and dairy free? If so, what is the ratio?
Hi Kristie! So glad you loved the brownies! I don’t test any of my recipes with sugar free substitutes so I don’t know how that would turn out!
Its was very tasteful.i have tried many brownie recipes I failed but this is amazing .best ever recipie i got it . You guys try it with her guide give in recipie 100% it will work 🤤
I am so happy to hear that! Thanks so much for the review! 🙂
I’ve been searching around for a brownies’ recipe, actually tried a few that flopped quite badly. Not these…
I just made these and they are gooey rich Fudgy crispy on the top… just perfect. The only thing I did different was one of my eggs had 2 yolks (I had a feeling the brownies will turn out great when I saw the double yolk). So I’m not sure if that made a good difference or no difference at all, and if I should add a yolk next time as well, but definitely try this recipe if you’re craving great brownies.
Hi Yasmeen! YAY! I am so happy you loved the brownies so much! Thanks so much for the review 🙂
In the 1950’s my mother would make brownies from a Baker’s chocolate recipe for me. They were wonderful – fudge, chewy, intense chocolate. Baker’s no longer makes its baking squares. I thought this was a list taste until I made these brownies. Beautiful recipe!
Hi Bruce! What a lovely review – I am so honored that the brownies brought back such a fond memory! Thanks so much for the kind review!
I can’t find the measurements anywhere:( will someone pls let me know what they are? I’m so eager to try these
These were absolutely delicious! I used refined coconut oil instead of butter but otherwise followed the recipe exactly. Yum!
Hi Cate! I’m so happy to hear that you loved them and that they worked with the coconut oil! Thanks so much for the review 😀