Dairy Free Chocolate Chip Cookies
This post contains affiliate links. Read the full disclosure here.
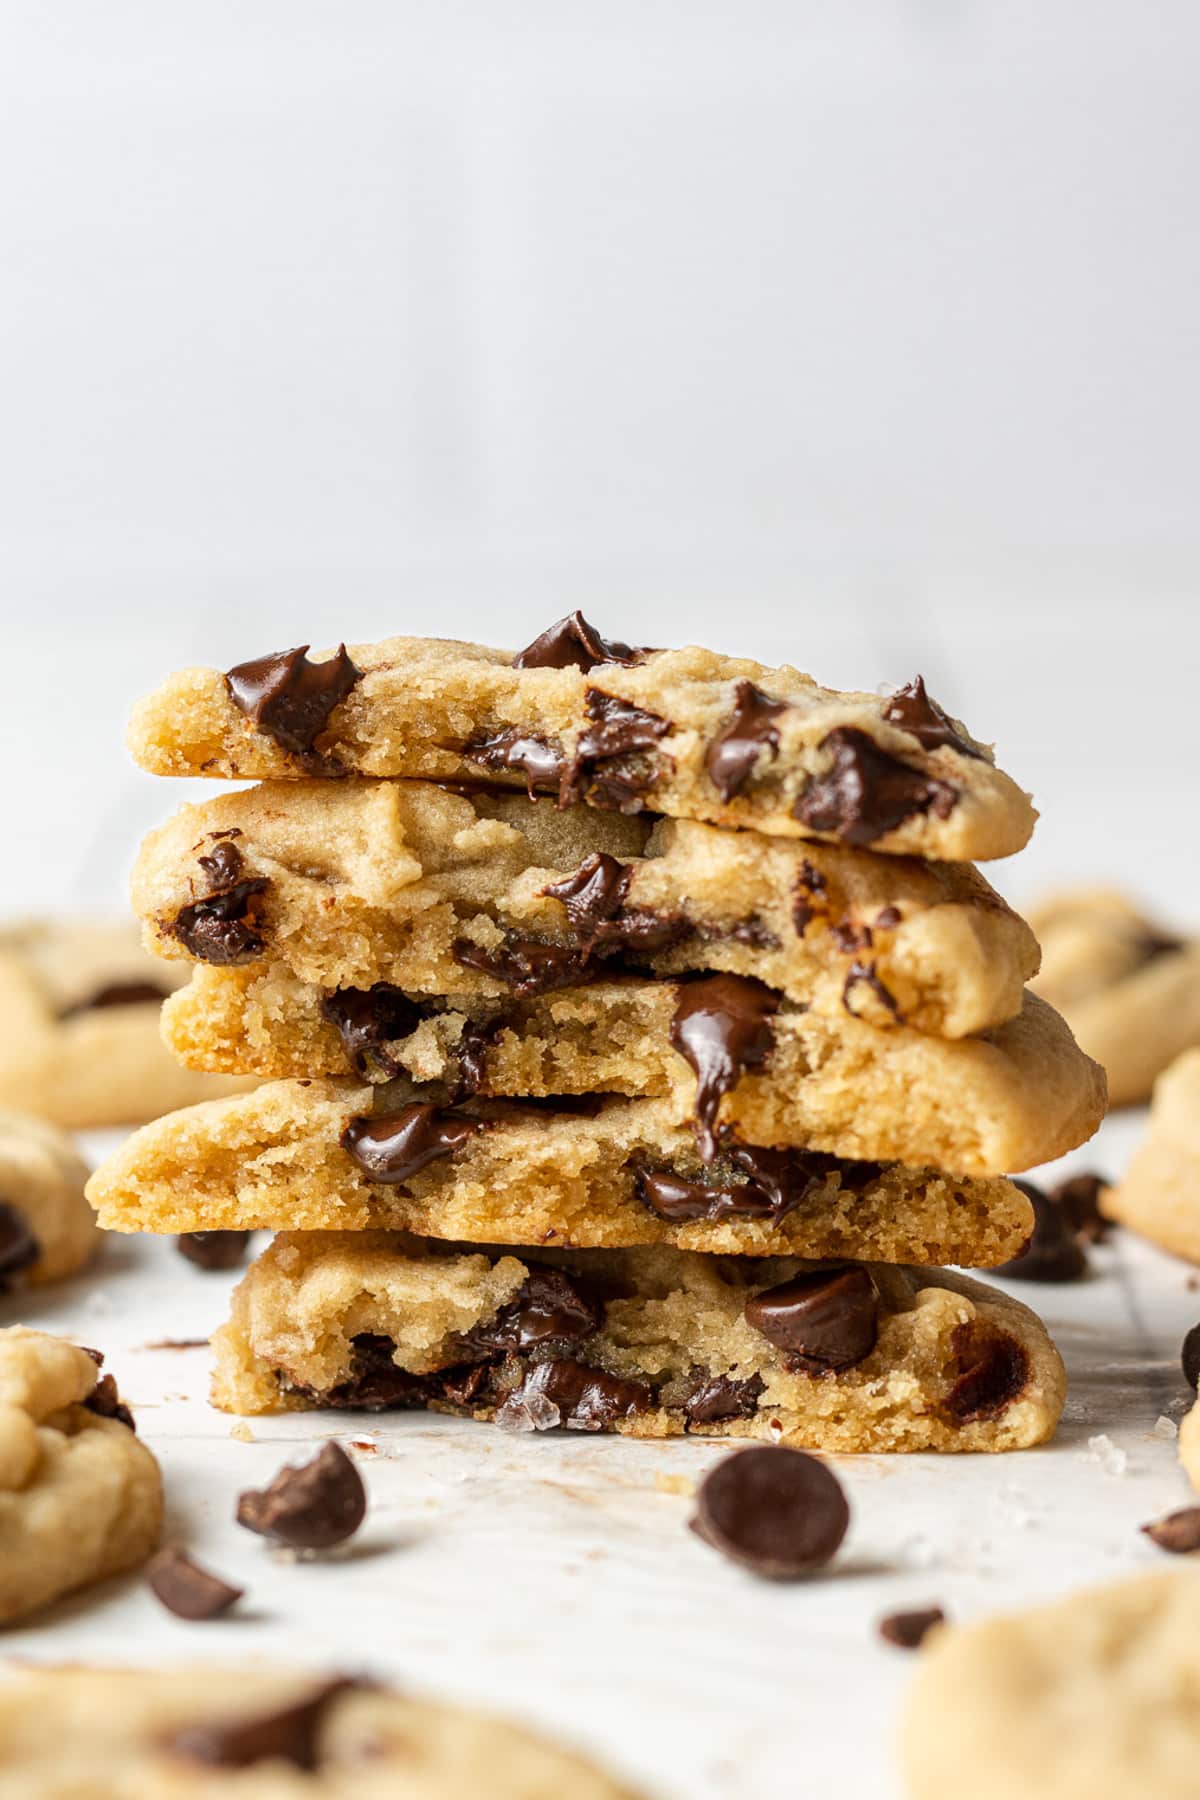
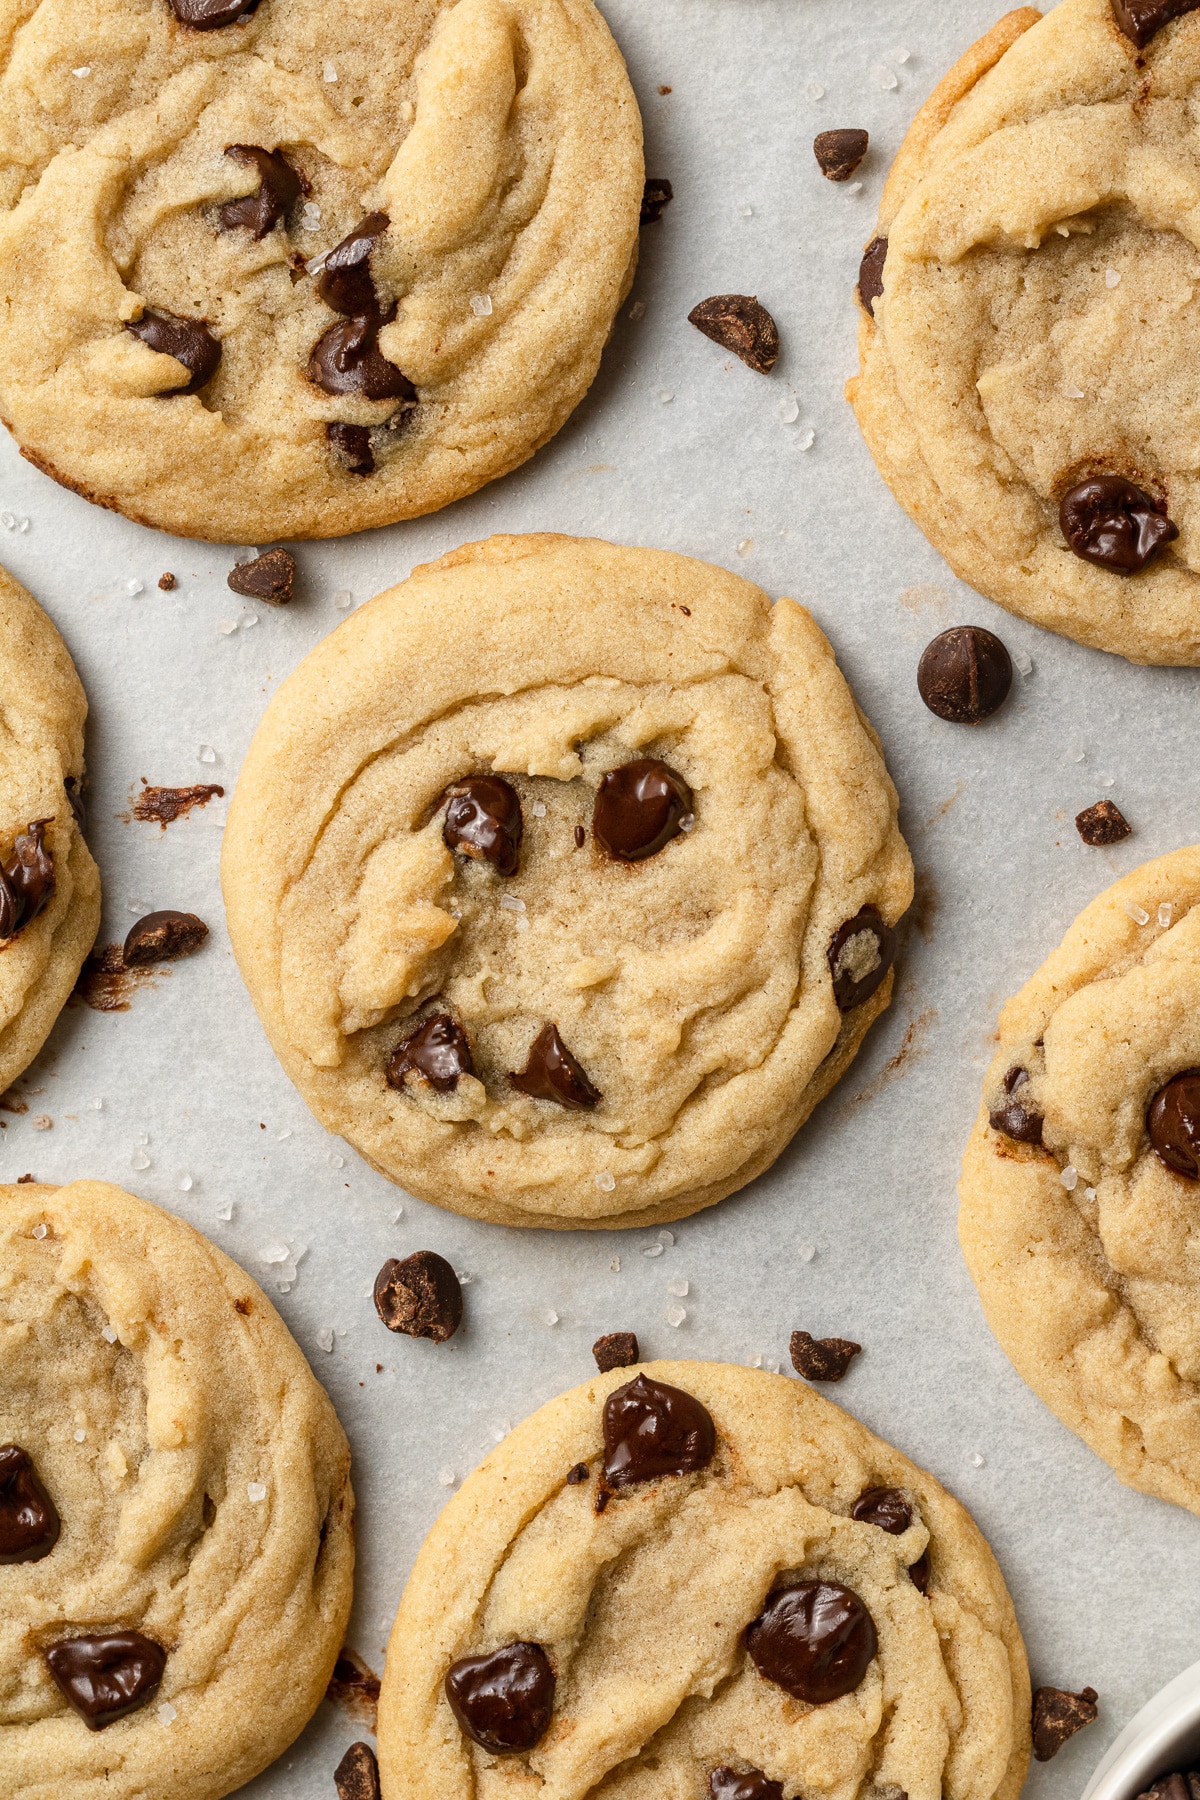
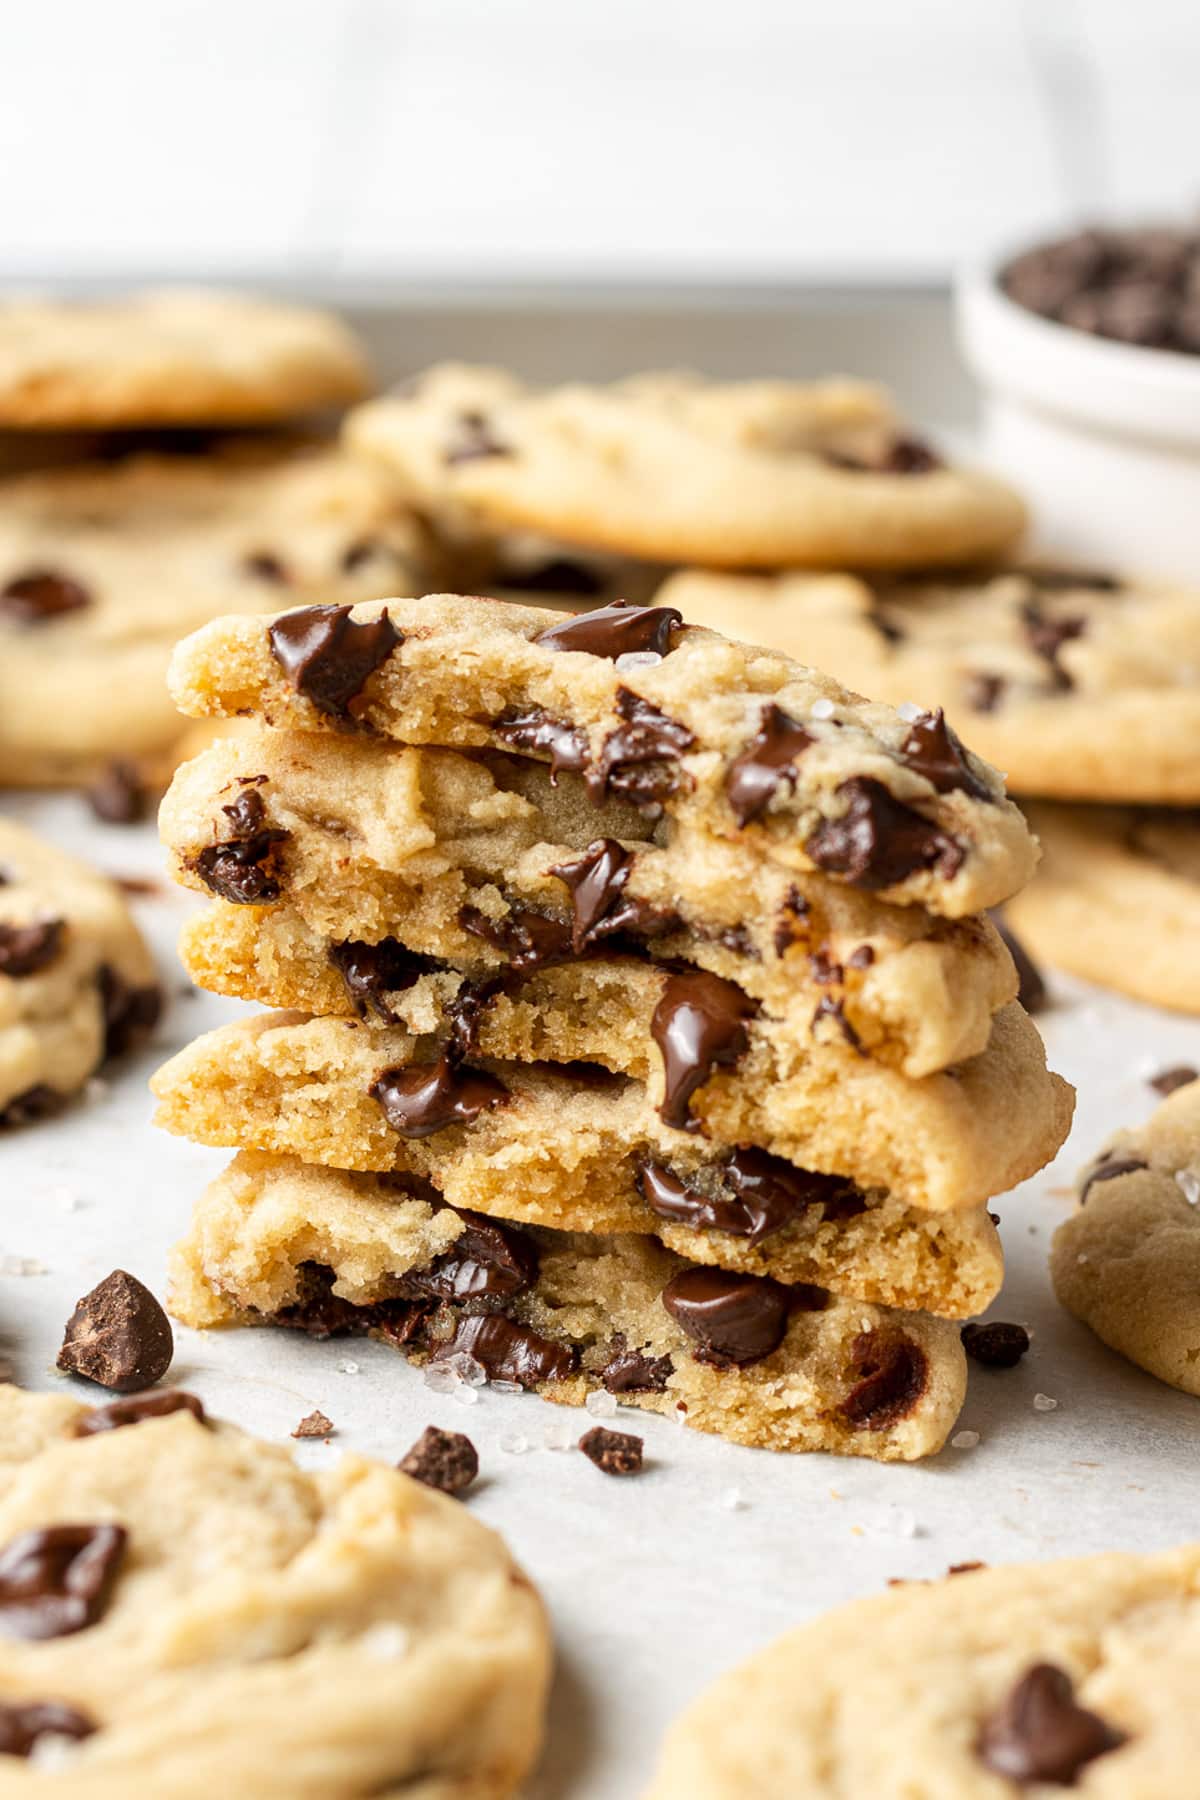
These dairy free chocolate chip cookies are soft, gooey, with slightly crispy edges and a buttery flavour you would never expect from dairy free cookies. They have just 9 ingredients, take 20 minutes to make and there’s no chill time required!
I avoided creating my own dairy free chocolate chip cookie recipe for a long time, because there are so many recipes out there. But everyone has their own version of what the perfect cookie is – and this is mine!
These dairy free cookies are SO good, I can easily sit down and eat 8 of them. Not that I’m speaking from experience or anything… 😉 They are super easy to make, but hard to stop eating. In my opinion, they’re better than any cookie I’ve tried even with dairy!
Featured Reader Review
“Me and my sister have been on a hunt to find the best chocolate chip cookie recipe and she recently can’t have dairy. This is our new favorite and beats any cookie recipe even with dairy. We cannot stop making and eating these!!”
Rach
If you’re looking for more dairy free cookie recipes, you’ll love my dairy free oatmeal cookies or my dairy free peanut butter cookies!
Why You’ll Love These Dairy Free Chocolate Chip Cookies
- These cookies have a delicious buttery flavor (even without any real dairy butter!)
- You can easily freeze the cookie dough or the baked cookies to enjoy later.
- When testing this recipe, I found that two eggs made the cookies more cakey, but just one egg created the perfect soft and chewy texture.
- These cookies pair well with a variety of different add ins, like white chocolate chips, peanut butter chips, or chopped nuts!
Ingredient Notes
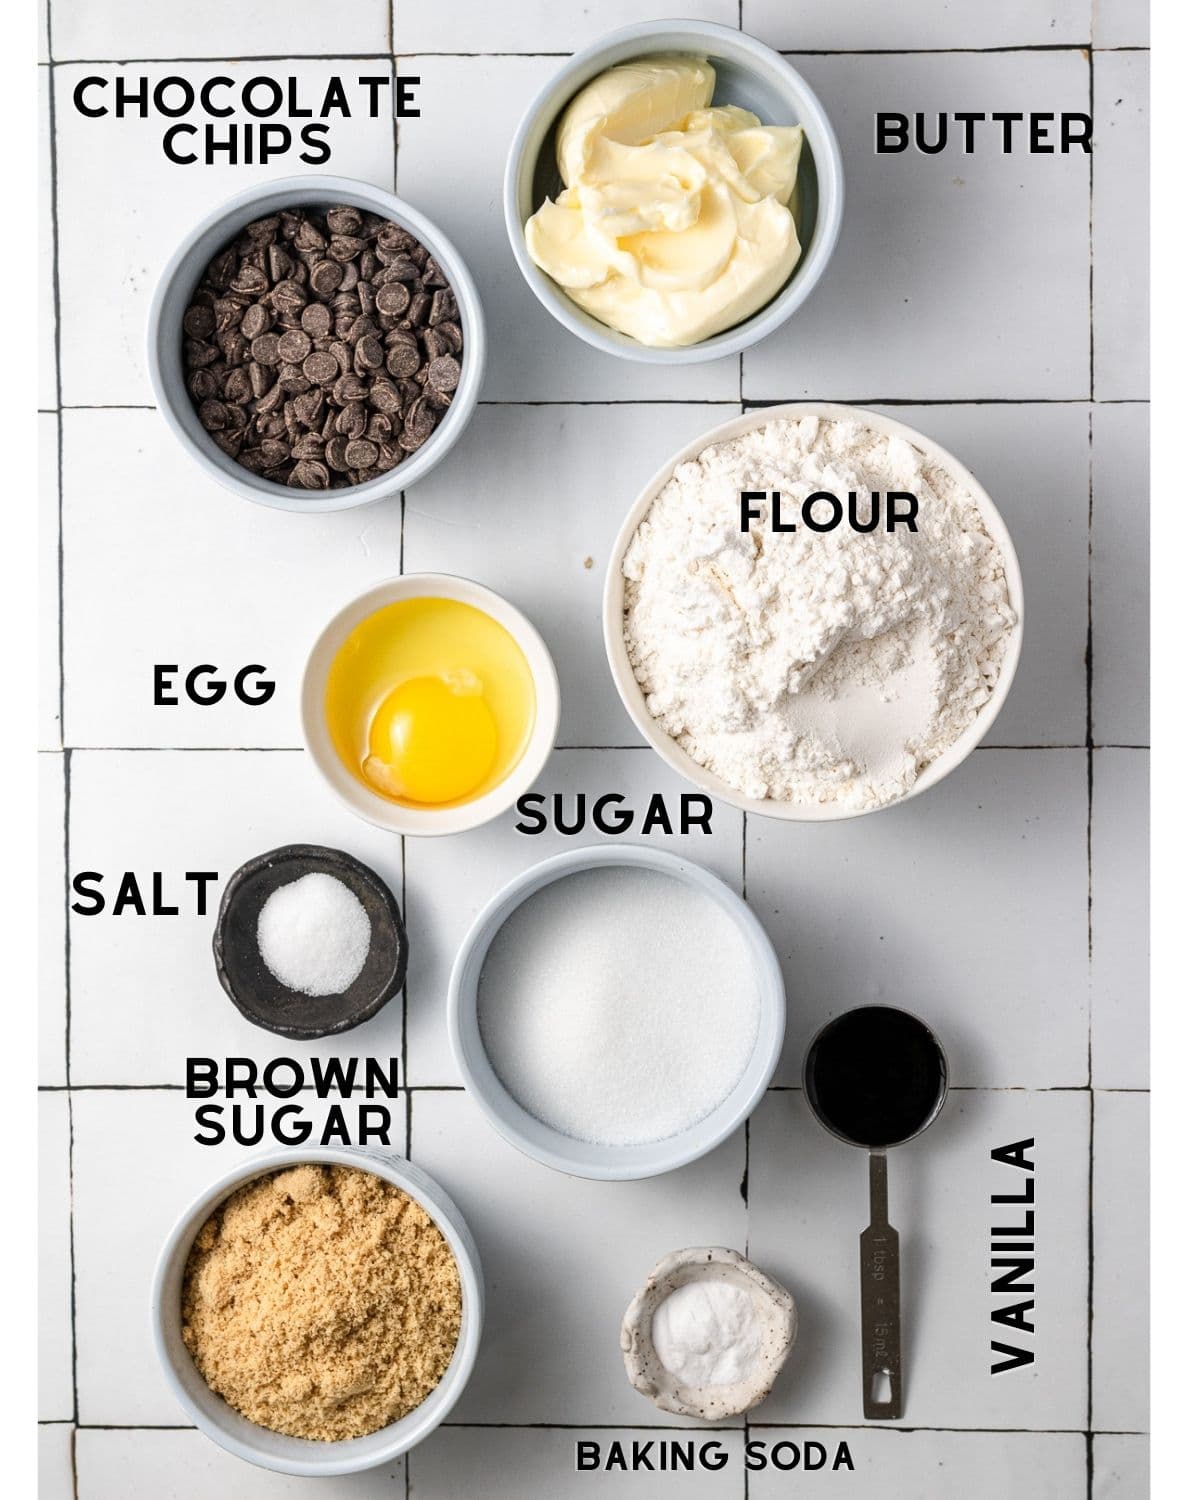
- Butter: You can use any kind of dairy free butter for this recipe. If you don’t follow a dairy free diet, these also work great with regular butter.
- Chocolate Chips: I love using dairy free semisweet chocolate chips, but you can use any chocolate chips that you’d like (even vegan white chocolate chips). I also sometimes like to chop up a chocolate bar and use chocolate chunks.
How To Make These Cookies
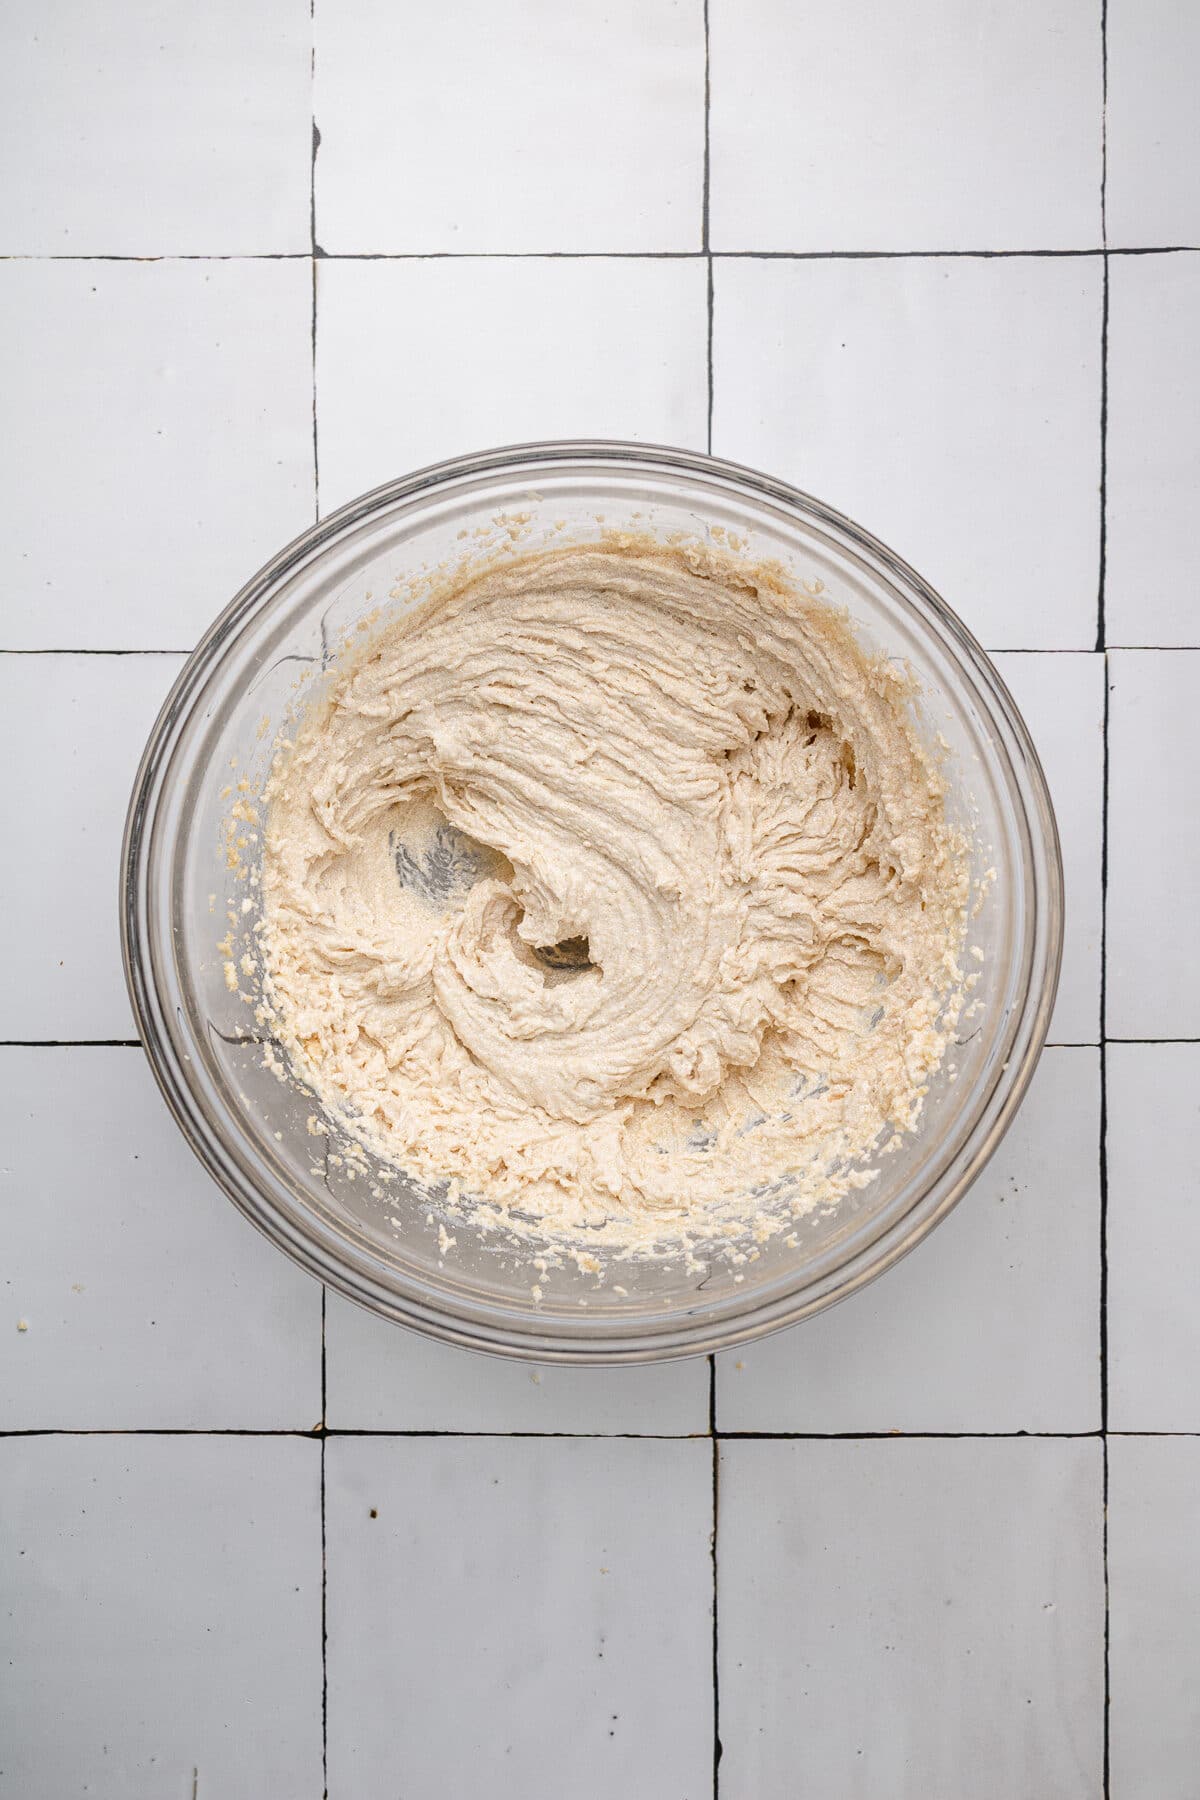
Beat butter and sugars together.
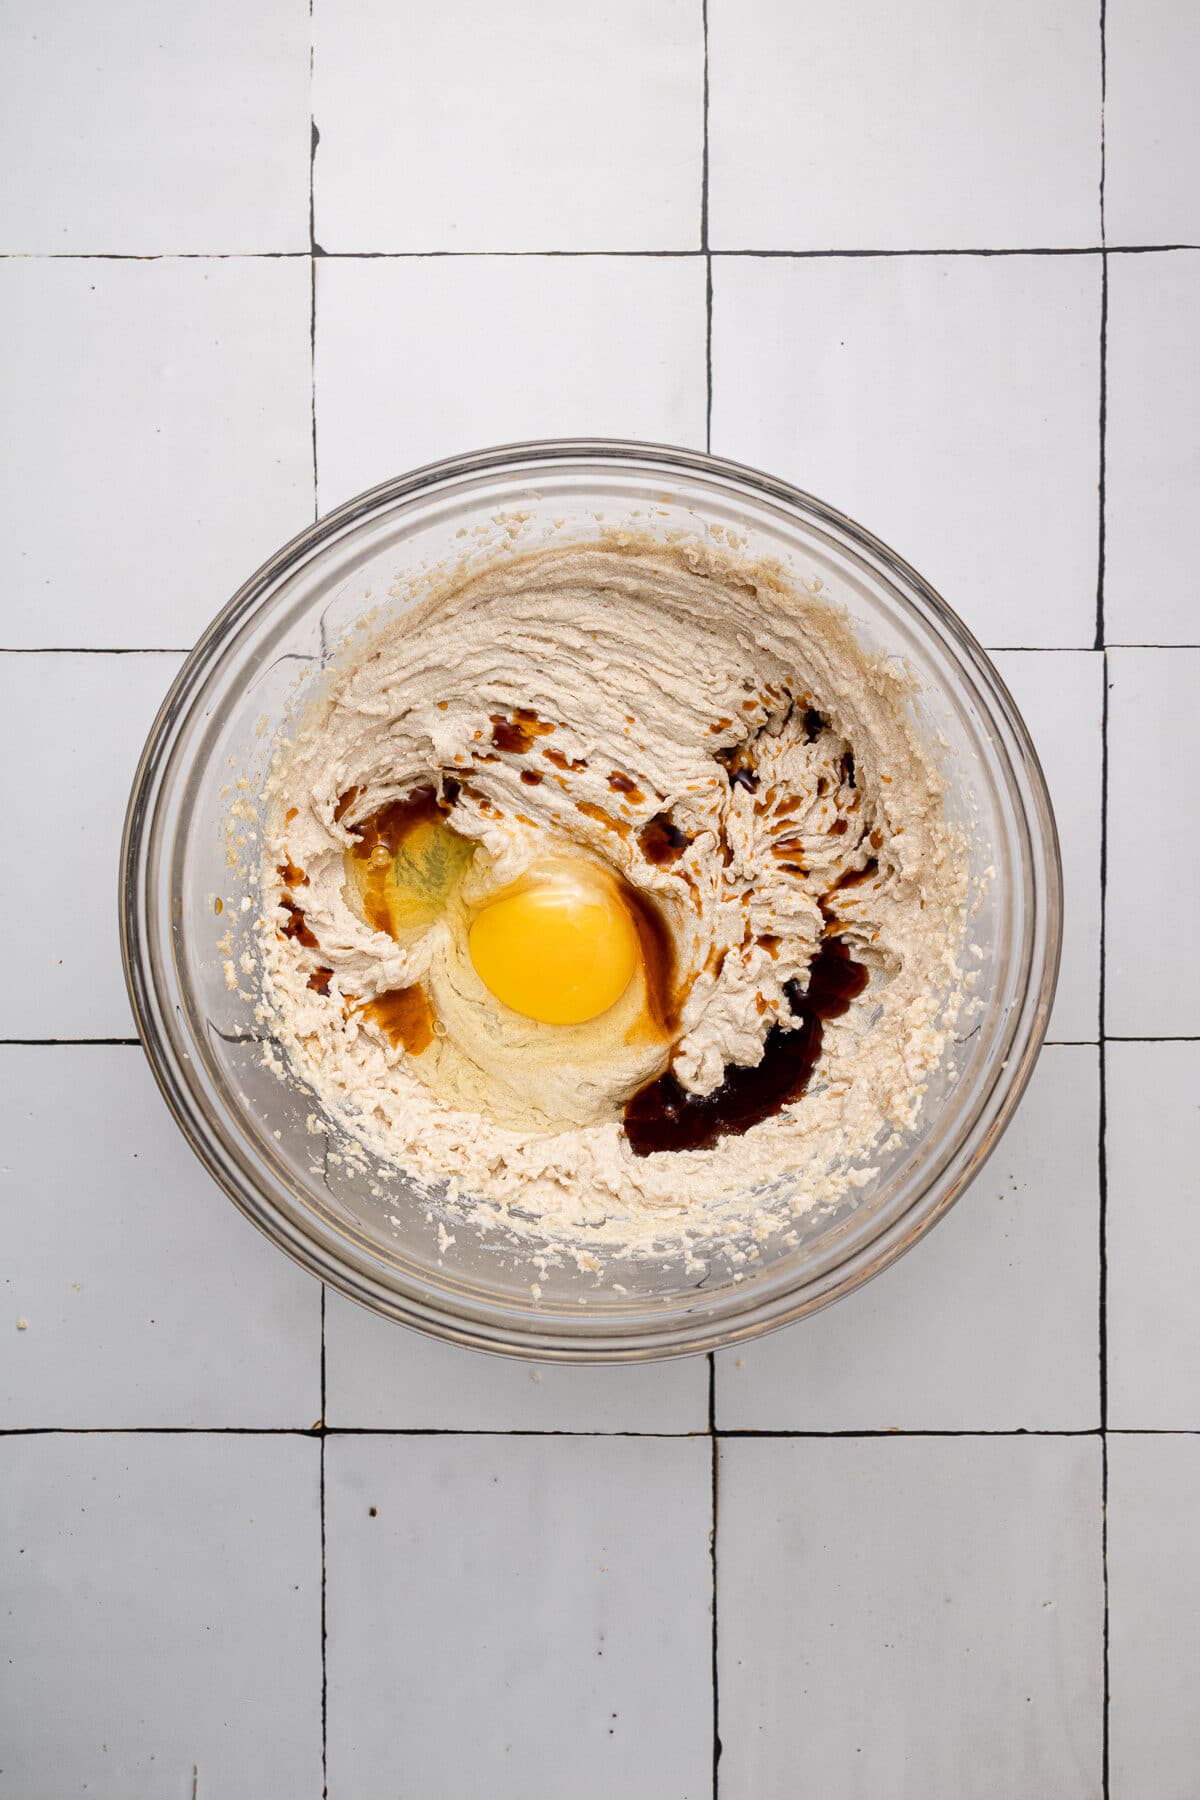
Add in egg and vanilla!
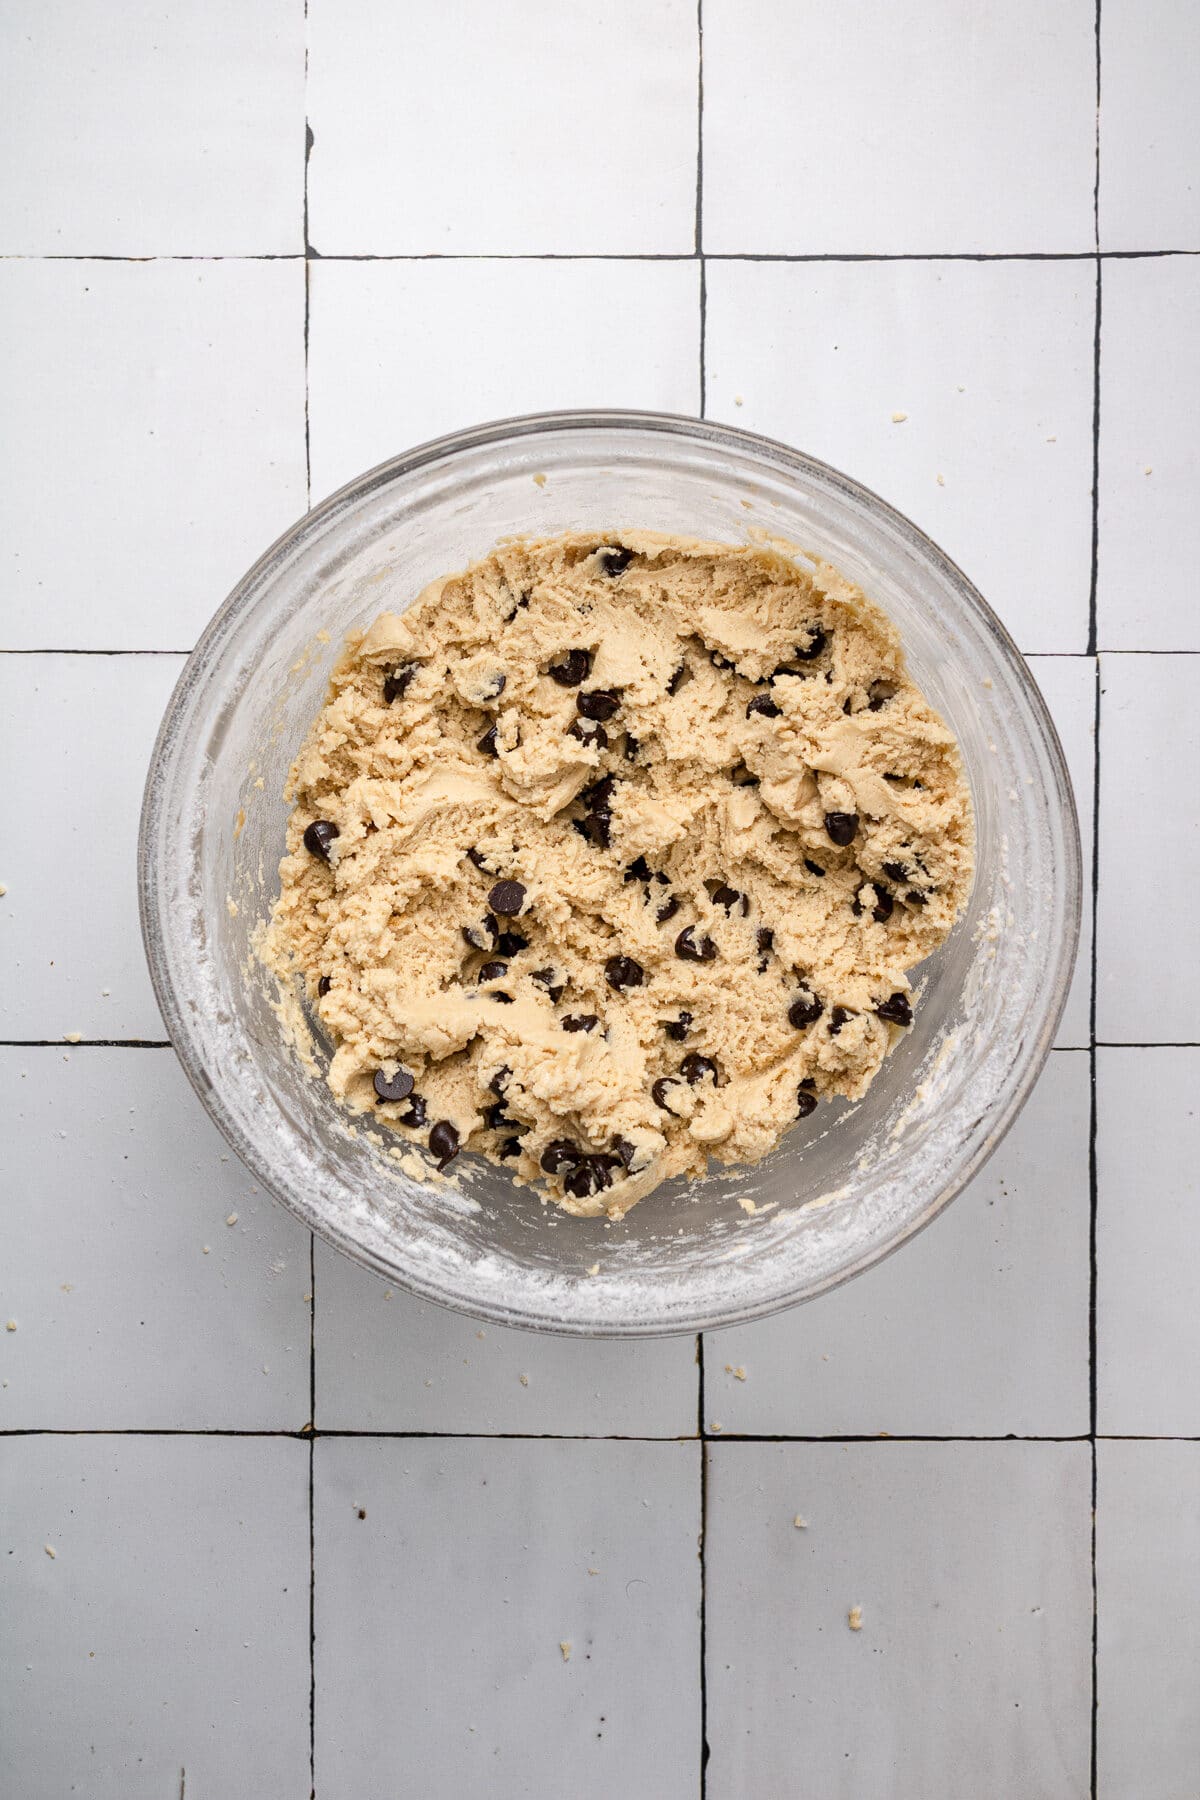
Mix in dry ingredients!
Bake and enjoy!
Expert Tips
- Please use a kitchen scale or the scoop and level method to properly measure your flour! This is the most common baking mistake I see and the cookies will not turn out as they should if you use too much flour.
- When in doubt, under-bake your cookies rather than over-baking them. One of the key factors in a perfectly soft chocolate chip cookie is to take them out of the oven when they look slightly under-baked. They will continue to bake on the baking sheet and stay soft for days if they aren’t over-baked to begin with!
More Dairy Free Recipes You’ll Love


If you make this recipe, let me know how it went in the comments below, I’d love to hear from you! You can also tag me on Instagram or Facebook so I can check it out!
Baking FAQ
These are the topics I’m asked about most frequently:
You can get these answers and more in my frequently asked questions post!

Dairy Free Chocolate Chip Cookies
Video
Ingredients
- ¾ cup (158 g) dairy free butter, softened , (or regular butter if not dairy free)
- ½ cup (100 g) granulated sugar
- ½ cup (105 g) light brown sugar
- 1 egg
- 1 tbsp vanilla extract
- ¾ tsp salt
- ¾ tsp baking soda
- 2 cup + 2 tbsp (268 g) all-purpose flour
- ½-¾ cup dairy free chocolate chips or chopped chocolate , (I use semisweet)
Instructions
- Preheat oven to 350°F and line 2 baking sheets with parchment paper.
- In a medium bowl, combine flour, baking soda, and salt. Set aside.
- In the bowl of a standing mixer with the paddle attachment or a handheld mixer, combine butter and sugars, mixing until light and fluffy (1-2 minutes).
- Add in the egg and vanilla extract, and beat until just combined (do not over-mix!).
- Mix in the dry ingredients until a dough forms. Toss in the chocolate and mix until just combined.
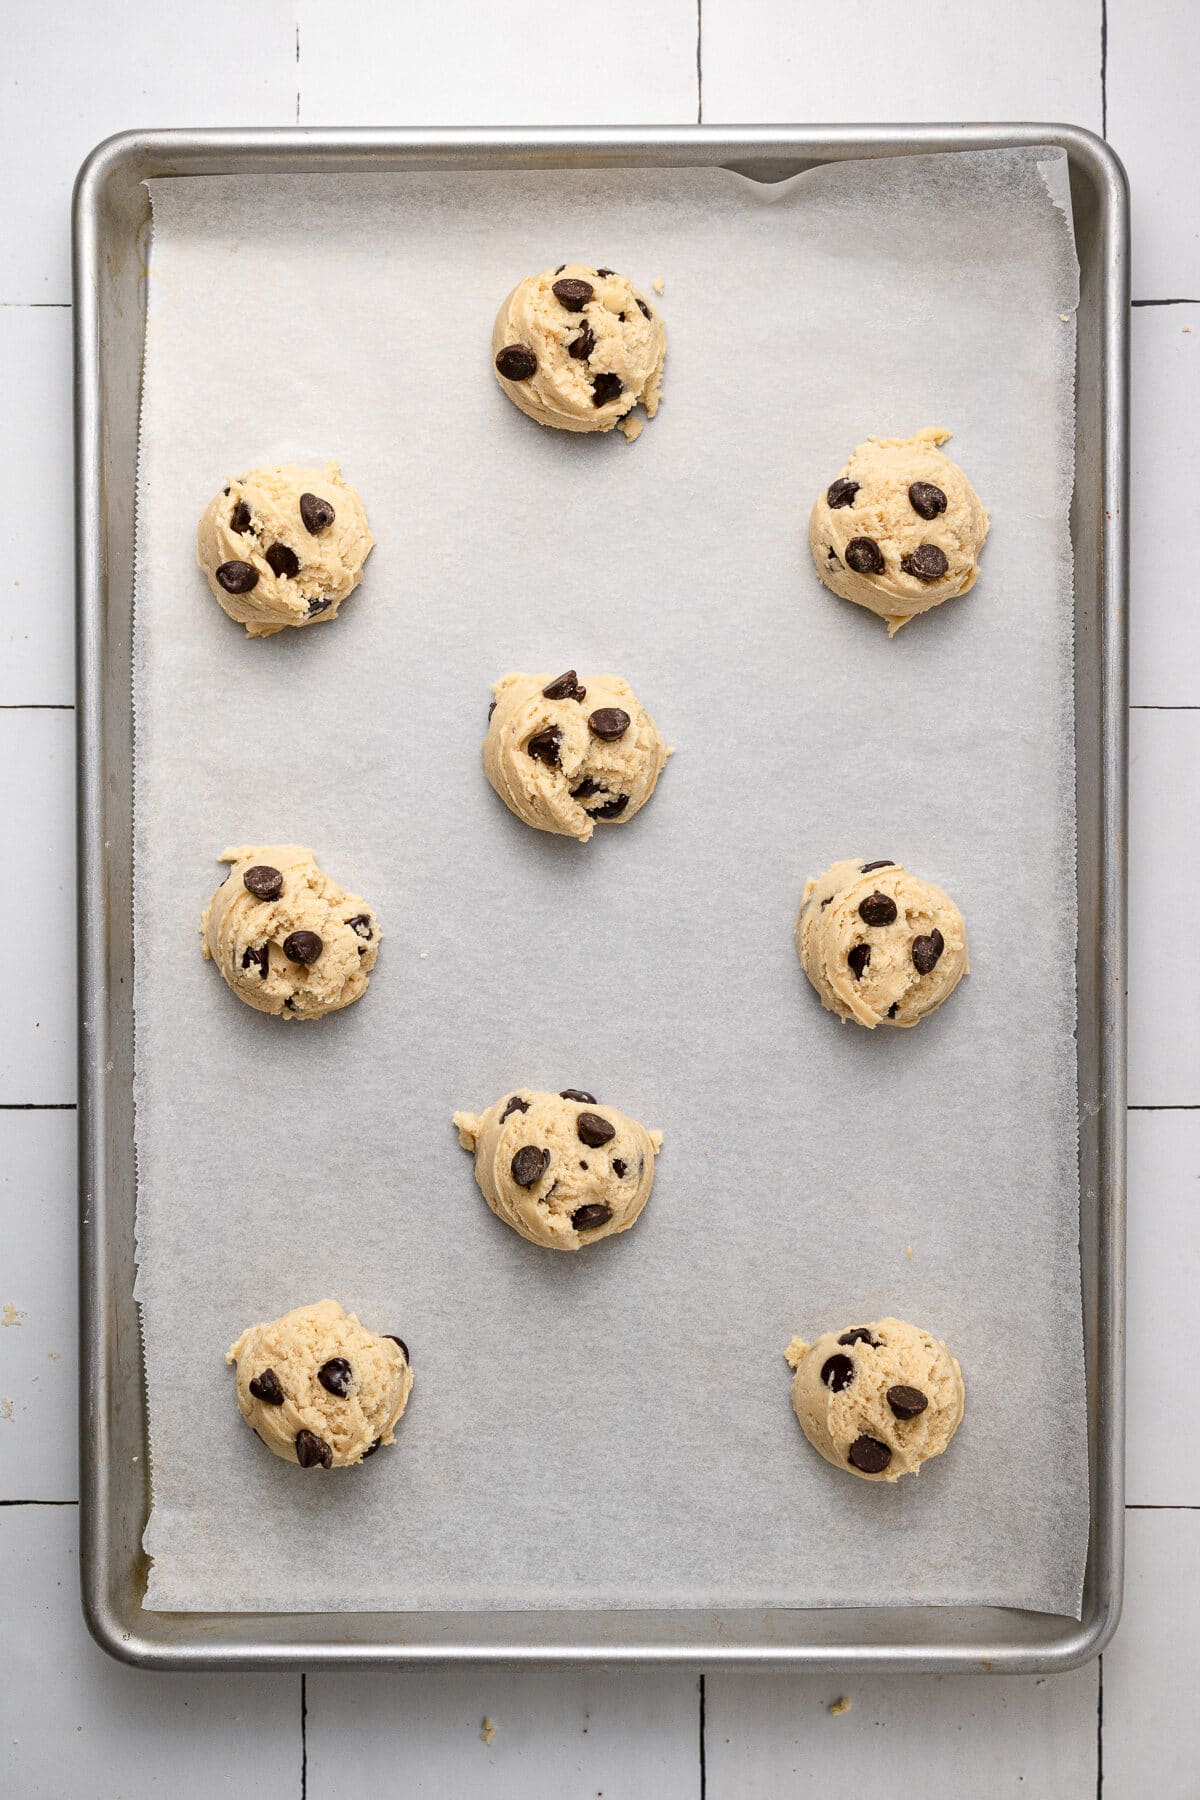
- Use a medium cookie scoop or spoon to make 1.5-2 tbsp sized balls and place them on the baking sheet around 3-4 inches apart.
- Bake the cookies (one sheet at a time for even baking) for 8-11 minutes. Remove them from the oven when the edges look set. They will look under-baked in the middle! Remove from the oven and leave them on the baking sheet for 5 minutes, then transfer to a cooling rack to cool completely. Enjoy!

Notes
The calorie information provided for this recipe is an estimate. The accuracy of the calories listed is not guaranteed.
Wow! I made this as my second time ever making chocolate chip cookies and truly these were some of the best cookies I’ve had! They had a crisp exterior, a soft interior and the chocolate was just melted to the perfect amount. I did make mine a touch bigger so I only made 18 and I had to cook them for 16-17 minutes instead, but seriously, look no further for a dairy free chocolate chip cookie recipe 😍
Hi Jeremy, thanks so much for your comment and feedback! So glad you loved the recipe!
Cookies were shaped like hockey pucks and had no flavor other than the chocolate chips.
Hi Edward, sorry to hear that it didn’t work out for you. Did you use metric measurements and weigh your dry ingredients? It sounds like you may have over-measured your flour. Another factor could be expired baking soda, but given that you mentioned a lack of flavor it sounds more likely that flour was over-measured.
These were sooo yummy. My baby is allergic to milk, so I have been looking for a good cookie recipe since I can’t have chips ahoy anymore. We added melted peanutbutter and dry oats to the mix and it was AMAZING. We also used Enjoy Life chocolate chips. Dairy free coconut whipped cream on top is even better. Great dessert. Very thick and filling (at least how ours turned out). Super yummy, will make again!
Hi Brittany! So glad that you enjoyed the cookies! Thanks so much for your comment!
I added marshmallow and grahm cracker pieces to it! I also made it gluten free by using gluten free flower!
Yum! Thank you so much for sharing!!
They turned out so well
So glad to hear it! Thanks for your comment, Autumn!