Dairy Free Biscuits
This post contains affiliate links. Read the full disclosure here.
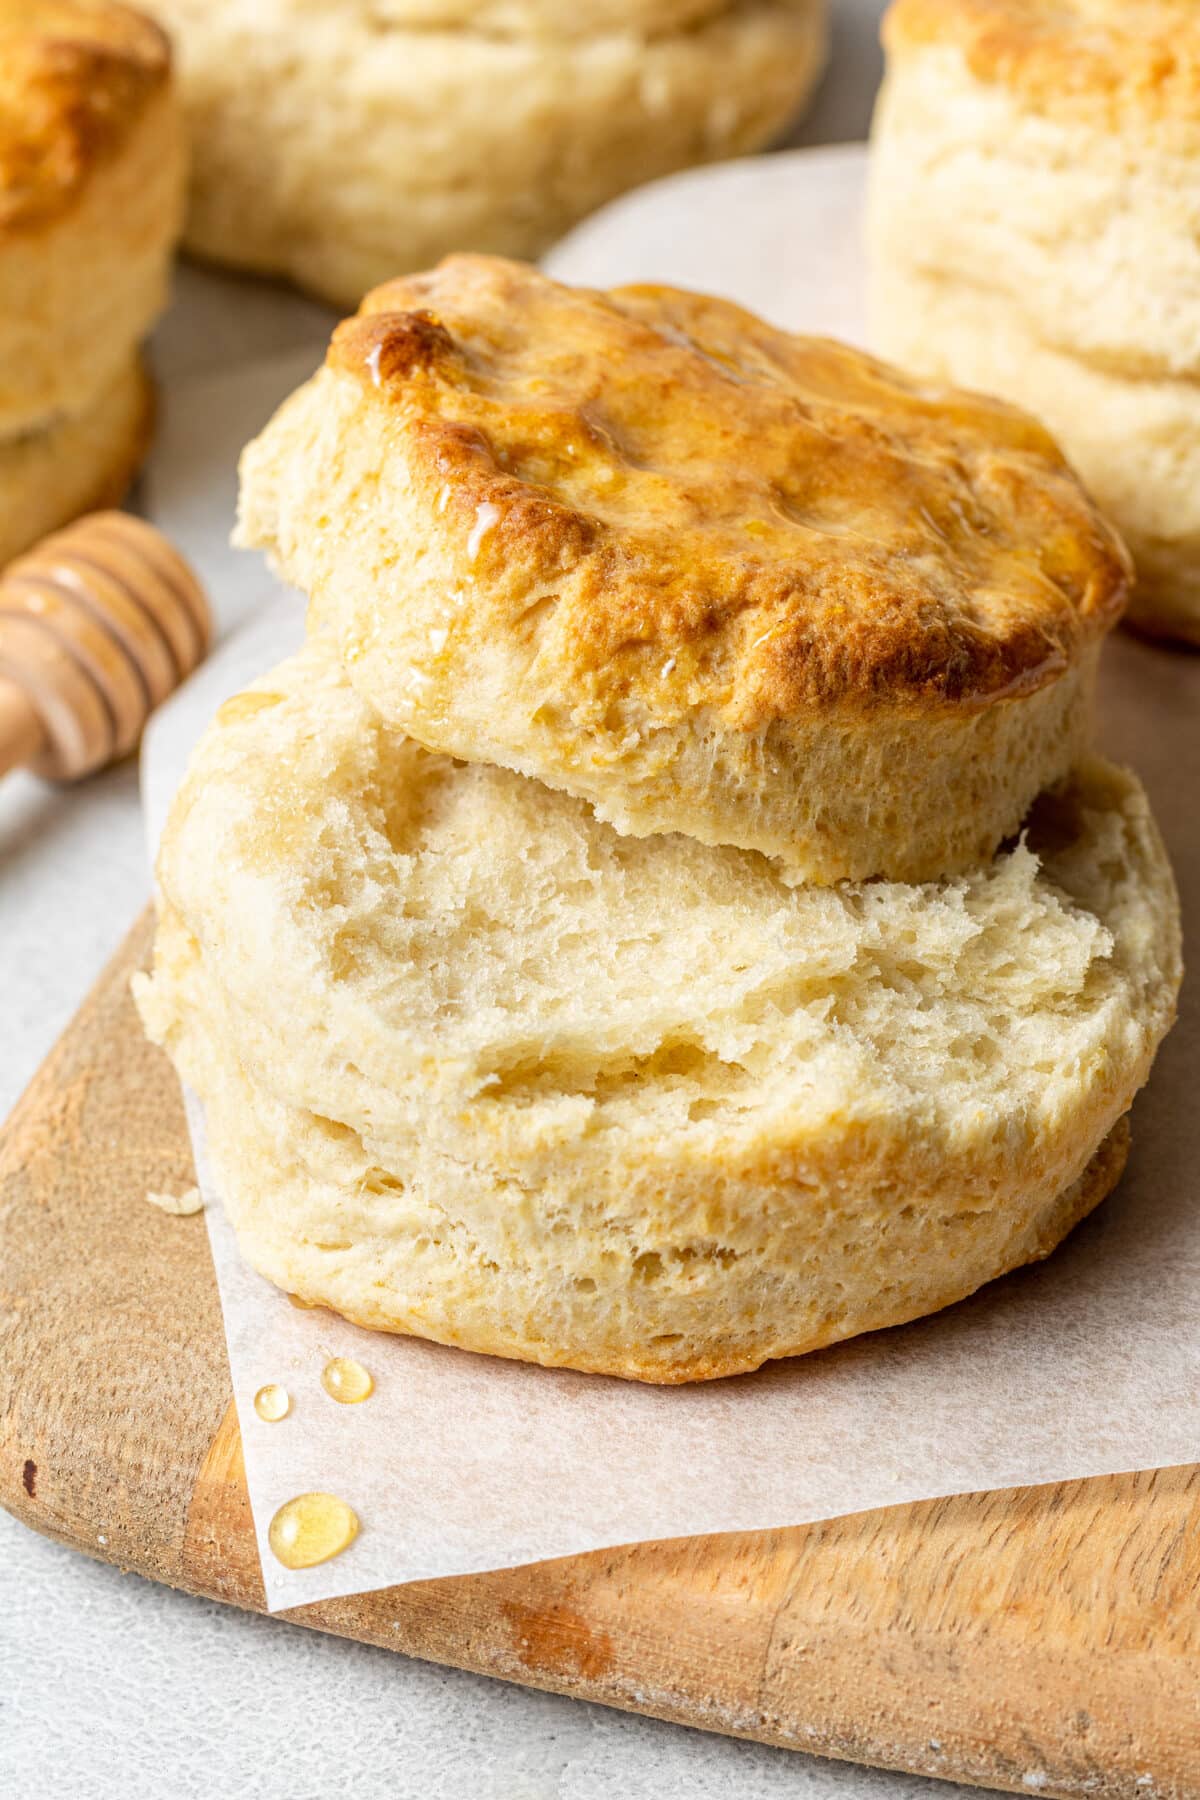
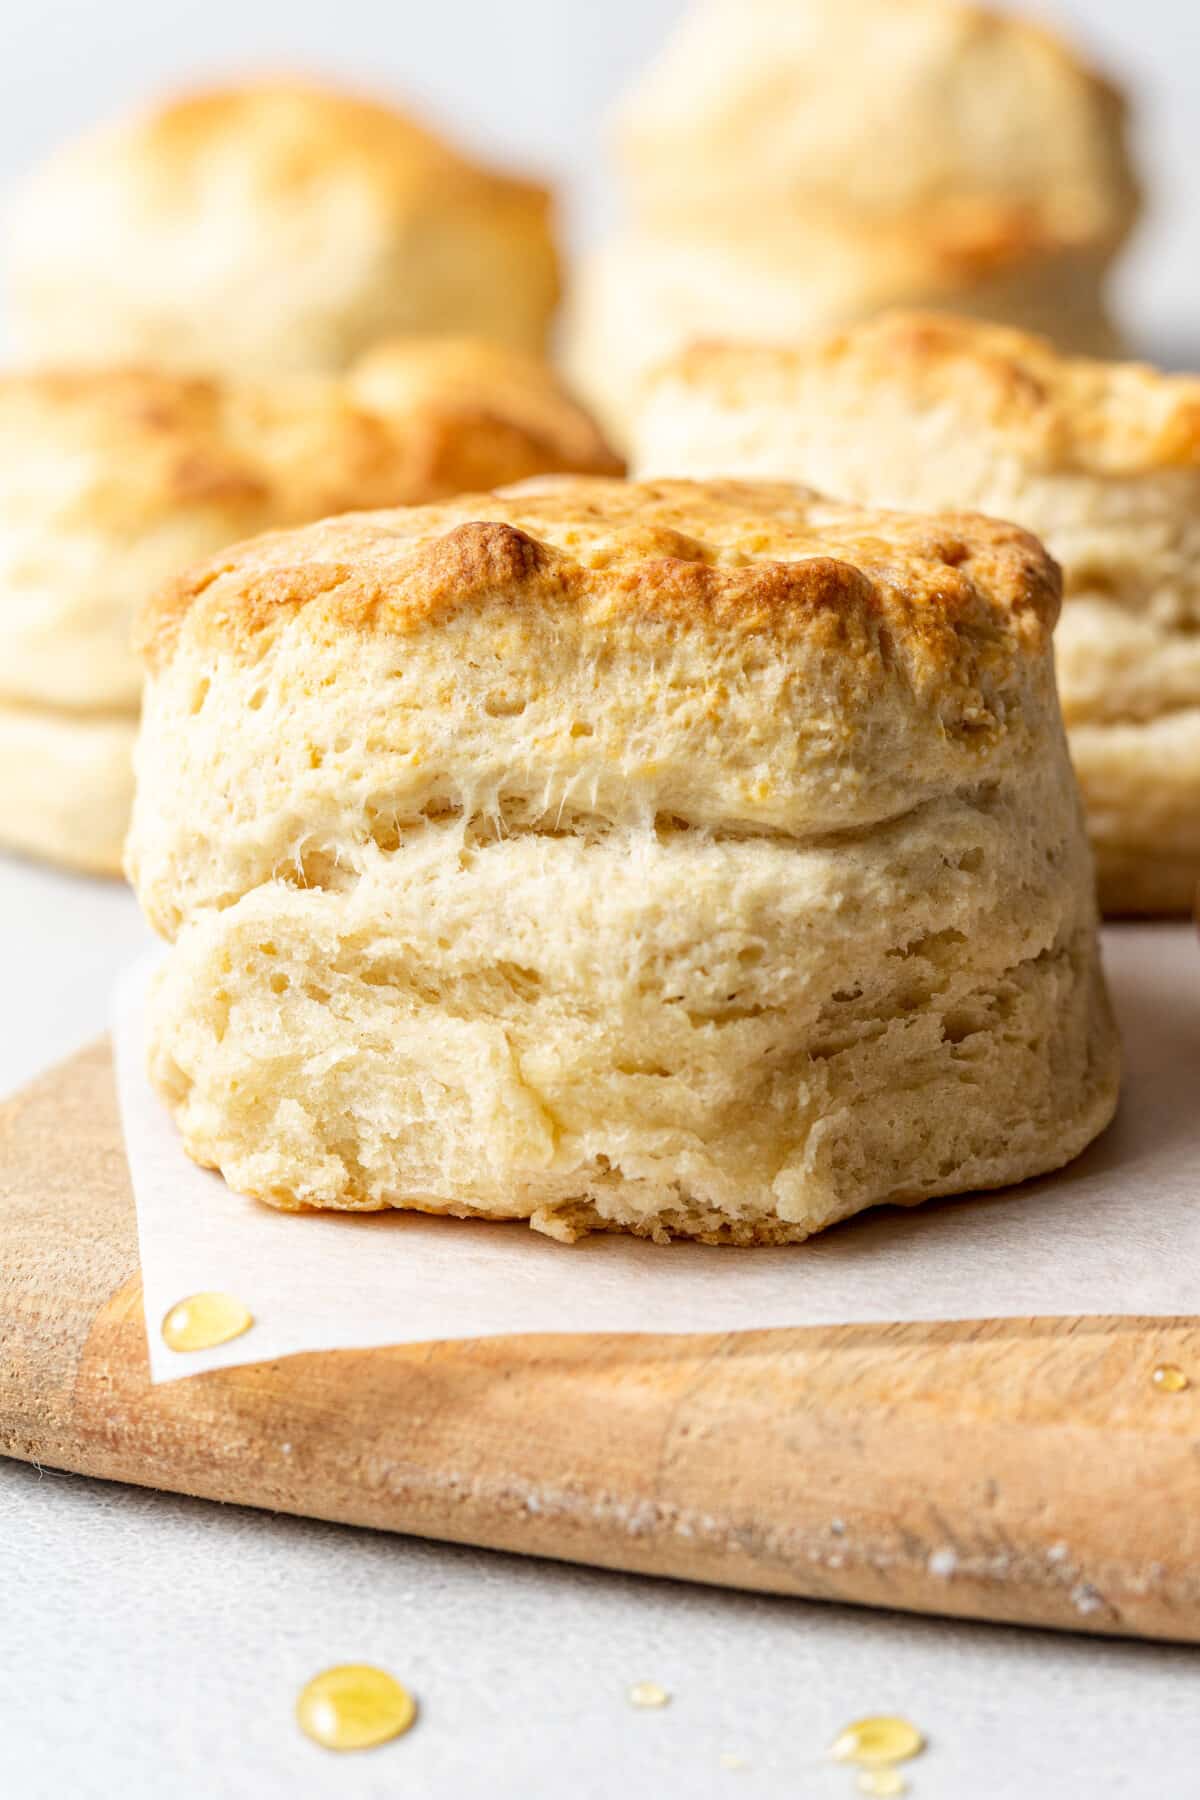
These dairy free biscuits are buttery, with perfect flaky layers, and so easy to make! They are made in one bowl, with no mixer, 6 simple ingredients, and ready in under 30 minutes! Vegan and freezer friendly too!
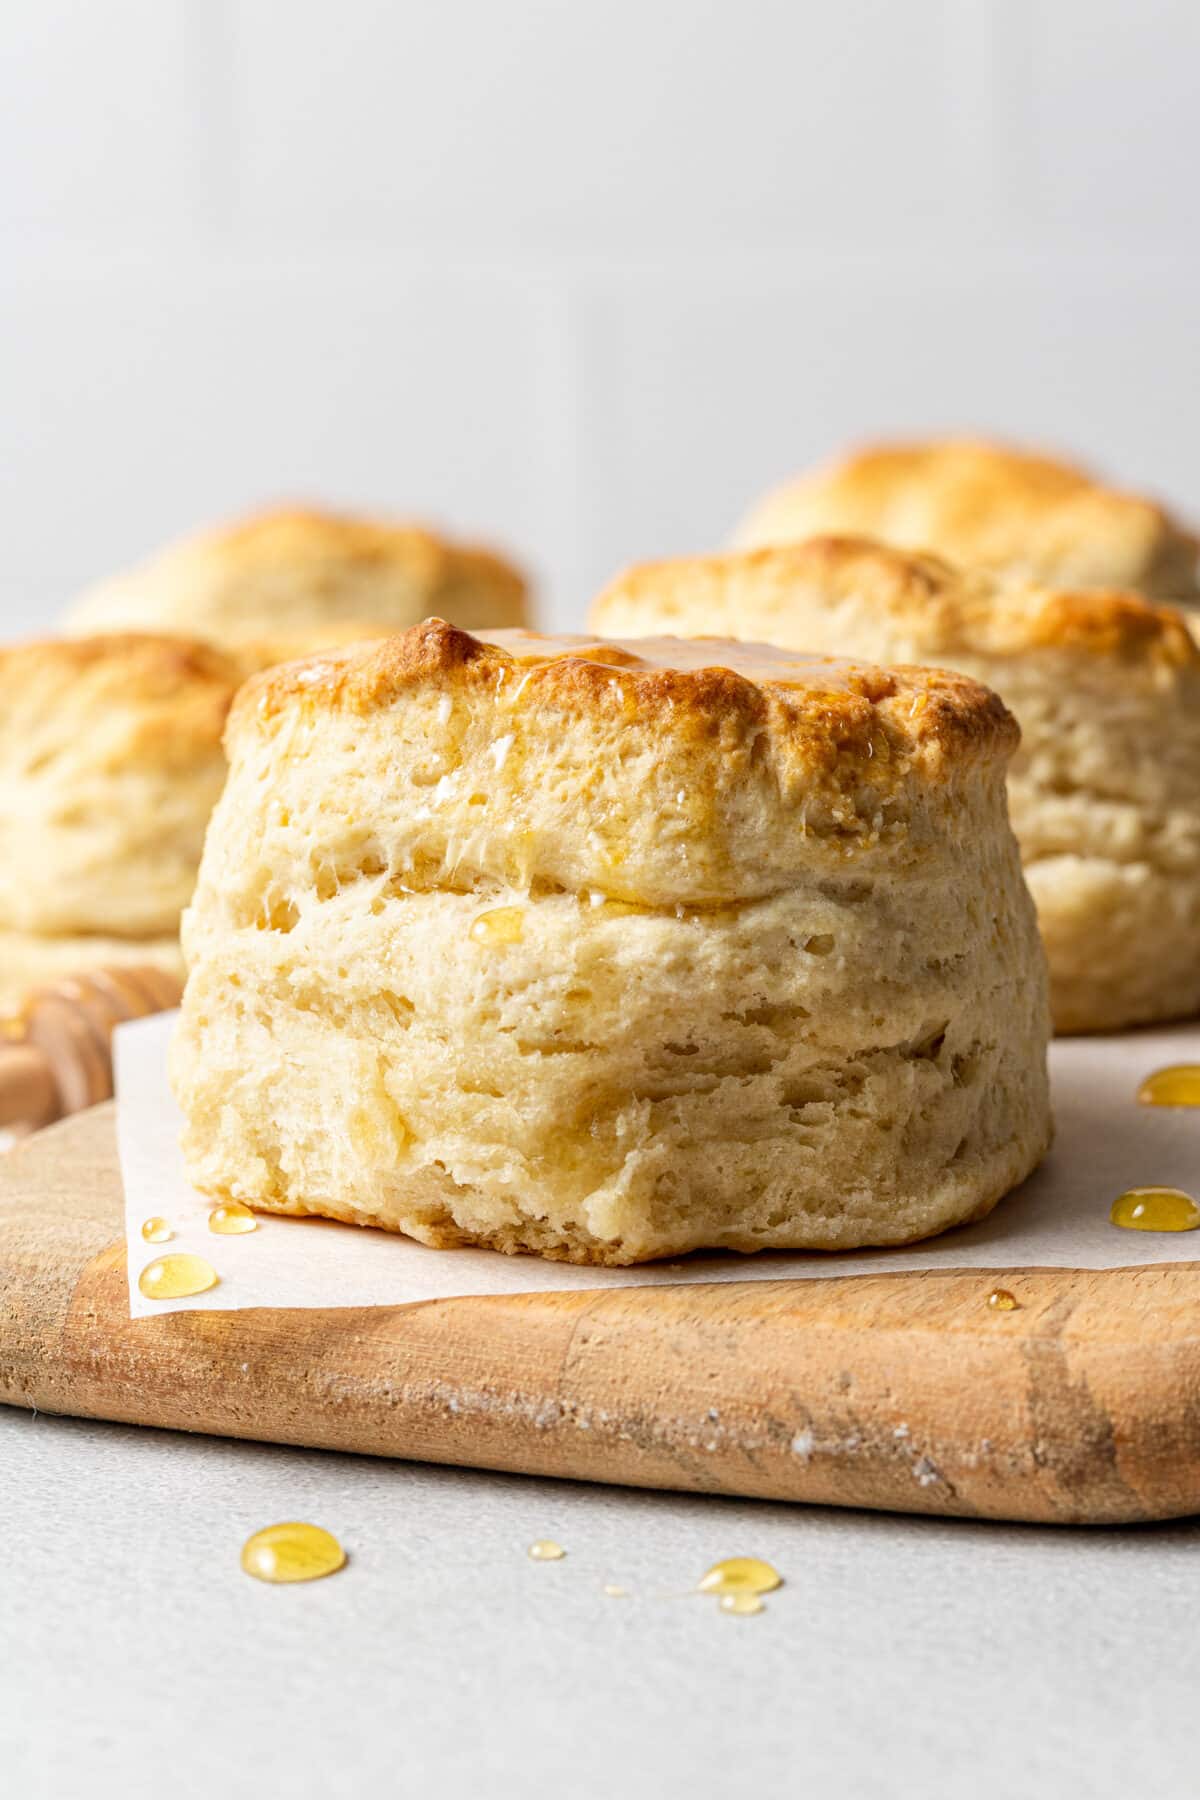
Is there anything better than a freshly baked biscuit smothered in butter? I think not. If you’ve never made homemade biscuits, you are in for a treat.
They are so easy to make and go well with everything, I even use this recipe as a base for making vegan strawberry shortcake!
These dairy free biscuits are perfect to serve for breakfast or brunch, they take less than 20 minutes to make too. People won’t even be able to tell that they’re dairy free and vegan!
Featured Reader Review
“This recipe truly exceeded all of my expectations. So flaky and delicious! I would have never known it was dairy free if I hadn’t made them myself 😁”
Katie
Why I Love These Biscuits
- They’re made with homemade vegan buttermilk, which takes just minutes to make and makes them taste just like classic buttermilk biscuits!
- They are also egg free, nut free, and soy free if you use soy free butter and a soy free milk!
- You can use this recipe to make 6 tall biscuits with flakey, buttery layers or 8 slightly shorter biscuits.
Ingredients Needed
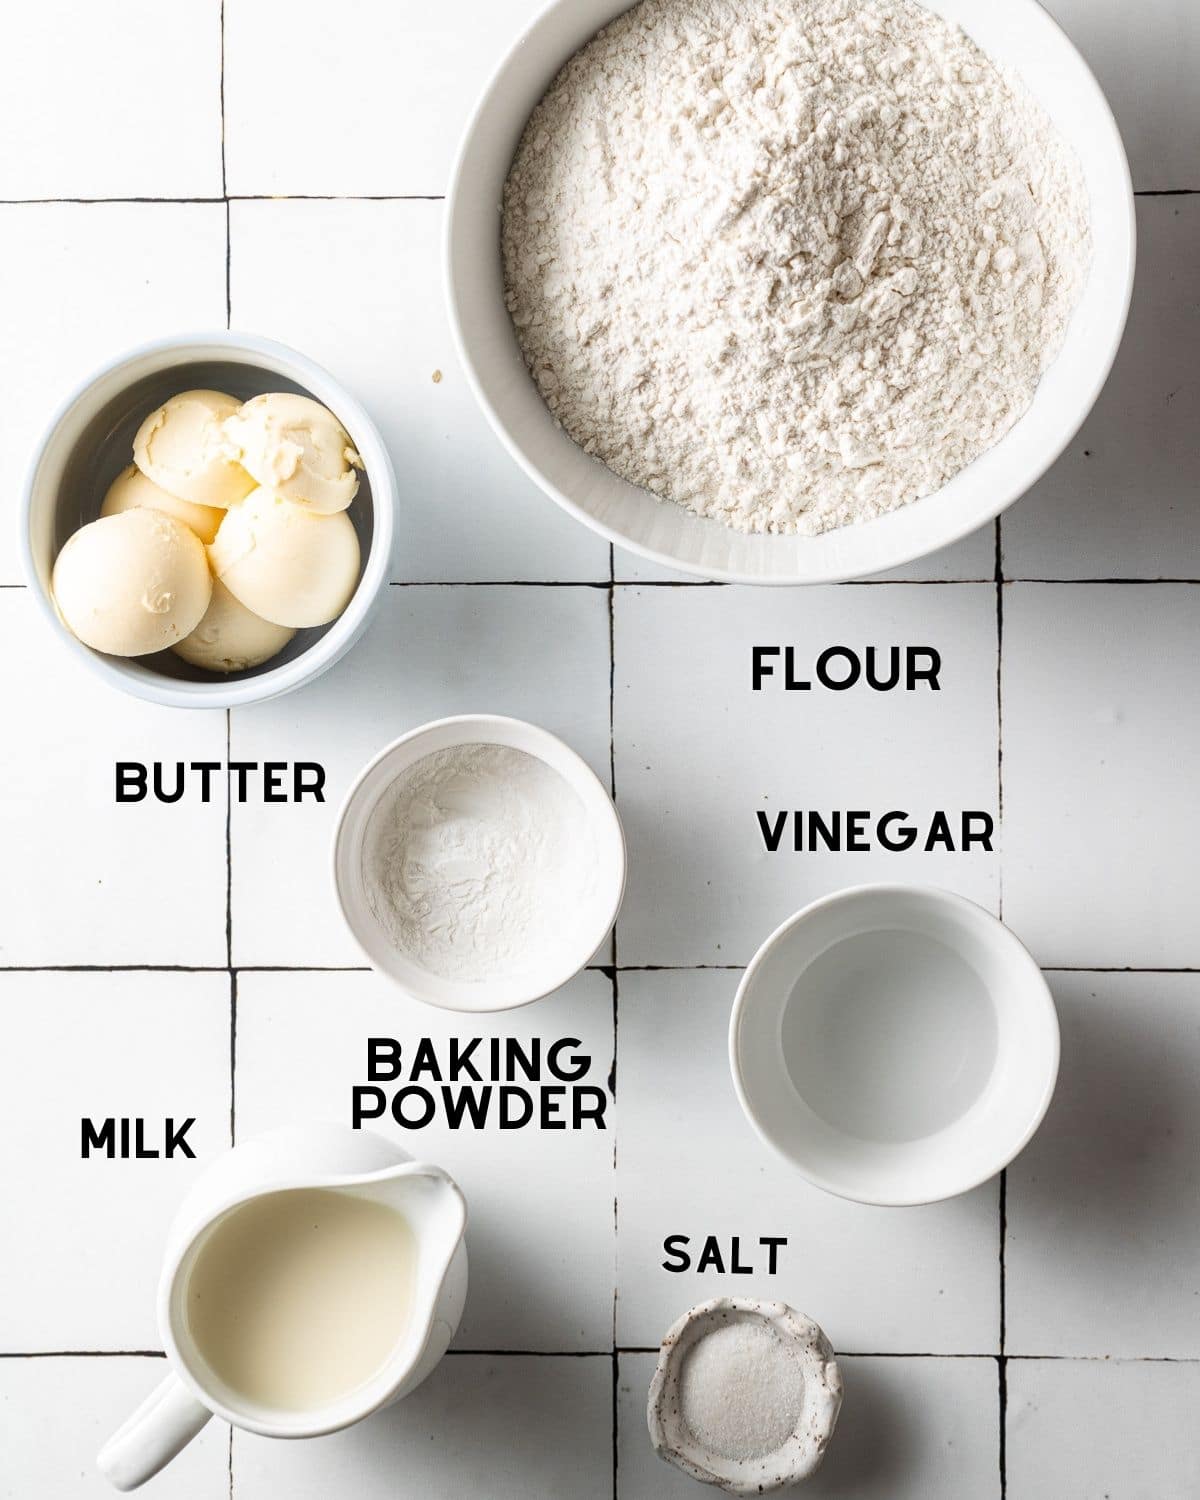
- Milk: Since the milk will be combined with vinegar to make vegan buttermilk, I recommend soy milk, as it tends to work best for homemade buttermilk. However, any dairy free milk will work with this recipe!
- Vinegar: White vinegar is used to curdle to milk and make buttermilk from scratch! If you don’t have vinegar you can replace this with lemon juice.
- Butter: Dairy free butter can vary in texture. Some are soft right out of the fridge (like a margarine consistency), where as others are more firm and take time to soften to room temperature. Since we want the butter to be as cold as possible, the best dairy free butter to use for this recipe is the firm butter, like Earth Balance brand.
How To Make These Biscuits
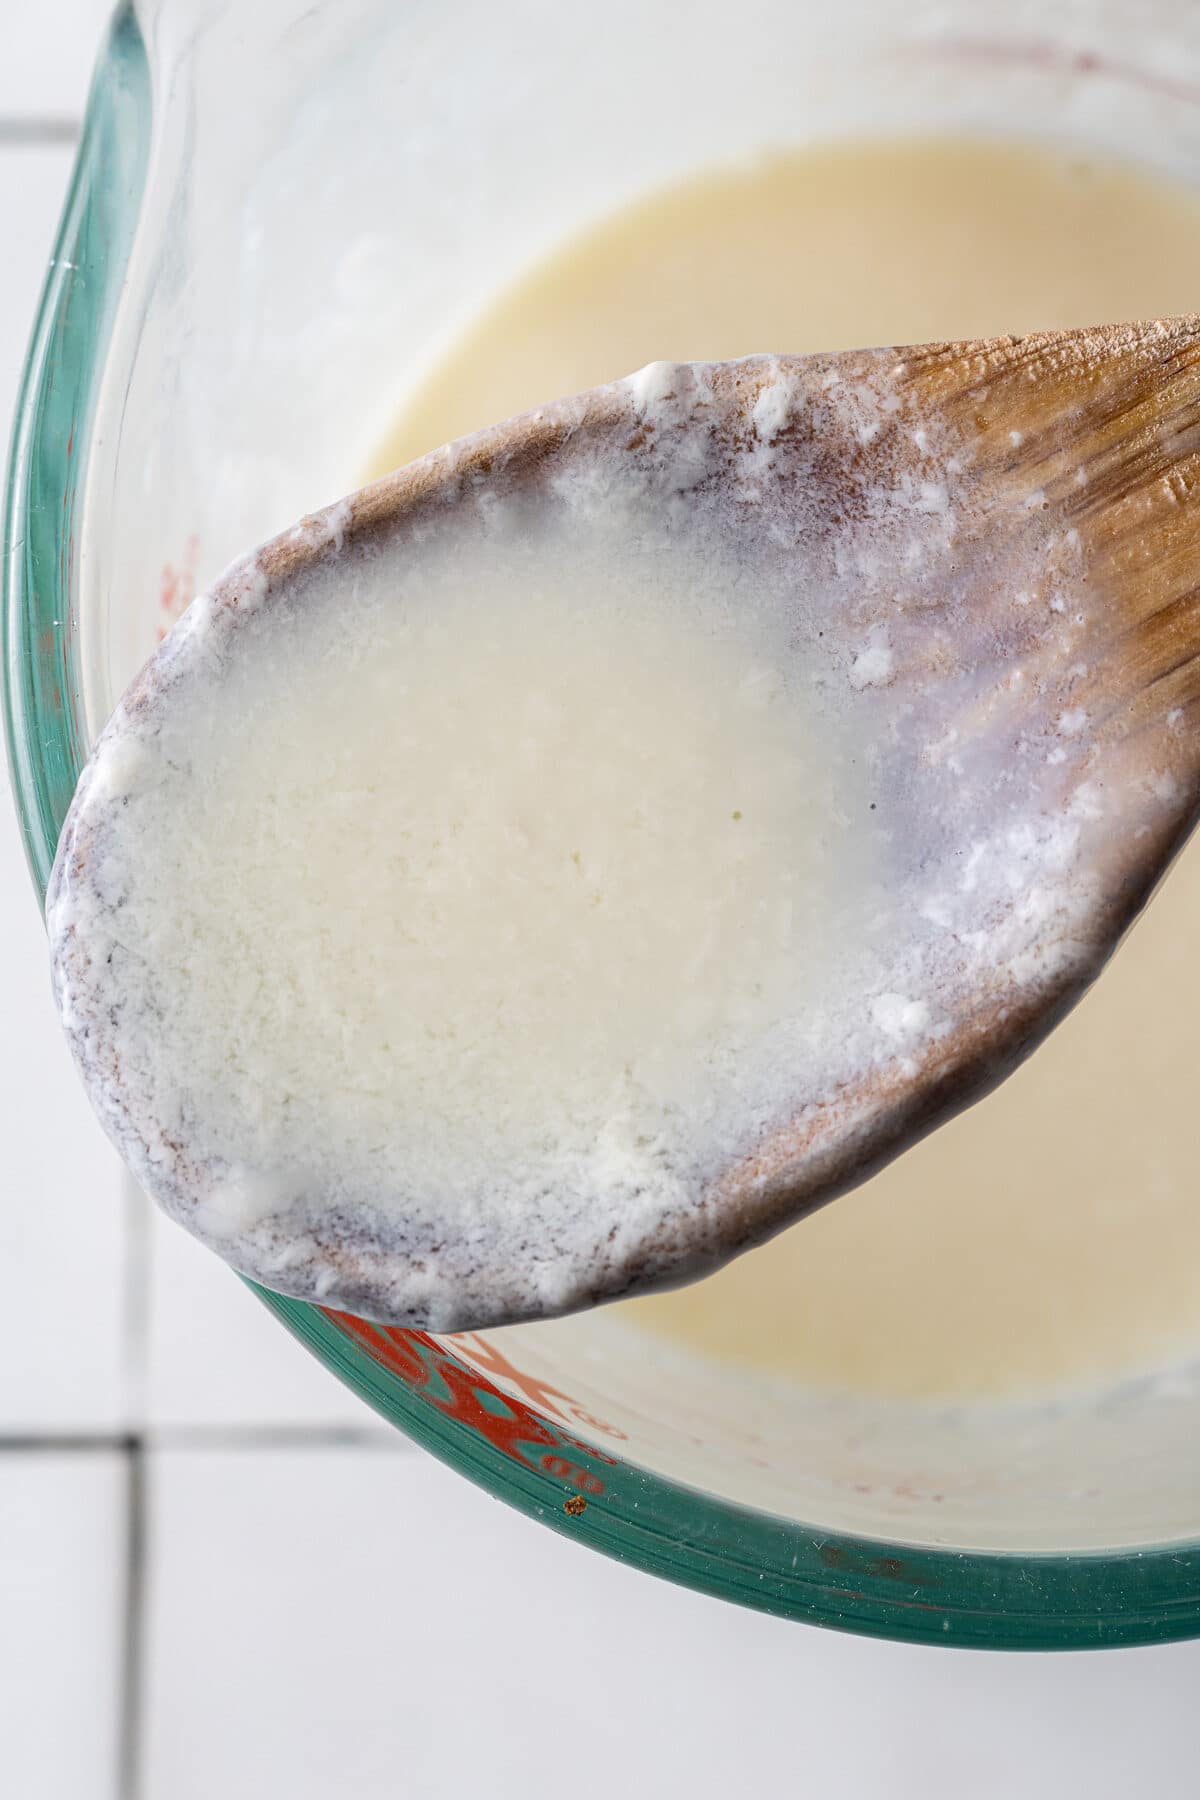
Make the vegan buttermilk!
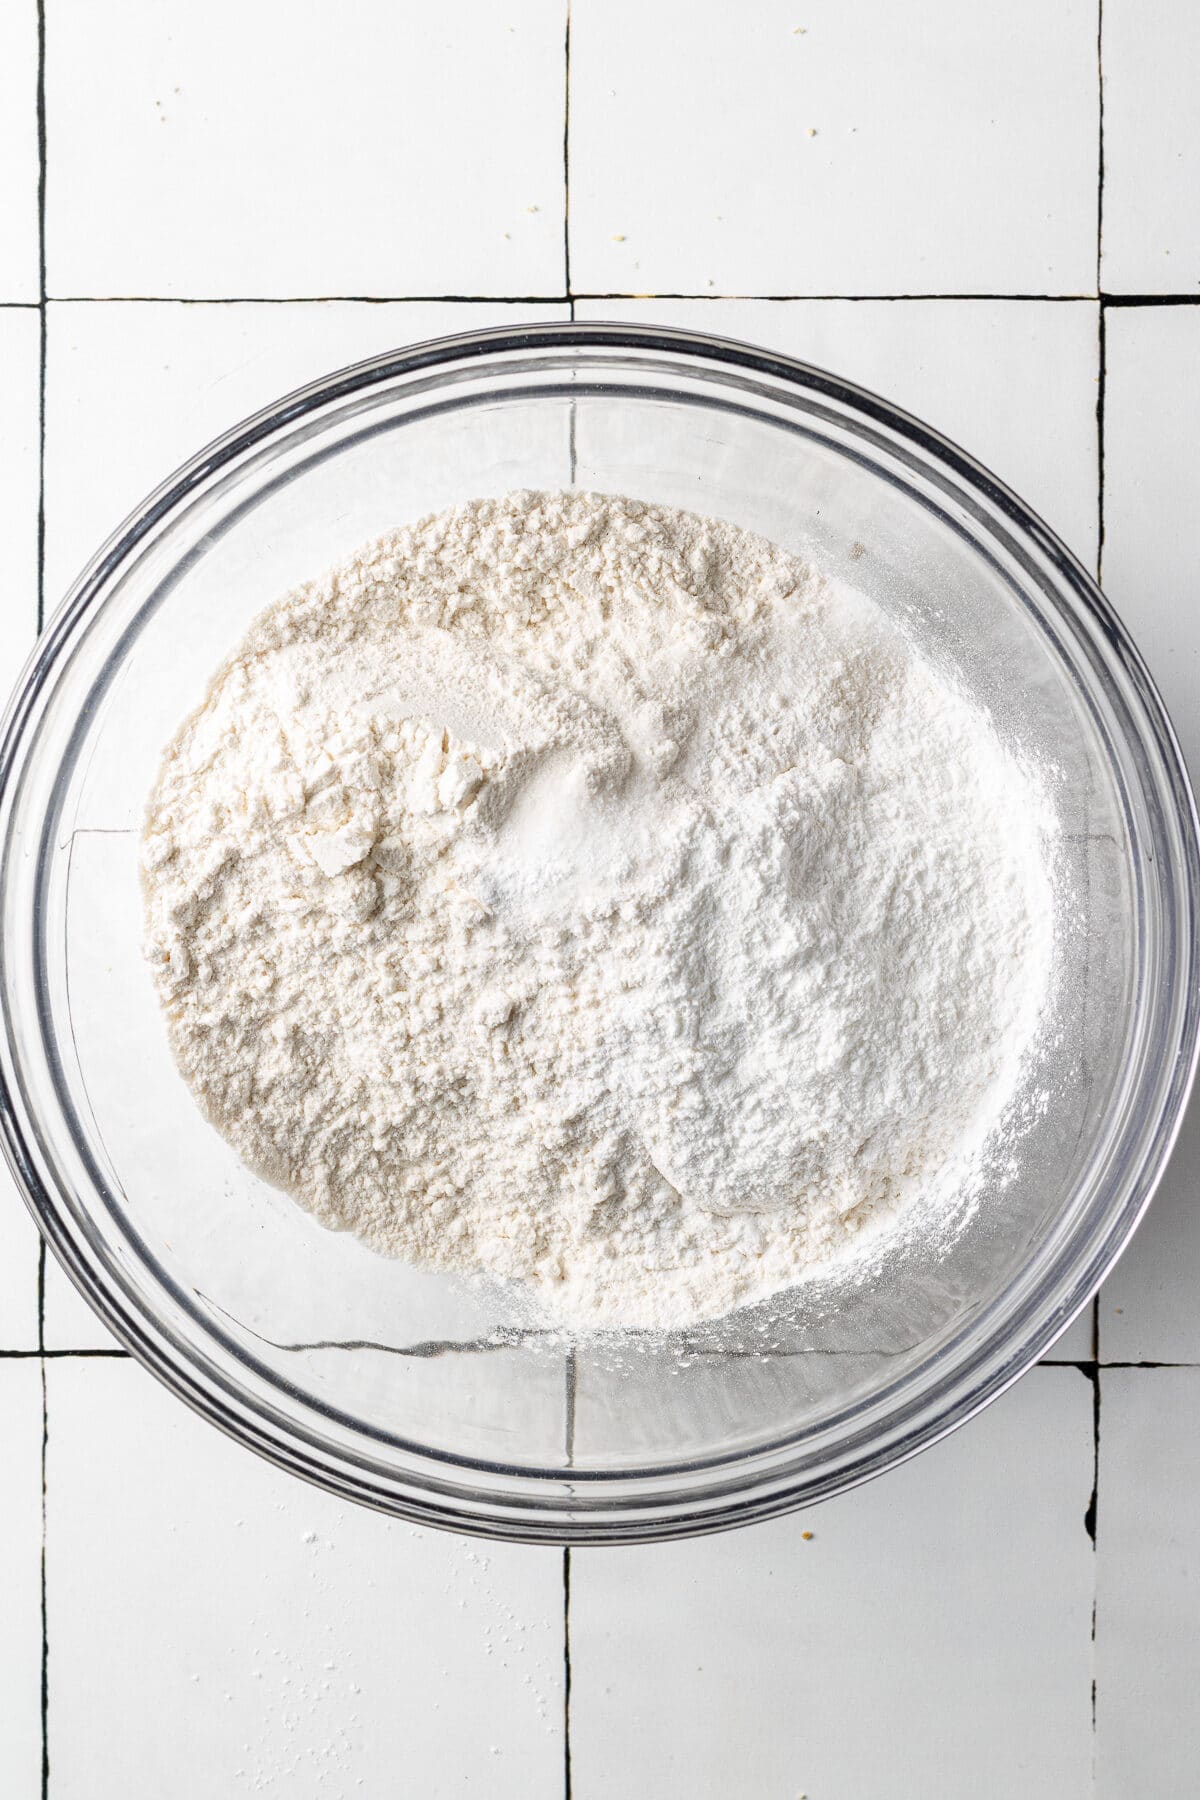
Combine dry ingredients.
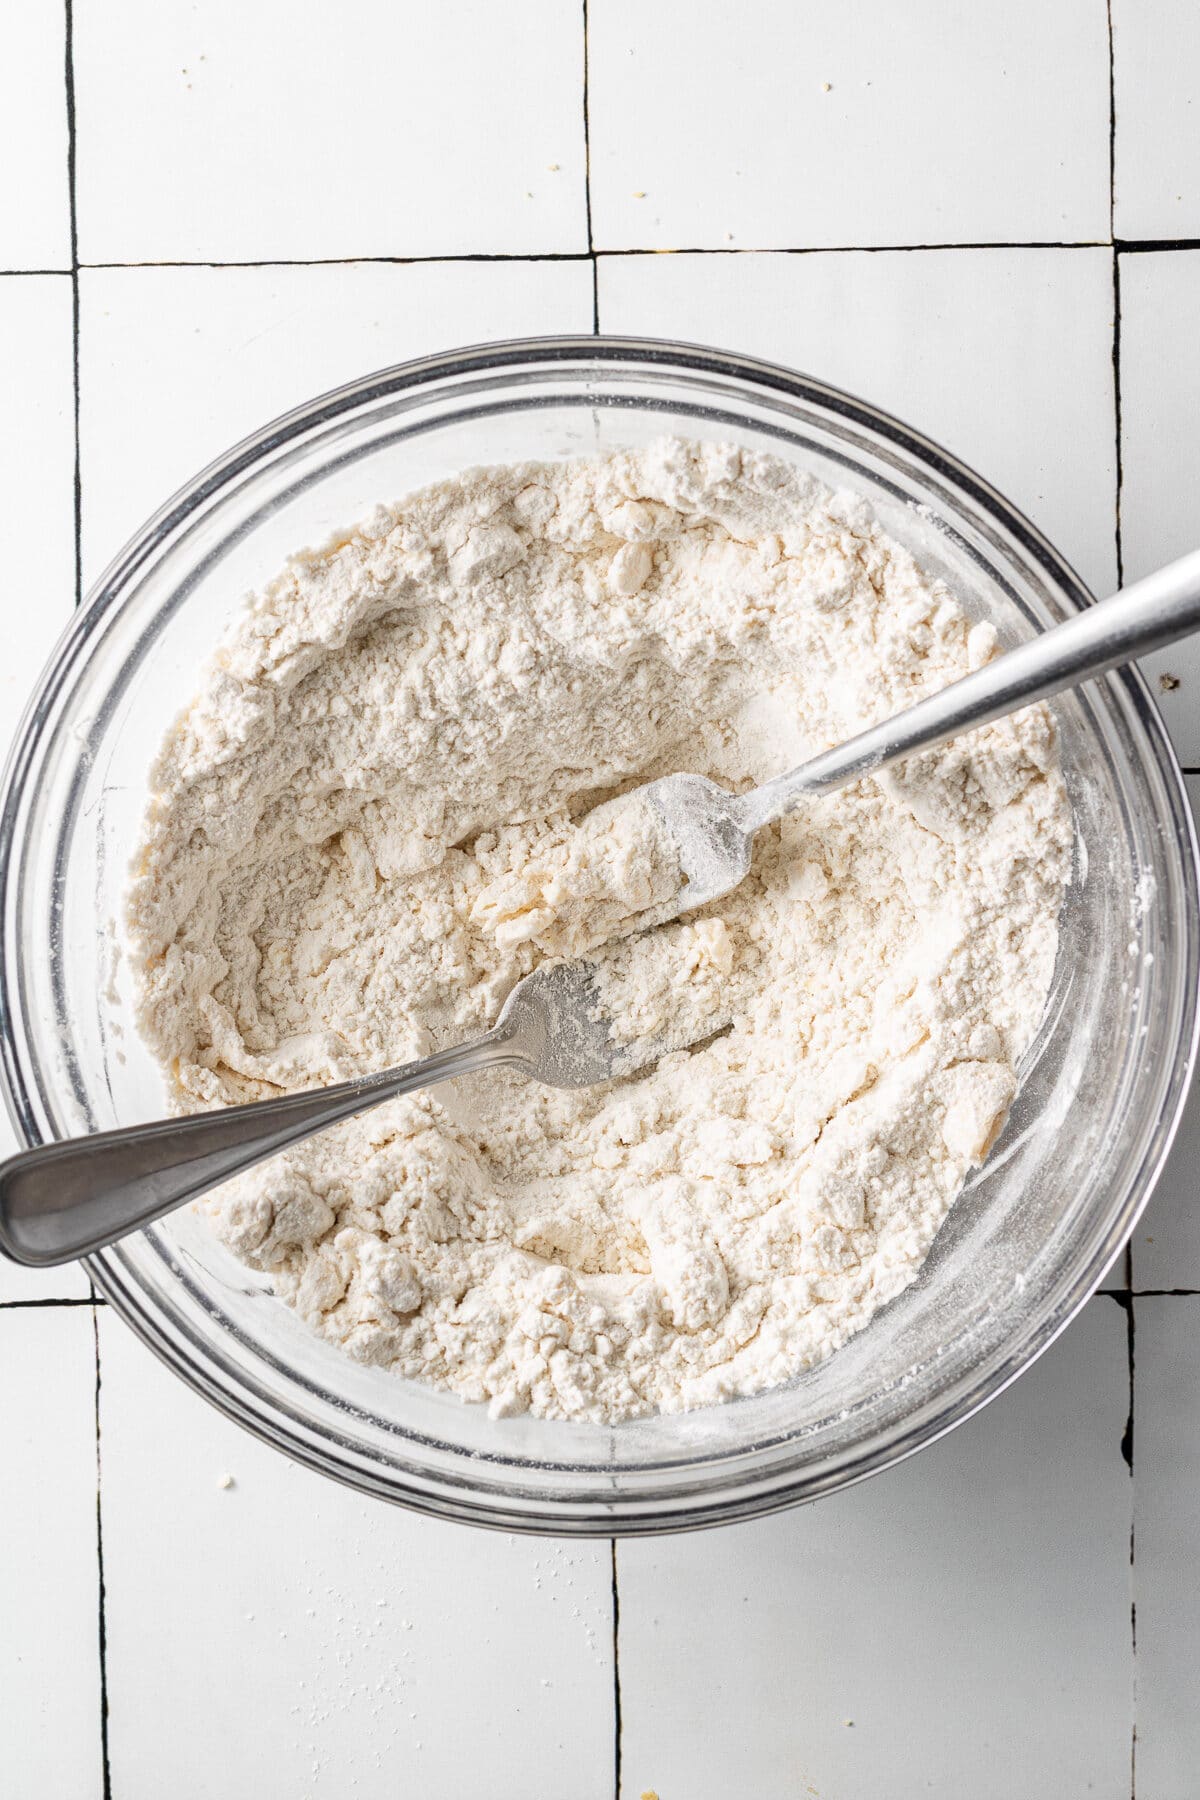
Cut in the cold butter!
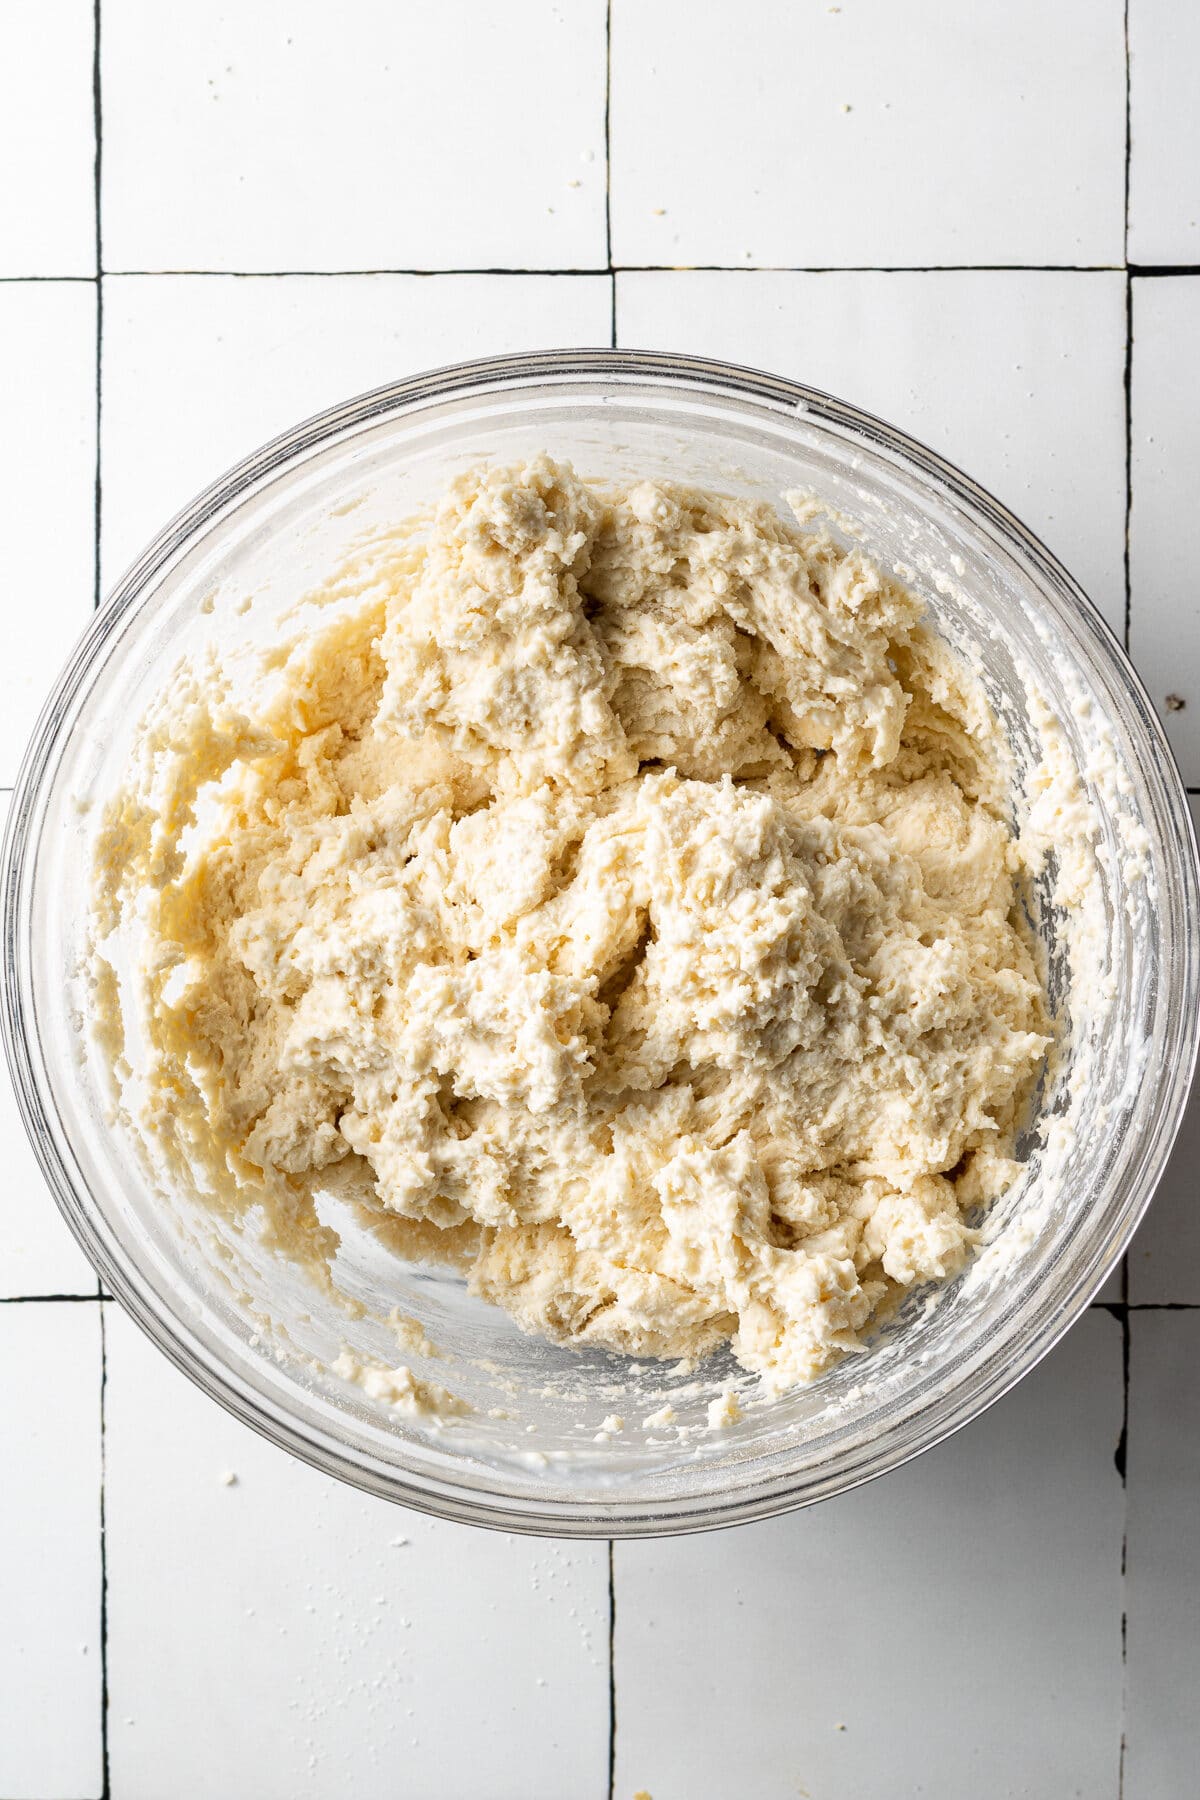
Add the buttermilk!
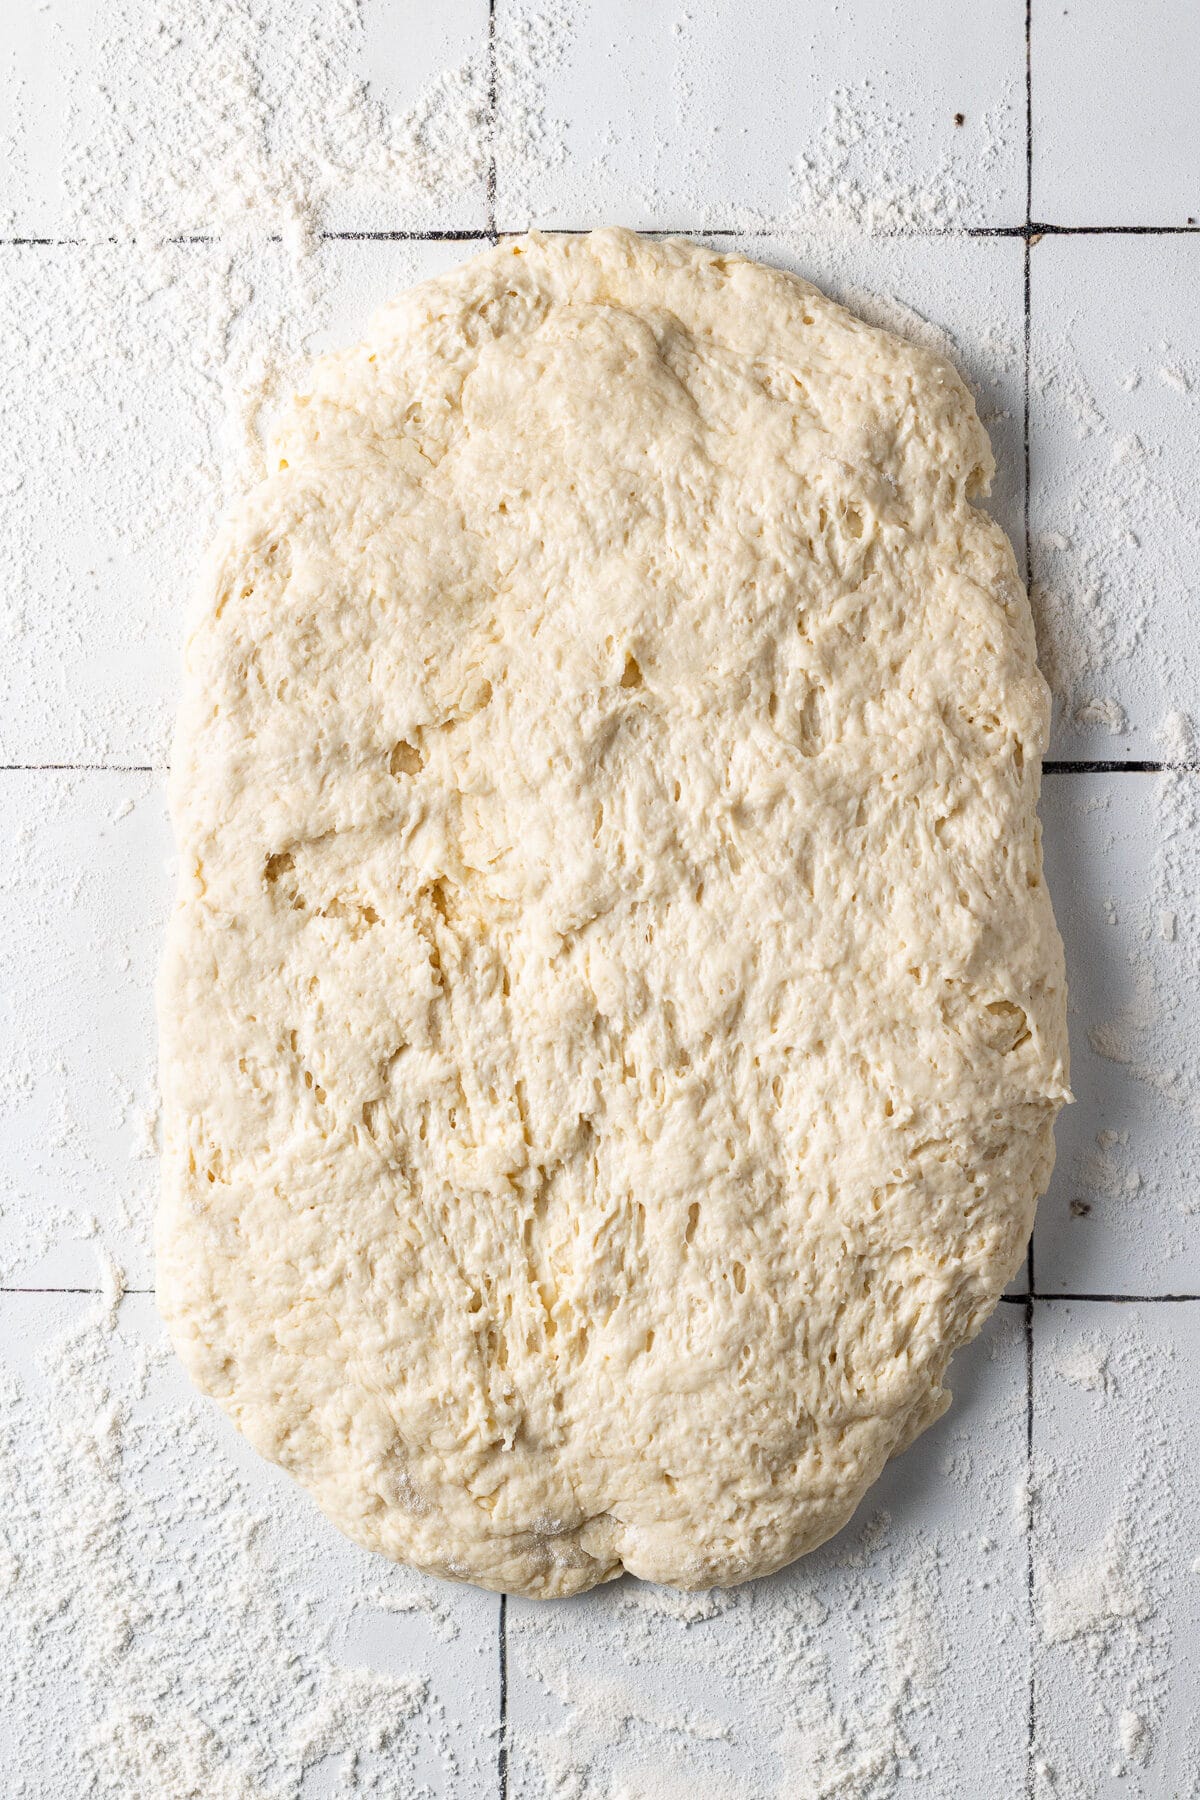
Shape the dough.
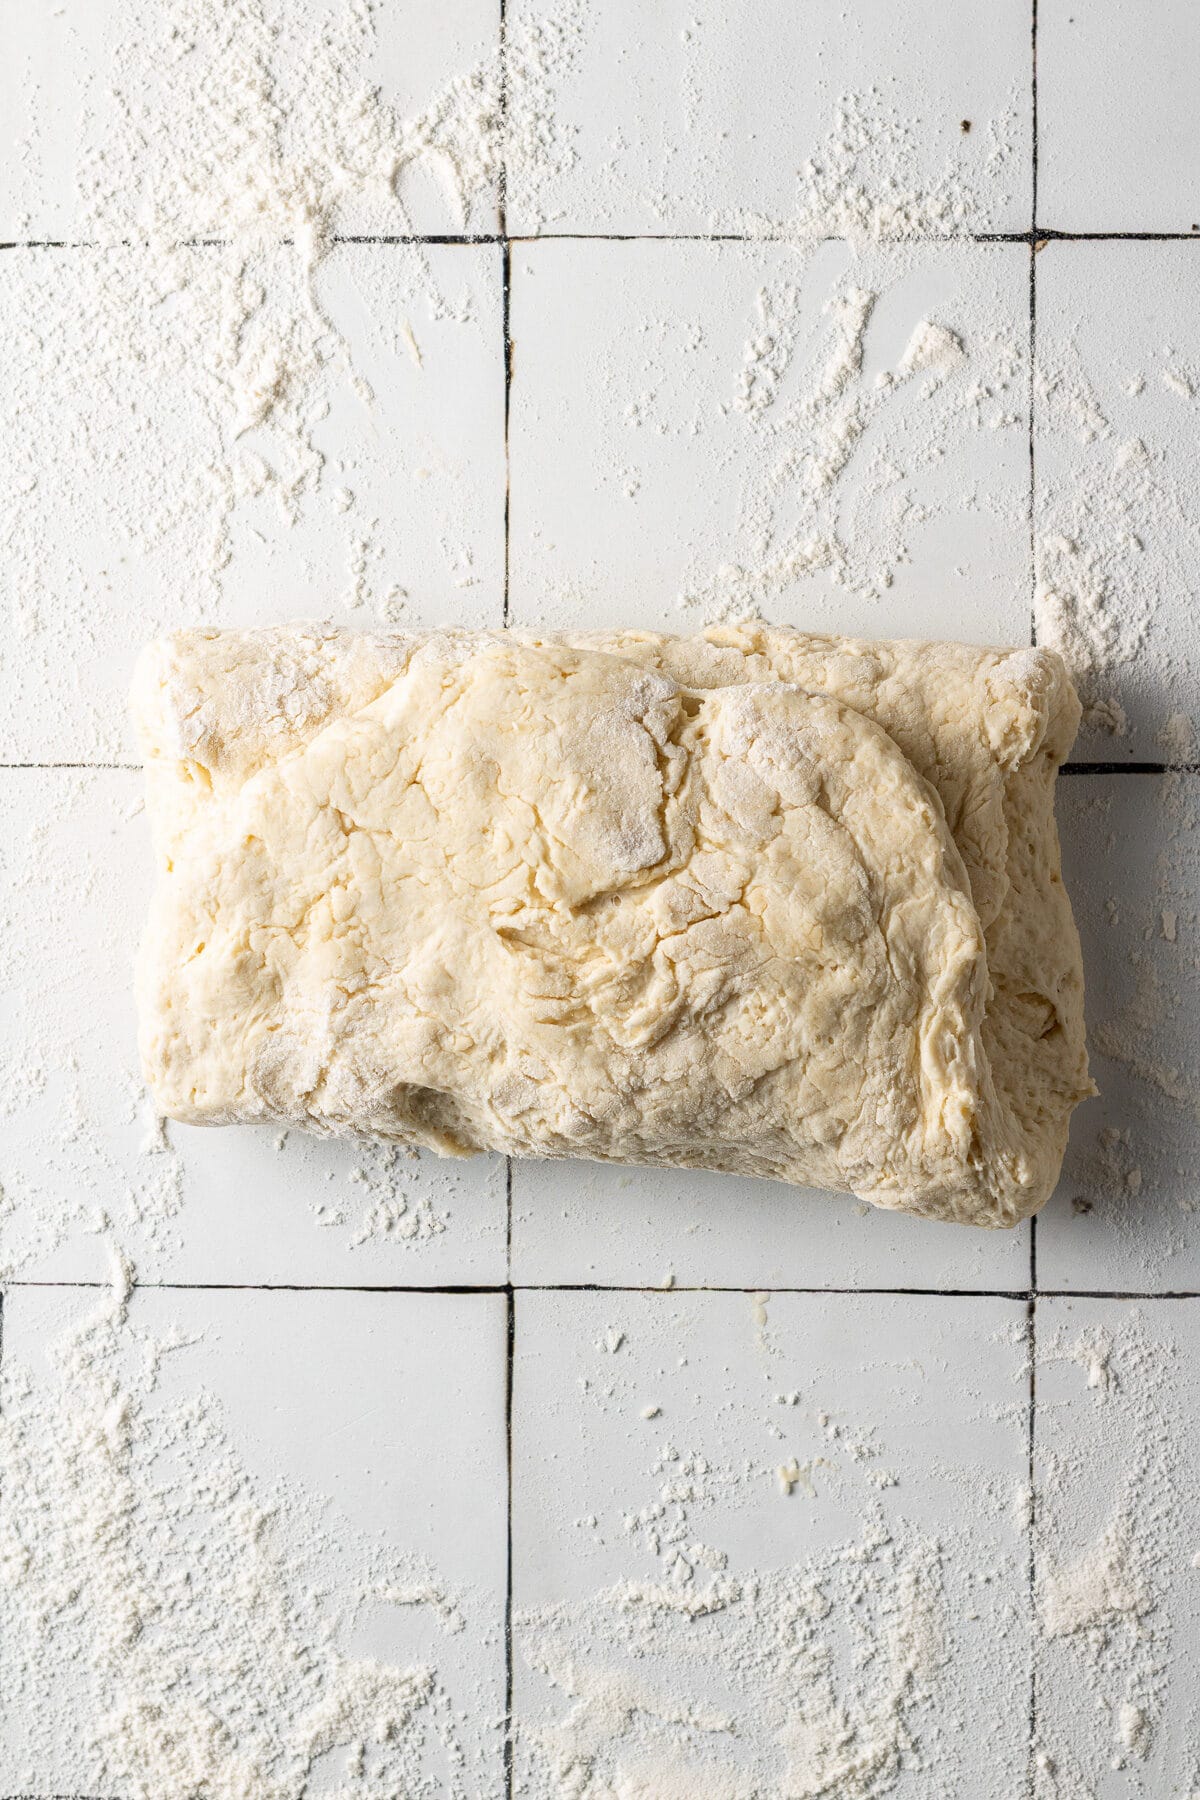
Fold it a few times.
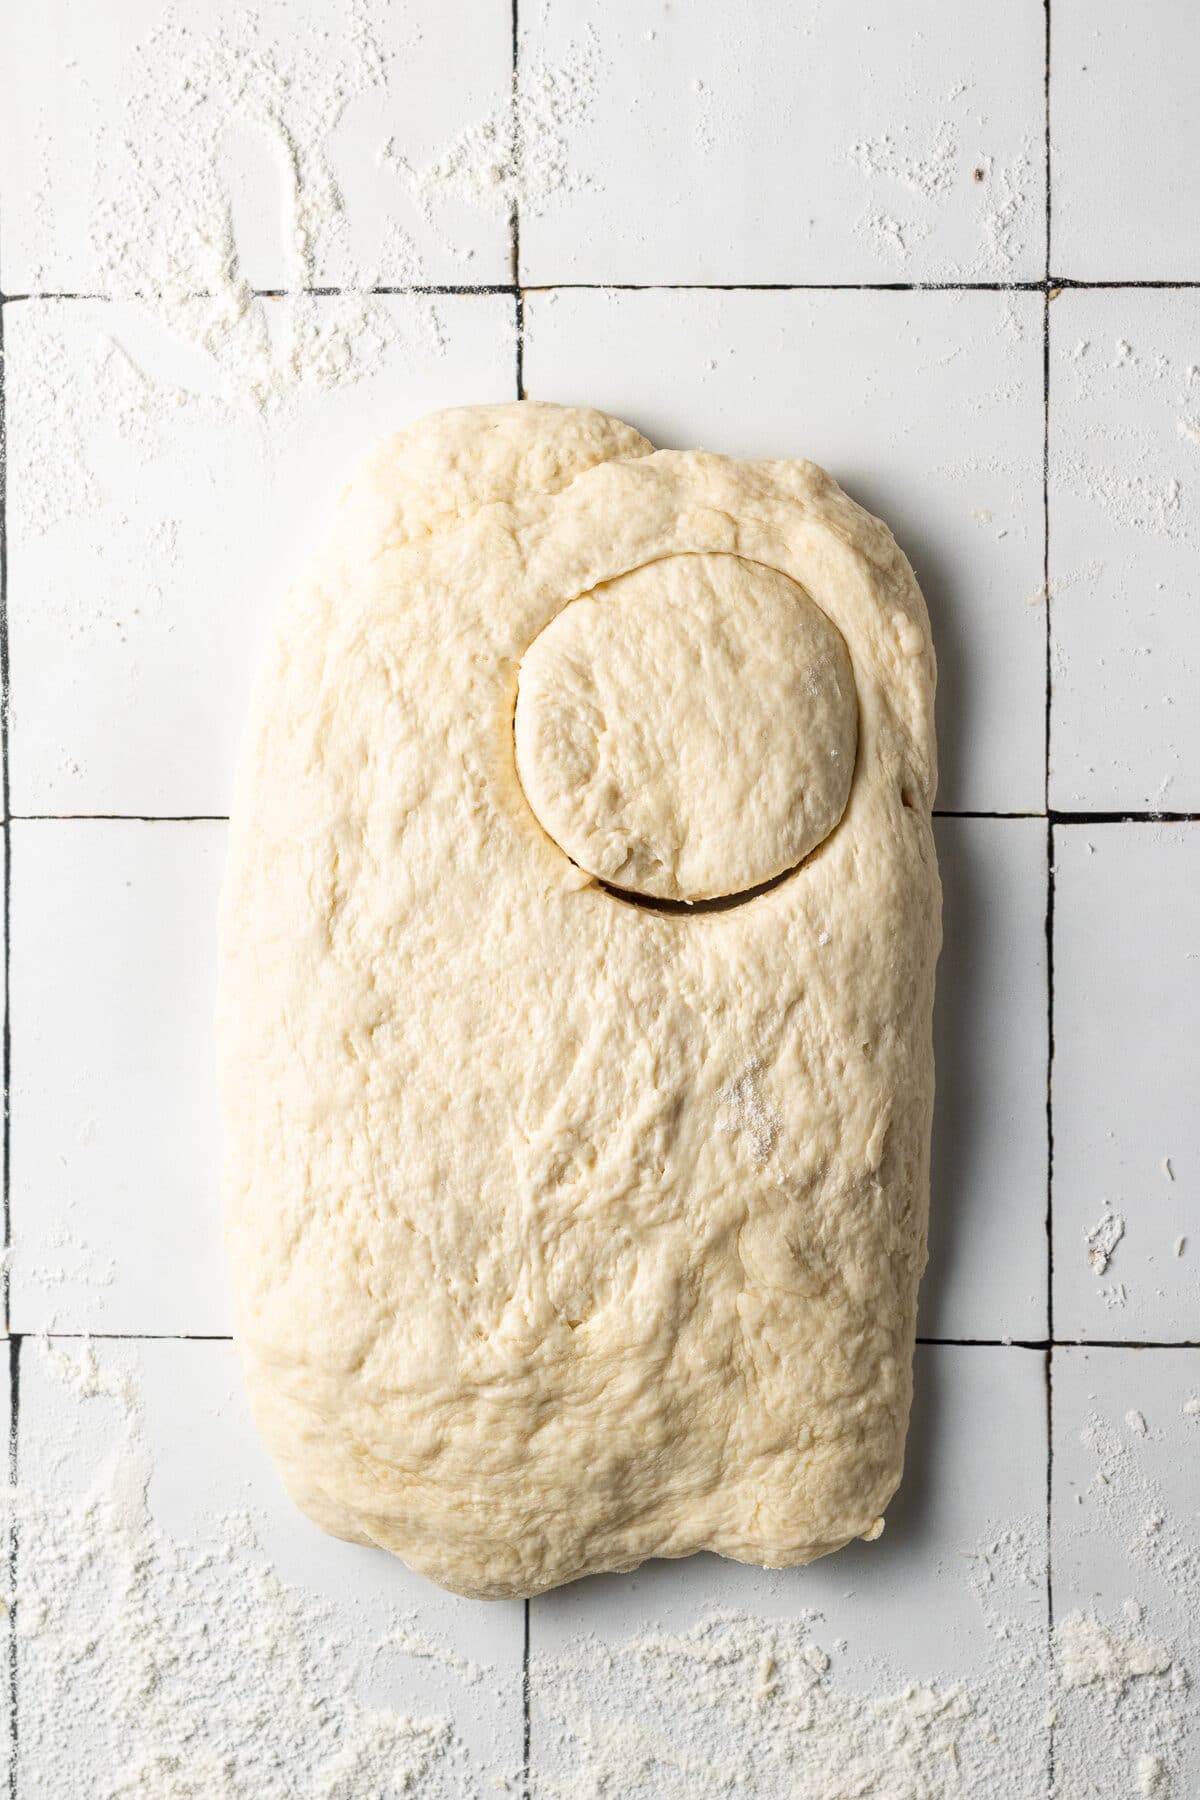
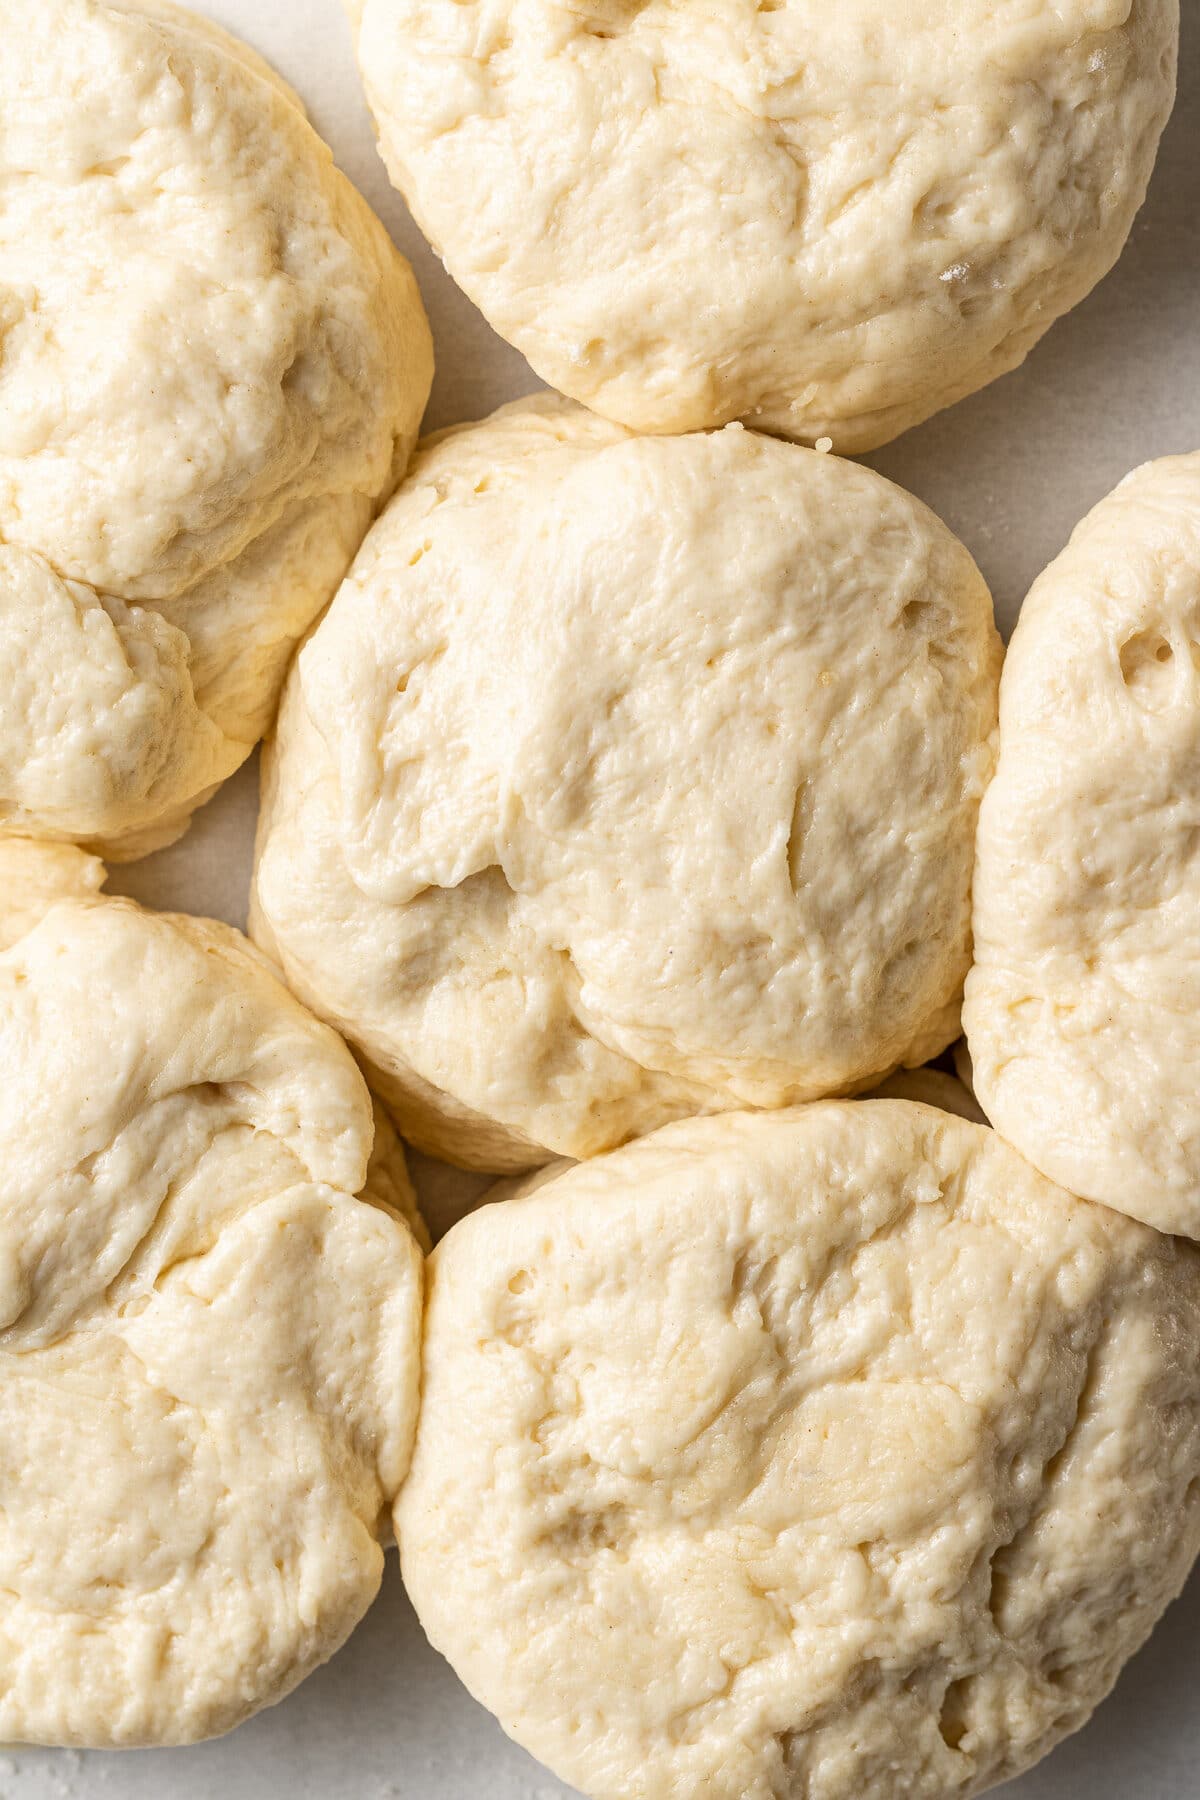
Cut out the biscuits.
Bake!
How to serve these Biscuits
- Most of the time I like to eat biscuits fresh out of the oven slathered in butter, but sometimes I even like to make berry shortcake! You can reduce the salt to 1/2 tsp, top with dairy free whipped cream, a sprinkle of sugar, and fresh or frozen berries.
These biscuits also are delicious topped with butter, eggs, gravy, jam, or served with chili or soup! Here are a few great dairy free and vegan spreads to serve with the biscuits:
- Chocolate Hazelnut Spread
- Nut Butter
- Jam
- Gravy (if you are not vegan)
- Honey if you’re not vegan!
Recipe Developer Tips
- Be sure to use cold butter!
- Try to work quickly so that you handle the dough as little as possible.
- If the dough is too sticky as you work with it, you can add in a little bit more flour.
- Flouring your hands makes it much easier to work with the dough!
More Brunch Recipes You’ll Love


If you make this recipe, let me know how it went in the comments below, I’d love to hear from you! You can also tag me on Instagram or Facebook so I can check it out!
Baking FAQ
These are the topics I’m asked about most frequently:
You can get these answers and more in my frequently asked questions post!

Dairy Free Biscuits
Video
Ingredients
- ¾ cup soy milk (or other dairy free milk of choice)
- ½ tbsp white vinegar
- 2¼ cup (281.25 g) all-purpose flour, SEE NOTES
- 1 tbsp + 1 tsp baking powder
- ¾ tsp salt
- ½ cup very cold dairy free/vegan butter, SEE NOTES
Instructions
- Chop the vegan butter into small cubes or chunks and place in the freezer for 10-15 minutes. Add ½ tbsp of white vinegar to a liquid measuring cup and fill with milk up to the 3/4 cup mark. You should have 3/4 cup total of buttermilk. Set aside until it looks curdled.
- Preheat oven to 450°F and line a baking sheet with parchment paper.
- Add the flour, salt, and baking powder to a large bowl and whisk until combined. Add in the cold butter, then use a pastry cutter or two forks to cut it into the dry mixture (photos are in post above for reference), until the mixture resembles sand.
- Pour in the buttermilk and use a wooden spoon to mix until combined. Do not over-mix. The dough will be fluffy and slightly sticky.
- Transfer the dough to a floured surface. Dust your hands with flour then form the dough into a rectangle, around 1 inch thick (SEE NOTES if making 8 shorter biscuits instead of 6 tall biscuits).
- Take one short side of the rectangle of dough and fold it in towards the middle, then fold the other side in (so you have a square). Gently flatten the log again, around 1 inch thick, then repeat two more times (3 times total). Try to work quickly so that you handle the dough as little as possible.
- After the final fold, gently form the dough into a 1 inch thick rectangle and use a biscuit cutter to cut circles in the dough (do not twist the biscuit cutter to remove it. Either pull the dough away from the sides or lift straight up – see notes).
- Place the biscuits onto a baking sheet, making sure they are touching each other. Brush the tops with more vegan milk then bake until golden brown, around 13-17 minutes. Serve immediately.
Equipment
Notes
The calorie information provided for this recipe is an estimate. The accuracy of the calories listed is not guaranteed.
These biscuits are delicious. My daughter is breastfeeding and needed to go dairy free for the baby. I made them for a family dinner and no one could tell they were dairy free. Will definitely itely make again.
This question will make most people here cringe because Most here are vegan. My daughter in-law is dairy intolerant. Can these be made with lard instead of butter.
I haven’t tested the recipe with lard or even baked with lard much before, so I can’t say for sure. I’d recommend using a few tablespoons less of the lard if you want to try it, since it’s 100% fat.
Couldn’t believe I got such a moist and honestly one of the best biscuits I’ve had. And it’s vegan! I can definitely see why people switch to vegan and I’m willing to try many other vegan recipes!
Happy to hear this! Thank you Ariana!
I was recently reading a book of historical fiction, and in the bok, homemade bread and biscuits were often mentioned. Naturally, this led me to crave homemade biscuits. While I bake and cook often, biscuits was new. These turned out beautifully and my family approved! We were able to make 13 biscuits out of the recipe and no one could tell they were dairy free. Thanks so much! Adding this to our recipe folder for sure.
Hi Kiley! Happy to help with your book cravings! Thank you for leaving a review!
Today, I’ve made biscuits for the first time –
Vegan buttermilk biscuits with butter. I use unsweetened oat milk; so this recipe gives a recipe to make buttermilk from any milk, other than dairy. It only takes one other ingredient and 10 minutes.
It works. It’s amazing.
Since I live in the South and we love butter in this house, I used real butter. I even opted for the salted butter. That’s my personal cooking preference.
True to the recipe, these biscuits are light and fluffy with layers, along with a perfectly crisp bite throughout. They are not crumbly or too crisp.
The prep time and cleanup was minimal and what’s more; I had all of the ingredients right here at home.
I give this recipe 5 stars.
Hi Jenny! So glad to hear you enjoyed these biscuits! I appreciate your review 😍
Shockingly really good! I recently switched to being dairy free because my baby has a dairy allergy, and I’ve been so disappointed with dairy-free recipes where the dairy really shines (I.e. butter for biscuits!) I made these to put on top of a chicken pot pie filling and it turned out so good. Definitely saving this recipe! I uses oat milk and Miyoko’s butter alternative.
These turned out perfectly! Thank you.
Thank you for your review Sharrine!
Thank you for recipe I did use self rising flour,no baking soda, powder or salt needed ..I was worried the almond milk wouldn’t work but success my daughters stomach thanks you!
I am so happy the recipe worked with those substitutions!
This recipe truly exceeded all of my expectations. So flaky and delicious! I would have never known it was dairy free if I hadn’t made them myself 😁
I am so happy you loved the biscuits Katie! Thanks so much for the review!
Can you use dairy free fat free milk?
Dairy free fat free milk should work!
I’m really excited to try these! Can I freeze them before cooking them and then just bring them out to bake as needed?
Hi Christina, I actually haven’t tried it myself but I think that would work fine! I’d just add around 5 more minutes to the baking time when baking from frozen. You could also bake all the biscuits and then freeze them for later. Enjoy!
These were delicious! I used almond milk and country crock plant butter.
Hi Marie! Yay I am so happy to hear that you loved the biscuits! Thanks so much for the review 🙂
Breakfast is changed for ever now. I made a bunch of these and froze them, and they are delicious, fluffy with the right amount of crunch every time. My family loves the breakfast sandwiches, myself I am a simple butter and honey guy. THANK YOU!
Hi Andrew! Thanks so much for the review! I’m so happy to hear that you loved the biscuits 😀
These came out perfectly! Got the exact right consistency with the measurements provided, they rose beautifully, amazing flaky layers and tasted great! I would decrease the salt next time, just a touch too much for me. Otherwise, my new favorite biscuit recipe.
Hi Chrysti! Yay! I am so happy to hear that you loved the biscuits so much! Thanks so much for taking the time to come back and leave a review! 🙂
Just made these using oat milk. The texture is great! I feel they’re lacking a bit in flavor (probably because I’m used to using cream) but because I made them to eat with sausage gravy, I think they’ll work great. Super easy! Thanks
So glad you loved them Lauren!
These were absolutely delicious! Just as flakey every time they come out of the freezer to be heated up.
Hi Adrienne! So glad that you loved the biscuits! Thanks so much for the review 🙂
I noticed the recipe said to brush biscuits with dairy free milk before baking…is the correct or should it be dairy free butter? Planning on making tonight. Thanks!
They should be brushed with milk, not butter. Enjoy!
The here were the tallest and flakiest biscuits I’ve ever baked but… the bottoms were completely burnt! So weird! I only baked them for 12 minutes. The rest of the biscuits were perfect and I cut the bottoms off. I use an all natural brown parchment paper – maybe it’s not meant for 450*? Next time I’ll use my baking non-stick silicone pad and see if that makes a difference.
I also added thyme and smoked paprika, tastes delicious and will go great for the breakfast sandwiches I’m prepping and freezing.
Hi Amy! Thank you for your review! The rack they were baked on could have been too close to the heating element, or the temp in your oven is off. Do you have an oven thermometer to check oven temp?
Used almond milk since I can’t have soy and they turned out so yummy! Thank you! Being dairy and soy free for my son made it so I couldn’t eat the store bought biscuits and I’ve been craving them!
Hi Jessica! I’m so happy that you loved the biscuits and that they satisfied your craving 🙂 Thanks so much for taking the time to leave a review!
These are absolutly amazing! I loved them!!
Hi Bo! I am so happy to hear that you loved the biscuits! Thanks for taking the time to leave a review 🙂
Please recommend a butter
Hi Kelly, I like to use Earth Balance, but you can use any vegan butter. Ideally, it should be a brand that gets hard in the fridge (some stay some, like margarine). Enjoy!
Great tip to freeze the butter! Flakey texture turnout out perfectly and they were gone before they had a chance to cool down!
Hi Jill! I’m so happy to hear that you loved the biscuits! They disappear fast in our house too 🙂 Thanks for taking the time to come back and leave a review!
I will need to make these again because I didn’t weigh my flour or use the technique so the dough was dry. The biscuits still turned out amazing despite that! My family loved them too!
Hi Kayma! Too much flour would definitely lead to a drier dough, you’re right! But I’m so happy to hear that the biscuits turned out great anyway and that they were a hit! Thanks so much for taking the time to leave a review 🙂
How does rice milk work for this recipe?
Hi Sam! I haven’t tested this with rice milk, but I know that rice milk does have a more watery consistency than other creamier dairy free milks. I think it would still work fine though!