Chocolate Sandwich Cookies
This post contains affiliate links. Read the full disclosure here.
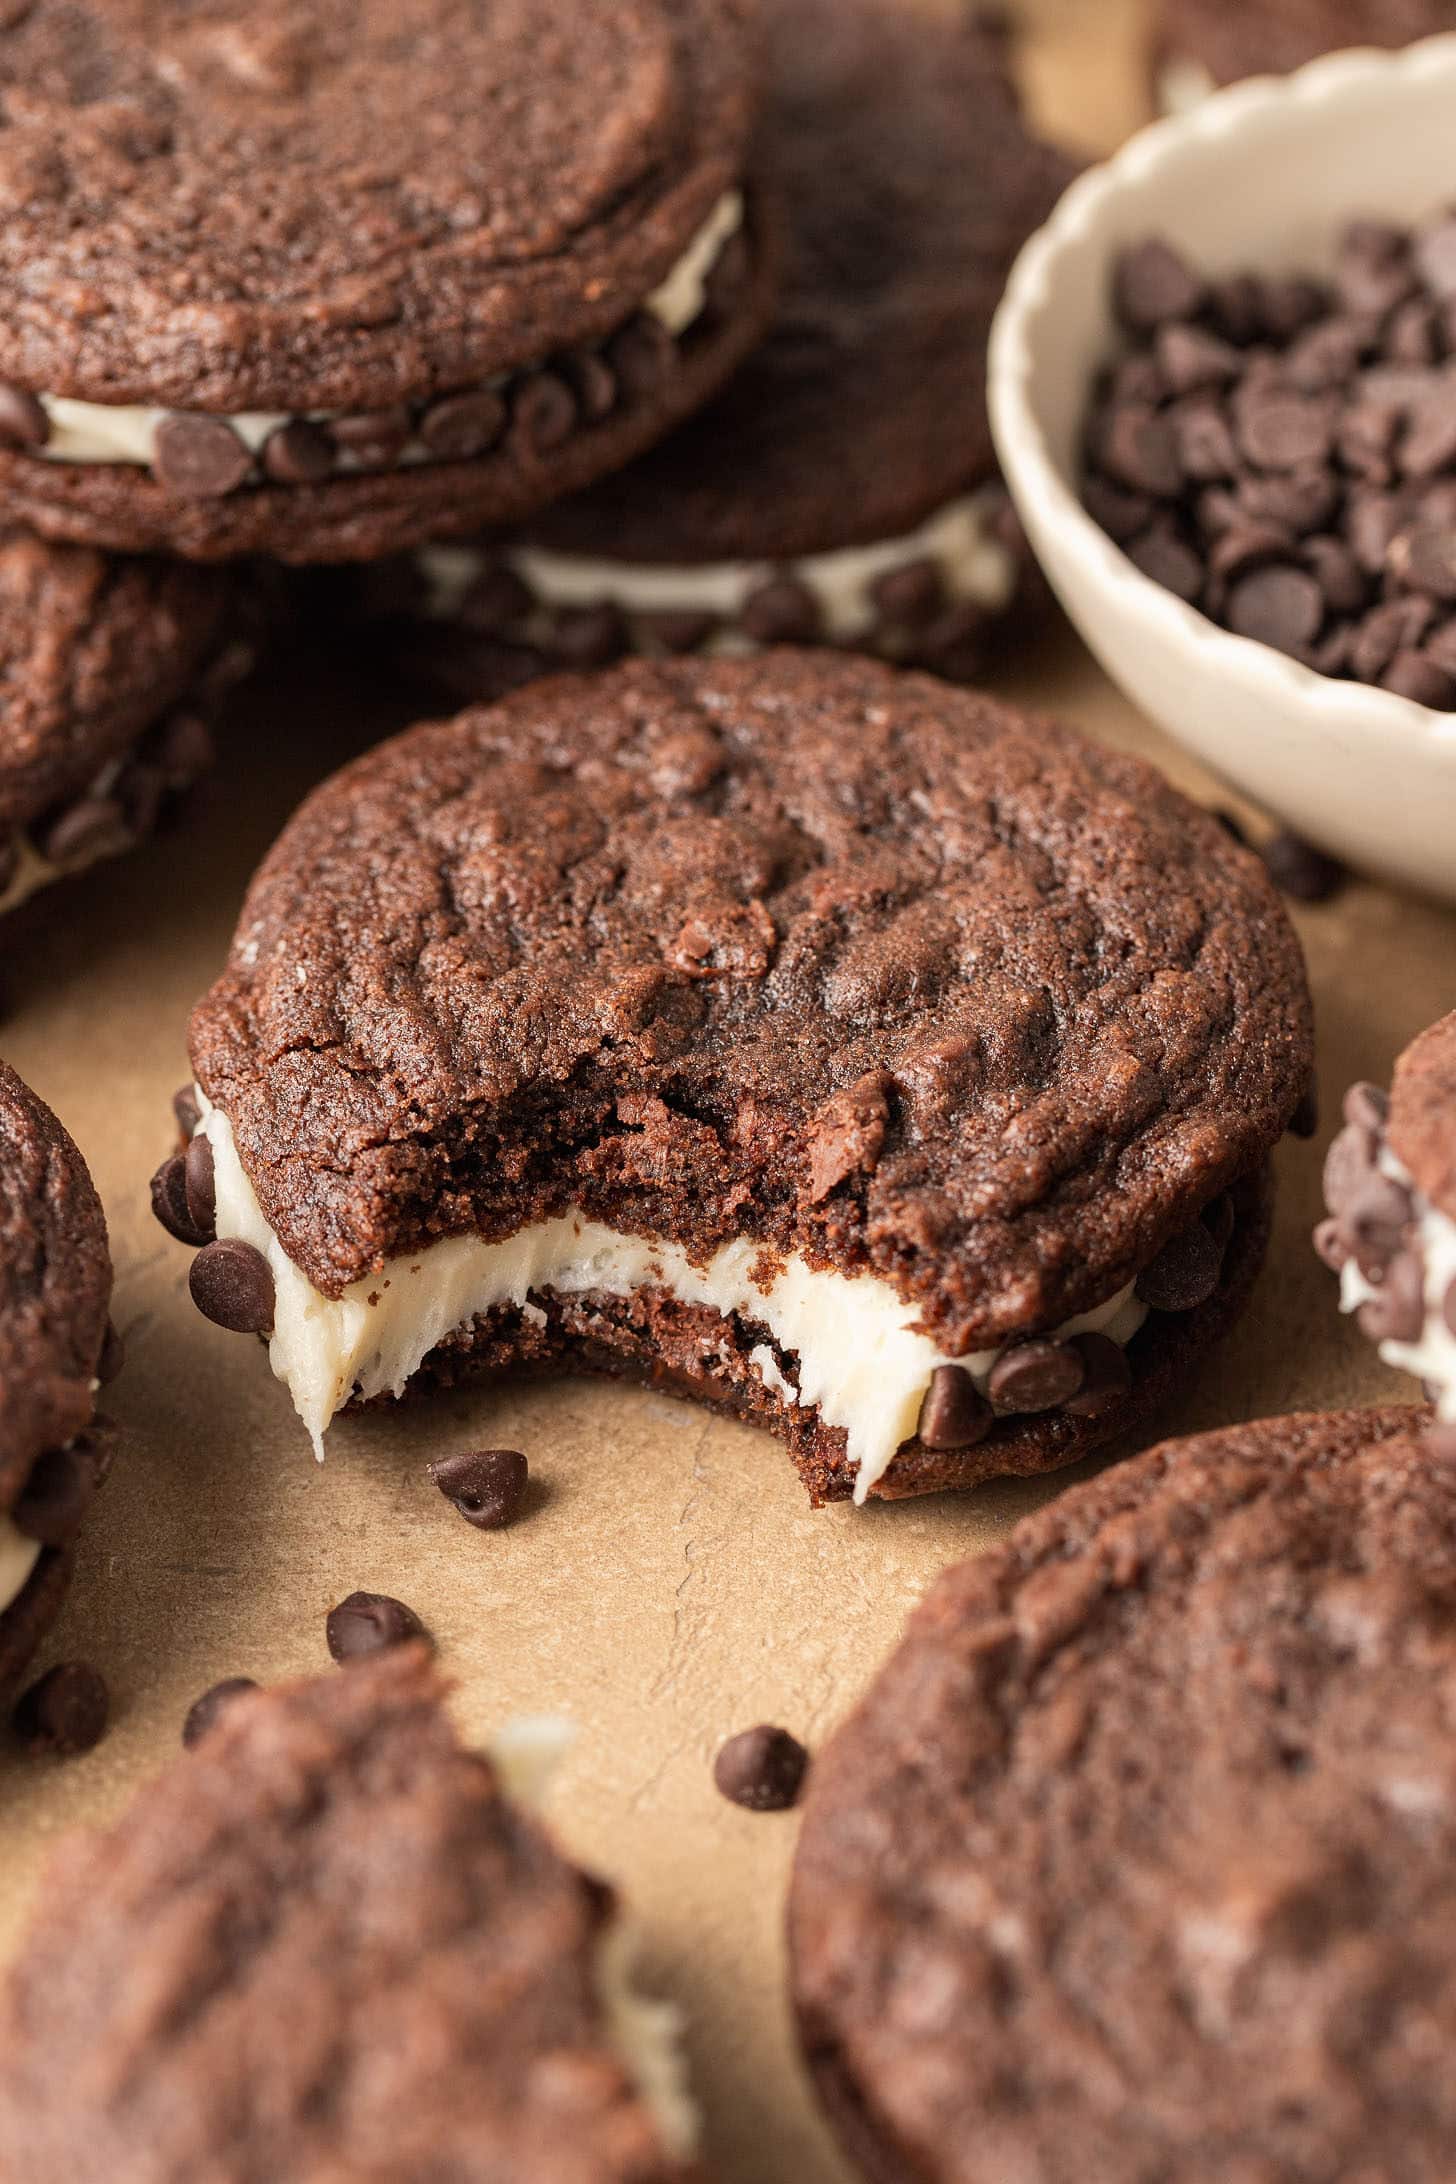
These chocolate sandwich cookies are filled with homemade vanilla buttercream and rolled in mini chocolate chips! These are so much better than any store-bought sandwich cookie. Plus, you don’t need to chill the cookie dough.
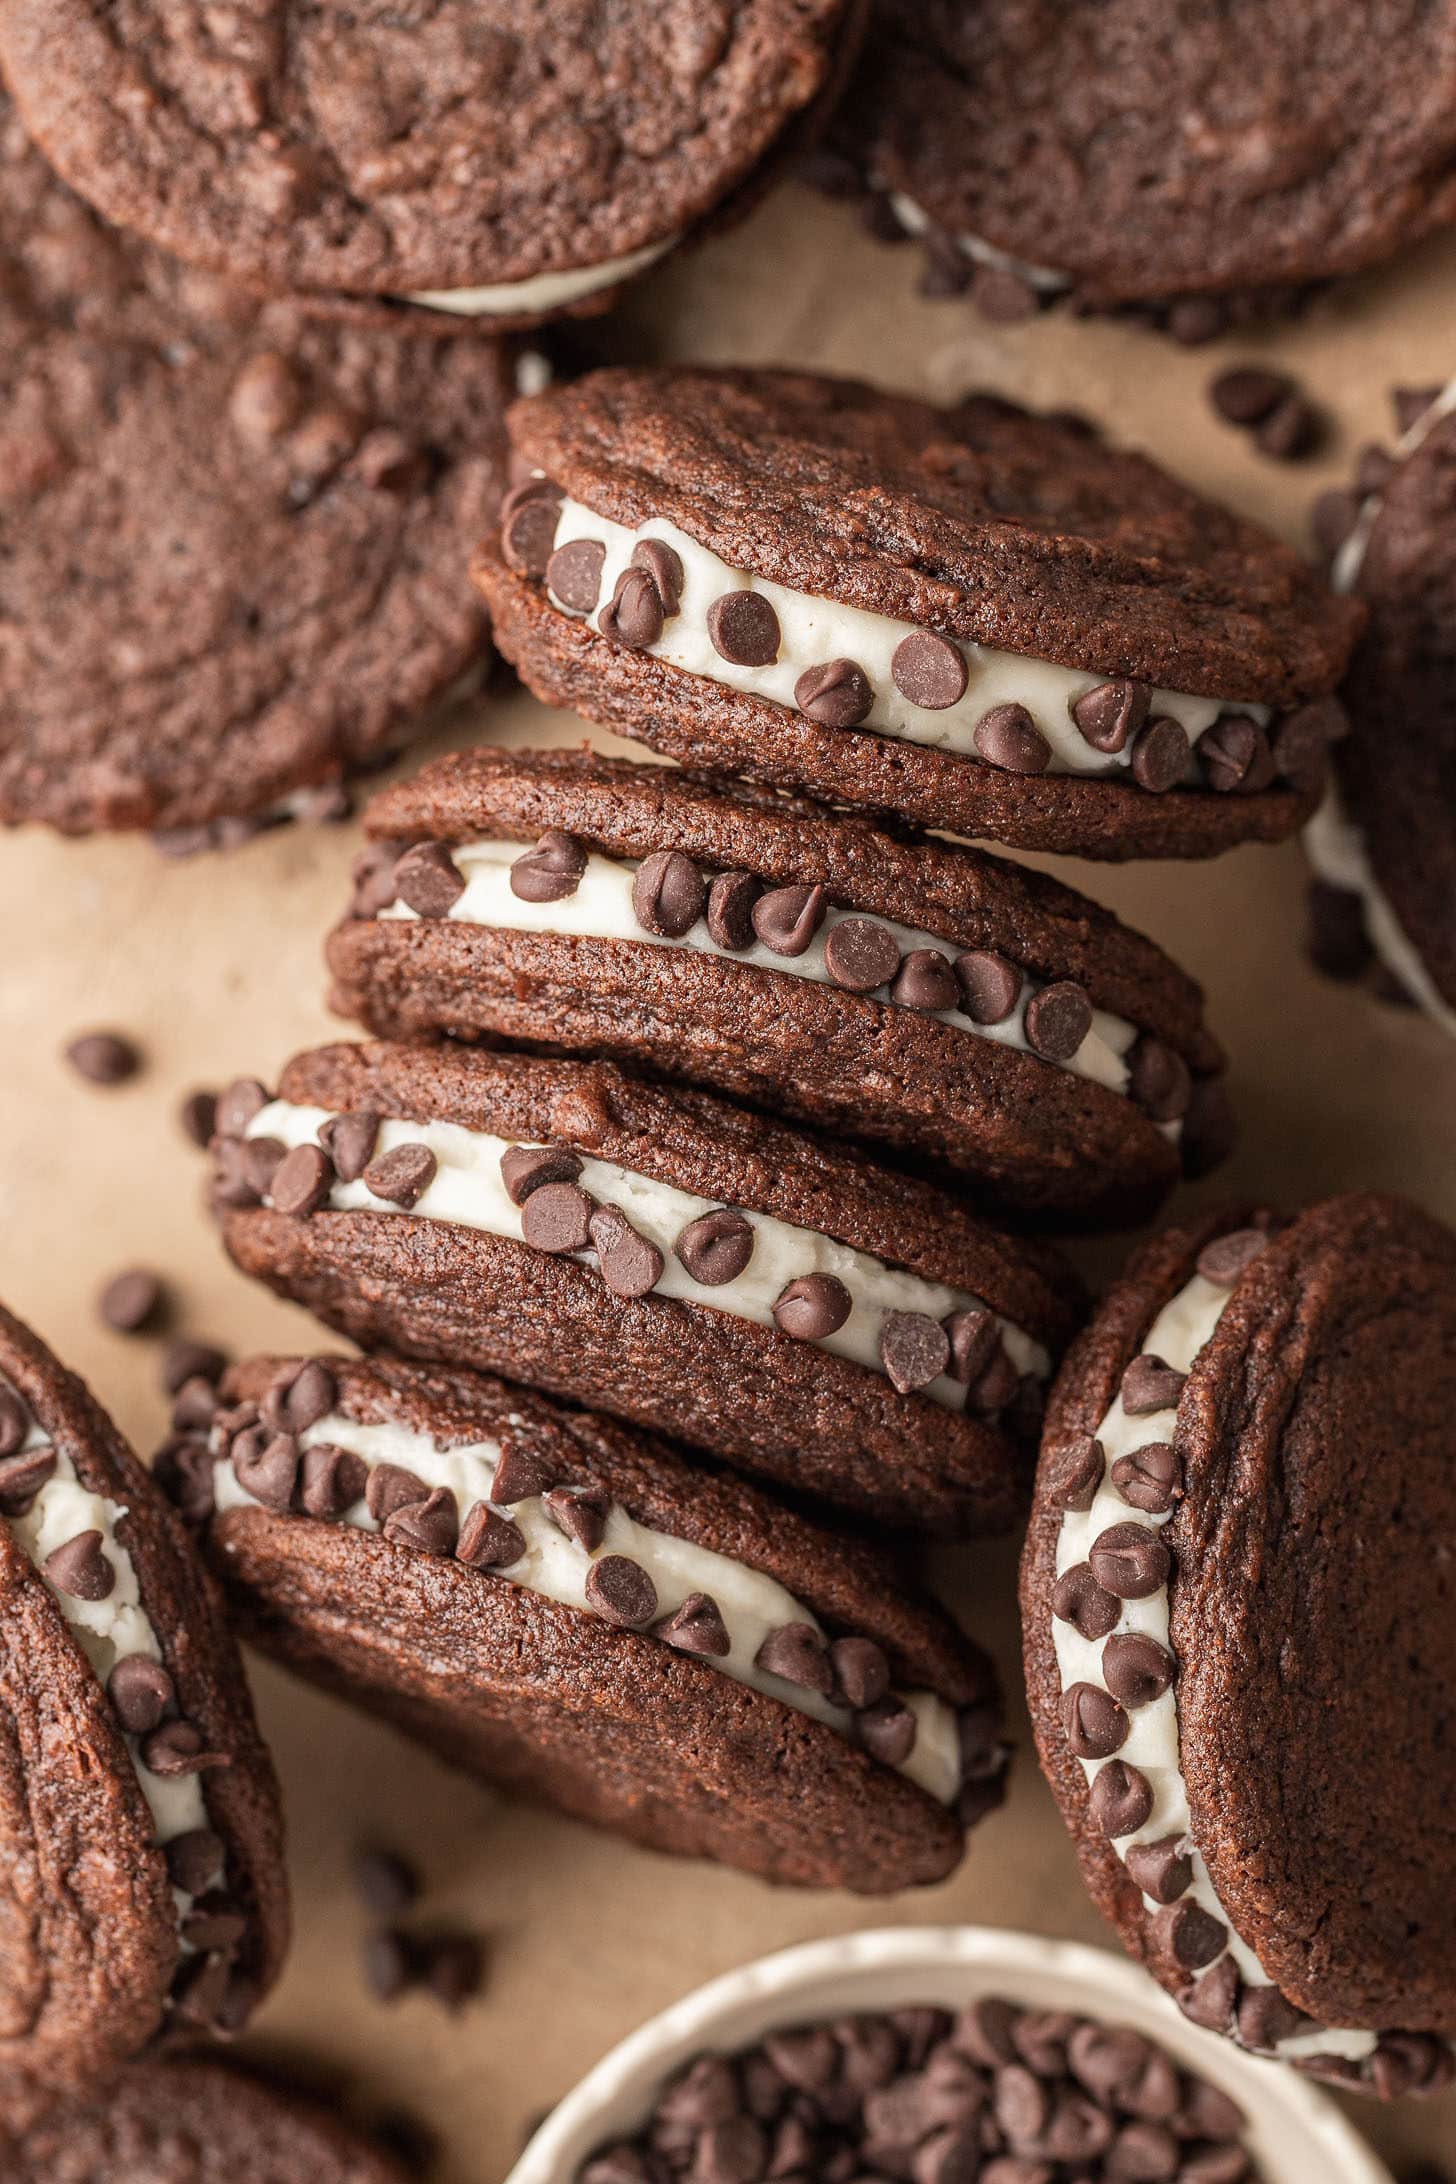
Forget about store-bought sandwich cookies (Oreos, I’m looking at you!), these homemade chocolate sandwich cookies are next level. Each soft chocolate cookie is sandwiched with the best vanilla buttercream.
I then rolled each cookie in mini chocolate chips for an extra hit of chocolate, but you could swap that out for nuts or sprinkles!
Why You’ll Love These Chocolate Sandwich Cookies
- Each chocolate cookie is super soft and fudgy, no dry cookies here!
- You don’t need to chill the cookie dough.
- The cookies are filled with vanilla frosting, but you could always swap that out for chocolate buttercream in a pinch.
- You can easily make these chocolate sandwich cookies dairy-free, so they’re great if you have food allergies.
Ingredients Needed
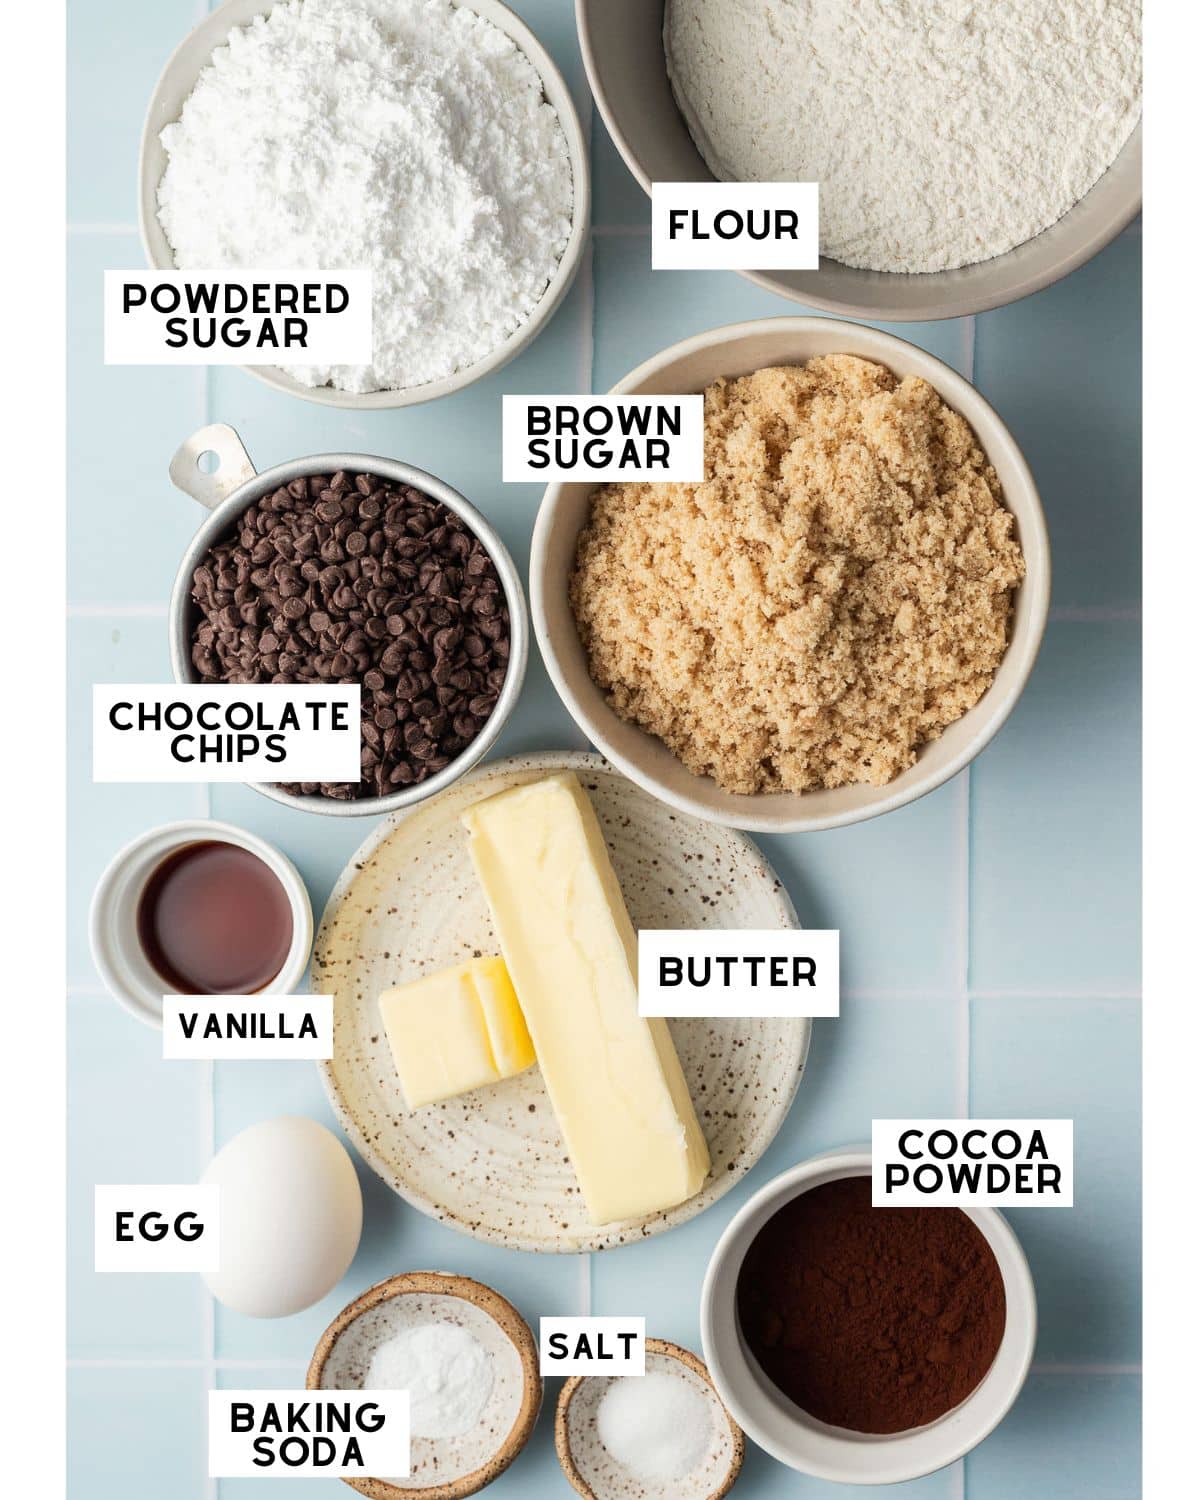
- Butter: You can use regular butter, or if you’re dairy-free like me, you can use vegan butter.
- Chocolate Chips: I recommend using mini chocolate chips for the cookies! I also like rolling the cookies in even more mini chocolate chips.
- Vanilla: If you can, try to use real vanilla extract. It makes all the difference!
- Cocoa: Use unsweetened Dutch-processed cocoa powder and not natural cocoa powder.
Step by Step Instructions
Step 1: Preheat your oven to 350°F and line two baking sheets with parchment paper.
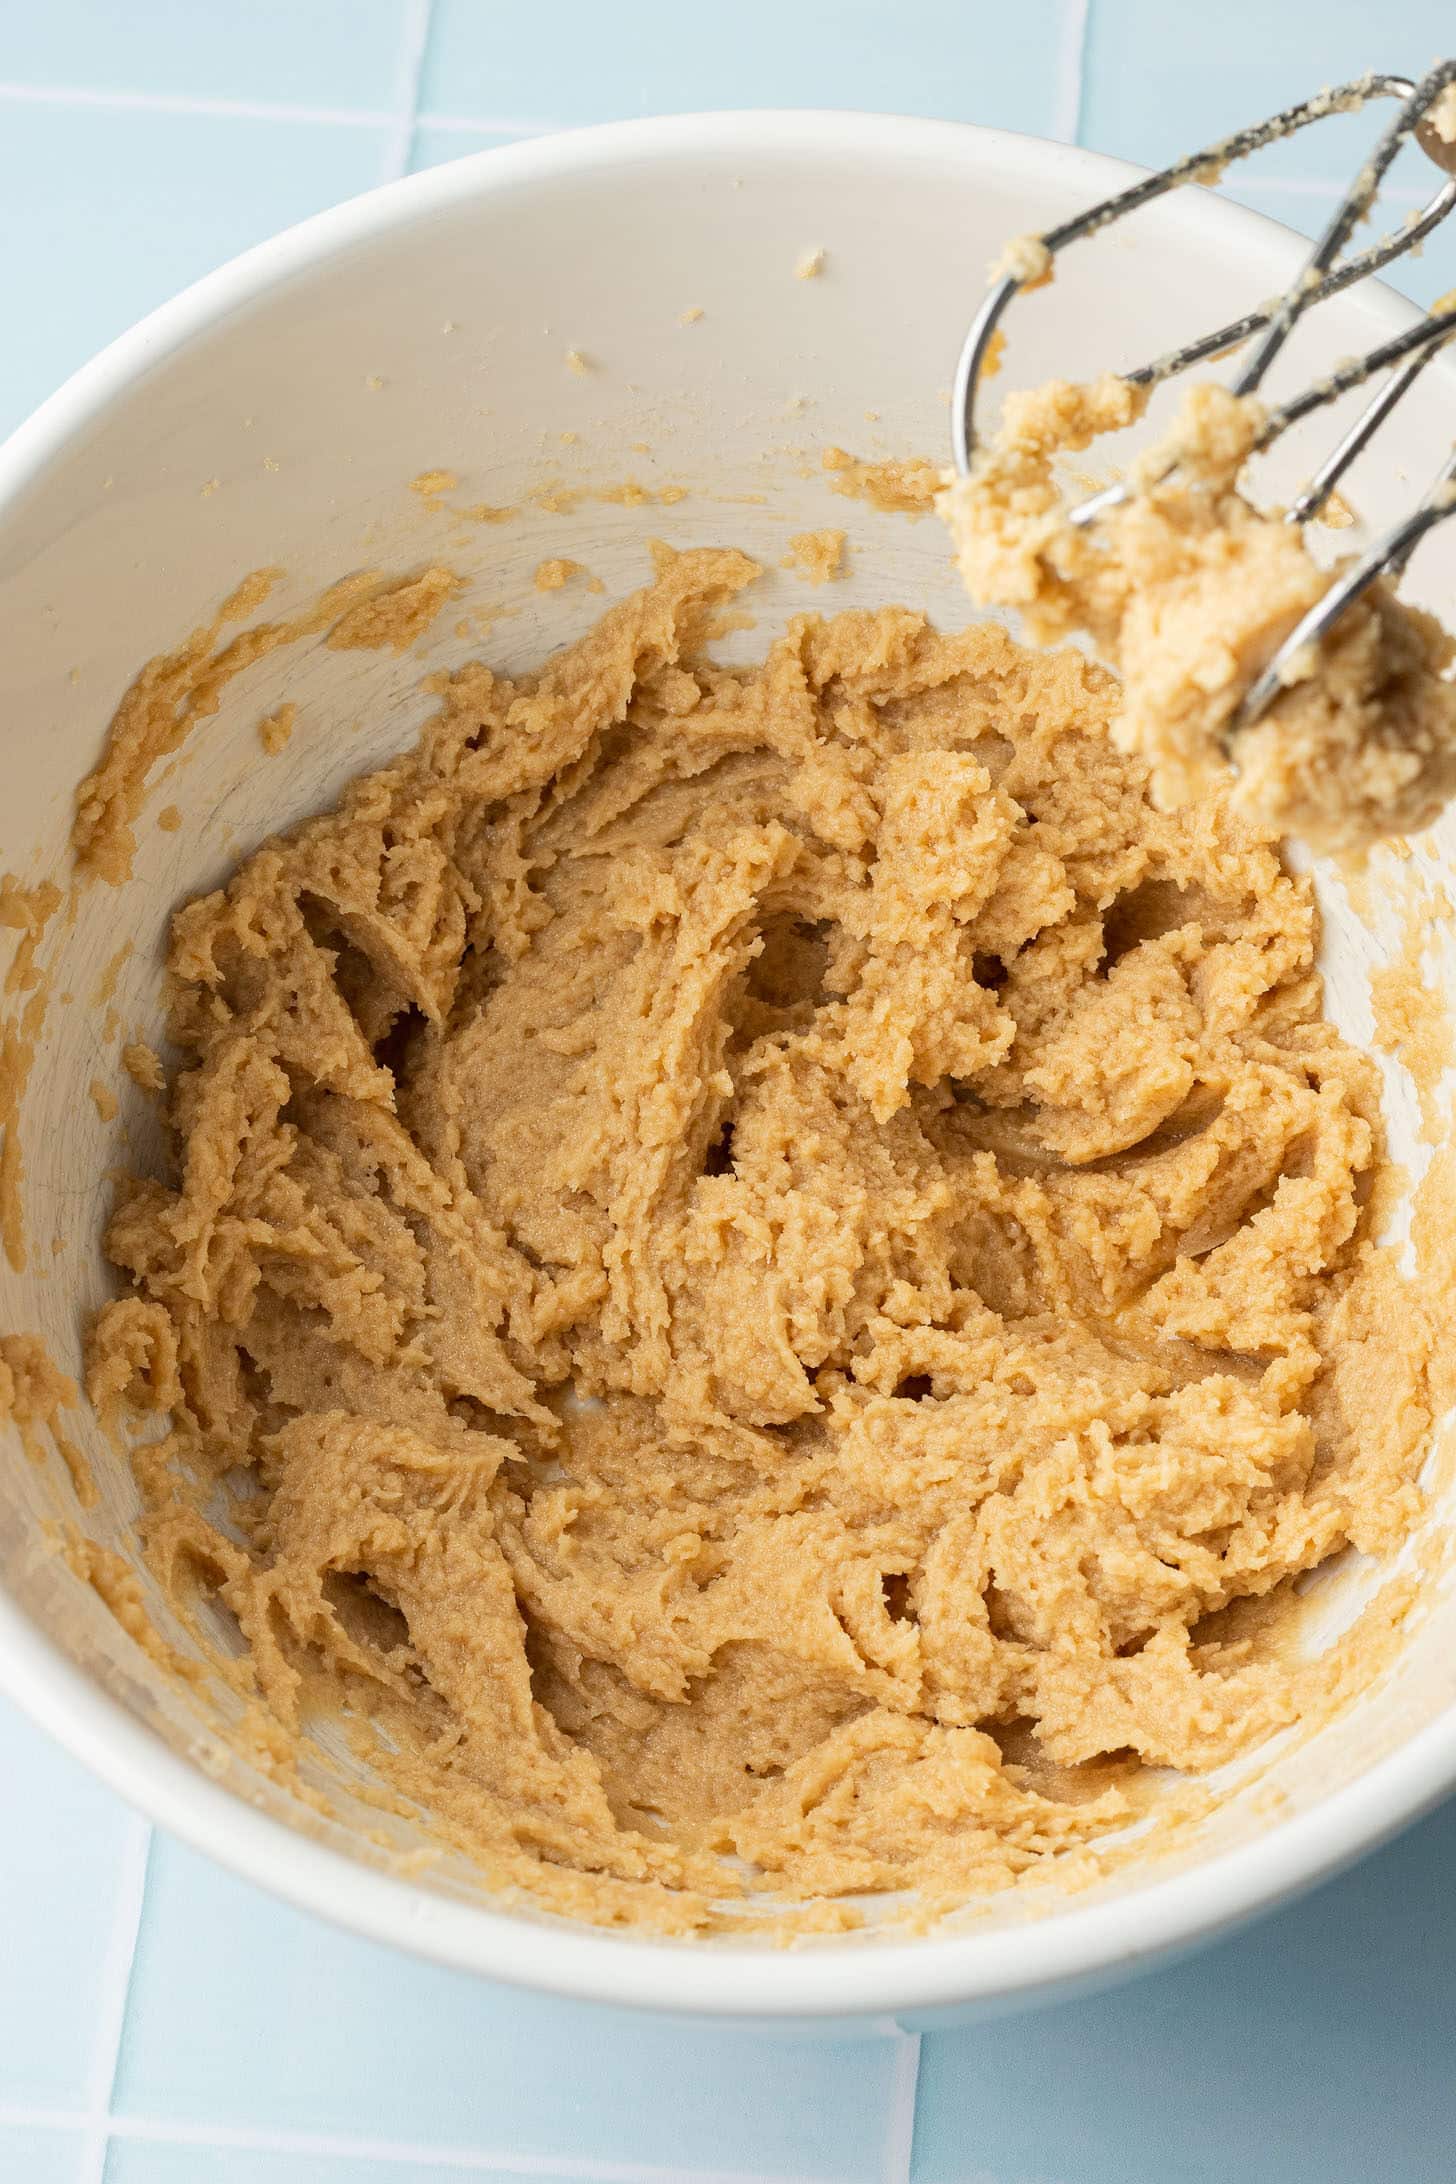
Step 2: In a stand mixer or in a bowl with a handheld mixer, beat the butter and brown sugar until light and fluffy. Add the vanilla extract and egg.
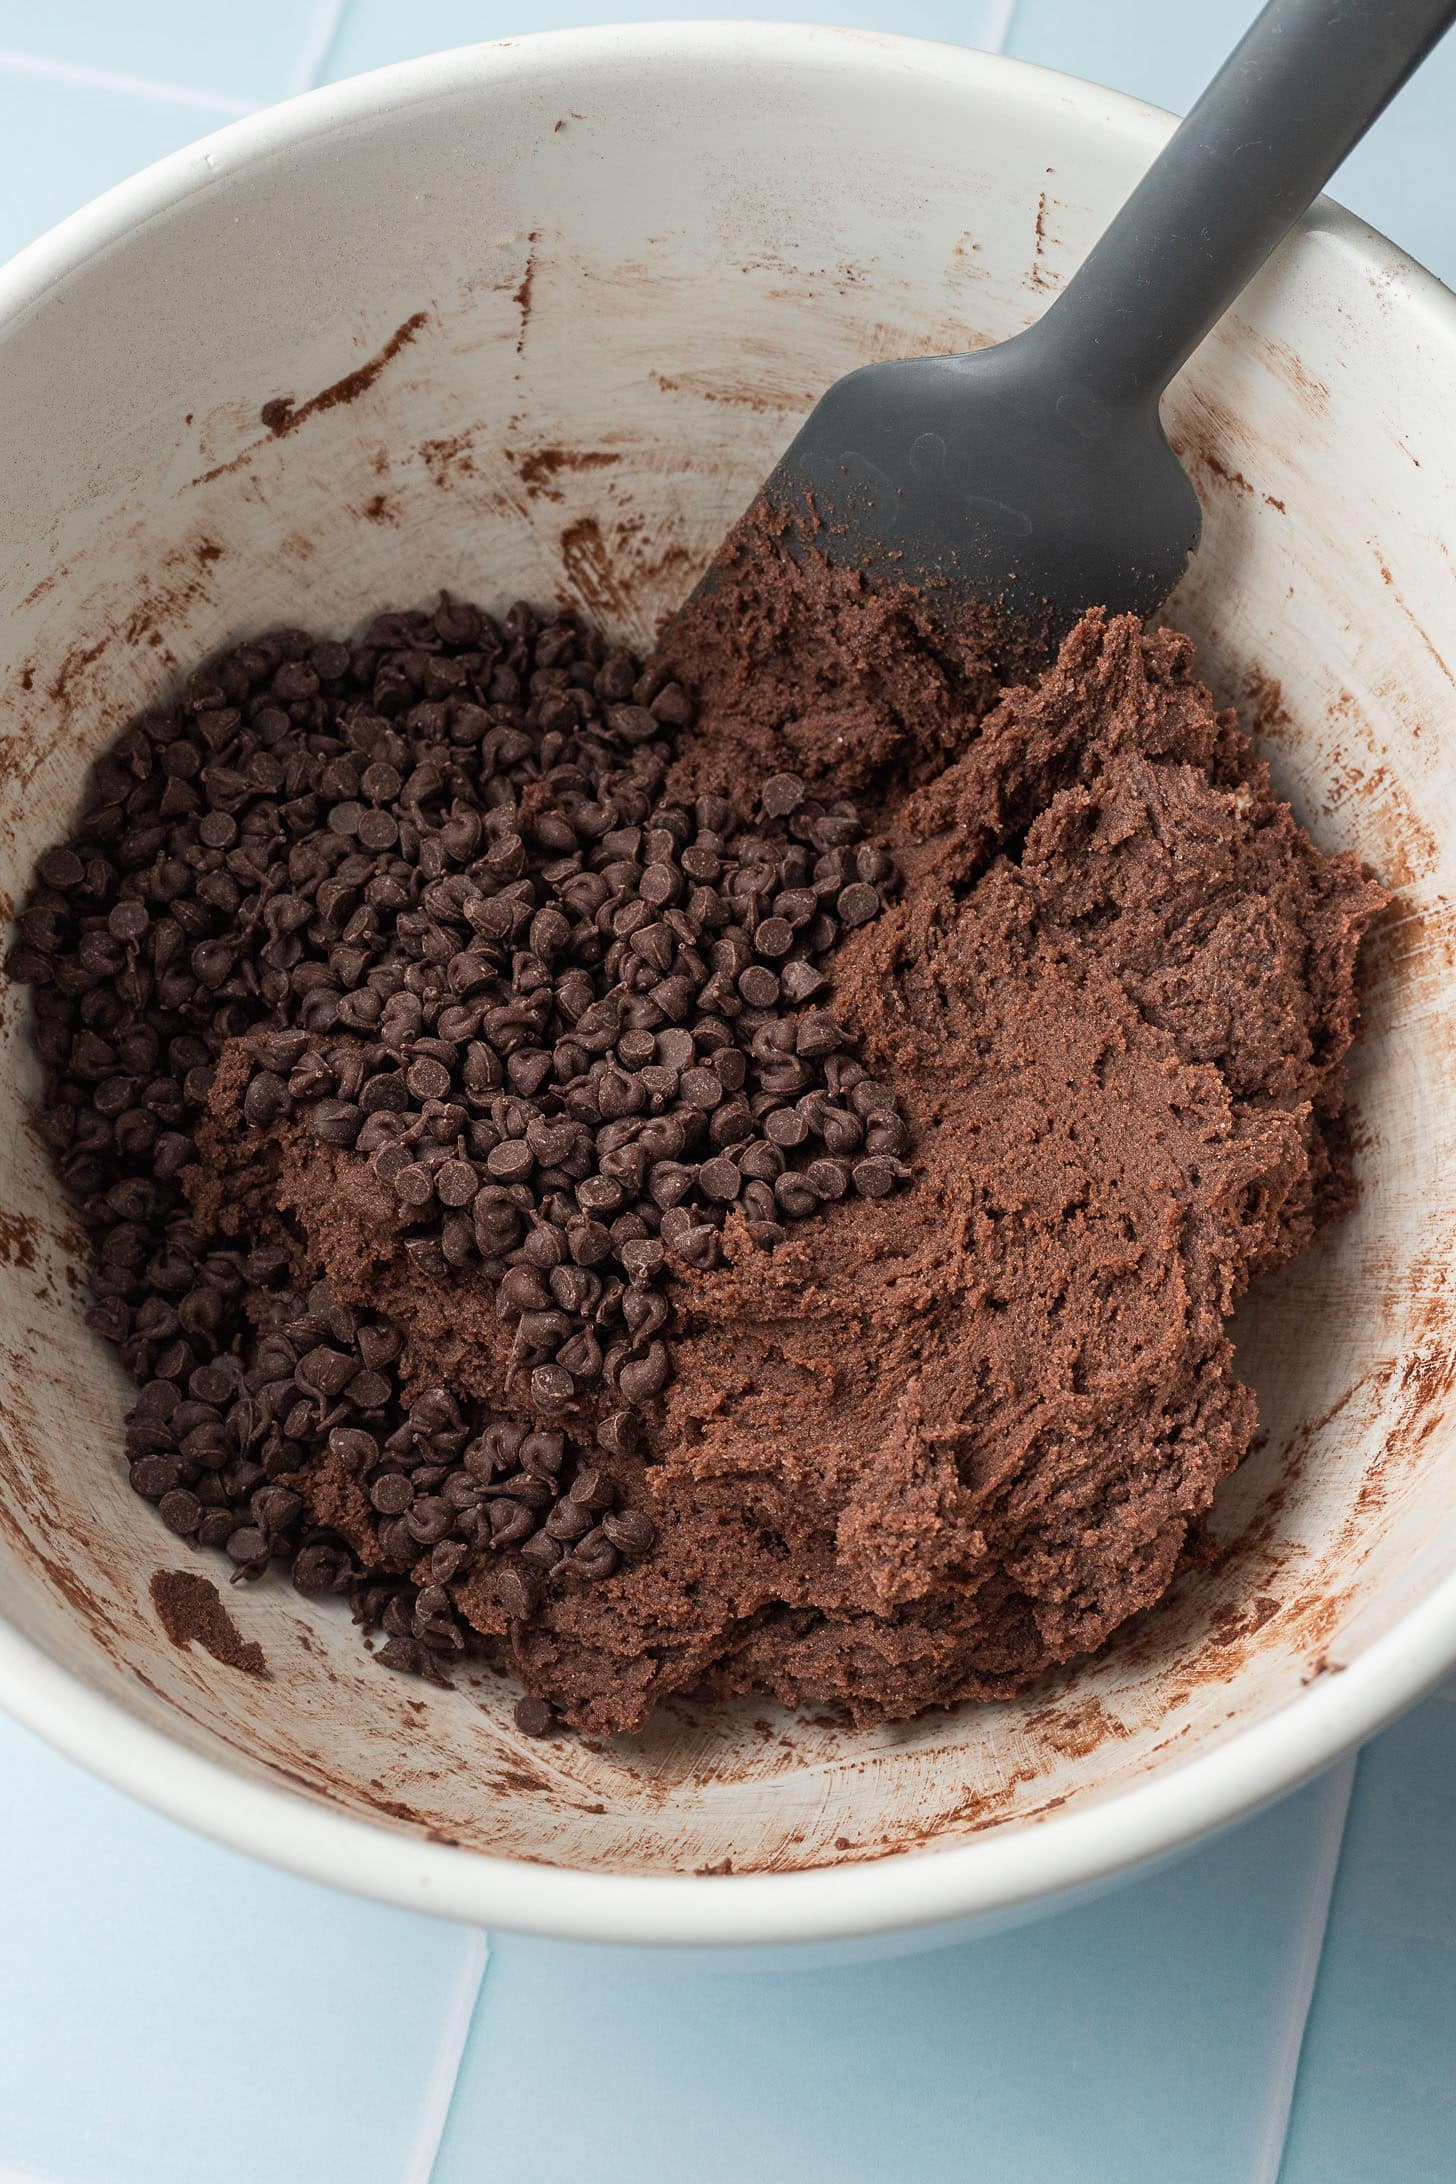
Step 3: Add the flour, baking soda, cocoa powder, and salt. Mix until just combined. Stir in the mini chocolate chips.
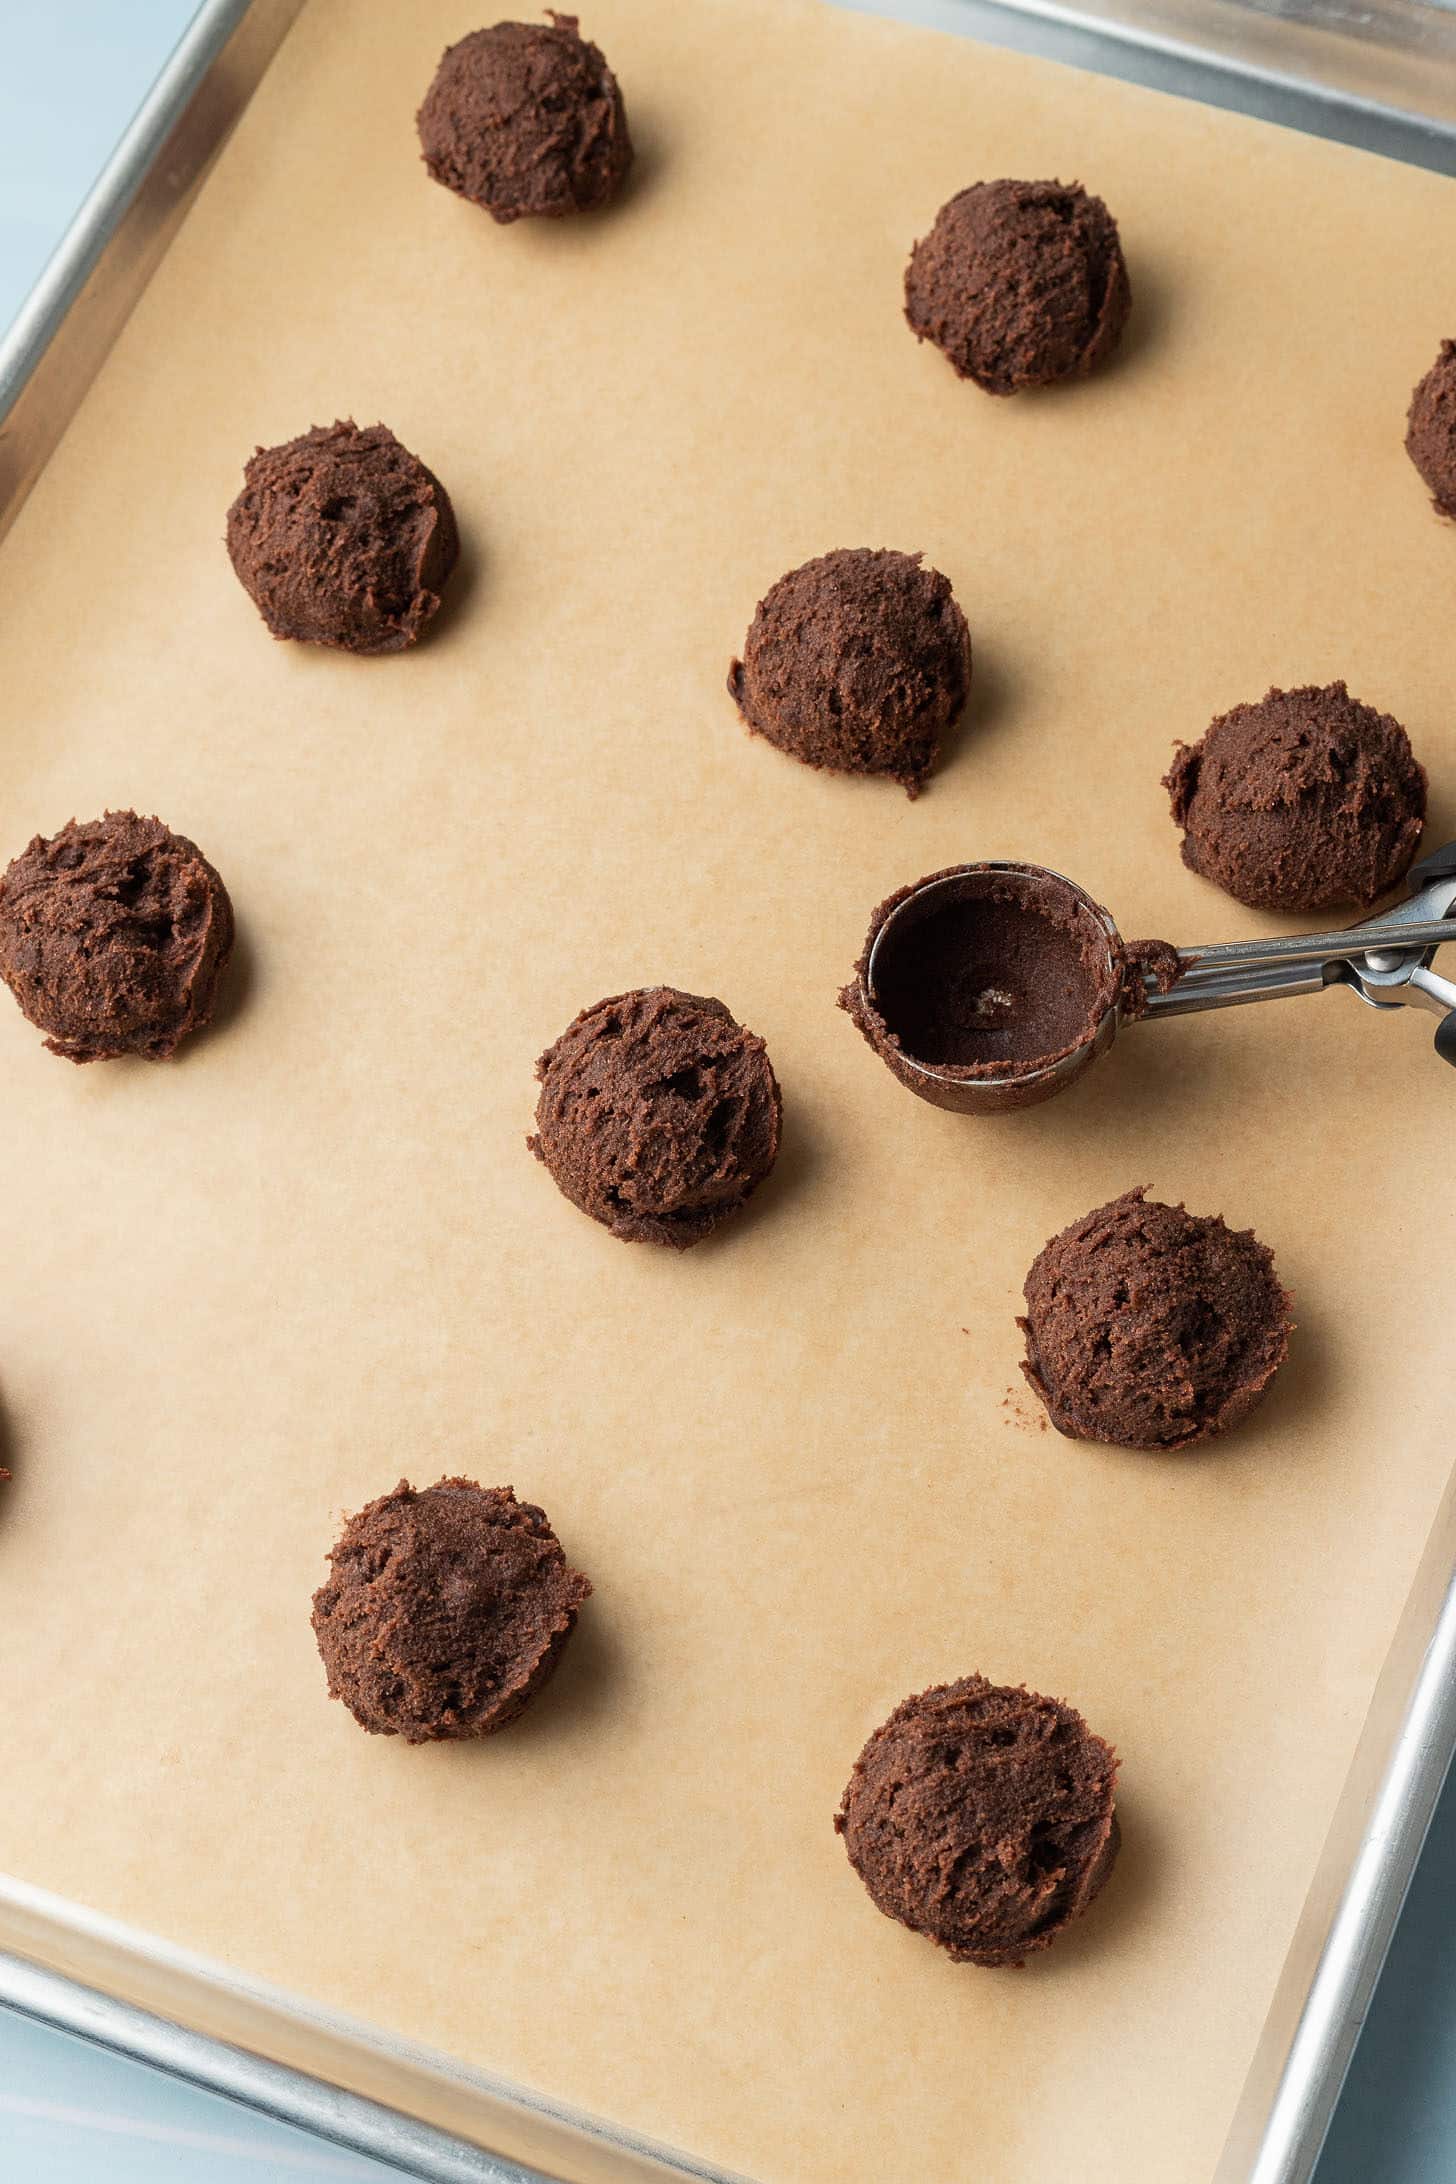
Step 4: Use a medium cookie scoop or spoon to scoop out 1.5 tablespoon-sized cookie dough balls and place on your prepared baking sheet, keeping them 3 inches apart.
Step 5: Bake one sheet at a time for 8-10 minutes, or until the edges have set. Let the cookies cool on the baking sheet for 10 minutes before removing to a wire cooling rack to cool completely.
Step 6: Make the vanilla buttercream. In a medium bowl, combine the butter with the vanilla, salt, and powdered sugar. Add more powdered sugar if needed.
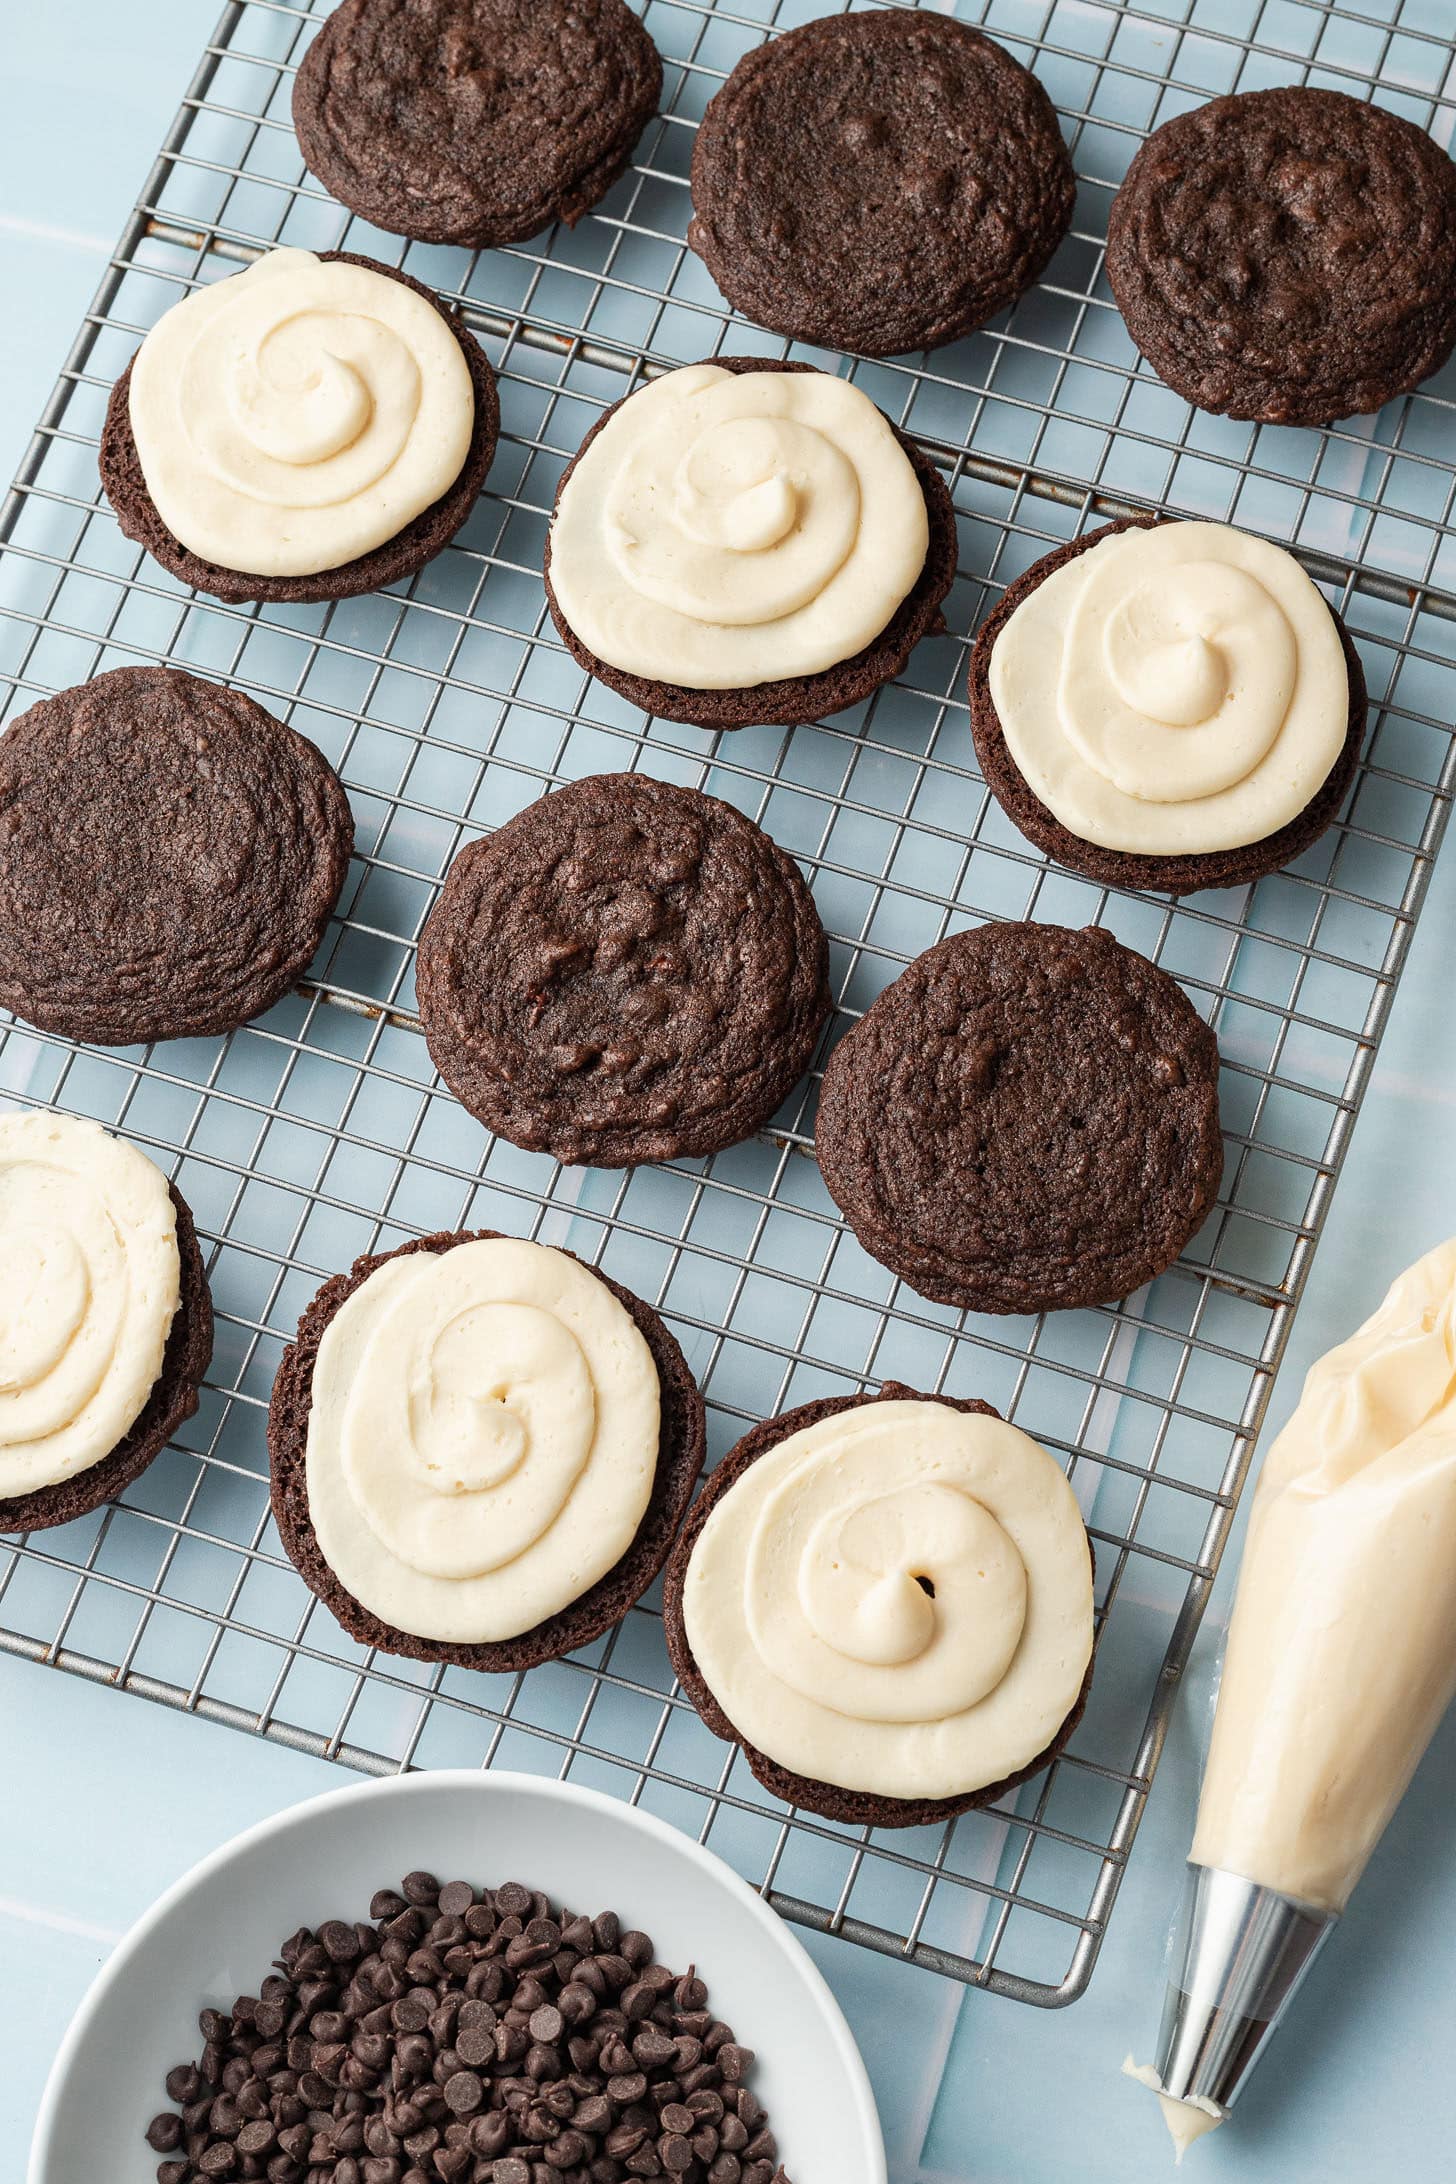
Step 7: Once the cookies have cooled completely, flip 5 of the cookies upside down. Use a small spatula to scoop around 1.5 tablespoons of frosting onto each cookie.
Step 8: Place one of the unfrosted cookies on top of each, then gently press them together.
Step 9: Pour extra mini chocolate chips into a shallow bowl and roll the sandwich cookies in the chips to coat the frosting.
Options for Rolling Your Cookies
Not only are there mini chocolate chips in the cookies, but I also rolled the sandwich cookies in even more mini chocolate chips!
If you prefer, you can roll the cookies in sprinkles (think fun, holiday sprinkles!), shredded coconut, or finely chopped nuts!
Expert Tips
- I always recommend using a kitchen scale to weigh out your ingredients, especially your flour and cocoa powder! It’s super easy to add too much if you’re using measuring cups, which will make your cookies dry.
- Don’t have a kitchen scale? Then make sure to use the scoop and level method to weigh out both your flour and cocoa powder.
- When adding dry ingredients to the bowl, stop mixing as soon as the dough is combined. If you overmix the cookie dough, it’ll change the texture of the cookies!
- The cookies need to cool completely before you fill them with frosting, or the frosting will melt!
Storage Instructions
I recommend storing these sandwich cookies in an airtight container at room temperature for 4-5 days, or in the fridge.
To freeze, place in a freezer bag and freeze for up to 2 months. Let thaw at room temperature before enjoying.
More Cookie Recipes You’ll Love


If you make this recipe, let me know how it went in the comments below, I’d love to hear from you! You can also tag me on Instagram or Facebook so I can check it out!
Baking FAQ
These are the topics I’m asked about most frequently:
You can get these answers and more in my frequently asked questions post!

Chocolate Sandwich Cookies
Ingredients
Chocolate Cookies
- ⅔ cup (140 g) butter, softened, (regular or dairy free)
- 1 cup (200 g) light brown sugar
- 1 tsp vanilla extract
- 1 egg
- 1½ cup (188 g) all purpose flour
- ⅓ cup (29 g) unsweetened cocoa powder
- ½ tsp salt
- ½ tsp baking soda
- ½ cup semisweet chocolate chips, (regular or mini)
Vanilla Buttercream
- ½ cup (105 g) butter, softened, (regular or dairy free)
- 1½ cup (180 g) powdered sugar
- 1 tsp vanilla extract
- ⅛ tsp salt
For Rolling
- ½ cup mini chocolate chips
Instructions
Chocolate Cookies
- Preheat the oven to 350°F and line two baking sheets with parchment paper.
- In the bowl of a handheld mixer or standing mixer, beat the butter and brown sugar together until light and fluffy (around 1-2 minutes). Add in the egg and vanilla extract.
- Add in the flour, salt, baking soda, and cocoa powder and mix until just combined. Stir in the chocolate chips.
- Use a medium cookie scoop or roll the dough into 1.5 tablespoon sized balls and place on the baking sheet around 3 inches apart.
- Bake one tray at a time for 8-10 minutes or until the edges are set. Let the cookies cool for 10 minutes on the baking sheet, then transfer to a wire rack to cool completely.
Vanilla Buttercream
- Make the buttercream. In a medium bowl combine butter, vanilla extract, salt, and powdered sugar. Add more powdered sugar as needed to adjust the consistency to your liking.
Assembling the Cookie Sandwiches
- Once the cookies have cooled completely, flip 5 of the cookies upside down and use a spoon or small spatula to scoop around 1.5 Tablespoons of frosting onto each cookie.
- Place one of the unfrosted cookies over top of each and gently push them together to even out the frosting in the sandwich.
- Pour the mini chocolate chips into a shallow bowl and roll the cookie sandwiches in them to coat the buttercream. Enjoy!


Notes
The calorie information provided for this recipe is an estimate. The accuracy of the calories listed is not guaranteed.
Photography by: Kelly at Bake & Bacon